2005 CHEVROLET CLASSIC oil change
[x] Cancel search: oil changePage 89 of 320
Instrument Panel Overview...............................3-4
Hazard Warning Flashers................................3-6
Other Warning Devices...................................3-6
Horn.............................................................3-6
Tilt Wheel.....................................................3-6
Turn Signal/Multifunction Lever.........................3-7
Turn and Lane-Change Signals........................3-8
Headlamp High/Low-Beam Changer..................3-8
Flash-to-Pass.................................................3-8
Windshield Washer.........................................3-9
Windshield Wiper Lever...................................3-9
Cruise Control..............................................3-10
Headlamps..................................................3-13
Headlamps on Reminder................................3-14
Headlamps Off in PARK (P)...........................3-14
Delayed Headlamps......................................3-14
Daytime Running Lamps (DRL).......................3-14
Automatic Headlamp System..........................3-15
Instrument Panel Brightness...........................3-16
Dome Lamp.................................................3-16
Entry/Exit Lighting.........................................3-16
Trunk Lamp.................................................3-16
Battery Run-Down Protection..........................3-16
Accessory Power Outlets...............................3-17
Ashtrays and Cigarette Lighter........................3-18Climate Controls............................................3-18
Climate Control System.................................3-18
Outlet Adjustment.........................................3-21
Warning Lights, Gages, and Indicators............3-22
Instrument Panel Cluster................................3-23
Speedometer and Odometer...........................3-24
Trip Odometer..............................................3-24
Tachometer.................................................3-25
Safety Belt Reminder Light.............................3-25
Airbag Readiness Light..................................3-26
Charging System Light..................................3-27
Brake System Warning Light..........................3-27
Anti-Lock Brake System Warning Light.............3-28
Engine Coolant Temperature Gage..................3-29
Low Coolant Warning Light............................3-29
Malfunction Indicator Lamp.............................3-30
Oil Pressure Light.........................................3-32
Passlock
®Warning Light................................3-33
Highbeam On Light.......................................3-34
Low Washer Fluid Warning Light.....................3-34
Door Ajar Light.............................................3-34
Service Vehicle Soon Light............................3-34
Fuel Gage...................................................3-35
Section 3 Instrument Panel
3-1
Page 141 of 320
Care of Your CDs
Handle CDs carefully. Store them in their original
cases or other protective cases and away from direct
sunlight and dust. If the surface of a CD is soiled,
dampen a clean, soft cloth in a mild, neutral detergent
solution and clean it, wiping from the center to the edge.
Be sure never to touch the side without writing when
handling CDs. Pick up CDs by grasping the outer edges
or the edge of the hole and the outer edge.
Care of the CD Player
The use of CD lens cleaners for CD players is not
advised, due to the risk of contaminating the lens of the
CD optics with lubricants internal to the CD mechanism.
Fixed Mast Antenna
The fixed mast antenna can withstand most car
washes without being damaged. If the mast should
ever become slightly bent, straighten it out by hand.
If the mast is badly bent, replace it.
Check occasionally to make sure the mast is still
tightened to the fender. If tightening is required, tighten
by hand, then with a wrench one quarter turn.
Chime Level Adjustment
Chime level adjustment is only available on RDS radios.
The radio is the vehicle chime producer. The chime is
produced from the driver’s side front door speakers.
To change the volume level, press and hold
pushbutton 6 with the ignition on and the radio power
off. The chime volume level will change from the normal
level to loud, and LOUD will appear on the radio
display. To change back to the default or normal setting,
press and hold pushbutton 6 again. The chime level
will change from the loud level to normal, and NORMAL
will appear on the radio display. Each time the chime
volume is changed, three chimes will sound as an
example of the new volume selected. Removing the
radio and not replacing it with a factory radio or chime
module will disable vehicle chimes.
3-53
Page 200 of 320
If you are in an area of extreme cold, where the
temperature falls below−20°F (−29°C), it is
recommended that you use either an SAE 5W-30
synthetic oil or an SAE 0W-30 oil. Both will provide
easier cold starting and better protection for your engine
at extremely low temperatures.
Engine Oil Additives
Do not add anything to your oil. The recommended oils
with the starburst symbol that meet GM Standard
GM6094M are all you will need for good performance
and engine protection.
When to Change Engine Oil
If any one of these is true for you, use the short trip/city
maintenance schedule:
•Most trips are less than 5 miles (8 km). This is
particularly important when outside temperatures
are below freezing.
•Most trips include extensive idling, such as frequent
driving in stop-and-go traffic.
•You frequently tow a trailer or use a carrier on top
of your vehicle.
•The vehicle is used for delivery service, police, taxi,
or other commercial application.Driving under these conditions causes engine oil to
break down sooner. If any one of these is true for your
vehicle, then you need to change your oil and filter
every 3,000 miles (5 000 km) or 3 months — whichever
occurs first.
If none of them is true, use the long trip/highway
maintenance schedule. Change oil and filter every
7,500 miles (12 500 km) or 12 months — whichever
occurs first. Driving a vehicle with a fully warmed engine
under highway conditions will cause engine oil to
break down slower.
What to Do with Used Oil
Used engine oil contains certain elements that may be
unhealthy for your skin and could even cause cancer.
Do not let used oil stay on your skin for very long. Clean
your skin and nails with soap and water, or a good
hand cleaner. Wash or properly dispose of clothing or
rags containing used engine oil. See the manufacturer’s
warnings about the use and disposal of oil products.
Used oil can be a threat to the environment. If you
change your own oil, be sure to drain all the oil from the
filter before disposal. Never dispose of oil by putting it in
the trash, pouring it on the ground, into sewers, or into
streams or bodies of water. Instead, recycle it by taking it
to a place that collects used oil. If you have a problem
properly disposing of your used oil, ask your dealer, a
service station or a local recycling center for help.
5-16
Page 201 of 320
Engine Air Cleaner/Filter
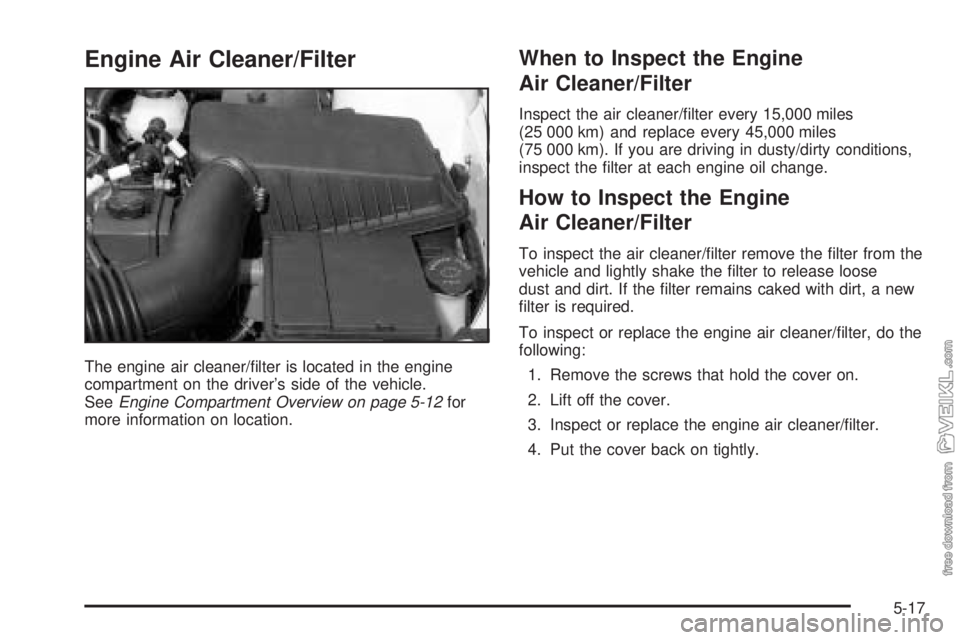
The engine air cleaner/filter is located in the engine
compartment on the driver’s side of the vehicle.
SeeEngine Compartment Overview on page 5-12for
more information on location.
When to Inspect the Engine
Air Cleaner/Filter
Inspect the air cleaner/filter every 15,000 miles
(25 000 km) and replace every 45,000 miles
(75 000 km). If you are driving in dusty/dirty conditions,
inspect the filter at each engine oil change.
How to Inspect the Engine
Air Cleaner/Filter
To inspect the air cleaner/filter remove the filter from the
vehicle and lightly shake the filter to release loose
dust and dirt. If the filter remains caked with dirt, a new
filter is required.
To inspect or replace the engine air cleaner/filter, do the
following:
1. Remove the screws that hold the cover on.
2. Lift off the cover.
3. Inspect or replace the engine air cleaner/filter.
4. Put the cover back on tightly.
5-17
Page 250 of 320
7. Remove all of the wheel nuts.
8. Remove the flat tire.
{CAUTION:
Rust or dirt on the wheel, or on the parts to
which it is fastened, can make the wheel nuts
become loose after a time. The wheel could
come off and cause an accident. When you
change a wheel, remove any rust or dirt from
the places where the wheel attaches to the
vehicle. In an emergency, you can use a cloth
or a paper towel to do this; but be sure to use
a scraper or wire brush later, if you need to,
to get all the rust or dirt off.
{CAUTION:
Never use oil or grease on studs or nuts. If
you do, the nuts might come loose. Your wheel
could fall off, causing a serious accident.
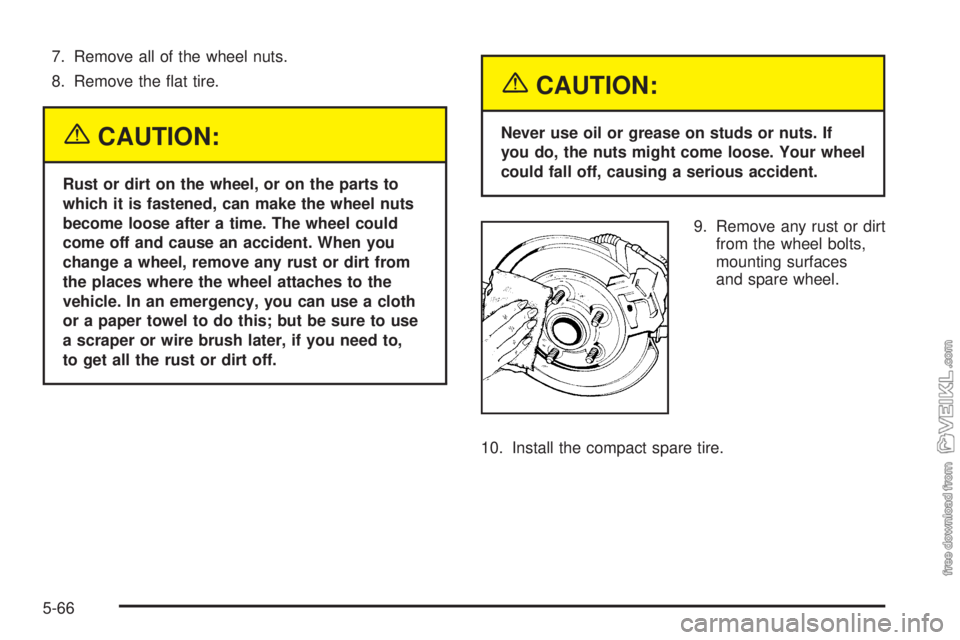
9. Remove any rust or dirt
from the wheel bolts,
mounting surfaces
and spare wheel.
10. Install the compact spare tire.
5-66
Page 272 of 320
Maintenance Schedule
Introduction
Important: Keep engine oil at the proper level and
change as recommended.
Have you purchased the GM Protection Plan? The Plan
supplements your new vehicle warranties. See your
Warranty and Owner Assistance booklet or your dealer
for details.
Maintenance Requirements
Maintenance intervals, checks, inspections and
recommended fluids and lubricants as prescribed in this
manual are necessary to keep your vehicle in good
working condition. Any damage caused by failure
to follow scheduled maintenance may not be covered
by warranty.
Your Vehicle and the Environment
Proper vehicle maintenance not only helps to keep your
vehicle in good working condition, but also helps the
environment. Improper vehicle maintenance can
even affect the quality of the air we breathe. Improper
fluid levels or the wrong tire inflation can increase
the level of emissions from your vehicle. To help protect
our environment, and to keep your vehicle in good
condition, be sure to maintain your vehicle properly.
6-2
Page 275 of 320
Selecting the Right Schedule
First you will need to decide which of the two schedules
is right for your vehicle. Here is how to decide which
schedule to follow:
Short Trip/City De�nition
Follow the Short Trip/City Scheduled Maintenance if
any one of these conditions is true for your vehicle:
•Most trips are less than 5 miles (8 km).
This is particularly important when outside
temperatures are below freezing.
•Most trips include extensive idling (such as
frequent driving in stop-and-go traffic).
•You frequently tow a trailer or use a carrier on
top of your vehicle.
•If the vehicle is used for delivery service, police,
taxi or other commercial application.
One of the reasons you should follow this schedule if
you operate your vehicle under any of these conditions
is that these conditions cause engine oil to break
down sooner.
Short Trip/City Intervals
Every 3,000 Miles (5 000 km):Engine Oil and Filter
Change (or 3 months, whichever occurs first).
Every 6,000 Miles (10 000 km):Tire Rotation.
Every 15,000 Miles (25 000 km):Engine Air Cleaner
Filter Inspection.
Every 45,000 Miles (75 000 km):Engine Air Cleaner
Filter Replacement.
Every 50,000 Miles (83 000 km):Automatic Transaxle
Service (severe conditions only).
Every 100,000 Miles (166 000 km):Spark Plug Wire
Inspection. Spark Plug Replacement.
Every 150,000 Miles (240 000 km):Cooling System
Service (or every 60 months, whichever occurs
first). Engine Accessory Drive Belt Inspection.
These intervals only summarize maintenance services.
Be sure to follow the complete scheduled maintenance
on the following pages.
6-5
Page 276 of 320
Long Trip/Highway De�nition
Follow this scheduled maintenanceonlyif none of
the conditions from the Short Trip/City Scheduled
Maintenance are true. Do not use this schedule if the
vehicle is used for trailer towing, driven in a dusty
area or used off paved roads. Use the Short Trip/City
schedule for these conditions.
Driving a vehicle with a fully warmed engine under
highway conditions will cause engine oil to break
down slower.
Long Trip/Highway Intervals
Every 7,500 Miles (12 500 km):Engine Oil and
Filter Change (or every 12 months, whichever occurs
first). Tire Rotation.
Every 15,000 Miles (25 000 km):Engine Air Cleaner
Filter Inspection.
Every 45,000 Miles (75 000 km):Engine Air Cleaner
Filter Replacement.
Every 50,000 Miles (83 000 km):Automatic Transaxle
Service (severe conditions only).
Every 100,000 Miles (166 000 km):Spark Plug Wire
Inspection. Spark Plug Replacement.Every 150,000 Miles (240 000 km):Cooling System
Service (or every 60 months, whichever occurs
first). Engine Accessory Drive Belt Inspection.
These intervals only summarize maintenance services.
Be sure to follow the complete scheduled maintenance
on the following pages.
Short Trip/City Scheduled
Maintenance
The services shown in this schedule up to 100,000 miles
(166 000 km) should be repeated after 100,000 miles
(166 000 km) at the same intervals for the life of
this vehicle. The services shown at 150,000 miles
(240 000 km) should be repeated at the same interval
after 150,000 miles (240 000 km) for the life of this
vehicle.
SeePart B: Owner Checks and Services on page 6-16
andPart C: Periodic Maintenance Inspections on
page 6-20.
Footnotes
+A good time to check your brakes is during tire
rotation. See Brake System Inspection on page 6-21.
6-6