2005 CHEVROLET CLASSIC lights
[x] Cancel search: lightsPage 1 of 320

Seats and Restraint Systems........................... 1-1
Front Seats
............................................... 1-2
Safety Belts
.............................................. 1-6
Child Restraints
.......................................1-26
Airbag System
.........................................1-46
Restraint System Check
............................1-52
Features and Controls..................................... 2-1
Keys
........................................................ 2-2
Doors and Locks
....................................... 2-7
Windows
.................................................2-13
Theft-Deterrent Systems
............................2-15
Starting and Operating Your Vehicle
...........2-15
Mirrors
....................................................2-27
Storage Areas
.........................................2-28
Instrument Panel............................................. 3-1
Instrument Panel Overview
.......................... 3-4
Climate Controls
......................................3-18
Warning Lights, Gages, and Indicators
........3-22
Audio System(s)
.......................................3-36
Driving Your Vehicle....................................... 4-1
Your Driving, the Road, and Your Vehicle
..... 4-2
Towing
...................................................4-32Service and Appearance Care.......................... 5-1
Service
..................................................... 5-3
Fuel
......................................................... 5-5
Checking Things Under the Hood
...............5-10
Bulb Replacement
....................................5-40
Windshield Wiper Blade Replacement
.........5-46
Tires
......................................................5-47
Appearance Care
.....................................5-71
Vehicle Identification
.................................5-78
Electrical System
......................................5-79
Capacities and Specifications
.....................5-85
Normal Maintenance Replacement Parts
......5-86
Maintenance Schedule..................................... 6-1
Maintenance Schedule
................................ 6-2
Customer Assistance and Information.............. 7-1
Customer Assistance and Information
........... 7-2
Reporting Safety Defects
...........................7-10
Index................................................................ 1
2005 Chevrolet Classic Owner ManualM
Page 4 of 320
Vehicle Damage Warnings
Also, in this manual you will find these notices:
Notice:These mean there is something that could
damage your vehicle.
A notice tells about something that can damage the
vehicle. Many times, this damage would not be covered
by your vehicle’s warranty, and it could be costly. But
the notice will tell what to do to help avoid the damage.
When you read other manuals, you might see
CAUTION and NOTICE warnings in different colors or
in different words.
There are also warning labels on the vehicle. They use
the same words, CAUTION or NOTICE.
Vehicle Symbols
The vehicle has components and labels that use
symbols instead of text. Symbols are shown along with
the text describing the operation or information
relating to a specific component, control, message,
gage, or indicator.
If you need help figuring out a specific name of a
component, gage, or indicator, reference the following
topics:
•Seats and Restraint Systems in Section 1
•Features and Controls in Section 2
•Instrument Panel Overview in Section 3
•Climate Controls in Section 3
•Warning Lights, Gages, and Indicators in Section 3
•Audio System(s) in Section 3
•Engine Compartment Overview in Section 5
iv
Page 76 of 320
Ignition Positions
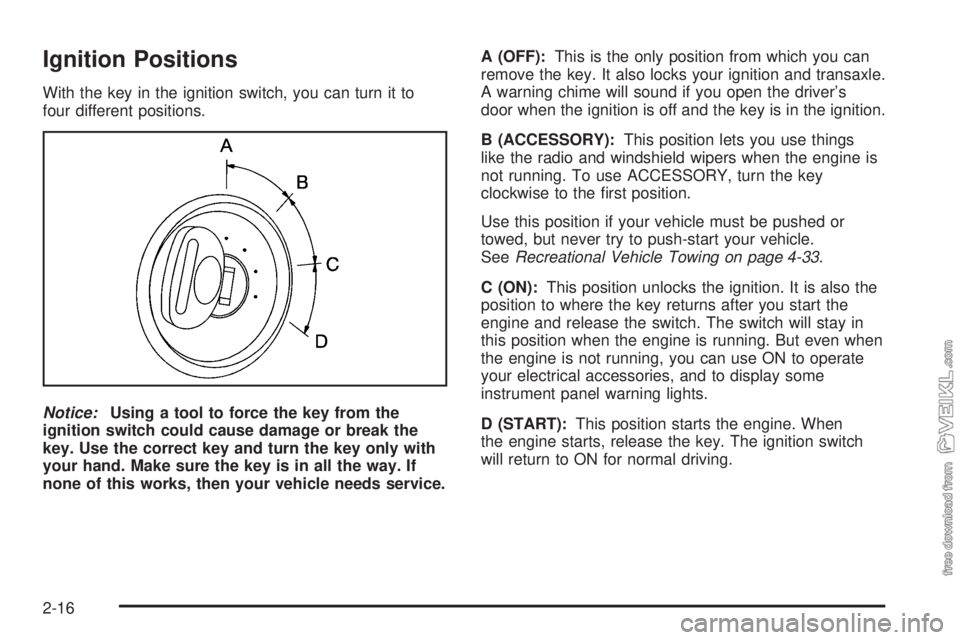
With the key in the ignition switch, you can turn it to
four different positions.
Notice:Using a tool to force the key from the
ignition switch could cause damage or break the
key. Use the correct key and turn the key only with
your hand. Make sure the key is in all the way. If
none of this works, then your vehicle needs service.A (OFF):This is the only position from which you can
remove the key. It also locks your ignition and transaxle.
A warning chime will sound if you open the driver’s
door when the ignition is off and the key is in the ignition.
B (ACCESSORY):This position lets you use things
like the radio and windshield wipers when the engine is
not running. To use ACCESSORY, turn the key
clockwise to the first position.
Use this position if your vehicle must be pushed or
towed, but never try to push-start your vehicle.
SeeRecreational Vehicle Towing on page 4-33.
C (ON):This position unlocks the ignition. It is also the
position to where the key returns after you start the
engine and release the switch. The switch will stay in
this position when the engine is running. But even when
the engine is not running, you can use ON to operate
your electrical accessories, and to display some
instrument panel warning lights.
D (START):This position starts the engine. When
the engine starts, release the key. The ignition switch
will return to ON for normal driving.
2-16
Page 89 of 320
Instrument Panel Overview...............................3-4
Hazard Warning Flashers................................3-6
Other Warning Devices...................................3-6
Horn.............................................................3-6
Tilt Wheel.....................................................3-6
Turn Signal/Multifunction Lever.........................3-7
Turn and Lane-Change Signals........................3-8
Headlamp High/Low-Beam Changer..................3-8
Flash-to-Pass.................................................3-8
Windshield Washer.........................................3-9
Windshield Wiper Lever...................................3-9
Cruise Control..............................................3-10
Headlamps..................................................3-13
Headlamps on Reminder................................3-14
Headlamps Off in PARK (P)...........................3-14
Delayed Headlamps......................................3-14
Daytime Running Lamps (DRL).......................3-14
Automatic Headlamp System..........................3-15
Instrument Panel Brightness...........................3-16
Dome Lamp.................................................3-16
Entry/Exit Lighting.........................................3-16
Trunk Lamp.................................................3-16
Battery Run-Down Protection..........................3-16
Accessory Power Outlets...............................3-17
Ashtrays and Cigarette Lighter........................3-18Climate Controls............................................3-18
Climate Control System.................................3-18
Outlet Adjustment.........................................3-21
Warning Lights, Gages, and Indicators............3-22
Instrument Panel Cluster................................3-23
Speedometer and Odometer...........................3-24
Trip Odometer..............................................3-24
Tachometer.................................................3-25
Safety Belt Reminder Light.............................3-25
Airbag Readiness Light..................................3-26
Charging System Light..................................3-27
Brake System Warning Light..........................3-27
Anti-Lock Brake System Warning Light.............3-28
Engine Coolant Temperature Gage..................3-29
Low Coolant Warning Light............................3-29
Malfunction Indicator Lamp.............................3-30
Oil Pressure Light.........................................3-32
Passlock
®Warning Light................................3-33
Highbeam On Light.......................................3-34
Low Washer Fluid Warning Light.....................3-34
Door Ajar Light.............................................3-34
Service Vehicle Soon Light............................3-34
Fuel Gage...................................................3-35
Section 3 Instrument Panel
3-1
Page 101 of 320
Using Cruise Control on Hills
How well your cruise control will work on hills depends
upon your speed, load and the steepness of the
hills. When going up steep hills, you may have to
step on the accelerator pedal to maintain your speed.
When going downhill, you may have to brake or shift to
a lower gear to keep your speed down. Applying the
brake takes you out of cruise control. Many drivers find
this to be too much trouble and do not use cruise
control on steep hills.
Ending Cruise Control
There are two ways to turn off the cruise control:
•Step lightly on the brake pedal;
•Press the OFF/ON button.
Erasing Speed Memory
When you turn off the cruise control or the ignition,
your cruise control set speed memory is erased.
Headlamps
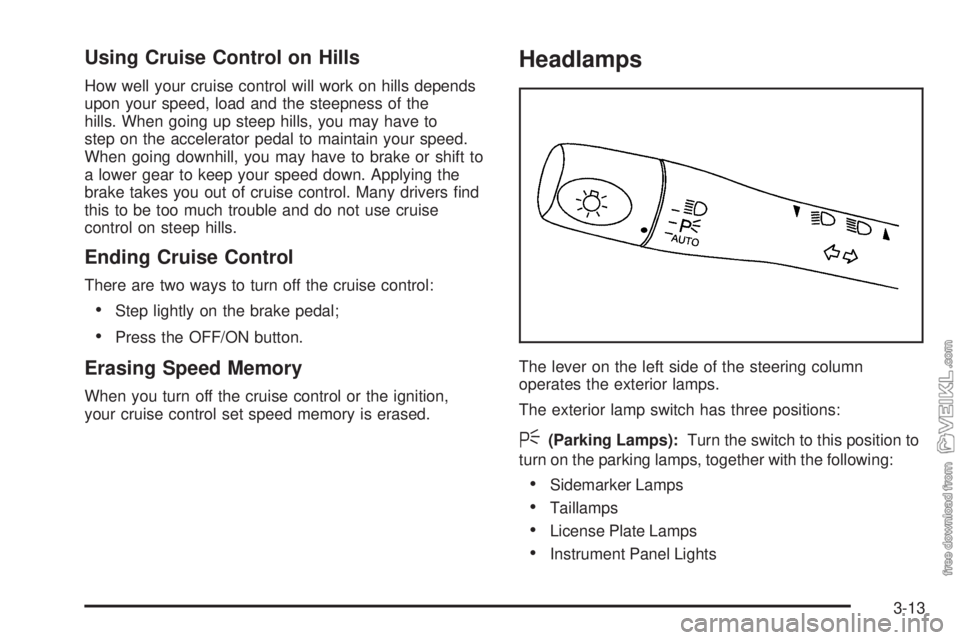
The lever on the left side of the steering column
operates the exterior lamps.
The exterior lamp switch has three positions:
<(Parking Lamps):Turn the switch to this position to
turn on the parking lamps, together with the following:
•Sidemarker Lamps
•Taillamps
•License Plate Lamps
•Instrument Panel Lights
3-13
Page 102 of 320
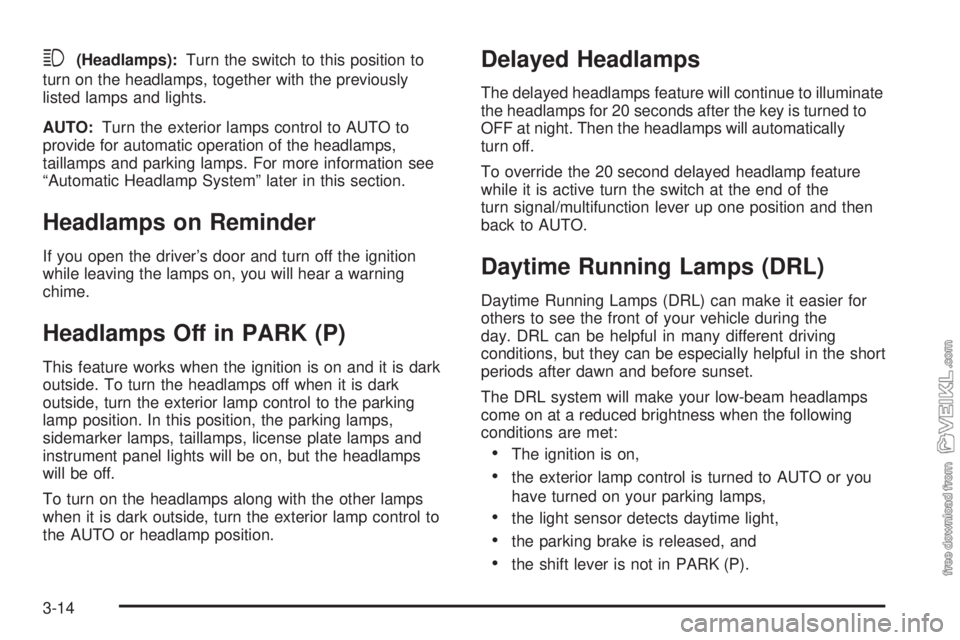
3(Headlamps):Turn the switch to this position to
turn on the headlamps, together with the previously
listed lamps and lights.
AUTO:Turn the exterior lamps control to AUTO to
provide for automatic operation of the headlamps,
taillamps and parking lamps. For more information see
“Automatic Headlamp System” later in this section.
Headlamps on Reminder
If you open the driver’s door and turn off the ignition
while leaving the lamps on, you will hear a warning
chime.
Headlamps Off in PARK (P)
This feature works when the ignition is on and it is dark
outside. To turn the headlamps off when it is dark
outside, turn the exterior lamp control to the parking
lamp position. In this position, the parking lamps,
sidemarker lamps, taillamps, license plate lamps and
instrument panel lights will be on, but the headlamps
will be off.
To turn on the headlamps along with the other lamps
when it is dark outside, turn the exterior lamp control to
the AUTO or headlamp position.
Delayed Headlamps
The delayed headlamps feature will continue to illuminate
the headlamps for 20 seconds after the key is turned to
OFF at night. Then the headlamps will automatically
turn off.
To override the 20 second delayed headlamp feature
while it is active turn the switch at the end of the
turn signal/multifunction lever up one position and then
back to AUTO.
Daytime Running Lamps (DRL)
Daytime Running Lamps (DRL) can make it easier for
others to see the front of your vehicle during the
day. DRL can be helpful in many different driving
conditions, but they can be especially helpful in the short
periods after dawn and before sunset.
The DRL system will make your low-beam headlamps
come on at a reduced brightness when the following
conditions are met:
•The ignition is on,
•the exterior lamp control is turned to AUTO or you
have turned on your parking lamps,
•the light sensor detects daytime light,
•the parking brake is released, and
•the shift lever is not in PARK (P).
3-14
Page 103 of 320
When the DRL system is on, the taillamps, sidemarker
lamps, parking lamps and instrument panel lights
will not be illuminated unless you have turned the
exterior lamps control to the parking lamp or headlamp
position.
The DRL system will remain off any time your vehicle is
in PARK (P) or the parking brake is engaged and the
vehicle speed is less than 8 mph (13 km/h), for
United States vehicles only.
As with any vehicle, you should turn on the regular
headlamp system when you need it.
Automatic Headlamp System
When it is dark enough outside, your Automatic
Headlamp System will turn on your headlamps at the
normal brightness along with other lamps such as
the taillamps, sidemarker, parking lamps and the
instrument panel lights. The radio lights will also be dim.
Your vehicle is equipped with a light sensor on the
top of the instrument panel under the defroster grill, so
be sure it is not covered which will cause the system
to be on whenever the ignition is on.
The system may also be on when driving through a
parking garage, heavy overcast weather or a tunnel.
This is normal.There is a delay in the transition between the daytime
and nighttime operation of the DRL and the Automatic
Headlamp System so that driving under bridges or bright
overhead street lights does not affect the system. The
DRL and Automatic Headlamp System will only be
affected when the light sensor sees a change in lighting
lasting longer than this delay.
If you start your vehicle in a dark garage, the automatic
headlamp system will come on immediately. Once
you leave the garage, it will take approximately
one minute for the automatic headlamp system to
change to DRL if it is light outside. During that delay,
your instrument panel cluster may not be as bright
as usual. Make sure your instrument panel brightness
control is in the full bright position. See “Instrument
Panel Brightness Control” underInstrument Panel
Brightness on page 3-16.
To idle your vehicle with the system off, set the park
brake while the ignition is off. Then start the vehicle.
The system will stay off until you release the park brake.
As with any vehicle, you should turn on the regular
headlamps when you need them.
3-15
Page 104 of 320
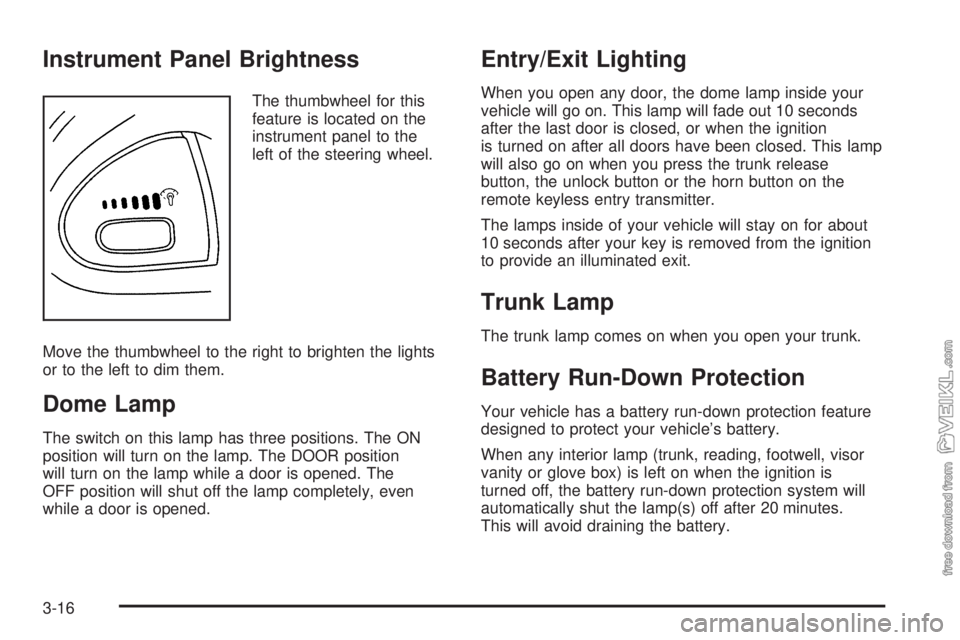
Instrument Panel Brightness
The thumbwheel for this
feature is located on the
instrument panel to the
left of the steering wheel.
Move the thumbwheel to the right to brighten the lights
or to the left to dim them.
Dome Lamp
The switch on this lamp has three positions. The ON
position will turn on the lamp. The DOOR position
will turn on the lamp while a door is opened. The
OFF position will shut off the lamp completely, even
while a door is opened.
Entry/Exit Lighting
When you open any door, the dome lamp inside your
vehicle will go on. This lamp will fade out 10 seconds
after the last door is closed, or when the ignition
is turned on after all doors have been closed. This lamp
will also go on when you press the trunk release
button, the unlock button or the horn button on the
remote keyless entry transmitter.
The lamps inside of your vehicle will stay on for about
10 seconds after your key is removed from the ignition
to provide an illuminated exit.
Trunk Lamp
The trunk lamp comes on when you open your trunk.
Battery Run-Down Protection
Your vehicle has a battery run-down protection feature
designed to protect your vehicle’s battery.
When any interior lamp (trunk, reading, footwell, visor
vanity or glove box) is left on when the ignition is
turned off, the battery run-down protection system will
automatically shut the lamp(s) off after 20 minutes.
This will avoid draining the battery.
3-16