2005 CADILLAC STS radio
[x] Cancel search: radioPage 252 of 446

Care of Your CDs
Handle CDs carefully. Store them in their original cases
or other protective cases and away from direct
sunlight and dust. If the surface of a CD is soiled,
dampen a clean, soft cloth in a mild, neutral detergent
solution and clean it, wiping from the center to the edge.
Be sure never to touch the side without writing when
handling CDs. Pick up CDs by grasping the outer edges
or the edge of the hole and the outer edge.
Care of the CD Player
The use of CD lens cleaners for CD players is not
advised, due to the risk of contaminating the lens of the
CD optics with lubricants internal to the CD mechanism.
Diversity Antenna System
The AM-FM antenna is integrated with the rear window
defogger, located in the rear window. Make sure that
the inside surface of the rear window is not scratched
and that the grid lines on the glass are not damaged.
If the inside surface is damaged, it could interfere
with radio reception.Notice:Do not apply aftermarket glass tinting with
metallic �lm. The metallic �lm in some tinting
materials will interfere with or distort the incoming
radio reception. Any damage caused to your
backglass antenna due to metallic tinting materials
will not be covered by your warranty.
Notice:Do not try to clear frost or other material
from the inside of the rear window with a razor blade
or anything else that is sharp, as this may damage
the rear window defogger grid and affect your
radio’s ability to pick up stations clearly. The repairs
would not be covered by your warranty.
If static is heard on the radio, when the rear window
defogger is turned on, it could mean that a defogger grid
line has been damaged. If this is true, the grid line
must be repaired.
If adding an aftermarket cellular telephone to your
vehicle, and the antenna needs to be attached to the
glass, make sure that the grid lines for the AM-FM
antennas are not damaged. Make sure the cellular
telephone antenna does not touch a grid line.
XM™ Satellite Radio Antenna
System
The XM™ Satellite Radio antenna is located on the roof
of your vehicle. Keep this antenna clear of snow and
ice build up for clear radio reception.
3-118
Page 334 of 446

Jump Starting
If your battery has run down, you may want to use
another vehicle and some jumper cables to start your
vehicle. Be sure to use the following steps to do it safely.
{CAUTION:
Batteries can hurt you. They can be dangerous
because:
They contain acid that can burn you.
They contain gas that can explode or
ignite.
They contain enough electricity to
burn you.
If you do not follow these steps exactly, some
or all of these things can hurt you.
Notice:Ignoring these steps could result in costly
damage to your vehicle that would not be covered
by your warranty.
Trying to start your vehicle by pushing or pulling it
will not work, and it could damage your vehicle.
1. Check the other vehicle. It must have a 12-volt
battery with a negative ground system.Notice:If the other vehicle’s system is not a 12-volt
system with a negative ground, both vehicles can
be damaged. Only use vehicles with 12-volt systems
with negative grounds to jump start your vehicle.
2. Get the vehicles close enough so the jumper cables
can reach, but be sure the vehicles are not touching
each other. If they are, it could cause a ground
connection you do not want. You would not be able
to start your vehicle and the bad grounding could
damage the electrical systems.
To avoid the possibility of the vehicles rolling, set
the parking brake �rmly on both vehicles involved in
the jump start procedure. Put an automatic
transmission in PARK (P) or a manual transmission
in NEUTRAL before setting the parking brake.
Notice:If you leave your radio or other accessories
on during the jump starting procedure, they could
be damaged. The repairs would not be covered
by your warranty. Always turn off your radio and
other accessories when jump starting your vehicle.
3. Turn off the ignition on both vehicles. Unplug
unnecessary accessories plugged into the cigarette
lighter or the accessory power outlets. Turn off
the radio and all lamps that are not needed. This
will avoid sparks and help save both batteries. And
it could save the radio!
5-38
Page 358 of 446

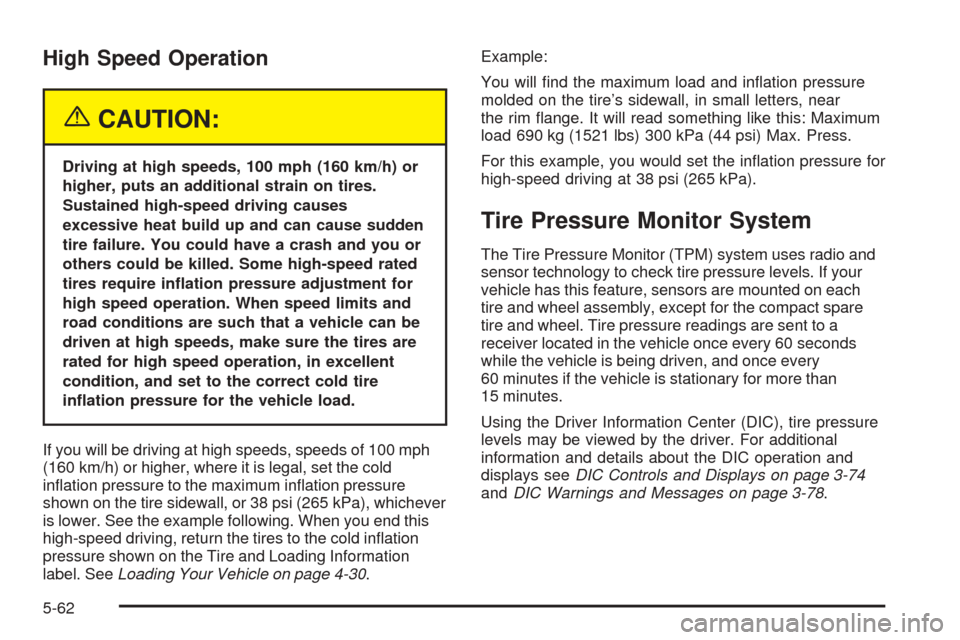
High Speed Operation
{CAUTION:
Driving at high speeds, 100 mph (160 km/h) or
higher, puts an additional strain on tires.
Sustained high-speed driving causes
excessive heat build up and can cause sudden
tire failure. You could have a crash and you or
others could be killed. Some high-speed rated
tires require in�ation pressure adjustment for
high speed operation. When speed limits and
road conditions are such that a vehicle can be
driven at high speeds, make sure the tires are
rated for high speed operation, in excellent
condition, and set to the correct cold tire
in�ation pressure for the vehicle load.
If you will be driving at high speeds, speeds of 100 mph
(160 km/h) or higher, where it is legal, set the cold
in�ation pressure to the maximum in�ation pressure
shown on the tire sidewall, or 38 psi (265 kPa), whichever
is lower. See the example following. When you end this
high-speed driving, return the tires to the cold in�ation
pressure shown on the Tire and Loading Information
label. SeeLoading Your Vehicle on page 4-30.Example:
You will �nd the maximum load and in�ation pressure
molded on the tire’s sidewall, in small letters, near
the rim �ange. It will read something like this: Maximum
load 690 kg (1521 lbs) 300 kPa (44 psi) Max. Press.
For this example, you would set the in�ation pressure for
high-speed driving at 38 psi (265 kPa).
Tire Pressure Monitor System
The Tire Pressure Monitor (TPM) system uses radio and
sensor technology to check tire pressure levels. If your
vehicle has this feature, sensors are mounted on each
tire and wheel assembly, except for the compact spare
tire and wheel. Tire pressure readings are sent to a
receiver located in the vehicle once every 60 seconds
while the vehicle is being driven, and once every
60 minutes if the vehicle is stationary for more than
15 minutes.
Using the Driver Information Center (DIC), tire pressure
levels may be viewed by the driver. For additional
information and details about the DIC operation and
displays seeDIC Controls and Displays on page 3-74
andDIC Warnings and Messages on page 3-78.
5-62
Page 382 of 446

When cleaning your vehicle’s interior, only use cleaners
speci�cally designed for the surfaces being cleaned.
Permanent damage may result from using cleaners on
surfaces for which they were not intended. Use glass
cleaner only on glass. Remove any accidental over-spray
from other surfaces immediately. To prevent over-spray,
apply cleaner directly to the cleaning cloth.
Notice:If you use abrasive cleaners when cleaning
glass surfaces on your vehicle, you could scratch
the glass and/or cause damage to the rear window
defogger and the integrated radio antenna. When
cleaning the glass on your vehicle, use only a soft
cloth and glass cleaner.
Many cleaners contain solvents that may become
concentrated in your vehicle’s breathing space. Before
using cleaners, read and adhere to all safety
instructions on the label. While cleaning your vehicle’s
interior, maintain adequate ventilation by opening
your vehicle’s doors and windows.
Dust may be removed from small buttons and knobs
using a small brush with soft bristles.
Your GM dealer has a product for cleaning your
vehicle’s glass. Should it become necessary, you can
also obtain a product from your GM dealer to remove
odors from your vehicle’s upholstery.Do not clean your vehicle using the following cleaners
or techniques:
Never use a knife or any other sharp object to
remove a soil from any interior surface.
Never use a stiff brush. It can cause damage to
your vehicle’s interior surfaces.
Never apply heavy pressure or rub aggressively
with a cleaning cloth. Use of heavy pressure
can damage your interior and does not improve the
effectiveness of soil removal.
Use only mild, neutral-pH soaps. Avoid laundry
detergents or dishwashing soaps with degreasers.
Using too much soap will leave a residue that
leaves streaks and attracts dirt. For liquid cleaners,
about 20 drops per gallon (3.78 L) of water is a
good guide.
Do not heavily saturate your upholstery while
cleaning.
Damage to your vehicle’s interior may result from
the use of many organic solvents such as naptha,
alcohol, etc.
5-86
Page 391 of 446

Electrical System
Add-On Electrical Equipment
Notice:Don’t add anything electrical to your vehicle
unless you check with your dealer �rst. Some
electrical equipment can damage your vehicle and
the damage wouldn’t be covered by your warranty.
Some add-on electrical equipment can keep other
components from working as they should.
Your vehicle has an airbag system. Before attempting to
add anything electrical to your vehicle, seeServicing
Your Airbag-Equipped Vehicle on page 1-56.
Headlamp Wiring
The headlamp wiring has an individual fuse. An electrical
overload will cause the lamps to go on and off, or in some
cases to remain off. If this happens, have the headlamp
wiring checked right away.
Windshield Wiper Fuses
The windshield wiper motor is protected by an internal
circuit breaker. If the wiper motor overheats due to
heavy snow, the wipers will stop until the motor cools
and will then restart.
Power Windows and Other Power
Options
Circuit breakers protect the power windows and power
seats. When the current load is too heavy, the circuit
breaker opens and closes, protecting the circuit until the
problem is �xed or goes away.
Fuses and Circuit Breakers
The wiring circuits in your vehicle are protected from
short circuits by a combination of fuses, circuit breakers
and fusible thermal links. This greatly reduces the
chance of �res caused by electrical problems.
Look at the silver-colored band inside the fuse. If the
band is broken or melted, replace the fuse. Be sure you
replace a bad fuse with a new one of the identical
size and rating. If a fuse should blow, see your dealer
for service immediately.
If you ever have a problem on the road and don’t have
a spare fuse, you can borrow one that has the same
amperage. Just pick some feature of your vehicle
that you can get along without — like the radio or
cigarette lighter — and use its fuse, if it is the correct
amperage. Replace it as soon as you can.
The fuses are located in three fuse blocks. One is
located in the engine compartment, on the passenger’s
side of the vehicle, and the other two are located
under the rear seat on both the driver’s and passenger’s
side of the vehicle.
5-95
Page 400 of 446

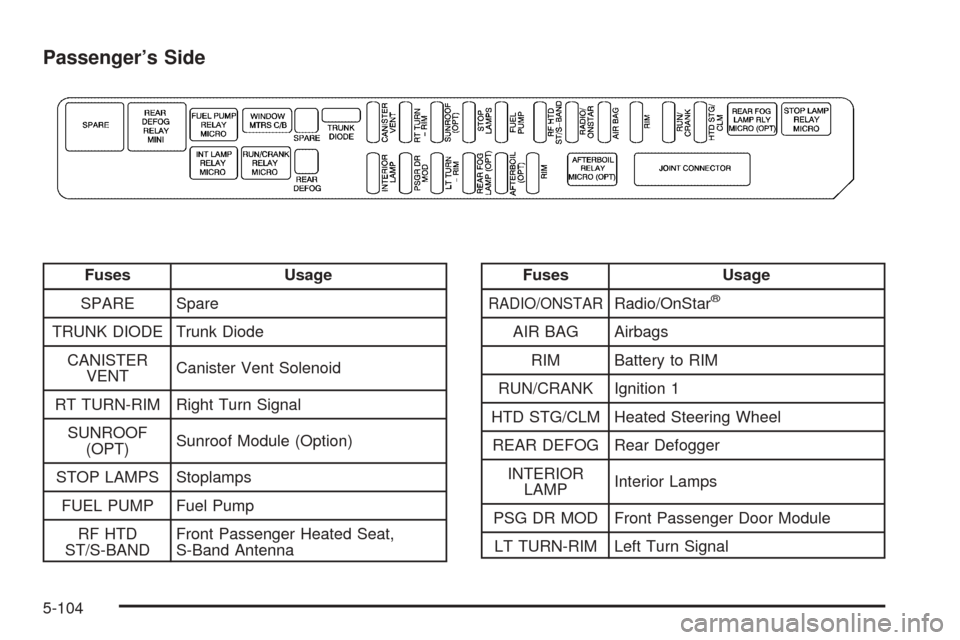
Passenger’s Side
Fuses Usage
SPARE Spare
TRUNK DIODE Trunk Diode
CANISTER
VENTCanister Vent Solenoid
RT TURN-RIM Right Turn Signal
SUNROOF
(OPT)Sunroof Module (Option)
STOP LAMPS Stoplamps
FUEL PUMP Fuel Pump
RF HTD
ST/S-BANDFront Passenger Heated Seat,
S-Band AntennaFuses Usage
RADIO/ONSTARRadio/OnStar®
AIR BAG Airbags
RIM Battery to RIM
RUN/CRANK Ignition 1
HTD STG/CLM Heated Steering Wheel
REAR DEFOG Rear Defogger
INTERIOR
LAMPInterior Lamps
PSG DR MOD Front Passenger Door Module
LT TURN-RIM Left Turn Signal
5-104
Page 433 of 446

A
Accessory Power Outlets.................................3-49
Adaptive Cruise Control...................................3-20
Additives, Fuel................................................. 5-6
Add-On Electrical Equipment............................5-95
Air Cleaner/Filter, Engine.................................5-20
Air Conditioning..............................................3-50
Airbag
Readiness Light..........................................3-63
Airbag Sensing and Diagnostic Module (SDM)...... 7-8
Airbag System................................................1-45
How Does an Airbag Restrain?......................1-53
Servicing Your Airbag-Equipped Vehicle..........1-56
What Makes an Airbag In�ate?......................1-53
What Will You See After an Airbag In�ates?....1-54
When Should an Airbag In�ate?....................1-52
Where Are the Airbags?...............................1-48
All-Wheel Drive...............................................5-42
All-Wheel Drive (AWD) System.........................2-29
Antenna, Diversity Antenna System..................3-118
Antenna, XM™ Satellite Radio Antenna
System.....................................................3-118
Anti-Lock Brake System (ABS)........................... 4-6
Anti-Lock Brake, System Warning Light..............3-65
Appearance Care............................................5-85
Aluminum or Chrome-Plated Wheels..............5-91
Care of Safety Belts....................................5-88
Chemical Paint Spotting...............................5-92
Cleaning Exterior Lamps/Lenses....................5-89Appearance Care (cont.)
Cleaning the Inside of Your Vehicle................5-85
Fabric/Carpet..............................................5-87
Finish Care.................................................5-89
Finish Damage............................................5-92
Instrument Panel, Vinyl, and Other Plastic
Surfaces.................................................5-88
Leather......................................................5-87
Sheet Metal Damage...................................5-92
Speaker Covers..........................................5-88
Tires..........................................................5-91
Underbody Maintenance...............................5-92
Vehicle Care/Appearance Materials................5-93
Washing Your Vehicle...................................5-89
Weatherstrips..............................................5-88
Windshield and Wiper Blades........................5-90
Wood Panels..............................................5-88
Ashtrays........................................................3-49
Audio System(s).............................................3-92
Audio Steering Wheel Controls....................3-116
Care of Your CD Player..............................3-118
Care of Your CDs......................................3-118
Diversity Antenna System............................3-118
Navigation/Radio System, see Navigation
Manual.................................................3-111
Audio Systems
Radio Personalization.................................3-112
Audio System(s)
Radio with CD............................................3-94
Setting the Time..........................................3-93
1
Page 434 of 446

Audio System(s) (cont.)
Theft-Deterrent Feature...............................3-115
Understanding Radio Reception...................3-117
XM™ Satellite Radio Antenna System...........3-118
Automatic Transmission
Fluid..........................................................5-21
Operation...................................................2-26
B
Battery..........................................................5-37
Exterior Lighting Battery Saver......................3-41
Inadvertent Power Saver..............................3-43
Load Management.......................................3-42
Before Leaving on a Long Trip.........................4-22
Brake
Anti-Lock Brake System (ABS)........................ 4-6
Emergencies................................................ 4-8
Panic Assist................................................4-10
Parking......................................................2-29
System Warning Light..................................3-64
Brakes..........................................................5-34
Braking........................................................... 4-5
Braking in Emergencies..................................... 4-8
Break-In, New Vehicle.....................................2-22
Bulb Replacement...........................................5-48
Back-Up Lamps...........................................5-50
Front Turn Signal Lamps..............................5-49
Halogen Bulbs............................................5-49Bulb Replacement (cont.)
Headlamp Aiming........................................5-46
High Intensity Discharge (HID) Lighting...........5-48
Replacement Bulbs......................................5-51
Sidemarker Lamps.......................................5-50
Buying New Tires...........................................5-68
C
California Fuel.................................................. 5-6
Canadian Owners................................................ ii
Capacities and Speci�cations..........................5-106
Carbon Monoxide...................2-14, 2-33, 4-25, 4-37
Care of
Safety Belts................................................5-88
Your CD Player.........................................3-118
Your CDs .................................................3-118
Center Console Storage Area...........................2-45
Chains, Tire...................................................5-73
Charging System Light....................................3-64
Check
Engine Light...............................................3-68
Checking Things Under the Hood......................5-10
Chemical Paint Spotting...................................5-92
Child Restraints
Child Restraint Systems...............................1-32
Infants and Young Children...........................1-28
Lower Anchorages and Top Tethers for
Children (LATCH System)..........................1-38
2