2005 BUICK LACROSSE clock
[x] Cancel search: clockPage 82 of 410

Doors and Locks
Door Locks
{CAUTION:
Unlocked doors can be dangerous.
Passengers — especially children — can
easily open the doors and fall out of a
moving vehicle. When a door is locked, the
handle will not open it. You increase the
chance of being thrown out of the vehicle
in a crash if the doors are not locked. So,
wear safety belts properly and lock the
doors whenever you drive.
CAUTION: (Continued)
CAUTION: (Continued)
Young children who get into unlocked
vehicles may be unable to get out. A child
can be overcome by extreme heat and can
suffer permanent injuries or even death
from heat stroke. Always lock your vehicle
whenever you leave it.
Outsiders can easily enter through an
unlocked door when you slow down or
stop your vehicle. Locking your doors can
help prevent this from happening.
There are several ways to lock and unlock the vehicle.
From the outside, turn the door/ignition key in the
driver’s door lock cylinder brie�y counterclockwise to
unlock the driver’s door. Turn and hold it to unlock all the
doors. You can also use the remote keyless entry
transmitter. From the inside use the manual or power
door locks.
2-10
Page 93 of 410

Starting and Operating Your
Vehicle
New Vehicle Break-In
Notice:Your vehicle does not need an elaborate
break-in. But it will perform better in the long run if
you follow these guidelines:
Do not drive at any one speed, fast or slow, for
the �rst 500 miles (805 km). Do not make
full-throttle starts.
Avoid making hard stops for the �rst 200 miles
(322 km) or so. During this time your new
brake linings are not yet broken in. Hard stops
with new linings can mean premature wear
and earlier replacement. Follow this breaking-in
guideline every time you get new brake
linings.
Do not tow a trailer during break-in. SeeTowing
a Trailer on page 4-35for more information.
Ignition Positions
With the ignition key in the ignition, the key can be
turned to four different positions:
A (OFF):This is the only position in which the ignition
key can be inserted or removed. This position locks
the ignition and transaxle. It is a theft-deterrent feature.
B (ACCESSORY):This position lets the radio and
windshield wipers operate while the engine is off. To use
ACCESSORY, turn the key clockwise.
2-21
Page 130 of 410

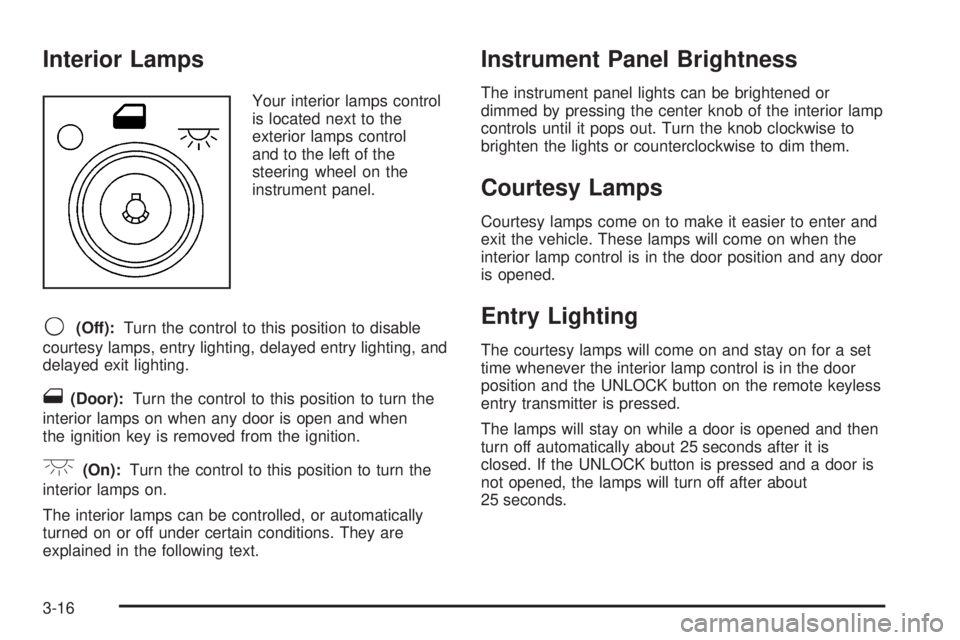
Interior Lamps
Your interior lamps control
is located next to the
exterior lamps control
and to the left of the
steering wheel on the
instrument panel.
9(Off):Turn the control to this position to disable
courtesy lamps, entry lighting, delayed entry lighting, and
delayed exit lighting.
1(Door):Turn the control to this position to turn the
interior lamps on when any door is open and when
the ignition key is removed from the ignition.
+(On):Turn the control to this position to turn the
interior lamps on.
The interior lamps can be controlled, or automatically
turned on or off under certain conditions. They are
explained in the following text.
Instrument Panel Brightness
The instrument panel lights can be brightened or
dimmed by pressing the center knob of the interior lamp
controls until it pops out. Turn the knob clockwise to
brighten the lights or counterclockwise to dim them.
Courtesy Lamps
Courtesy lamps come on to make it easier to enter and
exit the vehicle. These lamps will come on when the
interior lamp control is in the door position and any door
is opened.
Entry Lighting
The courtesy lamps will come on and stay on for a set
time whenever the interior lamp control is in the door
position and the UNLOCK button on the remote keyless
entry transmitter is pressed.
The lamps will stay on while a door is opened and then
turn off automatically about 25 seconds after it is
closed. If the UNLOCK button is pressed and a door is
not opened, the lamps will turn off after about
25 seconds.
3-16
Page 136 of 410

9(Fan):Turn the knob by this symbol, located on the
left side of the climate control panel, clockwise or
counterclockwise to increase or decrease the fan speed.
During the highest fan speed selections, the fan
speed will be temporarily reduced between the transition
to a new mode. The fan will resume the original
speed when the transition to the new mode is complete.
Temperature Control:Turn the center knob clockwise
or counterclockwise to increase or decrease the
temperature inside your vehicle.
Use the right knob to select from the following modes:
H(Vent):This mode directs outside air to the
instrument panel outlets. If driving in city traffic, and the
vehicle is stopped and idling, or the weather is hot,
switch from this mode to the recirculation mode.
To prevent the air inside the vehicle from becoming
stale, be sure to return to the vent mode periodically.
)(Bi-Level):This mode directs half of the air to the
instrument panel outlets, and the remaining air to
the �oor outlets. Some air may be directed toward the
windshield. Slightly cooler air is directed to the
instrument panel outlets and warmer air is directed to
the �oor outlets.
6(Floor):This mode directs most of the air to the
�oor outlets with some air directed toward the side
window outlets and a little air directed to the windshield.
In this mode, the system will automatically use outside
air. The air conditioning compressor will be engaged
unless the outside temperature is 40°F (4°C) or below.
Recirculation cannot be selected when in this mode.
You can also select modes by using the
following buttons:
h(Recirculate):Press this button to recirculate
cabin air through the vehicle. It can be used to prevent
outside air and odors from entering your vehicle or
to help heat or cool the air inside your vehicle more
quickly. An indicator light below the button will come on
in this mode. Operation in this mode during periods
of high humidity and cool outside temperatures
may result in increased window fogging. If window
fogging is experienced, select the defrost mode.
3-22
Page 163 of 410

Trip/Odometer Menu Items
TRIP/ODO (Trip Odometer):Press this button to scroll
through the following menu items:
Odometer
Press the trip/odometer button until the odometer
displays. This mode shows the distance the vehicle has
been driven in either miles or kilometers.
Trip A and Trip B
Press the trip/odometer button until A or B displays. This
mode shows the current distance traveled in either
miles or kilometers since the last reset for each
trip odometer. Both trip odometers can be used at the
same time.
Each trip odometer can be reset to zero separately by
pressing the set/reset button on the uplevel vehicle or by
pressing and holding the trip odometer button on the
base level vehicle while the desired trip odometer
is displayed.
The display will show the odometer on the top line and
the trip odometer information, either A or B, on the
bottom line.
Time Elapsed (Uplevel Only)
Press the trip/odometer button until TIME ELAPSED :00
displays. This mode is like a stopwatch, in that you
can clock the time it takes to get from one point
to another. Each of the �elds for the hours, minutes,
and seconds are two numeric digits.
Once TIME ELAPSED :00 is displayed, press the
set/reset button on the uplevel vehicle to start the timing
feature. Press the set/reset button again to stop it. If
you will be starting and stopping your vehicle, during a
trip for instance, the TIME ELAPSED feature will
automatically start timing where it left off when you last
stopped. To reset it, press and hold the set/reset
button for approximately 1.5 seconds. The display will
return to zero. Press the trip/odometer button to
exit from the TIME ELAPSED display.
Average Speed (Uplevel Only)
Press the trip/odometer button until AVERAGE SPEED
displays. This mode shows the average speed of
the vehicle in miles per hour (mph) or kilometers per
hour (km/h). This average is calculated based on
the various vehicle speed recorded since the last reset
of this value. To reset the value, press the trip/odometer
button to display AVERAGE SPEED, then press and
hold the set/reset button on the uplevel vehicle.
The display will return to zero.
3-49
Page 245 of 410

Steering in Emergencies
There are times when steering can be more effective
than braking. For example, you come over a hill and �nd
a truck stopped in your lane, or a car suddenly pulls
out from nowhere, or a child darts out from between
parked cars and stops right in front of you. You
can avoid these problems by braking — if you can stop
in time. But sometimes you cannot; there is not room.
That is the time for evasive action — steering around
the problem.
Your vehicle can perform very well in emergencies like
these. First apply your brakes.
SeeBraking on page 4-5. It is better to remove as much
speed as you can from a possible collision. Then
steer around the problem, to the left or right depending
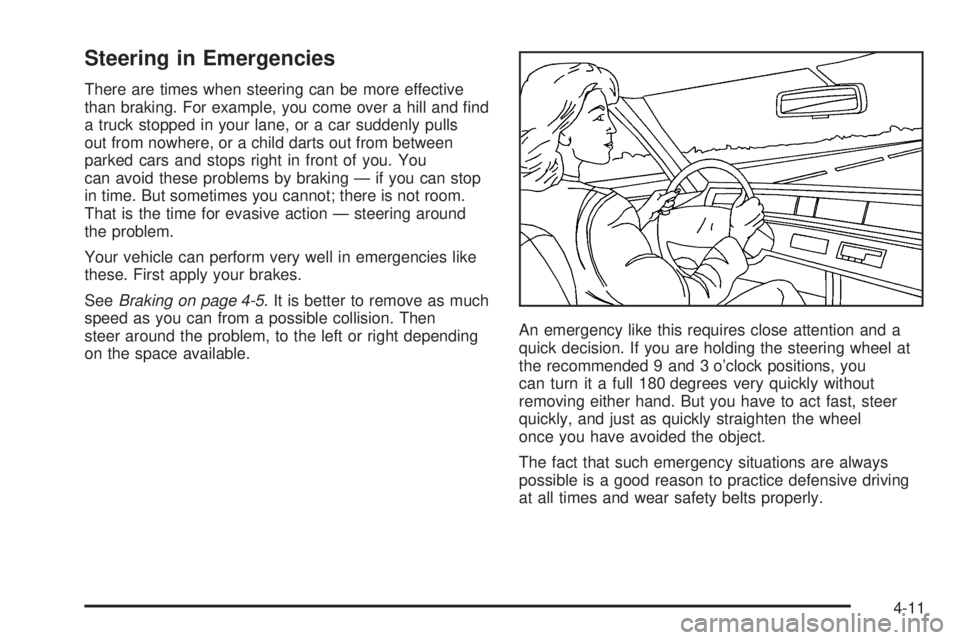
on the space available.An emergency like this requires close attention and a
quick decision. If you are holding the steering wheel at
the recommended 9 and 3 o’clock positions, you
can turn it a full 180 degrees very quickly without
removing either hand. But you have to act fast, steer
quickly, and just as quickly straighten the wheel
once you have avoided the object.
The fact that such emergency situations are always
possible is a good reason to practice defensive driving
at all times and wear safety belts properly.
4-11
Page 284 of 410

Filling the Tank
{CAUTION:
Fuel vapor burns violently and a fuel �re can
cause bad injuries. To help avoid injuries to
you and others, read and follow all the
instructions on the pump island. Turn off your
engine when you are refueling. Do not smoke
if you are near fuel or refueling your vehicle.
Keep sparks, �ames and smoking materials
away from fuel. Do not leave the fuel pump
unattended when refueling your vehicle — this
is against the law in some places. Keep
children away from the fuel pump; never let
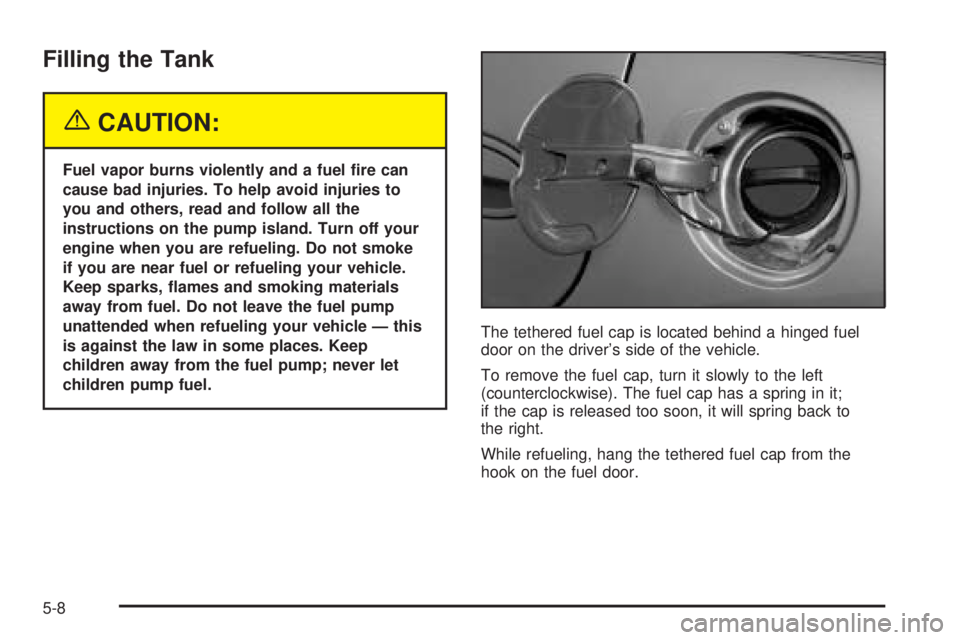
children pump fuel.The tethered fuel cap is located behind a hinged fuel
door on the driver’s side of the vehicle.
To remove the fuel cap, turn it slowly to the left
(counterclockwise). The fuel cap has a spring in it;
if the cap is released too soon, it will spring back to
the right.
While refueling, hang the tethered fuel cap from the
hook on the fuel door.
5-8
Page 285 of 410

{CAUTION:
If you spill fuel and then something ignites it,
you could be badly burned. Fuel can spray out
on you if you open the fuel cap too quickly.
This spray can happen if your tank is nearly
full, and is more likely in hot weather. Open
the fuel cap slowly and wait for any hiss noise
to stop. Then unscrew the cap all the way.
Be careful not to spill fuel. Do not top off or over�ll the
tank and wait a few seconds after you have �nished
pumping before removing the nozzle. Clean fuel
from painted surfaces as soon as possible. See
Washing Your Vehicle on page 5-81.
When replacing the fuel cap, turn it to the right
(clockwise) until it clicks. Make sure the cap is fully
installed. The diagnostic system can determine if the fuel
cap has been left off or improperly installed. This
would allow fuel to evaporate into the atmosphere. See
Malfunction Indicator Lamp on page 3-39.Your vehicle may also be equipped with a check gas
cap warning light, which will be displayed on the
instrument panel cluster if the fuel cap is not properly
installed. SeeCheck Gas Cap Light on page 3-46
for more information.
If your vehicle has a Driver Information Center (DIC),
the CHECK GAS CAP message will be displayed if the
fuel cap is not properly installed. SeeDIC Warnings
and Messages on page 3-53for more information.
{CAUTION:
If a �re starts while you are refueling, do not
remove the nozzle. Shut off the �ow of fuel by
shutting off the pump or by notifying the
station attendant. Leave the area immediately.
Notice:If you need a new fuel cap, be sure to get
the right type. Your dealer can get one for you.
If you get the wrong type, it may not �t properly.
This may cause your malfunction indicator lamp to
light and may damage your fuel tank and emissions
system. SeeMalfunction Indicator Lamp on
page 3-39.
5-9