2005 BUICK CENTURY brake light
[x] Cancel search: brake lightPage 74 of 348

Programming Delayed Locking
Delayed locking has two modes.
Mode One (One Chime):Delayed locking is turned off.
Mode Two (Two Chimes):Delayed locking is
turned on.
1. Close the doors.
2. Move the ignition key to the RUN position.
3. Apply the regular brakes.
4. Press and hold the power door unlock switch. While
holding the power door unlock switch, move the
shift lever out of and back into PARK (P).
One or two chimes will sound indicating what mode
the delayed locking is in.
5. Release the power door unlock switch, after one
of the chime mode sequences, to set the
desired mode.
Illumination on Remote Activation
This feature provides interior lighting when a remote
keyless entry door unlock command is received by the
vehicle. The ignition must be off for this feature to
work. The interior lamps will stay on until either the
ignition is turned to RUN or until 40 seconds has
elapsed. If a door is opened during this time, the timed
lighting will be canceled, and the interior lamps will
remain on. Also see “Entry Lighting” underInterior
Lamps on page 3-15for more information.
Matching Transmitter(s) to
Your Vehicle
Each remote keyless entry transmitter is uniquely coded
to prevent another transmitter from unlocking your
vehicle. If a transmitter is lost or stolen, a replacement
can be purchased through your dealer. Remember
to bring any additional transmitters so they also can be
re-coded to match the new transmitter. Once your
dealer has coded the new transmitter, the lost
transmitter cannot unlock the vehicle. The vehicle can
have a maximum of four transmitters coded to it.
2-8
Page 83 of 348

If a key is accidentally used that has a damaged or
missing resistor pellet, the starter will not work.
The SECURITY warning light on the instrument panel
will then come on. But you do not have to wait three
minutes before trying another ignition key.
See your dealer or a locksmith who can service the
PASS-Key
®II to have a new key made.
If the SECURITY warning light comes on the instrument
panel while the vehicle is being driven, the engine
will still be able to be started after it is turned off.
The PASS-Key
®II system, however, is not working
properly and must be serviced by your dealer.
The vehicle is not protected by the PASS-Key
®II
system when this happens.
If a PASS-Key
®II ignition key is lost or damaged,
see your dealer or a locksmith who can service
PASS-Key
®II to have a new key made. Also, see
Roadside Assistance Program on page 7-6for
more information.
Starting and Operating
Your Vehicle
New Vehicle Break-In
Notice:Your vehicle does not need an elaborate
“break-in.” But it will perform better in the long run
if you follow these guidelines:
Do not drive at any one speed — fast or
slow — for the �rst 500 miles (805 km).
Do not make full-throttle starts.
Avoid making hard stops for the �rst 200 miles
(322 km) or so. During this time your new
brake linings are not yet broken in. Hard stops
with new linings can mean premature wear
and earlier replacement. Follow this
breaking-in guideline every time you
get new brake linings.
Do not tow a trailer during break-in. SeeTowing
a Trailer on page 4-38for more information.
2-17
Page 90 of 348

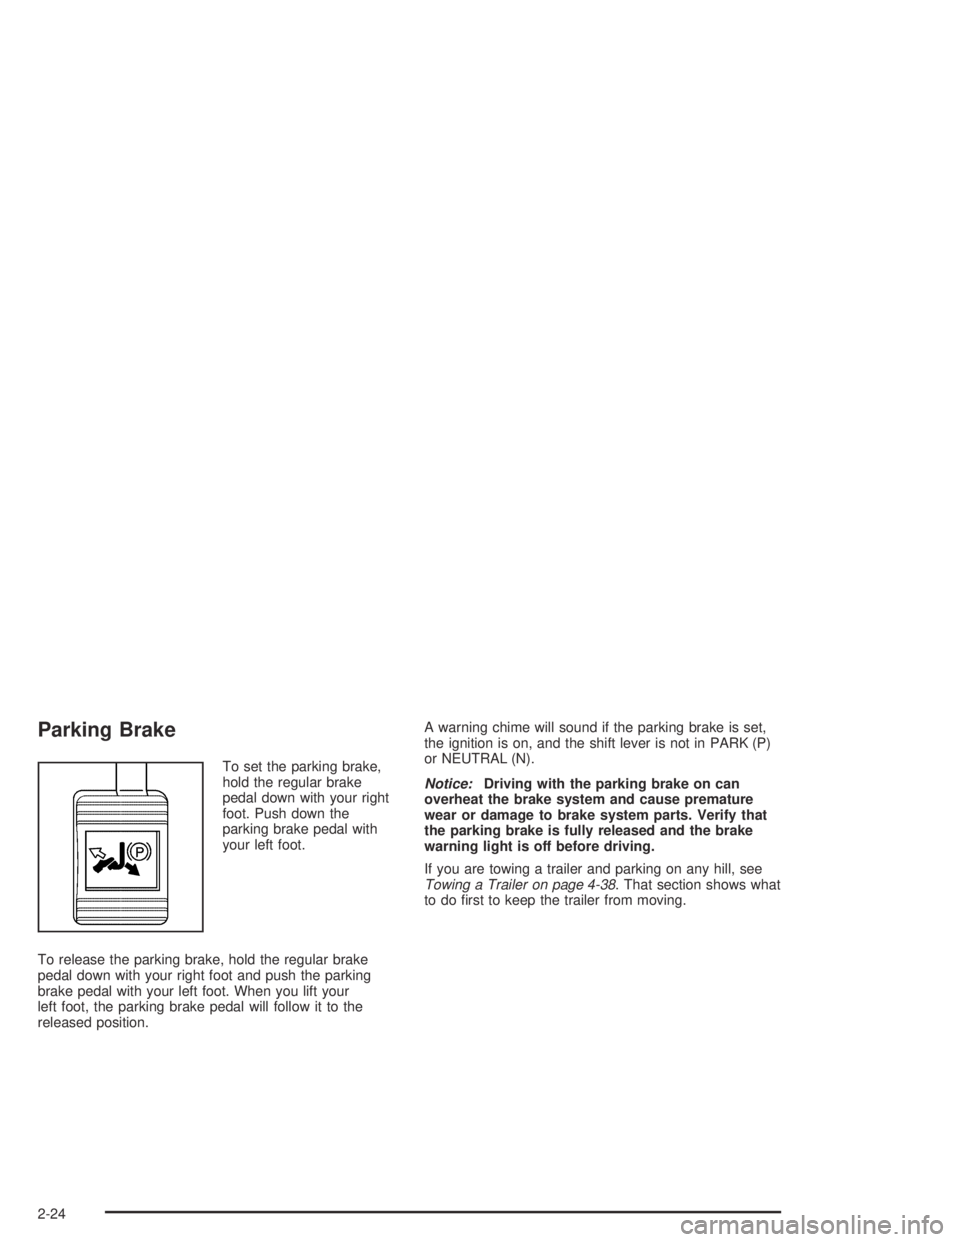
Parking Brake
To set the parking brake,
hold the regular brake
pedal down with your right
foot. Push down the
parking brake pedal with
your left foot.
To release the parking brake, hold the regular brake
pedal down with your right foot and push the parking
brake pedal with your left foot. When you lift your
left foot, the parking brake pedal will follow it to the
released position.A warning chime will sound if the parking brake is set,
the ignition is on, and the shift lever is not in PARK (P)
or NEUTRAL (N).
Notice:Driving with the parking brake on can
overheat the brake system and cause premature
wear or damage to brake system parts. Verify that
the parking brake is fully released and the brake
warning light is off before driving.
If you are towing a trailer and parking on any hill, see
Towing a Trailer on page 4-38. That section shows what
to do �rst to keep the trailer from moving.
2-24
Page 101 of 348

Instrument Panel Overview...............................3-4
Hazard Warning Flashers................................3-6
Other Warning Devices...................................3-6
Horn.............................................................3-6
Tilt Wheel.....................................................3-6
Turn Signal/Multifunction Lever.........................3-7
Turn and Lane-Change Signals........................3-7
Headlamp High/Low-Beam Changer..................3-8
Flash-to-Pass.................................................3-8
Windshield Wipers..........................................3-8
Windshield Washer.........................................3-9
Cruise Control..............................................3-10
Exterior Lamps.............................................3-13
Headlamps on Reminder................................3-13
Delayed Headlamps......................................3-13
Daytime Running Lamps/Automatic
Headlamp System.....................................3-14
Cornering Lamps..........................................3-15
Interior Lamps..............................................3-15
Instrument Panel Brightness...........................3-15
Courtesy Lamps...........................................3-15
Dome Lamp.................................................3-16
Entry Lighting...............................................3-16
Delayed Entry Lighting...................................3-16Delayed Exit Lighting.....................................3-17
Reading Lamps............................................3-17
Battery Run-Down Protection..........................3-17
Ashtrays and Cigarette Lighter........................3-18
Climate Controls............................................3-18
Dual Climate Control System..........................3-18
Dual Automatic Climate Control System...........3-21
Outlet Adjustment.........................................3-26
Passenger Compartment Air Filter...................3-26
Warning Lights, Gages, and Indicators............3-28
Instrument Panel Cluster................................3-29
Speedometer and Odometer...........................3-30
Trip Odometer..............................................3-30
Safety Belt Reminder Light.............................3-30
Airbag Readiness Light..................................3-31
Charging System Light..................................3-32
Brake System Warning Light..........................3-32
Anti-Lock Brake System Warning Light.............3-33
Enhanced Traction System Warning Light.........3-34
Low Traction Light........................................3-34
Engine Coolant Temperature Warning Light......3-35
Engine Coolant Temperature Gage..................3-35
Tire Pressure Light.......................................3-36
Section 3 Instrument Panel
3-1
Page 111 of 348

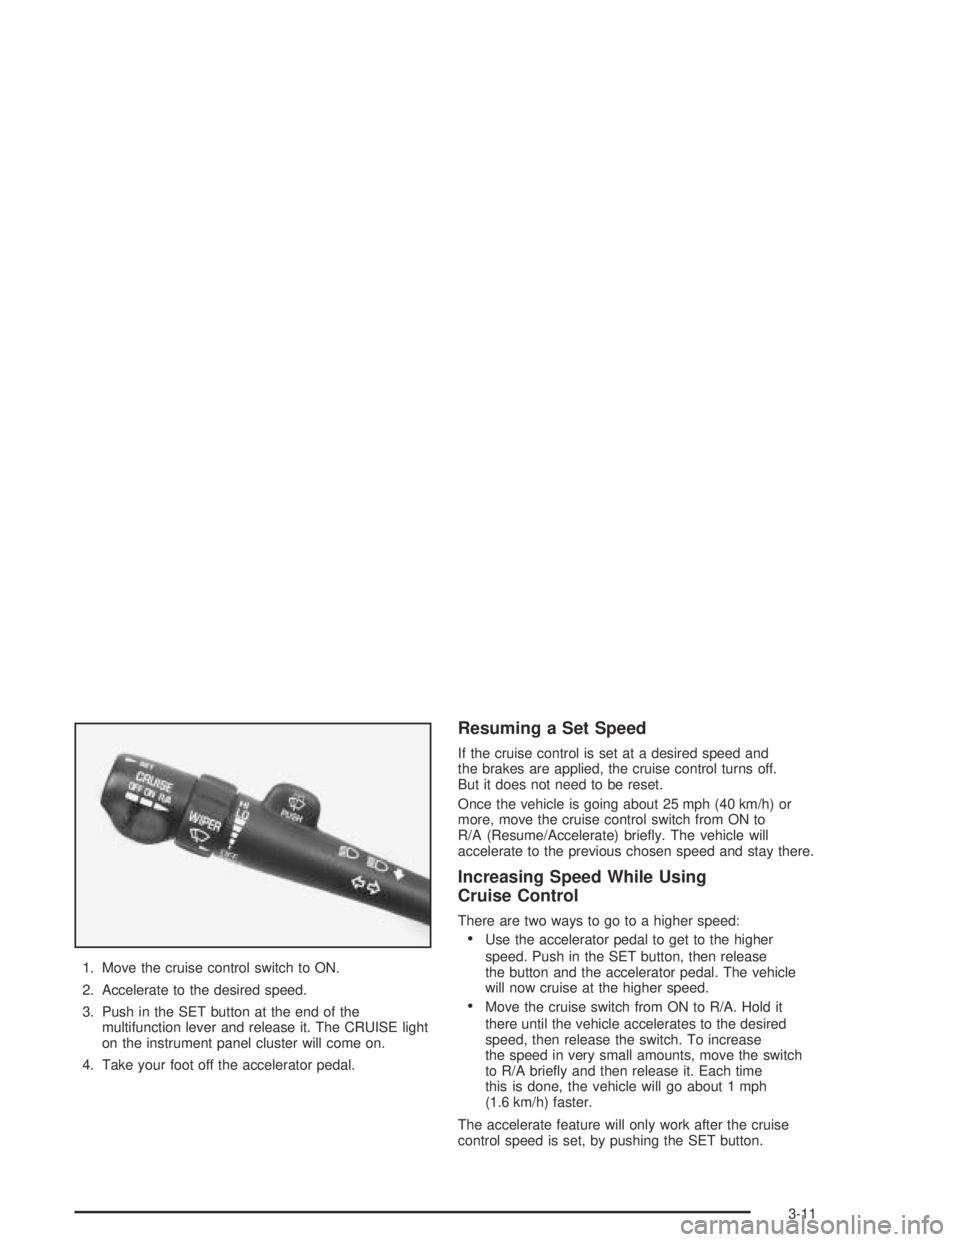
1. Move the cruise control switch to ON.
2. Accelerate to the desired speed.
3. Push in the SET button at the end of the
multifunction lever and release it. The CRUISE light
on the instrument panel cluster will come on.
4. Take your foot off the accelerator pedal.
Resuming a Set Speed
If the cruise control is set at a desired speed and
the brakes are applied, the cruise control turns off.
But it does not need to be reset.
Once the vehicle is going about 25 mph (40 km/h) or
more, move the cruise control switch from ON to
R/A (Resume/Accelerate) brie�y. The vehicle will
accelerate to the previous chosen speed and stay there.
Increasing Speed While Using
Cruise Control
There are two ways to go to a higher speed:
Use the accelerator pedal to get to the higher
speed. Push in the SET button, then release
the button and the accelerator pedal. The vehicle
will now cruise at the higher speed.
Move the cruise switch from ON to R/A. Hold it
there until the vehicle accelerates to the desired
speed, then release the switch. To increase
the speed in very small amounts, move the switch
to R/A brie�y and then release it. Each time
this is done, the vehicle will go about 1 mph
(1.6 km/h) faster.
The accelerate feature will only work after the cruise
control speed is set, by pushing the SET button.
3-11
Page 112 of 348

Reducing Speed While Using
Cruise Control
There are two ways to reduce the vehicle’s speed while
using cruise control:
Push in the SET button until the vehicle slows down
to the desired, then release it.
To slow the vehicle down in very small amounts,
push the SET button brie�y. Each time this is down,
the vehicle will go about 1 mph (1.6 km/h) slower.
Passing Another Vehicle While Using
Cruise Control
Use the accelerator pedal to increase the vehicle’s
speed. When you take your foot off the pedal, the
vehicle will slow down to the cruise control speed that
was set earlier.
Using Cruise Control on Hills
How well the cruise control will work on hills depends
upon the speed and load of the vehicle, and the
steepness of the hills. When going up steep hills, the
accelerator pedal may have to be pressed to maintain
the vehicle’s speed. When going downhill, the vehicle’s
brakes may have to be used, or a lower gear may
have to be used to keep the vehicle’s speed down.
Of course, applying the brake takes the vehicle out of
cruise control. Many drivers �nd this to be too much
trouble and do not use cruise control on steep hills.
Ending Cruise Control
There are two ways to turn off the cruise control:
Step lightly on the brake pedal.
Move the cruise switch to OFF.
Ending Speed Memory
When the cruise control or the ignition is turned off, or
the vehicle is shifted into PARK (P) or NEUTRAL (N),
the cruise control set speed memory is erased.
3-12
Page 114 of 348

4. Release the power door LOCK switch. These steps
must be carried out in a time period of less than
10 seconds, followed by a delay period of no more
than 10 seconds.
5. Then, press and hold the unlock position on the
power door switch. While holding the unlock
position, turn the exterior lamps control on and off
two times. Release the unlock position on the power
door switch. These operations must be carried
out in a time period of less than 10 seconds.
After releasing the unlock position on the power door
switch, a single chime will be heard if the delayed
headlamp illumination function has been turned off.
Two chimes will be heard if the feature has been turned
on. Disconnecting the vehicle’s battery for up to a
year will not change the programmed operation for
this feature.Daytime Running Lamps/Automatic
Headlamp System
Daytime Running Lamps (DRL) can make it easier for
others to see the front of the vehicle during the day.
DRL can be helpful in many different driving conditions,
but they can be especially helpful in the short periods
after dawn and before sunset. Daytime running lamps
are required to function at all times on all vehicles
�rst sold in Canada.
A light sensor on top of the instrument panel makes the
DRL work, so be sure it is not covered.
The DRL system will make the front turn signal lamps
come on when the following conditions are met:
The ignition is on.
The exterior lamps control is off.
The parking brake is released.
While the DRL are on, only the vehicle’s front turn
signal lamps will also be on. The headlamps,
taillamps, sidemarker and other lamps will not be on.
The instrument panel will not be lit up either.
3-14
Page 115 of 348

When it is dark enough outside, the front turn signal
lamps will turn off and the vehicle’s headlamps
and parking lamps will turn on. The other lamps that
come on with the headlamps will also come on.
When it is bright enough outside, the headlamps will go
off and the front turn signal lamps will come on.
To idle the vehicle with the DRL and automatic
headlamp control off, set the parking brake while the
ignition is in OFF or LOCK. Then start the vehicle.
The DRL, headlamps and parking lamps will stay off
until the parking brake is released.
To turn off the automatic headlamp feature when it is
dark outside, move the exterior lamp control to the
parking lamp position. The parking lamps will remain
illuminated and the headlamps will turn off. The
fog lamps will also go on if they were on previously.
As with any vehicle, the regular headlamp system
should be turned on when needed.Cornering Lamps
The cornering lamps are designed to come on to
provide additional light when a turn signal lamp
is activated.
Interior Lamps
The interior lamps can be controlled, or automatically
turn on or off under certain conditions. They are
explained in the following text.
Instrument Panel Brightness
The instrument panel lights can be brightened or
dimmed by turning the exterior lamps knob.
Turning the control all the way clockwise turns on the
courtesy lamps.
Courtesy Lamps
When any door is opened, several courtesy lamps come
on to make it easier to enter and exit the vehicle.
These lamps can also be turned on by turning the
exterior lamps control all the way clockwise to MAX.
3-15