2005 BMW Z4 ROADSTER 2.5I fuel
[x] Cancel search: fuelPage 5 of 120

Reference
At a glance
Controls
Driving tips
Mobility
Contents
The fastest way to find information on special
topics is by using the index starting on
page106.
Using this Owner's Manual
4Notes
At a glance
10Cockpit
Controls
16Opening and closing
27Adjustments
33Transporting children safely
36Driving
46Everything under control
50Technology for safety and driving
convenience
56Lamps
58Controlling the climate for pleasant
driving
64Interior conveniences
Driving tips
68Special operating instructions
Mobility
76Refueling
78Wheels and tires
84In the engine compartment
89Maintenance
91Replacement procedures
96Giving and receiving assistance
Reference
102Technical data
106Everything from A to Z
Page 14 of 120

Cockpit
12
Instrument cluster
1Speedometer
2Indicator and warning lamps12
3Tachometer46
with indicator and warning lamps12
4Engine coolant temperature gauge46
5Fuel gauge46
6Button for
>Time47
>Service interval display47
7Display field for selector lever and program
indicator
>Automatic transmission
*38
>Sequential manual gearbox SMG
*40
8Button for
>Trip odometer, reset to zero46
>Setting time47
9Display for
>Trip odometer/Odometer46
>Clock47
>Service interval47
>Computer
*48
Indicator and warning lamps
Technology that monitors itself
Indicator and warning lamps that are identified
by
+ are tested for proper functioning whenever
the ignition key is turned. They each light up
once for different periods of time.
If a malfunction occurs in one of the monitored
systems, the corresponding light does not go
out after the engine has started, or it lights up
again while the vehicle is in motion. You can find
more information about each system on the
specified pages.
Safety belt reminder +30
Airbags
+53
Battery charge current
+94
Page 18 of 120

Opening and closing
16
Opening and closing
The key set
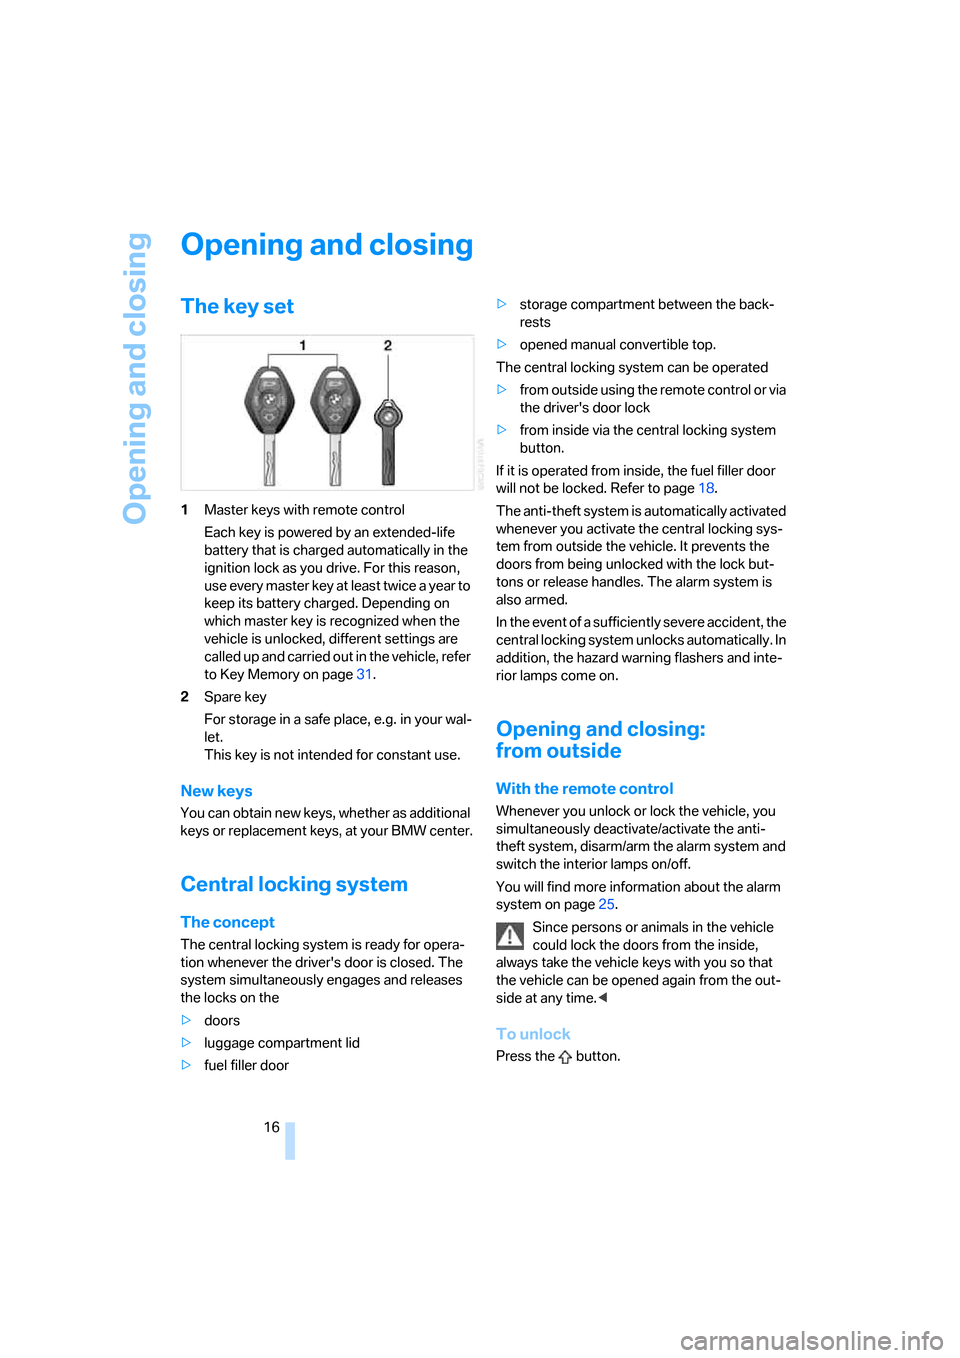
1Master keys with remote control
Each key is powered by an extended-life
battery that is charged automatically in the
ignition lock as you drive. For this reason,
use every master key at least twice a year to
keep its battery charged. Depending on
which master key is recognized when the
vehicle is unlocked, different settings are
called up and carried out in the vehicle, refer
to Key Memory on page31.
2Spare key
For storage in a safe place, e.g. in your wal-
let.
This key is not intended for constant use.
New keys
You can obtain new keys, whether as additional
keys or replacement keys, at your BMW center.
Central locking system
The concept
The central locking system is ready for opera-
tion whenever the driver's door is closed. The
system simultaneously engages and releases
the locks on the
>doors
>luggage compartment lid
>fuel filler door>storage compartment between the back-
rests
>opened manual convertible top.
The central locking system can be operated
>from outside using the remote control or via
the driver's door lock
>from inside via the central locking system
button.
If it is operated from inside, the fuel filler door
will not be locked. Refer to page18.
The anti-theft system is automatically activated
whenever you activate the central locking sys-
tem from outside the vehicle. It prevents the
doors from being unlocked with the lock but-
tons or release handles. The alarm system is
also armed.
In the event of a sufficiently severe accident, the
central locking system unlocks automatically. In
addition, the hazard warning flashers and inte-
rior lamps come on.
Opening and closing:
from outside
With the remote control
Whenever you unlock or lock the vehicle, you
simultaneously deactivate/activate the anti-
theft system, disarm/arm the alarm system and
switch the interior lamps on/off.
You will find more information about the alarm
system on page25.
Since persons or animals in the vehicle
could lock the doors from the inside,
always take the vehicle keys with you so that
the vehicle can be opened again from the out-
side at any time.<
To unlock
Press the button.
Page 19 of 120

Reference
At a glance
Controls
Driving tips
Mobility
17
Press the button once to unlock the driver’s
door and the fuel filler door; press a second time
to disengage all vehicle locks.
Convenience opening mode
Keep the button pressed:
The windows and the fully automatic convert-
ible top are opened.
To lock and secure
Press the button.
The hazard warning flashers light up once.
If you wish, you can have this special fea-
ture activated/deactivated.<
To switch on the interior lamps
With the vehicle locked:
Press the button.
With this function, you can also search for your
vehicle when parked in an underground garage,
for instance.
To open the luggage compartment
Press button briefly.
The luggage compartment lid will open slightly,
regardless of whether it was locked or
unlocked.
Before and after a trip, be sure that the
luggage compartment lid has not been
opened unintentionally.<
Panic mode*
By pressing and holding button for more
than approx. two seconds, you can trigger the
alarm systems
* in response to any impending
danger.
To switch off the alarm: press any of the but-
tons.
Malfunction
Local radio waves can impede the functioning
of the remote control.
Should this occur, open and close the vehicle
using the master key in either a door or the lug-
gage compartment lock.If it is no longer possible to lock the vehicle with
the remote control, the battery is discharged.
Use this remote control key while driving for an
extended period in order to recharge the bat-
tery, refer to page16.
For US owners only
The transmitter and receiver units comply with
part 15 of the FCC, Federal Communications
Commission, regulations. Operation is gov-
erned by the following:
FCC ID: LX8EWS
LX8FZVS
LX8FZVE
Compliance statement:
This device complies with part 15 of the FCC
Rules. Operation is subject to the following two
conditions:
>This device may not cause harmful interfer-
ence, and
>this device must accept any interference
received, including interference that may
cause undesired operation.
Any unauthorized modifications to these
devices could void the user's authority to
operate the equipment.<
At the door lock
One turn of the key in the driver's door lock
unlocks the driver's door and the fuel filler door.
Turn the key a second time to disengage all
other vehicle locks.
When the vehicle is locked, the hazard warning
flashers light up once.
If you wish, you can have this special fea-
ture activated/deactivated.<
Page 20 of 120

Opening and closing
18
Convenience operation
You can also operate the windows and the fully
automatic convertible top via the door lock.
>To open:
With the door closed, hold the key in the
Unlock position
>To close:
With the door closed, hold the key in the
Lock position.
Watch the closing process to ensure that
no one is trapped. Releasing the key
stops the operation.<
Manual operation
If there is an electrical malfunction, you can
unlock or lock the driver's door by turning the
key in the lock all the way to the left or right.
Opening and closing:
from inside
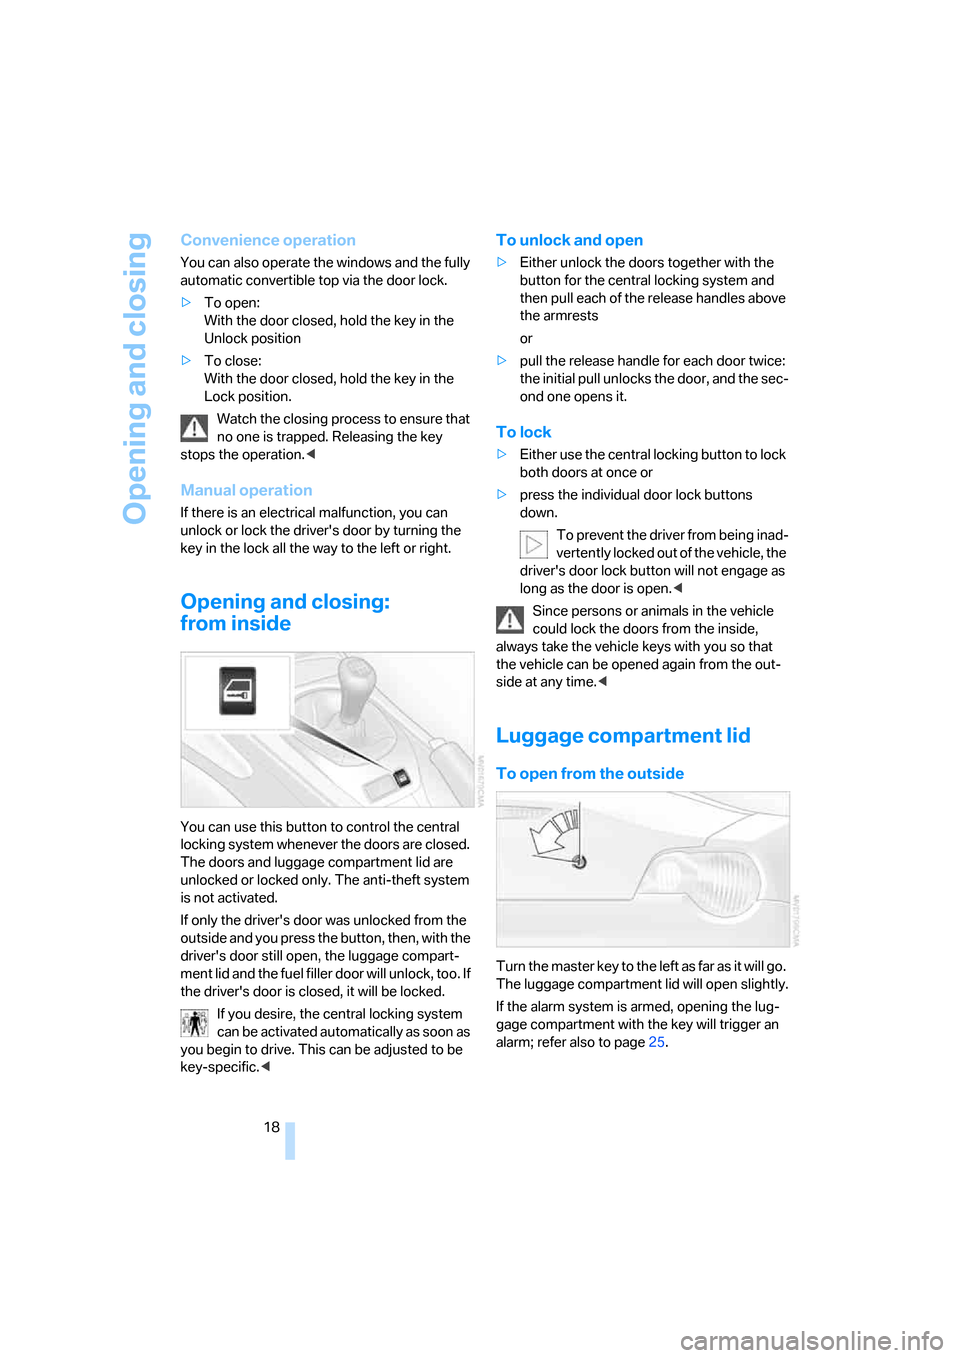
You can use this button to control the central
locking system whenever the doors are closed.
The doors and luggage compartment lid are
unlocked or locked only. The anti-theft system
is not activated.
If only the driver's door was unlocked from the
outside and you press the button, then, with the
driver's door still open, the luggage compart-
ment lid and the fuel filler door will unlock, too. If
the driver's door is closed, it will be locked.
If you desire, the central locking system
can be activated automatically as soon as
you begin to drive. This can be adjusted to be
key-specific.<
To unlock and open
>Either unlock the doors together with the
button for the central locking system and
then pull each of the release handles above
the armrests
or
>pull the release handle for each door twice:
the initial pull unlocks the door, and the sec-
ond one opens it.
To lock
>Either use the central locking button to lock
both doors at once or
>press the individual door lock buttons
down.
To prevent the driver from being inad-
vertently locked out of the vehicle, the
driver's door lock button will not engage as
long as the door is open.<
Since persons or animals in the vehicle
could lock the doors from the inside,
always take the vehicle keys with you so that
the vehicle can be opened again from the out-
side at any time.<
Luggage compartment lid
To open from the outside
Turn the master key to the left as far as it will go.
The luggage compartment lid will open slightly.
If the alarm system is armed, opening the lug-
gage compartment with the key will trigger an
alarm; refer also to page25.
Page 34 of 120

Adjustments
32 user by means of a data exchange with the key,
and makes adjustments accordingly.
Colored decals were provided with the keys to
help you distinguish between the different per-
sonal remote control keys.
What the system can do
You can learn about the entire array of features
that Vehicle Memory and Key Memory offer you
at your BMW center. A few examples follow
below:
Examples for Vehicle Memory:
>Various signals as acknowledgement when
locking or unlocking your vehicle: refer to
page17
>Windows are opened automatically, refer to
page20
>Reminder that the key is still in the ignition
switch after the driver's door has been
opened, refer to page37
>Activation/deactivation of the Follow-me-
home function: refer to page56
>Activation/deactivation of daytime driving
lamps: refer to page56
>Sets the units of measure for displaying
time, outside temperature, distance trav-
eled and fuel consumption in the instru-
ment cluster, refer to page48.
Examples for Key Memory:
>Locking of the vehicle when you start off:
refer to page18
>Automatically adjusts the driver's seat to
the personal programmed settings when
the vehicle is unlocked, refer to page29.
You will see this symbol throughout the
Owner's Manual. It is to remind you at
appropriate places of the settings that are avail-
able to you.<
Depending on how the memory functions
are configured, the vehicle may be oper-
ated differently from what is described in the
Owner's Manual. Should you decide to sell your
BMW one day, please remember to have the
memory functions returned to their original fac-
tory settings.<
Page 39 of 120

Reference
At a glance
Controls
Driving tips
Mobility
37
>On the first attempt, engage the starter for
approx. 10 seconds
>Press the accelerator pedal halfway down.
Avoid frequent starting attempts in short
succession or repeated starting attempts
during which the engine does not start. Other-
wise, uncombusted or incompletely combusted
fuel will pose a risk of the catalytic converter
overheating and being damaged.<
Manual transmission
1.Engage the parking brake
2.Gearshift lever in idling position
3.Depress the clutch pedal.
If the clutch pedal is not depressed, the
engine cannot be started
4.Start the engine.
Automatic transmission
1.Depress footbrake
2.Place selector lever in position P or N
3.Start the engine.
Sequential manual gearbox SMG
1.Depress footbrake
2.Move selector lever to neutral position N
3.Start the engine.
If the engine does not start, re-engage the
position last selected, refer to the display
in the instrument cluster, and then engage posi-
tion N again.<
Switching off the engine
Do not remove the ignition key while the
vehicle is still moving. If you did so, the
steering lock would engage when the steering
wheel is turned.
When you leave the vehicle, always remove the
ignition key and engage the steering lock.
Apply the parking brake when parking on steep
gradients, as the vehicle could otherwise start
to roll.<
You can have an acoustic signal set as a
reminder that the ignition key is still in the ignition switch after the driver's door has been
opened.<
Manual transmission
1.Turn the ignition key to position 1 or 0
2.Engage first gear or reverse gear.
Automatic transmission
1.Place the selector lever in position P
2.Turn the ignition key to position 1 or 0.
Sequential manual gearbox SMG
1.Engage a drive position
2.Turn the ignition key to position 1 or 0. An
acoustic signal sounds if the engine is
switched off while position N is engaged.
Parking brake
The parking brake is designed primarily to pre-
vent the vehicle from rolling when parked. It
operates against the rear wheels.
The indicator lamp lights up. As the
vehicle drives off, an acoustic signal
also sounds. The parking brake has
been applied.
Indicator lamp for Canadian models.
To engage
The detent engages automatically and the indi-
cator lamp in the instrument cluster comes on
when the ignition key is in position 2.
Page 48 of 120

Everything under control
46
Everything under control
Odometer
1Odometer
2Trip odometer
Odometer
With the ignition key in position 0, you can acti-
vate the displays shown in the illustration by
pressing the button – see arrow – in the instru-
ment cluster.
Trip odometer
To set to zero
Ignition key position 1
Keep the button pressed until the trip odometer
counter is set to zero.
Tachometer
Never allow the engine to operate with the nee-
dle in the red overspeed sector of the gauge.
To protect the engine, the fuel supply is inter-
rupted when you approach this sector.
Fuel gauge
When indicator lamp1 begins to stay on contin-
uously, there are still approx. 2.1 gallons/8 liters
of fuel in the fuel tank.
Tank capacity: approx. 14.5 gallons/55 liters.
If the tilt of the vehicle varies, for example when
you are driving in mountainous areas, the nee-
dle may fluctuate slightly.
Fill the fuel tank well before it is empty.
Driving to the last drop of fuel can prevent
the engine from operating properly and result in
damage.<
When you switch on the ignition, the indicator
lamp comes on briefly to indicate an operational
check.
Engine coolant temperature
gauge
Blue
The engine is still cold. Drive at moderate
engine and vehicle speeds.