2005 BMW 760LI SEDAN ESP
[x] Cancel search: ESPPage 95 of 239
Controls
93Reference
At a glance
Driving tips
Communications
Navigation
Entertainment
Mobility
EBV Electronic brake-force
distribution
EBV controls the brake system's applica-
tion pressure at the rear wheels to ensure
stable deceleration.
DSC Dynamic Stability Control
The system optimizes vehicle stability dur-
ing acceleration and when starting from a
full stop, as well as optimizing traction.
The system recognizes any tendency for
the vehicle to assume an unstable attitude
such as oversteer or understeer; it then
counteracts this tendency with a combina-
tion of graduated reductions in engine
torque and selective braking intervention at
individual wheels. DSC provides optimized
stability within the limits defined by the
laws of physics.
The DSC is operational every time you start
the engine. DSC contains the functions
DTC Dynamic Traction Control and DBC
Dynamic Brake Control.
Indicator lamp
The indicator lamp goes out shortly
after the engine starts.
The indicator lamp flashes:
DSC controls the drive and braking forces.
The indicator lamp stays lit:
DSC has been switched off using the Con-
trol Center.
Activating DTC Dynamic Traction
Control
In particular driving situations, in deep
snow, for example, DTC ensures the maxi-
mum forward momentum. The gain in for-
ward momentum in these situations
involves a reduction in vehicle stability.
DTC is active up to 45 mph/70 km/h.You may find it useful to briefly activate
DTC under the following special circum-
stances:
>When rocking the vehicle and starting
off in deep snow or on loose road sur-
faces
>When ascending snow-covered hills,
and when driving in deep or on hard-
packed snow
>When driving with snow chains.
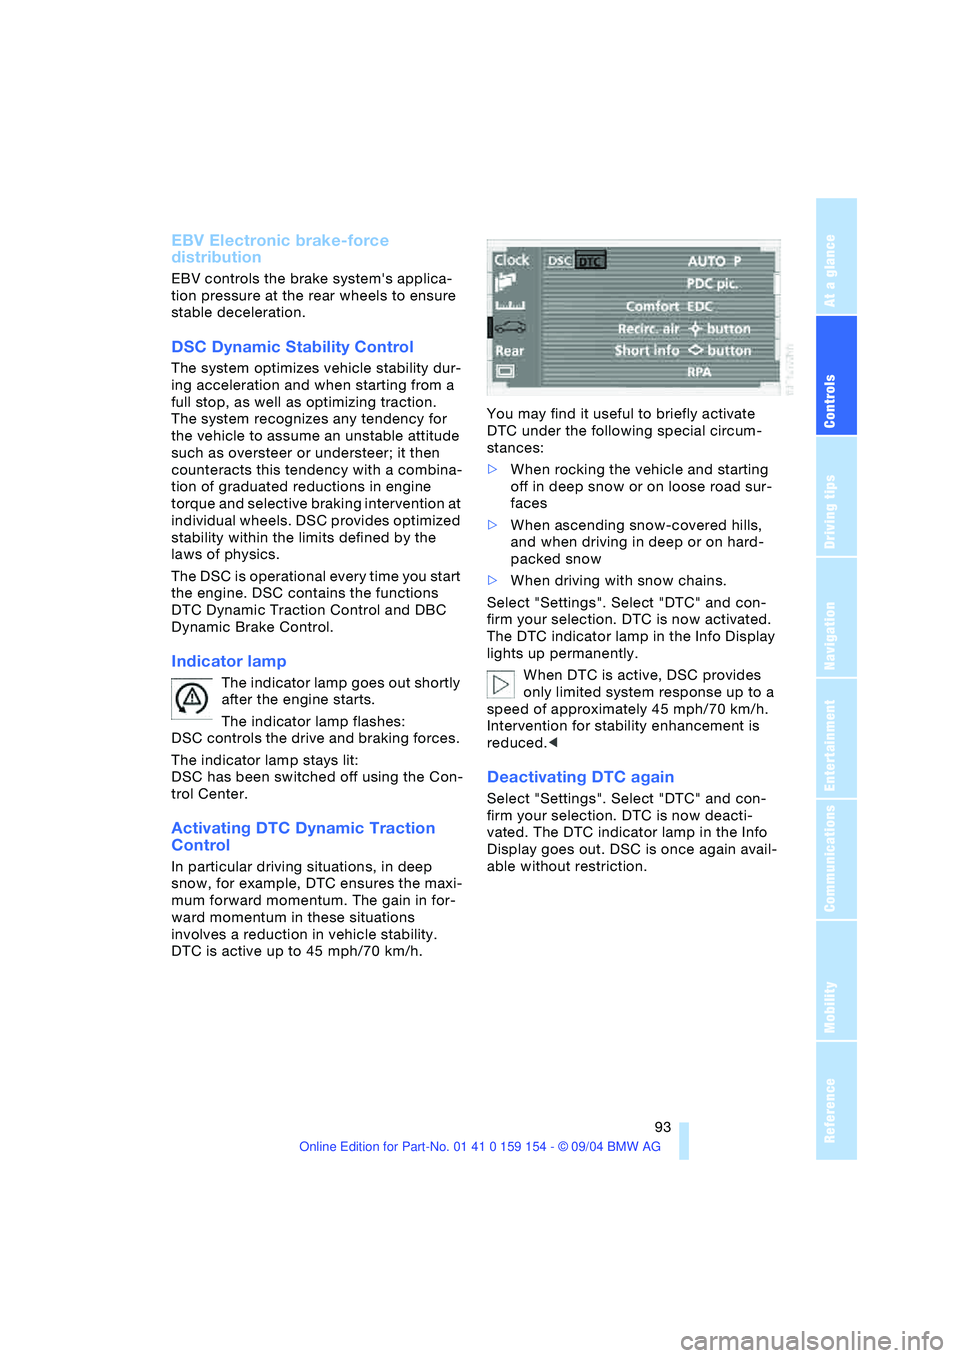
Select "Settings". Select "DTC" and con-
firm your selection. DTC is now activated.
The DTC indicator lamp in the Info Display
lights up permanently.
When DTC is active, DSC provides
only limited system response up to a
speed of approximately 45 mph/70 km/h.
Intervention for stability enhancement is
reduced.<
Deactivating DTC again
Select "Settings". Select "DTC" and con-
firm your selection. DTC is now deacti-
vated. The DTC indicator lamp in the Info
Display goes out. DSC is once again avail-
able without restriction.
Page 96 of 239
Technology for comfort, convenience and safety
94
Switching off DSC
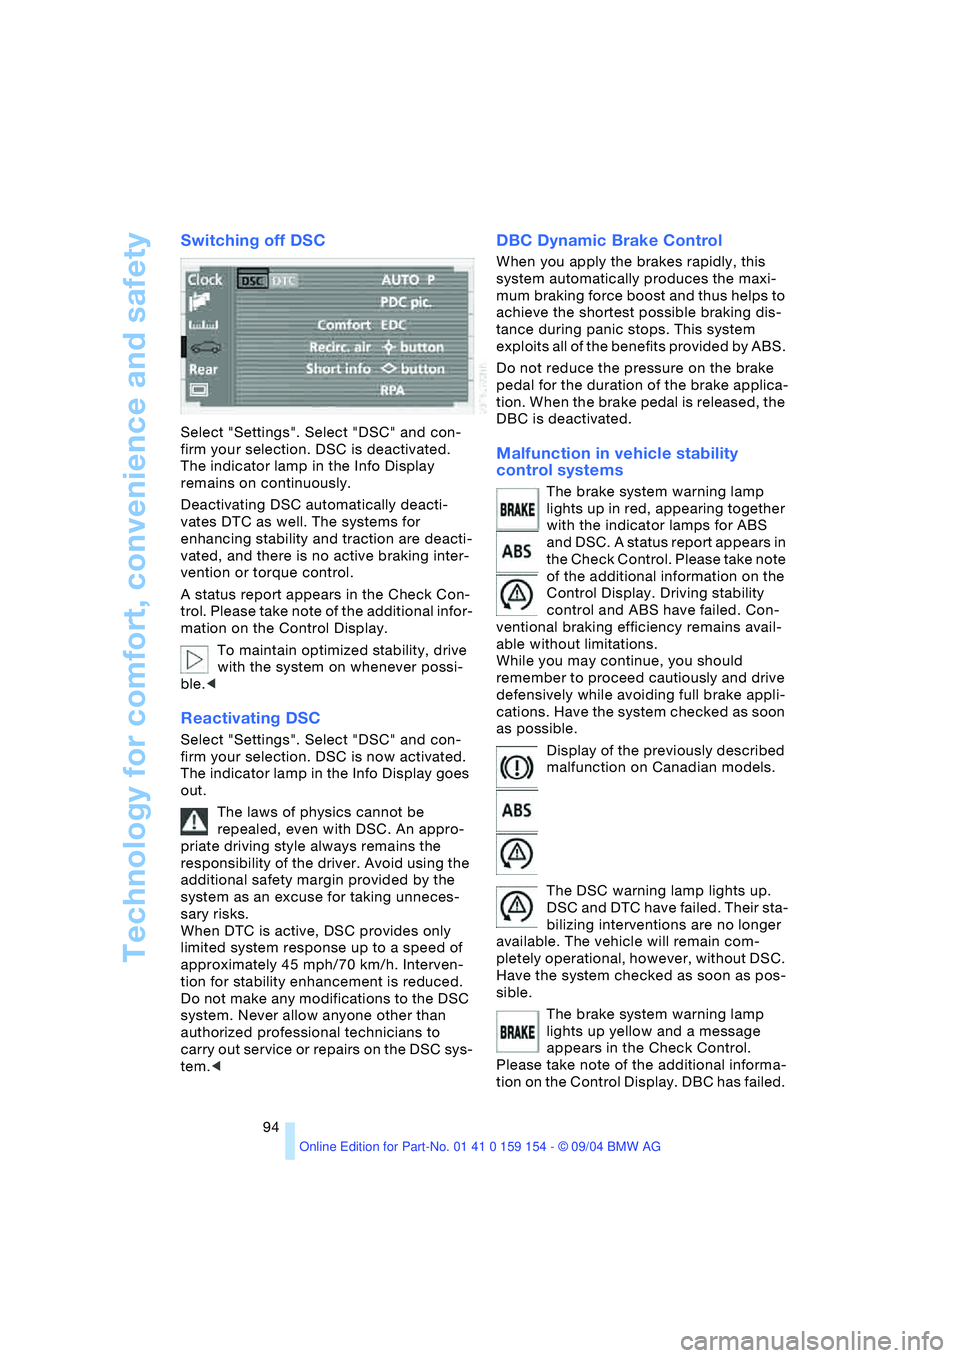
Select "Settings". Select "DSC" and con-
firm your selection. DSC is deactivated.
The indicator lamp in the Info Display
remains on continuously.
Deactivating DSC automatically deacti-
vates DTC as well. The systems for
enhancing stability and traction are deacti-
vated, and there is no active braking inter-
vention or torque control.
A status report appears in the Check Con-
trol. Please take note of the additional infor-
mation on the Control Display.
To maintain optimized stability, drive
with the system on whenever possi-
ble.<
Reactivating DSC
Select "Settings". Select "DSC" and con-
firm your selection. DSC is now activated.
The indicator lamp in the Info Display goes
out.
The laws of physics cannot be
repealed, even with DSC. An appro-
priate driving style always remains the
responsibility of the driver. Avoid using the
additional safety margin provided by the
system as an excuse for taking unneces-
sary risks.
When DTC is active, DSC provides only
limited system response up to a speed of
approximately 45 mph/70 km/h. Interven-
tion for stability enhancement is reduced.
Do not make any modifications to the DSC
system. Never allow anyone other than
authorized professional technicians to
carry out service or repairs on the DSC sys-
tem.<
DBC Dynamic Brake Control
When you apply the brakes rapidly, this
system automatically produces the maxi-
mum braking force boost and thus helps to
achieve the shortest possible braking dis-
tance during panic stops. This system
exploits all of the benefits provided by ABS.
Do not reduce the pressure on the brake
pedal for the duration of the brake applica-
tion. When the brake pedal is released, the
DBC is deactivated.
Malfunction in vehicle stability
control systems
The brake system warning lamp
lights up in red, appearing together
with the indicator lamps for ABS
and DSC. A status report appears in
the Check Control. Please take note
of the additional information on the
Control Display. Driving stability
control and ABS have failed. Con-
ventional braking efficiency remains avail-
able without limitations.
While you may continue, you should
remember to proceed cautiously and drive
defensively while avoiding full brake appli-
cations. Have the system checked as soon
as possible.
Display of the previously described
malfunction on Canadian models.
The DSC warning lamp lights up.
DSC and DTC have failed. Their sta-
bilizing interventions are no longer
available. The vehicle will remain com-
pletely operational, however, without DSC.
Have the system checked as soon as pos-
sible.
The brake system warning lamp
lights up yellow and a message
appears in the Check Control.
Please take note of the additional informa-
tion on the Control Display. DBC has failed.
Page 97 of 239
Controls
95Reference
At a glance
Driving tips
Communications
Navigation
Entertainment
Mobility
Have the system checked as soon as pos-
sible.
Display of the previously described
malfunction on Canadian models.
Dynamic Drive
The concept
Dynamic Drive minimizes body roll and
optimizes vehicle stability during cornering
and evasive maneuvers.
Active stabilizers at the front and rear axles
form the basis for Dynamic Drive. Suspen-
sion compliance adapts to suit driving con-
ditions, varying from performance-oriented
during cornering to smooth and comfort-
oriented when the vehicle is proceeding in
a straight line.
The system assumes operational status
each time you start the engine.
Driving with Dynamic Drive
During vehicle operation, the system con-
tinuously runs through closed-loop control
cycles lasting only fractions of a second.
Malfunction
The warning lamp lights up, accom-
panied by a status message in the
Check Control. Please take note of
the additional information on the Control
Display. A malfunction has occurred in the
system. Have the system checked as soon
as possible.
If the Dynamic Drive system switches
off in response to malfunction, please
remember to adapt your speed accord-
ingly, especially in curves.
The suspension will be noticeably softer
and the vehicle will display a greater ten-
dency to tilt during cornering and in cross-
winds.
If a Check Control message stating that you
should stop appears in addition to the red
symbol, stop immediately and switch off
the engine. In this case the oil level in the
reservoir may have dropped below the min-imum, possibly owing to a leak in the
hydraulic system.
Please observe the additional instructions
provided on the Control Display.<
EDC Electronic Damping
Control*
The suspension responds to changes in
factors such as road surface, or operating
conditions such as steering and braking, by
adapting to the new conditions within frac-
tions of a second.
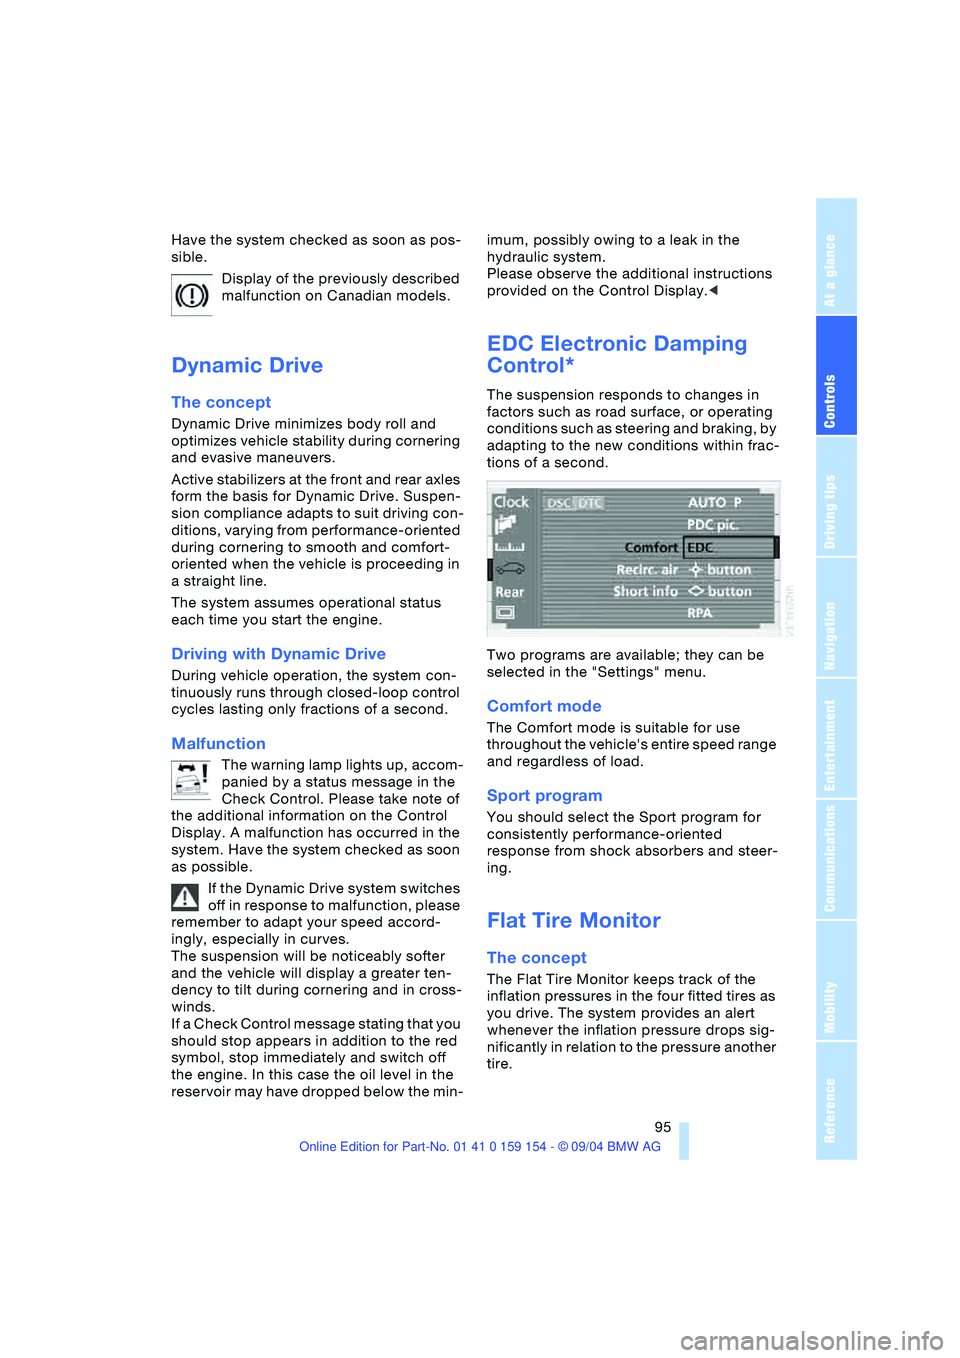
Two programs are available; they can be
selected in the "Settings" menu.
Comfort mode
The Comfort mode is suitable for use
throughout the vehicle's entire speed range
and regardless of load.
Sport program
You should select the Sport program for
consistently performance-oriented
response from shock absorbers and steer-
ing.
Flat Tire Monitor
The concept
The Flat Tire Monitor keeps track of the
inflation pressures in the four fitted tires as
you drive. The system provides an alert
whenever the inflation pressure drops sig-
nificantly in relation to the pressure another
tire.
Page 99 of 239
Controls
97Reference
At a glance
Driving tips
Communications
Navigation
Entertainment
Mobility
Vehicles with run-flat tires:
1.Cautiously reduce the vehicle speed to
below 50 mph/80 km/h. Avoid sudden
braking and steering maneuvers. Do not
exceed a vehicle speed of 50 mph/80
km/h
Due to the reinforcement on the
side walls of the run-flat tires,
inflation pressure loss can not usually
be recognized from the outside, refer to
Run-flat tires on page206.<
2.To continue driving, comply with the
instructions for driving with damaged
tires on page206.
Malfunction
The indicator lamp lights up yellow,
accompanied by a status message
in the Check Control. The Flat Tire
Monitor has malfunctioned or failed. Have
the system checked as soon as possible.
Self-leveling suspension*
Malfunction
A Check Control message appear-
ing together with this symbol indi-
cates a malfunction in the self-level-
ing suspension. Please take note of the
additional information on the Control Dis-
play.
Stop and inspect the vehicle. If the rear of
the vehicle is visibly lower than the front,
possibly accompanied by a tilt noticeable
when you compare the left rear with the
right rear, please respond by immediately
proceeding to the nearest BMW center.
Drive with appropriate caution in the mean-
time. The vehicle has reduced ground
clearance and driving comfort may be
noticeably reduced. Even if the attitude of
the vehicle is normal, you should consult
the nearest BMW center if the warning
lamp indicates a system fault.
Brake Force Display
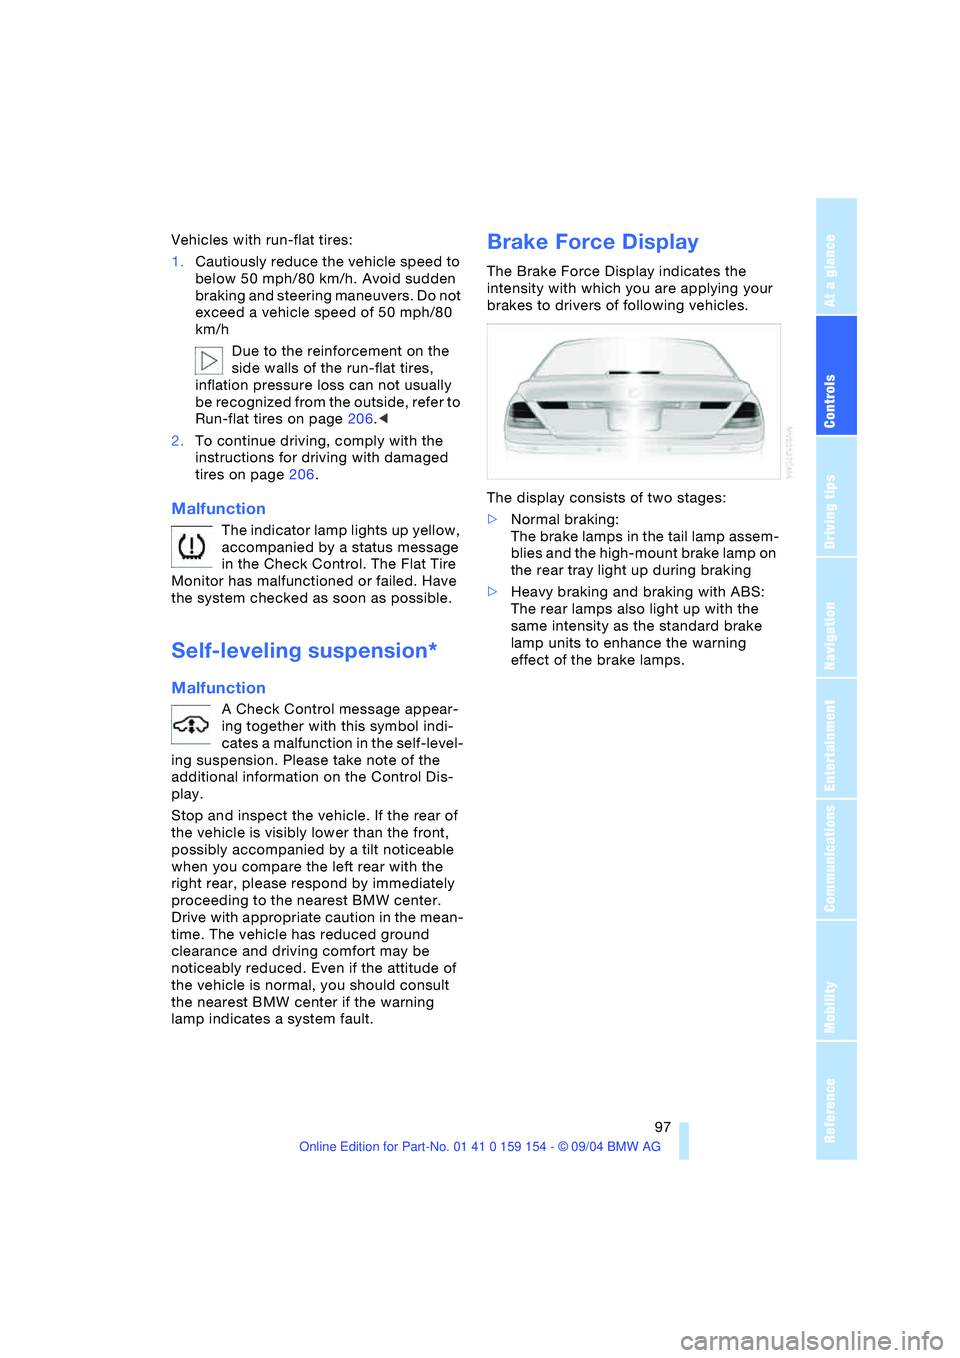
The Brake Force Display indicates the
intensity with which you are applying your
brakes to drivers of following vehicles.
The display consists of two stages:
>Normal braking:
The brake lamps in the tail lamp assem-
blies and the high-mount brake lamp on
the rear tray light up during braking
>Heavy braking and braking with ABS:
The rear lamps also light up with the
same intensity as the standard brake
lamp units to enhance the warning
effect of the brake lamps.
Page 100 of 239
Technology for comfort, convenience and safety
98
Airbags
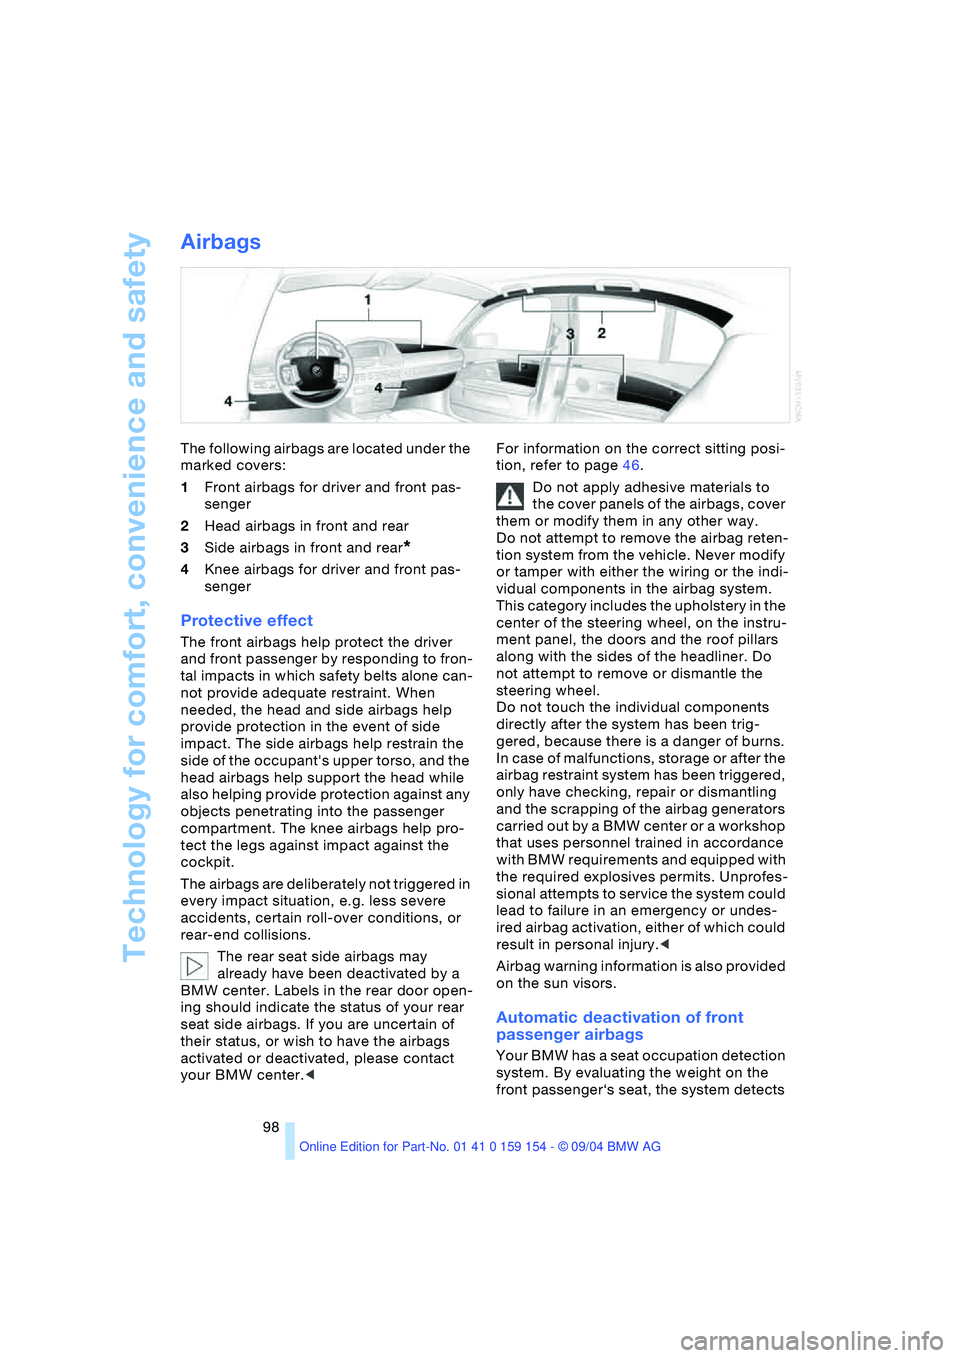
The following airbags are located under the
marked covers:
1Front airbags for driver and front pas-
senger
2Head airbags in front and rear
3Side airbags in front and rear
*
4Knee airbags for driver and front pas-
senger
Protective effect
The front airbags help protect the driver
and front passenger by responding to fron-
tal impacts in which safety belts alone can-
not provide adequate restraint. When
needed, the head and side airbags help
provide protection in the event of side
impact. The side airbags help restrain the
side of the occupant's upper torso, and the
head airbags help support the head while
also helping provide protection against any
objects penetrating into the passenger
compartment. The knee airbags help pro-
tect the legs against impact against the
cockpit.
The airbags are deliberately not triggered in
every impact situation, e.g. less severe
accidents, certain roll-over conditions, or
rear-end collisions.
The rear seat side airbags may
already have been deactivated by a
BMW center. Labels in the rear door open-
ing should indicate the status of your rear
seat side airbags. If you are uncertain of
their status, or wish to have the airbags
activated or deactivated, please contact
your BMW center.
Do not apply adhesive materials to
the cover panels of the airbags, cover
them or modify them in any other way.
Do not attempt to remove the airbag reten-
tion system from the vehicle. Never modify
or tamper with either the wiring or the indi-
vidual components in the airbag system.
This category includes the upholstery in the
center of the steering wheel, on the instru-
ment panel, the doors and the roof pillars
along with the sides of the headliner. Do
not attempt to remove or dismantle the
steering wheel.
Do not touch the individual components
directly after the system has been trig-
gered, because there is a danger of burns.
In case of malfunctions, storage or after the
airbag restraint system has been triggered,
only have checking, repair or dismantling
and the scrapping of the airbag generators
carried out by a BMW center or a workshop
that uses personnel trained in accordance
with BMW requirements and equipped with
the required explosives permits. Unprofes-
sional attempts to service the system could
lead to failure in an emergency or undes-
ired airbag activation, either of which could
result in personal injury.<
Airbag warning information is also provided
on the sun visors.
Automatic deactivation of front
passenger airbags
Your BMW has a seat occupation detection
system. By evaluating the weight on the
front passenger‘s seat, the system detects
Page 101 of 239
Controls
99Reference
At a glance
Driving tips
Communications
Navigation
Entertainment
Mobility
whether or not the seat is occupied by a
child in the child-restraint system or an
adult.
>When a child is seated in the child-
restraint system or with an empty seat,
the front and side airbags are automat-
ically deactivated on the passenger's
side
>When an adult is traveling in the front
seat, the front and side airbags remain
active on the passenger side.
Although not desired, it can occur in
the case of heavier children that the
front passenger airbags remain active or in
the case of very light adults or young per-
sons that the front passenger airbags are
deactivated.
The state of the front passenger airbags is
shown with the indicator lamp, refer to Indi-
cator lamps in the following. In this case
transport the corresponding persons on the
rear seat.
Except when persons to be transported, do
not increase the load on the front passen-
ger seat with additional items. Do not fit
seat covers, seat cushion padding, ball
mats or other items to the front passenger
seat unless they are specifically recom-
mended by BMW. Do not place any items
under the seat. Otherwise, the function of
the seat occupation detection could be
impaired.<
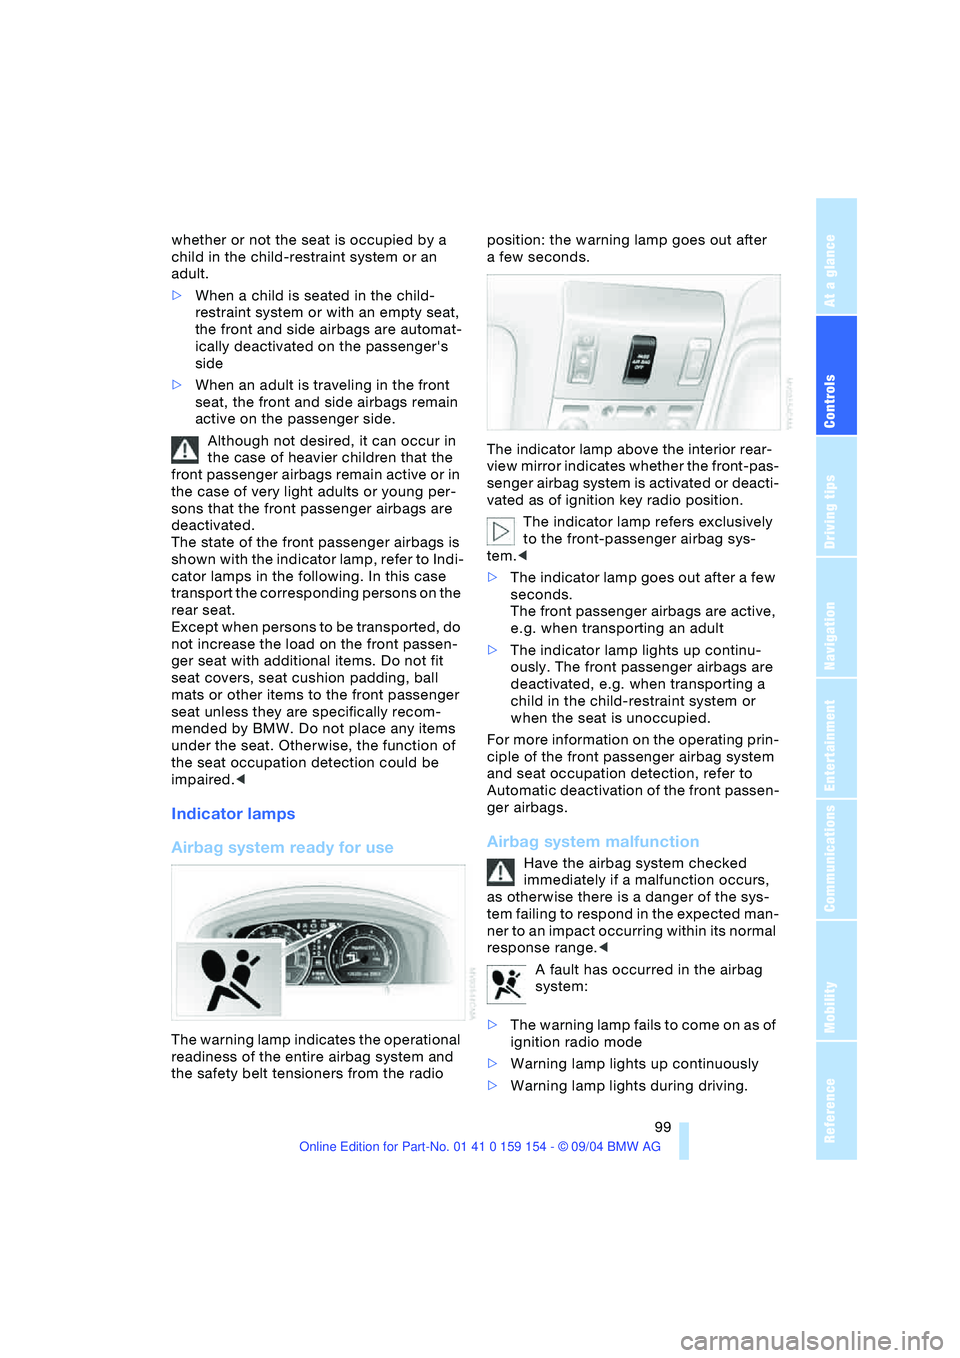
Indicator lamps
Airbag system ready for use
The warning lamp indicates the operational
readiness of the entire airbag system and
the safety belt tensioners from the radio position: the warning lamp goes out after
afew seconds.
The indicator lamp above the interior rear-
view mirror indicates whether the front-pas-
senger airbag system is activated or deacti-
vated as of ignition key radio position.
The indicator lamp refers exclusively
to the front-passenger airbag sys-
tem.<
>The indicator lamp goes out after a few
seconds.
The front passenger airbags are active,
e.g. when transporting an adult
>The indicator lamp lights up continu-
ously. The front passenger airbags are
deactivated, e.g. when transporting a
child in the child-restraint system or
when the seat is unoccupied.
For more information on the operating prin-
ciple of the front passenger airbag system
and seat occupation detection, refer to
Automatic deactivation of the front passen-
ger airbags.
Airbag system malfunction
Have the airbag system checked
immediately if a malfunction occurs,
as otherwise there is a danger of the sys-
tem failing to respond in the expected man-
ner to an impact occurring within its normal
response range.<
A fault has occurred in the airbag
system:
>The warning lamp fails to come on as of
ignition radio mode
>Warning lamp lights up continuously
>Warning lamp lights during driving.
Page 102 of 239
Lamps
100
Lamps
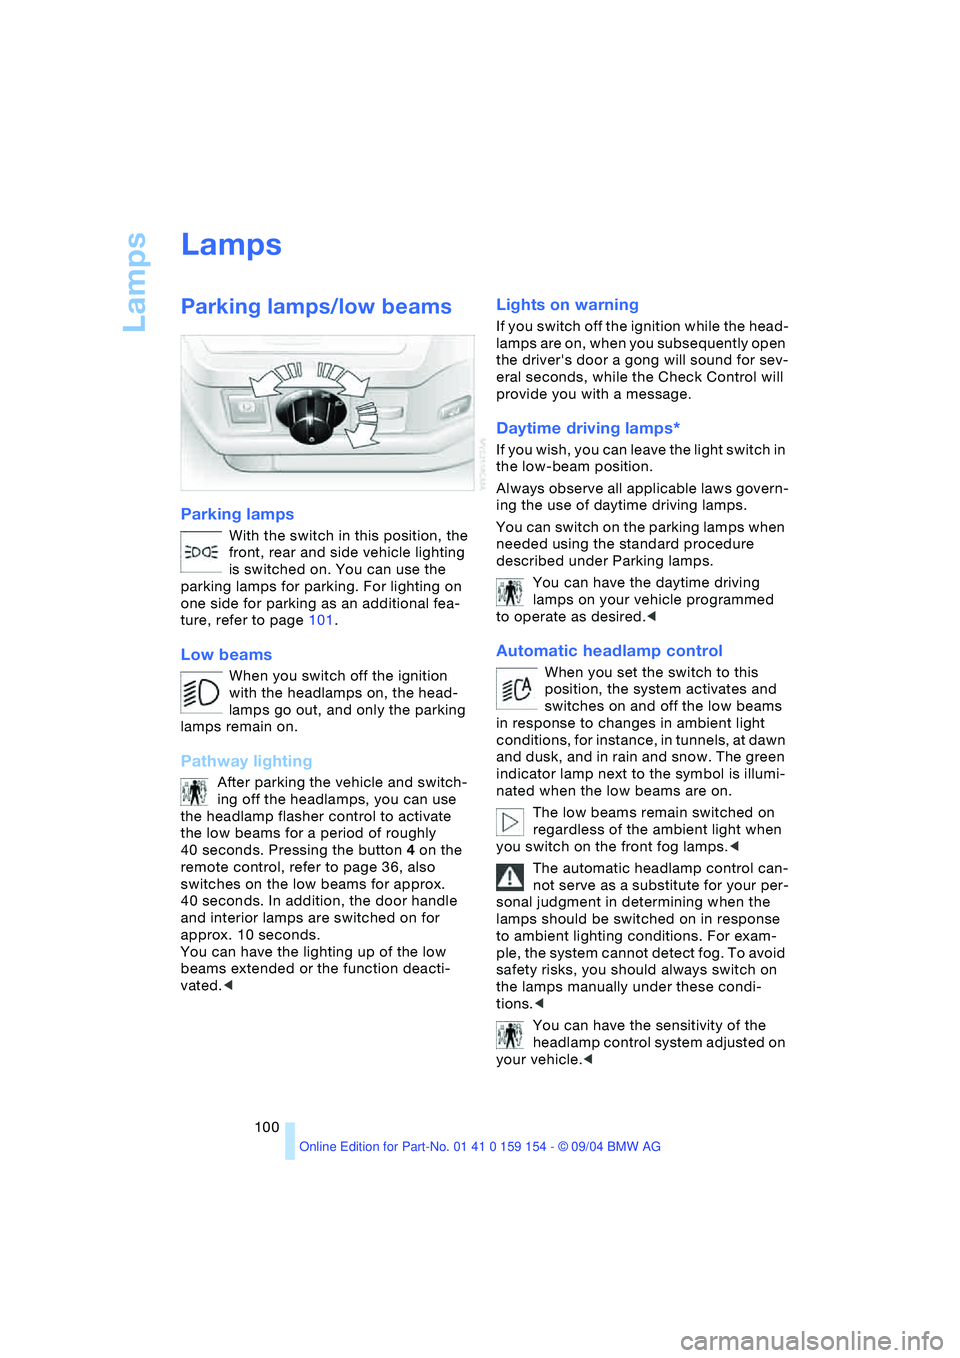
Parking lamps/low beams
Parking lamps
With the switch in this position, the
front, rear and side vehicle lighting
is switched on. You can use the
parking lamps for parking. For lighting on
one side for parking as an additional fea-
ture, refer to page101.
Low beams
When you switch off the ignition
with the headlamps on, the head-
lamps go out, and only the parking
lamps remain on.
Pathway lighting
After parking the vehicle and switch-
ing off the headlamps, you can use
the headlamp flasher control to activate
the low beams for a period of roughly
40 seconds. Pressing the button 4 on the
remote control, refer to page 36, also
switches on the low beams for approx.
40 seconds. In addition, the door handle
and interior lamps are switched on for
approx. 10 seconds.
You can have the lighting up of the low
beams extended or the function deacti-
vated.<
Lights on warning
If you switch off the ignition while the head-
lamps are on, when you subsequently open
the driver's door a gong will sound for sev-
eral seconds, while the Check Control will
provide you with a message
.
Daytime driving lamps*
If you wish, you can leave the light switch in
the low-beam position.
Always observe all applicable laws govern-
ing the use of daytime driving lamps.
You can switch on the parking lamps when
needed using the standard procedure
described under Parking lamps.
You can have the daytime driving
lamps on your vehicle programmed
to operate as desired.<
Automatic headlamp control
When you set the switch to this
position, the system activates and
switches on and off the low beams
in response to changes in ambient light
conditions, for instance, in tunnels, at dawn
and dusk, and in rain and snow. The green
indicator lamp next to the symbol is illumi-
nated when the low beams are on.
The low beams remain switched on
regardless of the ambient light when
you switch on the front fog lamps.<
The automatic headlamp control can-
not serve as a substitute for your per-
sonal judgment in determining when the
lamps should be switched on in response
to ambient lighting conditions. For exam-
ple, the system cannot detect fog. To avoid
safety risks, you should always switch on
the lamps manually under these condi-
tions.<
You can have the sensitivity of the
headlamp control system adjusted on
your vehicle.<
Page 104 of 239
Lamps
102
Interior lamps
Control of the interior lamps, footwell
lamps, courtesy lamps and ground lamps
is automatic.
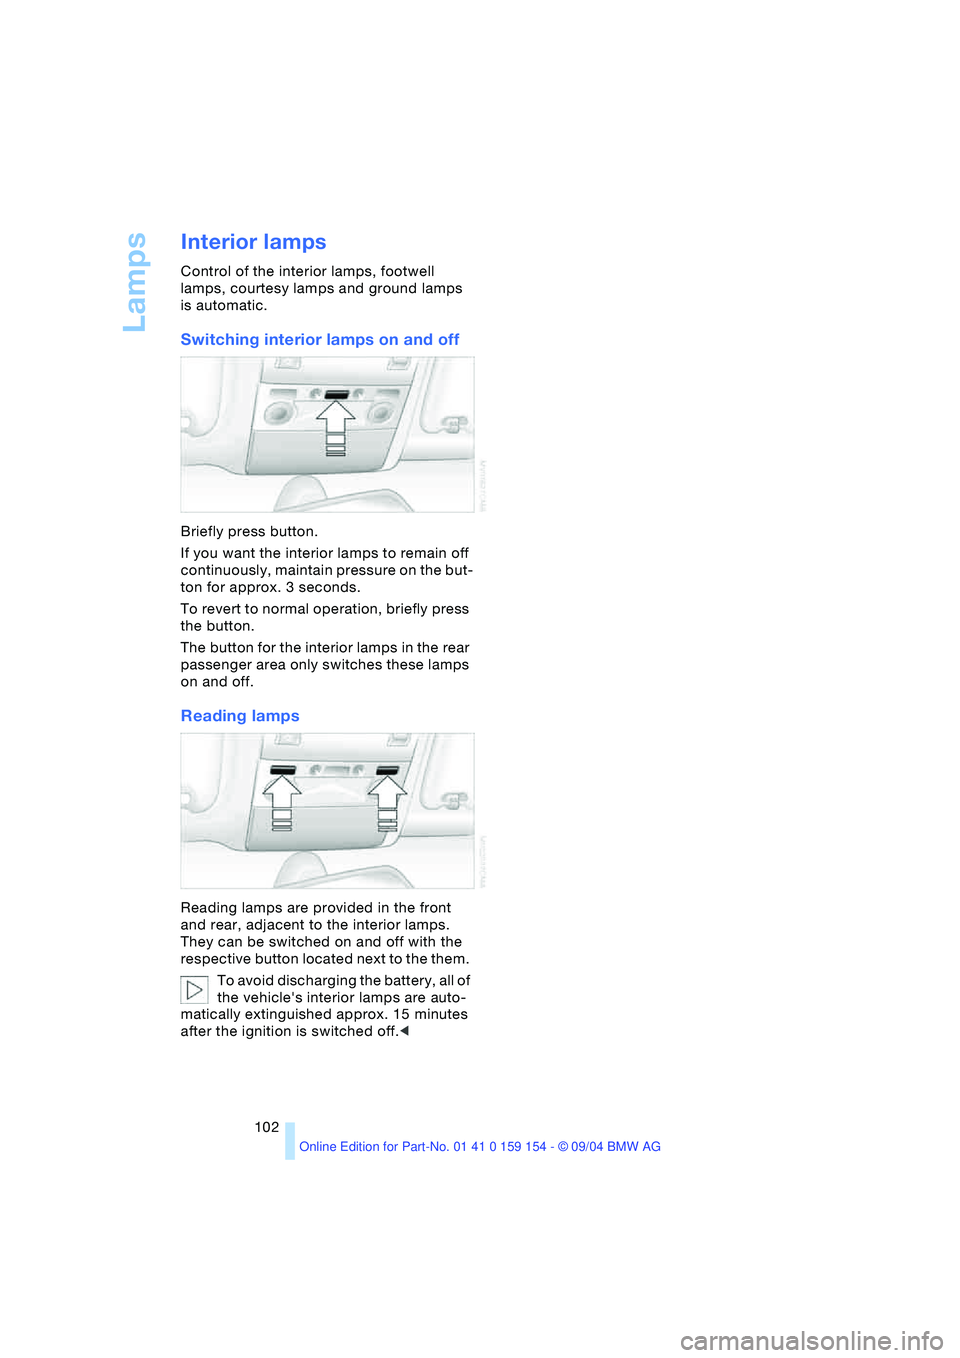
Switching interior lamps on and off
Briefly press button.
If you want the interior lamps to remain off
continuously, maintain pressure on the but-
ton for approx. 3 seconds.
To revert to normal operation, briefly press
the button.
The button for the interior lamps in the rear
passenger area only switches these lamps
on and off.
Reading lamps
Reading lamps are provided in the front
and rear, adjacent to the interior lamps.
They can be switched on and off with the
respective button located next to the them.
To avoid discharging the battery, all of
the vehicle's interior lamps are auto-
matically extinguished approx. 15 minutes
after the ignition is switched off.<