2005 BMW 645I CONVERTIBLE navigation system
[x] Cancel search: navigation systemPage 50 of 217
Controls
49Reference
At a glance
Driving tips
Communications
Navigation
Entertainment
Mobility
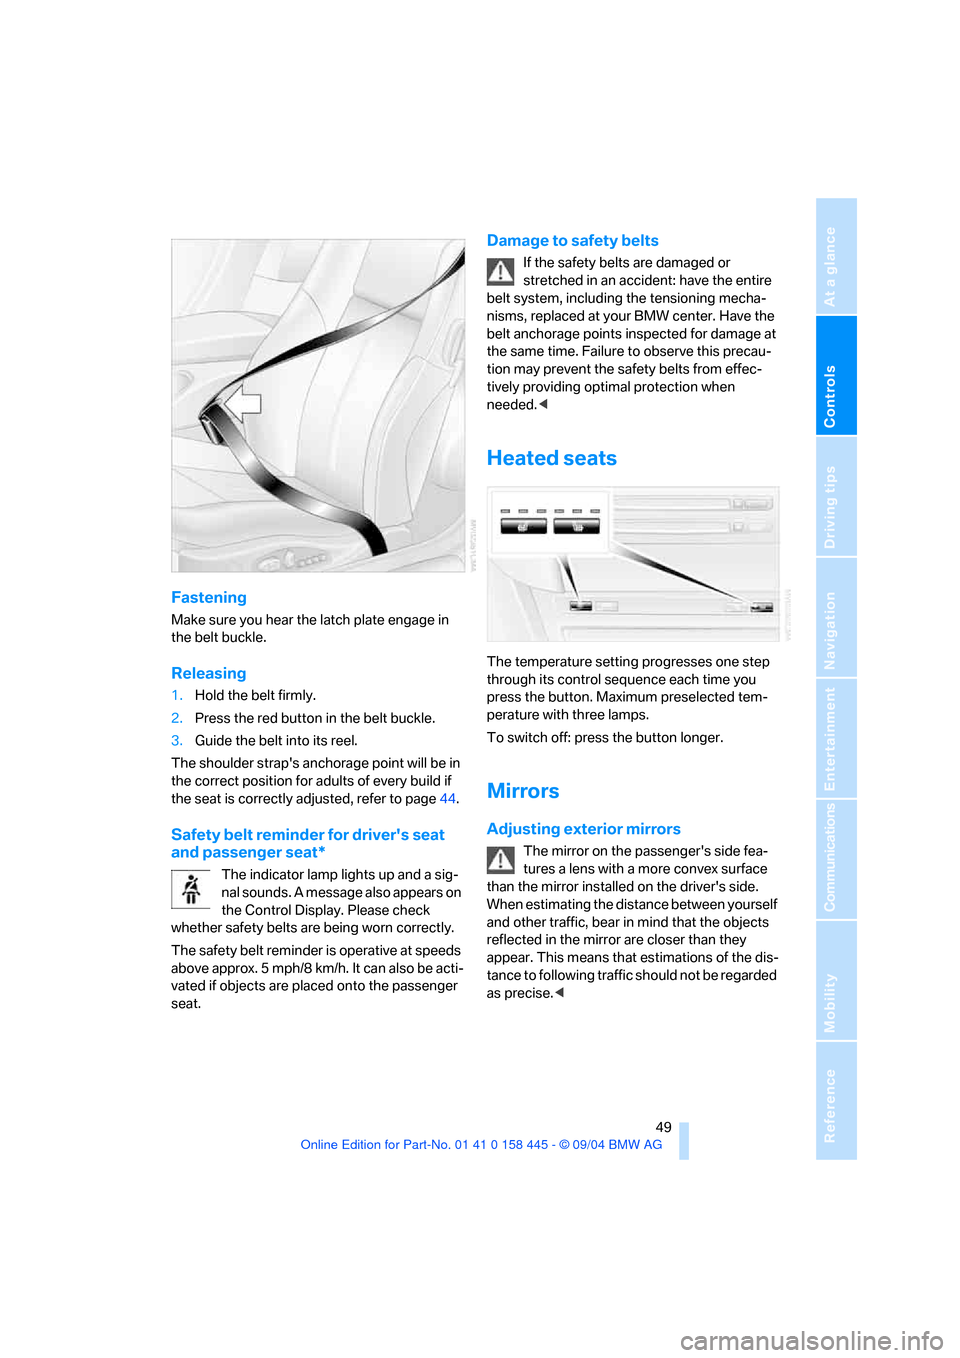
Fastening
Make sure you hear the latch plate engage in
the belt buckle.
Releasing
1.Hold the belt firmly.
2.Press the red button in the belt buckle.
3.Guide the belt into its reel.
The shoulder strap's anchorage point will be in
the correct position for adults of every build if
the seat is correctly adjusted, refer to page44.
Safety belt reminder for driver's seat
and passenger seat*
The indicator lamp lights up and a sig-
nal sounds. A message also appears on
the Control Display. Please check
whether safety belts are being worn correctly.
The safety belt reminder is operative at speeds
above approx. 5 mph/8 km/h. It can also be acti-
vated if objects are placed onto the passenger
seat.
Damage to safety belts
If the safety belts are damaged or
stretched in an accident: have the entire
belt system, including the tensioning mecha-
nisms, replaced at your BMW center. Have the
belt anchorage points inspected for damage at
the same time. Failure to observe this precau-
tion may prevent the safety belts from effec-
tively providing optimal protection when
needed.<
Heated seats
The temperature setting progresses one step
through its control sequence each time you
press the button. Maximum preselected tem-
perature with three lamps.
To switch off: press the button longer.
Mirrors
Adjusting exterior mirrors
The mirror on the passenger's side fea-
tures a lens with a more convex surface
than the mirror installed on the driver's side.
When estimating the distance between yourself
and other traffic, bear in mind that the objects
reflected in the mirror are closer than they
appear. This means that estimations of the dis-
tance to following traffic should not be regarded
as precise.<
Page 52 of 217
Controls
51Reference
At a glance
Driving tips
Communications
Navigation
Entertainment
Mobility
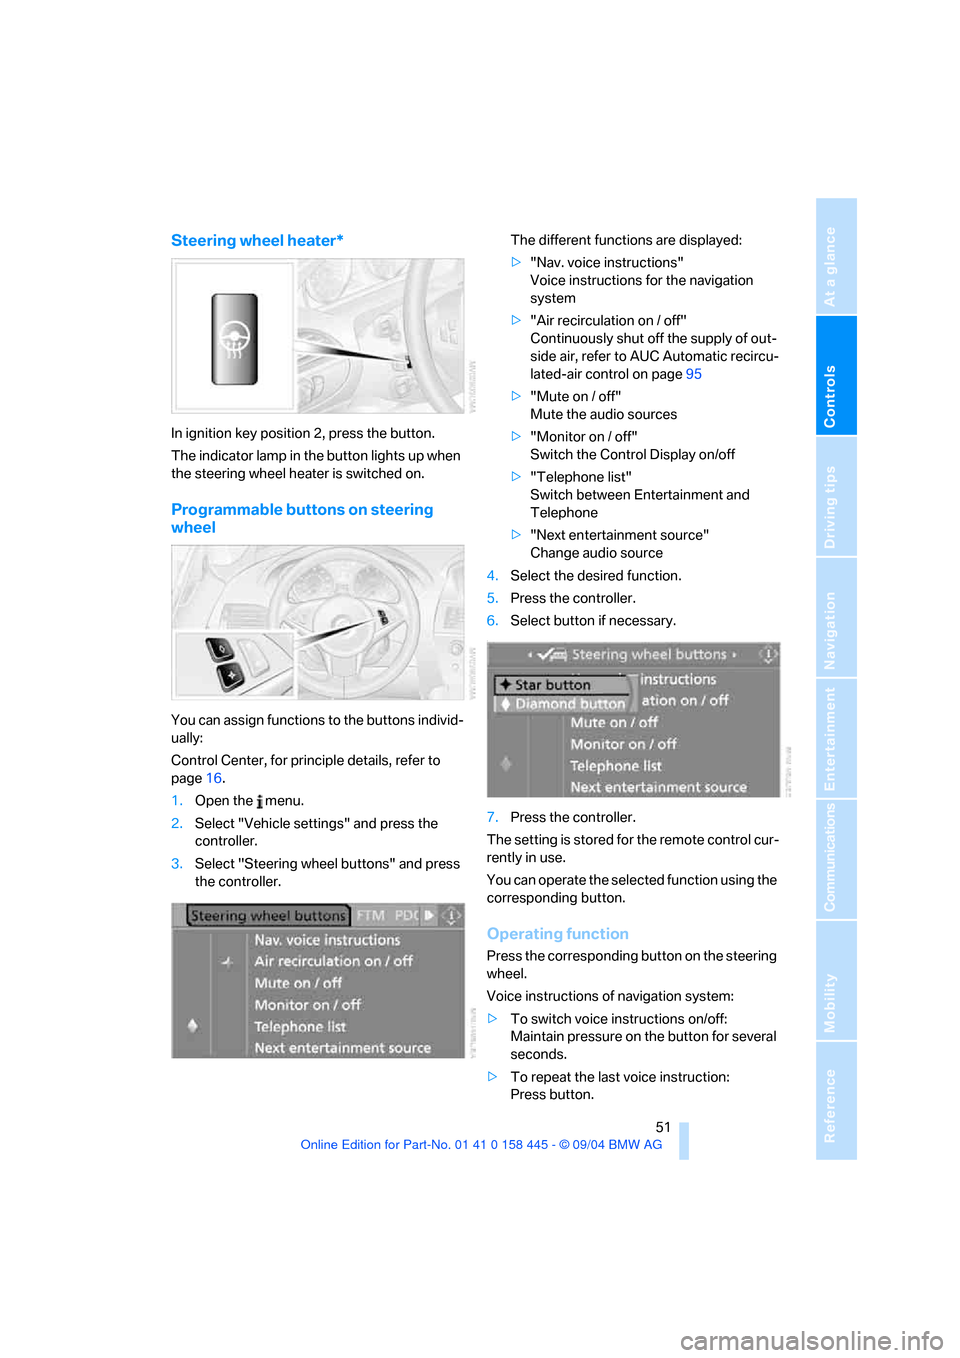
Steering wheel heater*
In ignition key position 2, press the button.
The indicator lamp in the button lights up when
the steering wheel heater is switched on.
Programmable buttons on steering
wheel
You can assign functions to the buttons individ-
ually:
Control Center, for principle details, refer to
page16.
1.Open the menu.
2.Select "Vehicle settings" and press the
controller.
3.Select "Steering wheel buttons" and press
the controller.The different functions are displayed:
>"Nav. voice instructions"
Voice instructions for the navigation
system
>"Air recirculation on / off"
Continuously shut off the supply of out-
side air, refer to AUC Automatic recircu-
lated-air control on page95
>"Mute on / off"
Mute the audio sources
>"Monitor on / off"
Switch the Control Display on/off
>"Telephone list"
Switch between Entertainment and
Telephone
>"Next entertainment source"
Change audio source
4.Select the desired function.
5.Press the controller.
6.Select button if necessary.
.
7.Press the controller.
The setting is stored for the remote control cur-
rently in use.
You can operate the selected function using the
corresponding button.
Operating function
Press the corresponding button on the steering
wheel.
Voice instructions of navigation system:
>To switch voice instructions on/off:
Maintain pressure on the button for several
seconds.
>To repeat the last voice instruction:
Press button.
Page 54 of 217
Controls
53Reference
At a glance
Driving tips
Communications
Navigation
Entertainment
Mobility
Information regarding this is located near the
buckle latch of each safety belt.
To lock safety belt
Pull the entire length of the belt from the belt
retractor. Allow the reel to retract the belt
somewhat and engage the buckle, then tighten
the belt against the child-restraint system. The
retraction mechanism is now locked.
To unlock safety belt
Release the buckle, remove the child-restraint
system and allow the belt retractor to reel the
belt completely in.
Coupe: child-restraint system with
tether strap
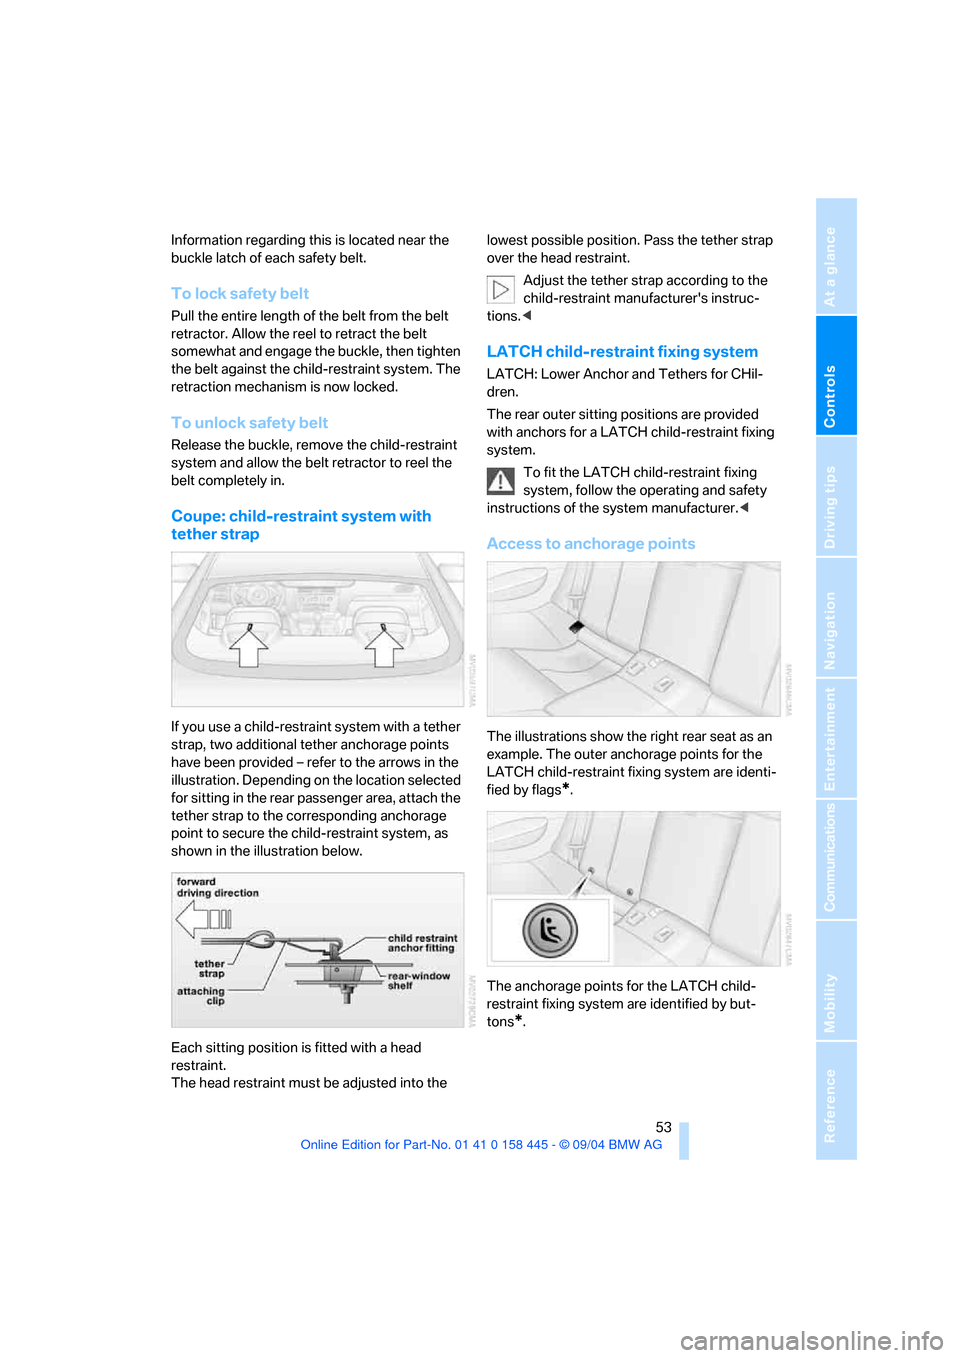
If you use a child-restraint system with a tether
strap, two additional tether anchorage points
have been provided – refer to the arrows in the
illustration. Depending on the location selected
for sitting in the rear passenger area, attach the
tether strap to the corresponding anchorage
point to secure the child-restraint system, as
shown in the illustration below.
Each sitting position is fitted with a head
restraint.
The head restraint must be adjusted into the lowest possible position. Pass the tether strap
over the head restraint.
Adjust the tether strap according to the
child-restraint manufacturer's instruc-
tions.<
LATCH child-restraint fixing system
LATCH: Lower Anchor and Tethers for CHil-
dren.
The rear outer sitting positions are provided
with anchors for a LATCH child-restraint fixing
system.
To fit the LATCH child-restraint fixing
system, follow the operating and safety
instructions of the system manufacturer.<
Access to anchorage points
The illustrations show the right rear seat as an
example. The outer anchorage points for the
LATCH child-restraint fixing system are identi-
fied by flags
*.
The anchorage points for the LATCH child-
restraint fixing system are identified by but-
tons
*.
Page 56 of 217
Controls
55Reference
At a glance
Driving tips
Communications
Navigation
Entertainment
Mobility
SMG Sequential manual transmission*
and automatic transmission*
Your BMW is equipped with the convenience
starting feature. It is sufficient to turn the igni-
tion key only briefly to position 3 and then
release it right away. The system responds by
automatically engaging the starter for a certain
period and allowing it to run until the engine
starts, after which it then disengages automati-
cally.
SMG Sequential manual transmission*
1.Press the brake pedal.
2.Engage selector-lever position N.
3.Start the engine.
If the engine does not start, engage the
last gear selected again, refer to instru-
ment cluster display, and then shift into posi-
tion N.<
Automatic transmission with
Steptronic*
1.Press the brake pedal.
2.Engage selector-lever position P or N.
3.Start the engine.
Switching off engine
Do not remove the ignition key while the
vehicle is rolling, as otherwise the steer-
ing wheel lock will immobilize the steering.
When leaving the vehicle, remove the ignition
key and lock the steering.
When parking on a downhill incline, apply the
handbrake, as otherwise the vehicle could roll
away.<
Manual transmission
1.Turn the ignition key to position 1 or 0.
2.Shift into first gear or reverse.
SMG Sequential manual transmission*
1.Engage a drive position.
2.Turn the ignition key to position 1 or 0.
A signal sounds on stopping the engine.
Automatic transmission with
Steptronic*
1.Engage selector-lever position P.
2.Turn the ignition key to position 1 or 0.
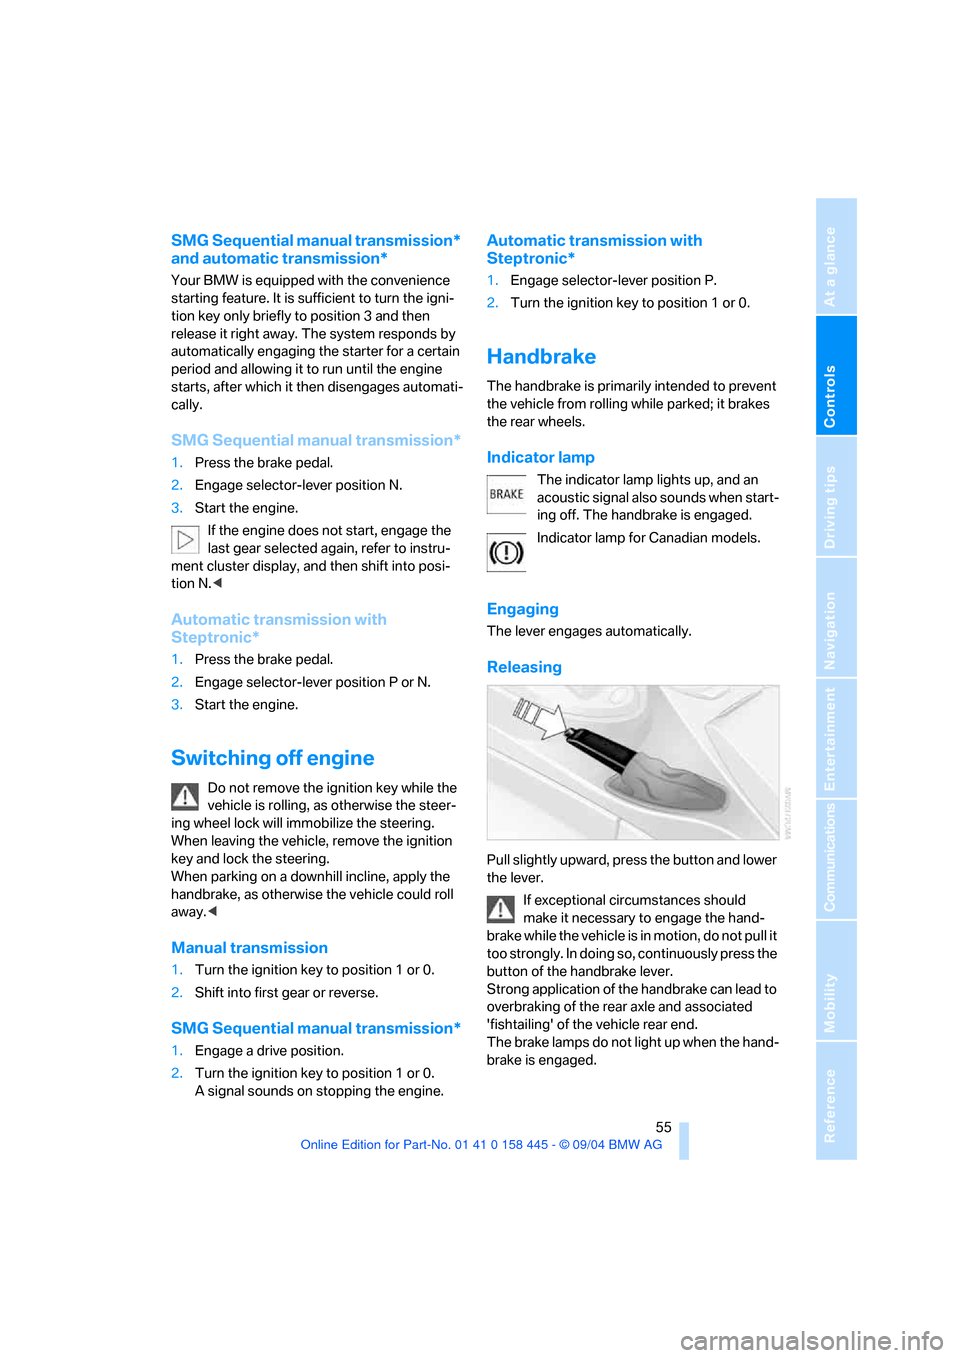
Handbrake
The handbrake is primarily intended to prevent
the vehicle from rolling while parked; it brakes
the rear wheels.
Indicator lamp
The indicator lamp lights up, and an
acoustic signal also sounds when start-
ing off. The handbrake is engaged.
Indicator lamp for Canadian models.
Engaging
The lever engages automatically.
Releasing
Pull slightly upward, press the button and lower
the lever.
If exceptional circumstances should
make it necessary to engage the hand-
brake while the vehicle is in motion, do not pull it
too strongly. In doing so, continuously press the
button of the handbrake lever.
Strong application of the handbrake can lead to
overbraking of the rear axle and associated
'fishtailing' of the vehicle rear end.
The brake lamps do not light up when the hand-
brake is engaged.
Page 58 of 217
Controls
57Reference
At a glance
Driving tips
Communications
Navigation
Entertainment
Mobility
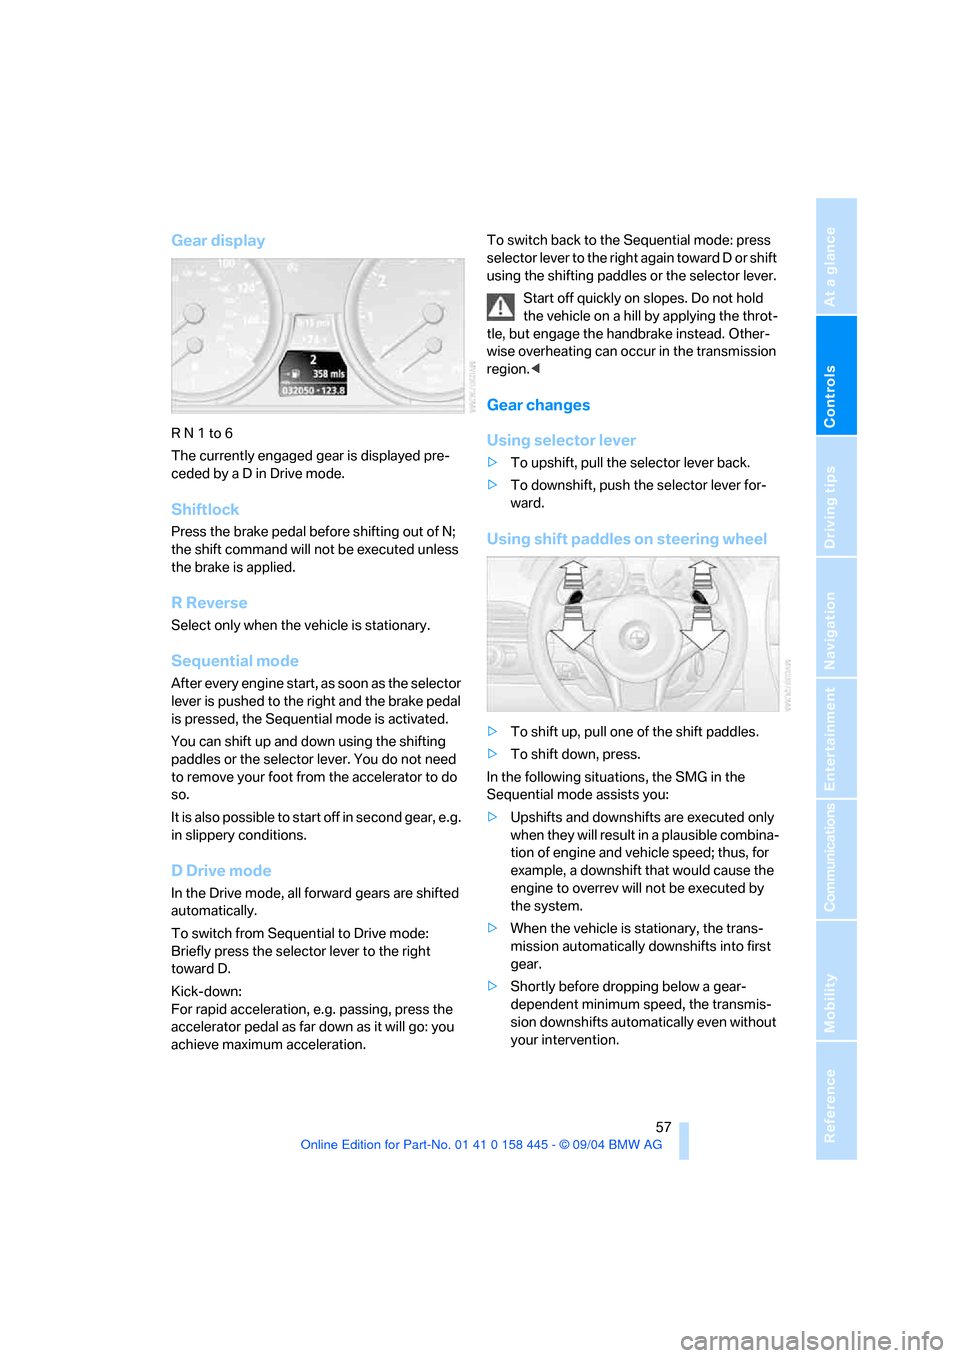
Gear display
R N 1 to 6
The currently engaged gear is displayed pre-
ceded by a D in Drive mode.
Shiftlock
Press the brake pedal before shifting out of N;
the shift command will not be executed unless
the brake is applied.
R Reverse
Select only when the vehicle is stationary.
Sequential mode
After every engine start, as soon as the selector
lever is pushed to the right and the brake pedal
is pressed, the Sequential mode is activated.
You can shift up and down using the shifting
paddles or the selector lever. You do not need
to remove your foot from the accelerator to do
so.
It is also possible to start off in second gear, e.g.
in slippery conditions.
D Drive mode
In the Drive mode, all forward gears are shifted
automatically.
To switch from Sequential to Drive mode:
Briefly press the selector lever to the right
toward D.
Kick-down:
For rapid acceleration, e.g. passing, press the
accelerator pedal as far down as it will go: you
achieve maximum acceleration.To switch back to the Sequential mode: press
selector lever to the right again toward D or shift
using the shifting paddles or the selector lever.
Start off quickly on slopes. Do not hold
the vehicle on a hill by applying the throt-
tle, but engage the handbrake instead. Other-
wise overheating can occur in the transmission
region.<
Gear changes
Using selector lever
>To upshift, pull the selector lever back.
>To downshift, push the selector lever for-
ward.
Using shift paddles on steering wheel
>To shift up, pull one of the shift paddles.
>To shift down, press.
In the following situations, the SMG in the
Sequential mode assists you:
>Upshifts and downshifts are executed only
when they will res ult in a plausible combina-
tion of engine and vehicle speed; thus, for
example, a downshift that would cause the
engine to overrev will not be executed by
the system.
>When the vehicle is stationary, the trans-
mission automatically downshifts into first
gear.
>Shortly before dropping below a gear-
dependent minimum speed, the transmis-
sion downshifts automatically even without
your intervention.
Page 60 of 217
Controls
59Reference
At a glance
Driving tips
Communications
Navigation
Entertainment
Mobility
recommended for a performance-oriented driv-
ing style. It is engaged automatically when the
Dynamic Driving Control is activated, see
below.
When the selector lever is briefly moved for-
ward or back, the manual mode is activated and
the Steptronic shifts gear. The instrument clus-
ter shows M1 through M6.
Upshifts and downshifts are executed only
when they will result in a plausible combination
of engine and vehicle speed; thus, for example,
a downshift that would cause the engine to
overrev will not be executed by the system. The
selected gear appears briefly in the instrument
cluster, followed by the current gear.
To use the automatic function again, move the
selector lever to the right into position D.
Dynamic Driving Control
The Dynamic Driving Control makes it possible
for your BMW to react in an even more perfor-
mance-oriented manner at the push of a button:
>The engine responds more spontaneously
to accelerator pedal movements.
>Cruise control:
The stored speed is reached more quickly
when it is requested.
Additionally with SMG:
>Gearshifts are faster.
>The engine speed range is used optimally in
the Drive mode.
With automatic transmission:
>The Sport program is activated.
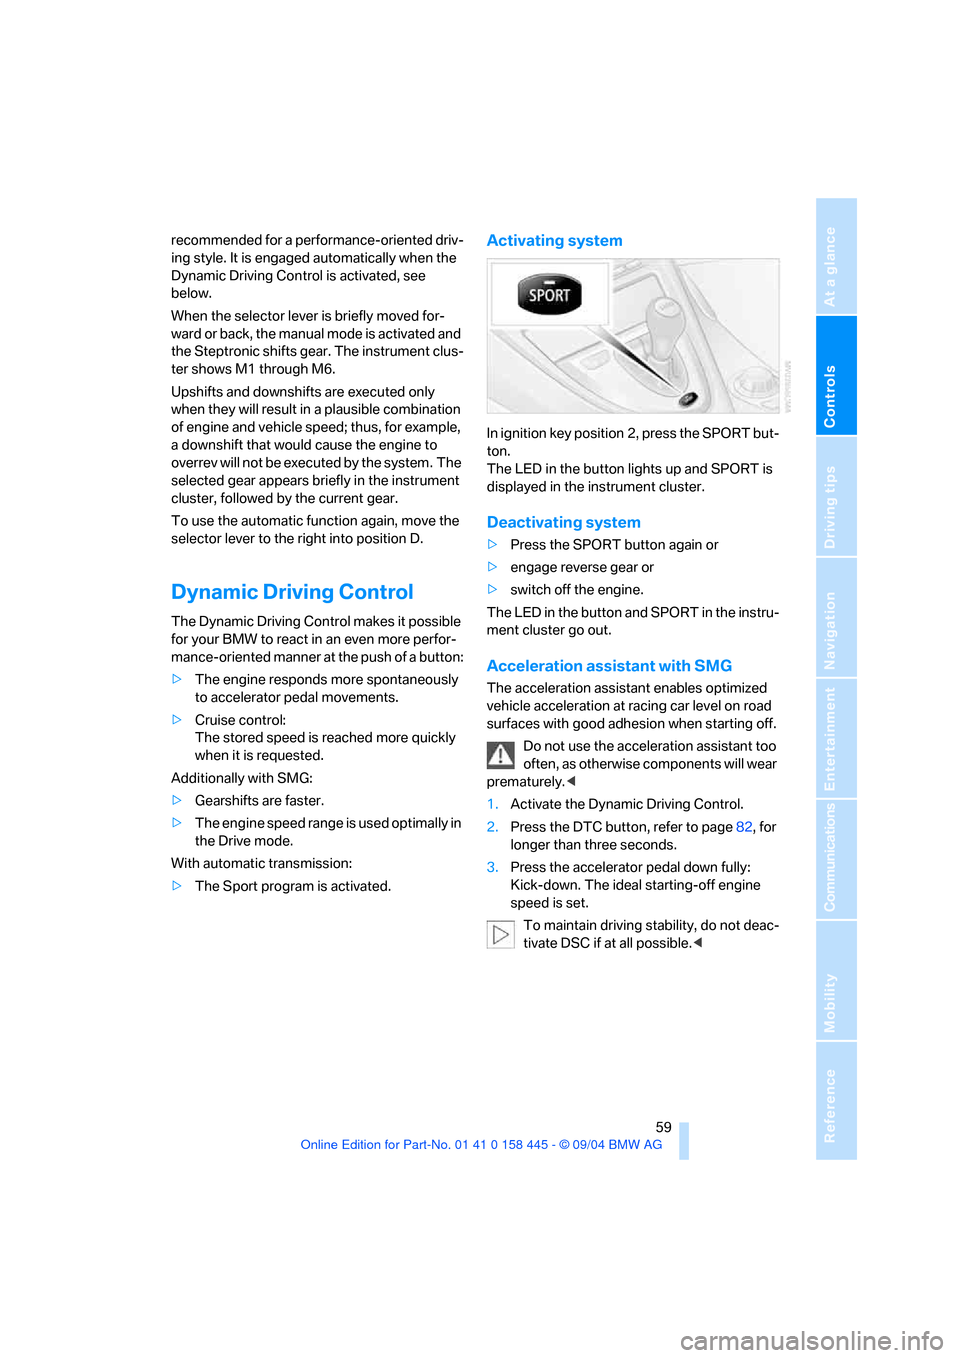
Activating system
In ignition key position 2, press the SPORT but-
ton.
The LED in the button lights up and SPORT is
displayed in the instrument cluster.
Deactivating system
>Press the SPORT button again or
>engage reverse gear or
>switch off the engine.
The LED in the button and SPORT in the instru-
ment cluster go out.
Acceleration assistant with SMG
The acceleration assistant enables optimized
vehicle acceleration at racing car level on road
surfaces with good adhesion when starting off.
Do not use the acceleration assistant too
often, as otherwise components will wear
prematurely.<
1.Activate the Dynamic Driving Control.
2.Press the DTC button, refer to page82, for
longer than three seconds.
3.Press the accelerator pedal down fully:
Kick-down. The ideal starting-off engine
speed is set.
To maintain driving stability, do not deac-
tivate DSC if at all possible.<
Page 62 of 217

Controls
61Reference
At a glance
Driving tips
Communications
Navigation
Entertainment
Mobility
The system reverts to operation at normal
speed whenever the vehicle is stationary.
Rain sensor
Wiper operation is controlled automatically as a
function of the rain intensity. The rain sensor is
located on the windshield, directly in front of the
interior rearview mirror.
Activating rain sensor
Press button. The LED in the button lights up.
Adjusting rain sensor sensitivity level
Turn the serrated dial 5.
Deactivating rain sensor
Press the button again. The LED goes out.
Deactivate the rain sensor when passing
through an automatic car wash. Failure to
do so could result in damage caused by undes-
ired wiper activation.<
Cleaning windshield and headlamps
The system sprays washer fluid against the
windshield and activates the wipers for a brief
period.
When the vehicle lighting system is switched
on, the headlamps are also cleaned at regular
and appropriate intervals.
Do not use the washers if there is any
danger that the fluid will freeze on the
windshield. If you do so, your vision could be
obscured. To avoid freezing, use a washer fluid
antifreeze, refer to Washer fluid.
Do not use washers when the washer fluid res-
ervoir is empty, as otherwise the washer pump
will be damaged.<
Windshield washer nozzles
The windshield washer nozzles are automati-
cally heated in ignition key position 2.
Washer fluid
Washer fluid antifreeze is flammable.
Always keep it well away from sparks and
open flames, and store it in tightly closed con-
tainers well out of the reach of children. Always
observe the instructions for use provided on the
containers.<
Washer fluid reservoir
Capacity approx. 5.3 US quarts/5 liters
Fill with water and – if required – with a washer
antifreeze, according to manufacturer's recom-
mendations.
In order maintain the mixture ratio, mix
the washer fluid before filling.<
Cruise control
The concept
The cruise control is available for use at speeds
of approx. 20 mph/30 km/h and higher. The
vehicle maintains and stores the speed that you
set using the lever mounted on the steering col-
umn.
Do not use the cruise control under driv-
ing conditions that do not permit a con-
stant speed, e.g.when driving on winding roads,
in heavy traffic or in poor road conditions such
as snow, rain, ice, and loose road surface.<
Page 64 of 217
Controls
63Reference
At a glance
Driving tips
Communications
Navigation
Entertainment
Mobility
cially on longer trips, the system can reduce
fatigue and tension, while increasing your
enjoyment of driving. Please use it safely and
responsibly.
In addition to holding a steady cruising speed, if
you encounter slower vehicles ahead, active
cruise control will, within the scope of given
possibilities, adjust your vehicle's speed auto-
matically so that one can flow with the traffic
without having to make constant adjustments.
If, for example, while cruising at the selected
speed, you begin to approach a slower vehicle
ahead of you in the same lane, the system will
reduce your vehicle's speed to the same as that
of the vehicle ahead to maintain your selected
distance setting between your vehicle and the
vehicle ahead. There are four settings for dis-
tance, which are additionally speed-dependent.
Based on your selected distance setting, the
system automatically decreases the throttle
setting and lightly applies the brakes if neces-
sary. The vehicle brake lamps will automatically
illuminate to signal a following driver to take
action. In addition, it may be necessary for the
vehicle or the driver to downshift, depending on
the kind of transmission your vehicle is
equipped with, to maintain the distance setting
selected. If the vehicle ahead speeds up or
when the lane ahead becomes clear, your vehi-
cle will accelerate to the speed you have
selected by increasing the throttle setting and
shifting gears automatically or by the driver as
needed.
Active cruise control is not and must not
be used as a collision avoidance/warning
system.<
Since this active cruise control system is
a new technology and operates differ-
ently from conventional cruise control systems
which you may be accustomed to, you are
strongly urged to read all of the pages relating
to this system before use. Pay special attention
to the information contained in the Things to
know about active cruise control section in this
manual beginning on page66.
within a normal engine speed range and also
change gears. Continuous operation at very
high or very low engine speeds is not possible.
In this case the driver is asked to shift or the
system deactivates itself.
Vehicles with SMG
Continuous operation at very high engine
speeds is not possible in the Sequential mode.
In this case the driver is asked to shift or the
system deactivates itself.
In the Drive mode the SMG acts similarly to the
automatic transmission in the D position.
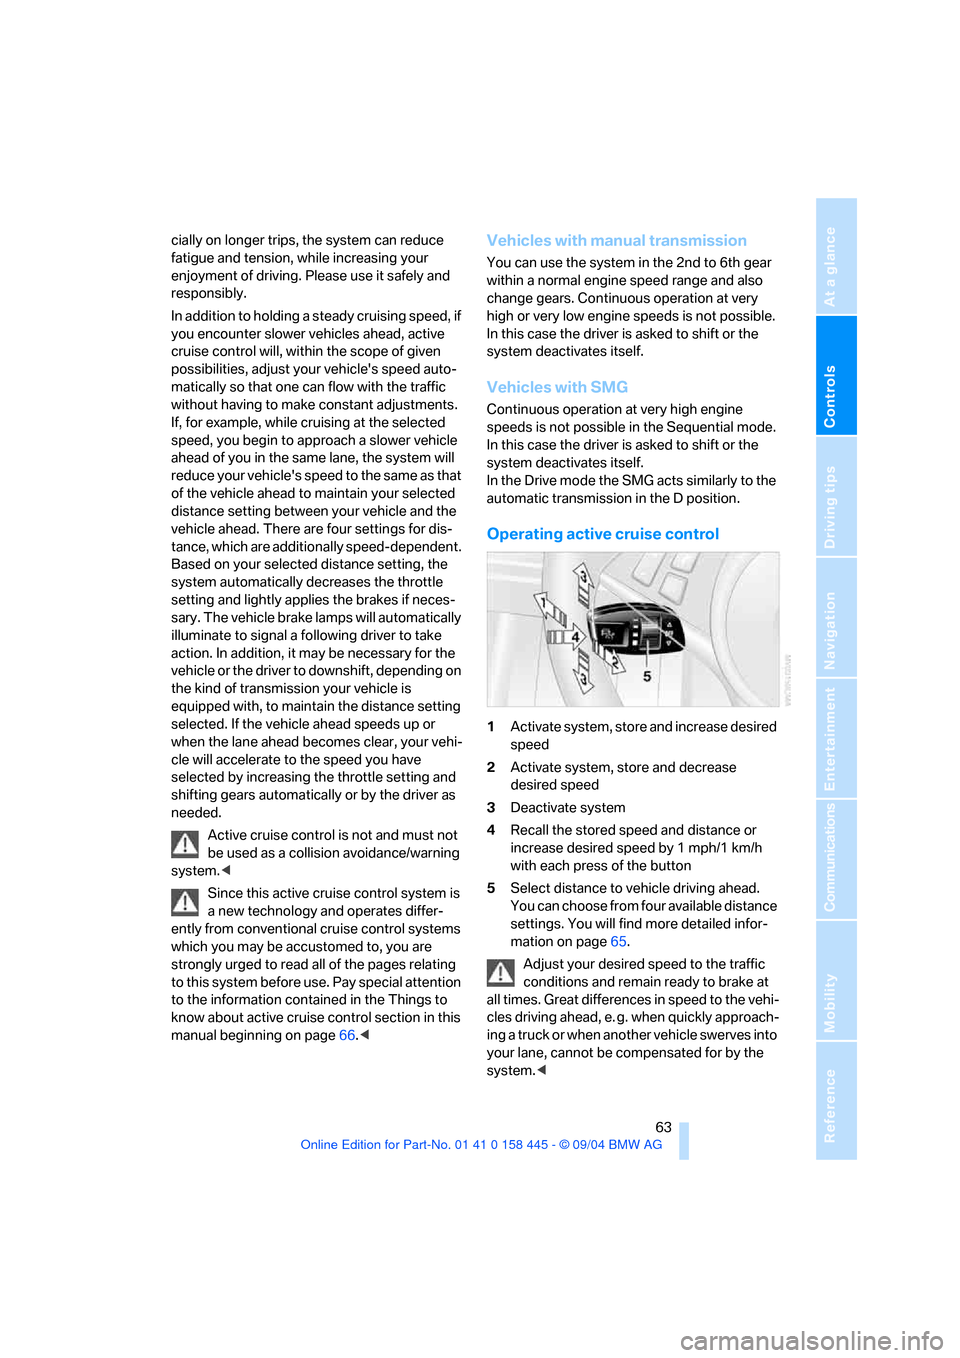
Operating active cruise control
1Activate system, store and increase desired
speed
2Activate system, store and decrease
desired speed
3Deactivate system
4Recall the stored speed and distance or
increase desired speed by 1 mph/1 km/h
with each press of the button
5Select distance to vehicle driving ahead.
You can choose from four available distance
settings. You will find more detailed infor-
mation on page65.
Adjust your desired speed to the traffic
conditions and remain ready to brake at
all times. Great differences in speed to the vehi-
cles driving ahead, e. g. when quickly approach-
ing a truck or when another vehicle swerves into
your lane, cannot be compensated for by the
system.<