2005 BMW 645I CONVERTIBLE ignition
[x] Cancel search: ignitionPage 57 of 217
Driving
56 Vehicles with manual or SMG transmission:
When parking on inclines, engage the hand-
brake, as even engaging the first or reverse gear
might not under certain circumstances secure
the vehicle against moving.
Vehicles with automatic transmission
*:
Engage selector-lever position P.<
To prevent corrosion and one-sided brak-
ing action, occasionally engage the hand-
brake lightly when the vehicle is slowly coming
to a stop if the traffic conditions are suitable.<
Manual transmission
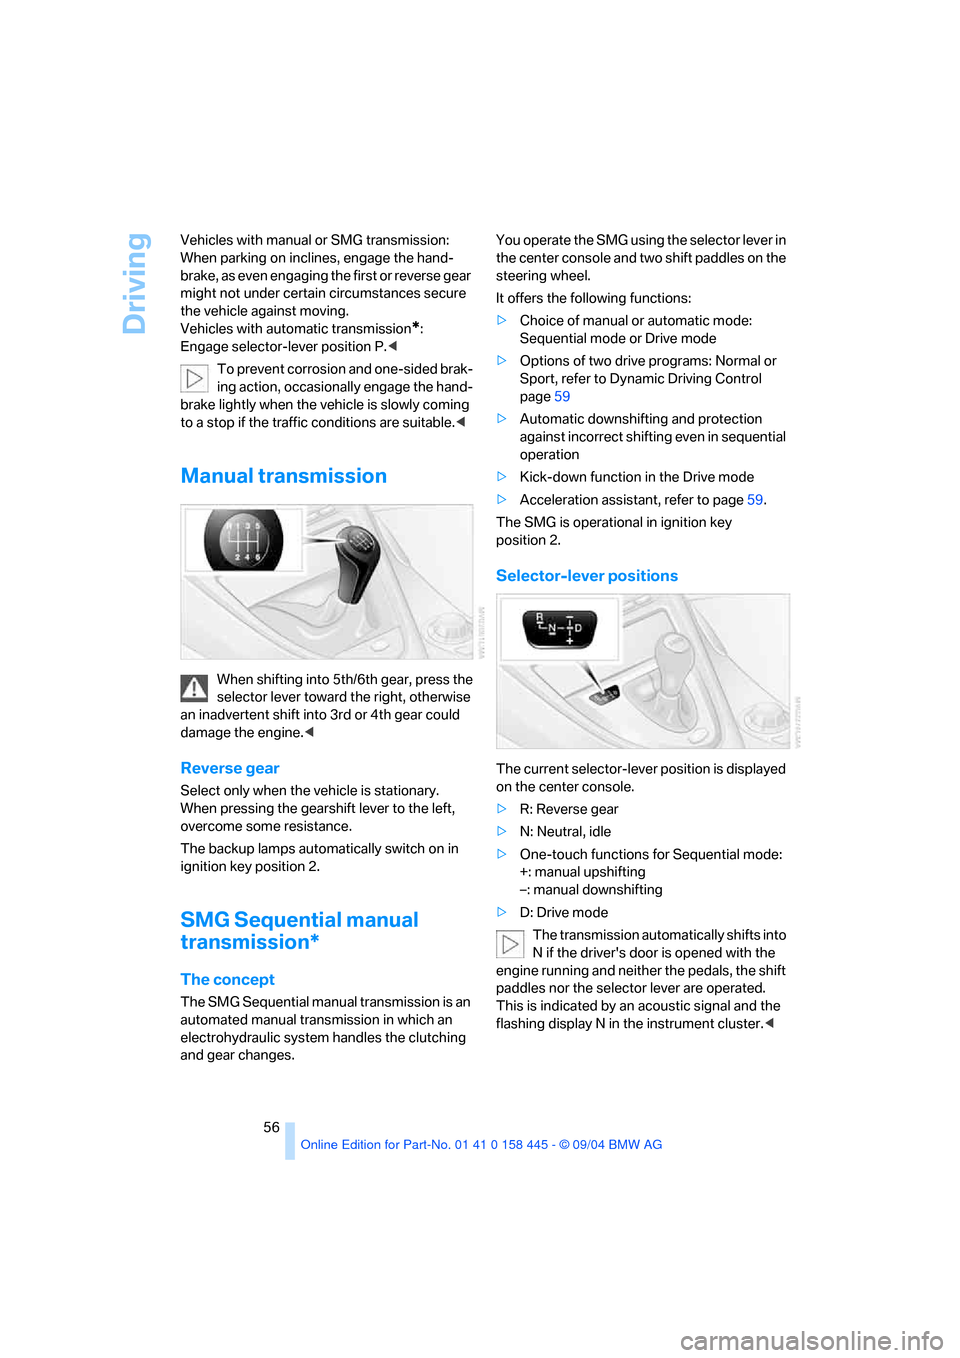
When shifting into 5th/6th gear, press the
selector lever toward the right, otherwise
an inadvertent shift into 3rd or 4th gear could
damage the engine.<
Reverse gear
Select only when the vehicle is stationary.
When pressing the gearshift lever to the left,
overcome some resistance.
The backup lamps automatically switch on in
ignition key position 2.
SMG Sequential manual
transmission*
The concept
The SMG Sequential manual transmission is an
automated manual transmission in which an
electrohydraulic system handles the clutching
and gear changes.You operate the SMG using the selector lever in
the center console and two shift paddles on the
steering wheel.
It offers the following functions:
>Choice of manual or automatic mode:
Sequential mode or Drive mode
>Options of two drive programs: Normal or
Sport, refer to Dynamic Driving Control
page59
>Automatic downshifting and protection
against incorrect shifting even in sequential
operation
>Kick-down function in the Drive mode
>Acceleration assistant, refer to page59.
The SMG is operational in ignition key
position 2.
Selector-lever positions
The current selector-lever position is displayed
on the center console.
>R: Reverse gear
>N: Neutral, idle
>One-touch functions for Sequential mode:
+: manual upshifting
–: manual downshifting
>D: Drive mode
The transmission automatically shifts into
N if the driver's door is opened with the
engine running and neither the pedals, the shift
paddles nor the selector lever are operated.
This is indicated by an acoustic signal and the
flashing display N in the instrument cluster.<
Page 60 of 217
Controls
59Reference
At a glance
Driving tips
Communications
Navigation
Entertainment
Mobility
recommended for a performance-oriented driv-
ing style. It is engaged automatically when the
Dynamic Driving Control is activated, see
below.
When the selector lever is briefly moved for-
ward or back, the manual mode is activated and
the Steptronic shifts gear. The instrument clus-
ter shows M1 through M6.
Upshifts and downshifts are executed only
when they will result in a plausible combination
of engine and vehicle speed; thus, for example,
a downshift that would cause the engine to
overrev will not be executed by the system. The
selected gear appears briefly in the instrument
cluster, followed by the current gear.
To use the automatic function again, move the
selector lever to the right into position D.
Dynamic Driving Control
The Dynamic Driving Control makes it possible
for your BMW to react in an even more perfor-
mance-oriented manner at the push of a button:
>The engine responds more spontaneously
to accelerator pedal movements.
>Cruise control:
The stored speed is reached more quickly
when it is requested.
Additionally with SMG:
>Gearshifts are faster.
>The engine speed range is used optimally in
the Drive mode.
With automatic transmission:
>The Sport program is activated.
Activating system
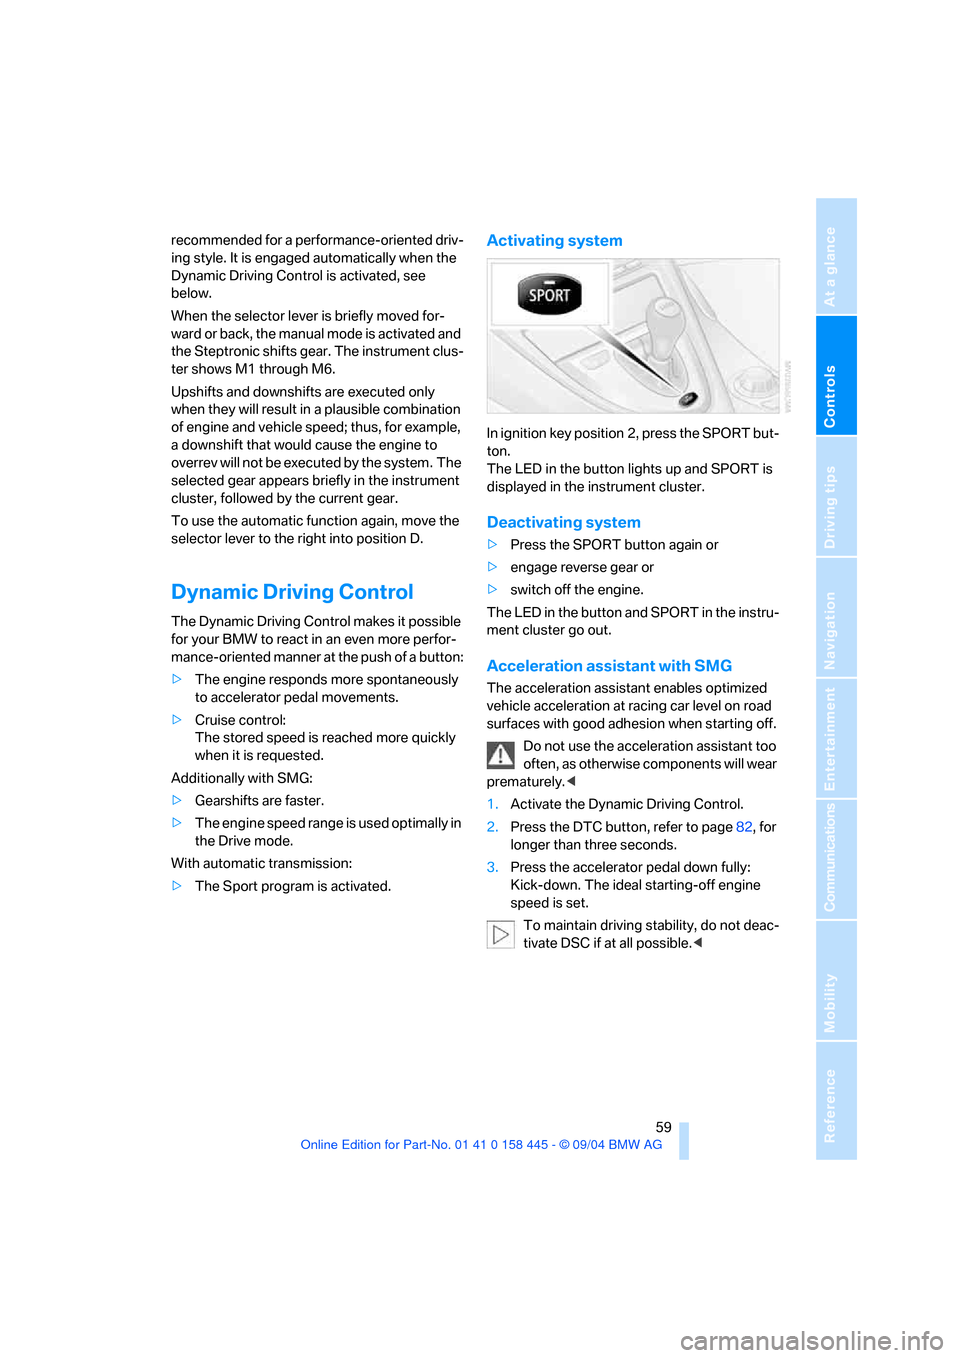
In ignition key position 2, press the SPORT but-
ton.
The LED in the button lights up and SPORT is
displayed in the instrument cluster.
Deactivating system
>Press the SPORT button again or
>engage reverse gear or
>switch off the engine.
The LED in the button and SPORT in the instru-
ment cluster go out.
Acceleration assistant with SMG
The acceleration assistant enables optimized
vehicle acceleration at racing car level on road
surfaces with good adhesion when starting off.
Do not use the acceleration assistant too
often, as otherwise components will wear
prematurely.<
1.Activate the Dynamic Driving Control.
2.Press the DTC button, refer to page82, for
longer than three seconds.
3.Press the accelerator pedal down fully:
Kick-down. The ideal starting-off engine
speed is set.
To maintain driving stability, do not deac-
tivate DSC if at all possible.<
Page 62 of 217

Controls
61Reference
At a glance
Driving tips
Communications
Navigation
Entertainment
Mobility
The system reverts to operation at normal
speed whenever the vehicle is stationary.
Rain sensor
Wiper operation is controlled automatically as a
function of the rain intensity. The rain sensor is
located on the windshield, directly in front of the
interior rearview mirror.
Activating rain sensor
Press button. The LED in the button lights up.
Adjusting rain sensor sensitivity level
Turn the serrated dial 5.
Deactivating rain sensor
Press the button again. The LED goes out.
Deactivate the rain sensor when passing
through an automatic car wash. Failure to
do so could result in damage caused by undes-
ired wiper activation.<
Cleaning windshield and headlamps
The system sprays washer fluid against the
windshield and activates the wipers for a brief
period.
When the vehicle lighting system is switched
on, the headlamps are also cleaned at regular
and appropriate intervals.
Do not use the washers if there is any
danger that the fluid will freeze on the
windshield. If you do so, your vision could be
obscured. To avoid freezing, use a washer fluid
antifreeze, refer to Washer fluid.
Do not use washers when the washer fluid res-
ervoir is empty, as otherwise the washer pump
will be damaged.<
Windshield washer nozzles
The windshield washer nozzles are automati-
cally heated in ignition key position 2.
Washer fluid
Washer fluid antifreeze is flammable.
Always keep it well away from sparks and
open flames, and store it in tightly closed con-
tainers well out of the reach of children. Always
observe the instructions for use provided on the
containers.<
Washer fluid reservoir
Capacity approx. 5.3 US quarts/5 liters
Fill with water and – if required – with a washer
antifreeze, according to manufacturer's recom-
mendations.
In order maintain the mixture ratio, mix
the washer fluid before filling.<
Cruise control
The concept
The cruise control is available for use at speeds
of approx. 20 mph/30 km/h and higher. The
vehicle maintains and stores the speed that you
set using the lever mounted on the steering col-
umn.
Do not use the cruise control under driv-
ing conditions that do not permit a con-
stant speed, e.g.when driving on winding roads,
in heavy traffic or in poor road conditions such
as snow, rain, ice, and loose road surface.<
Page 63 of 217
Driving
62
One lever for all functions
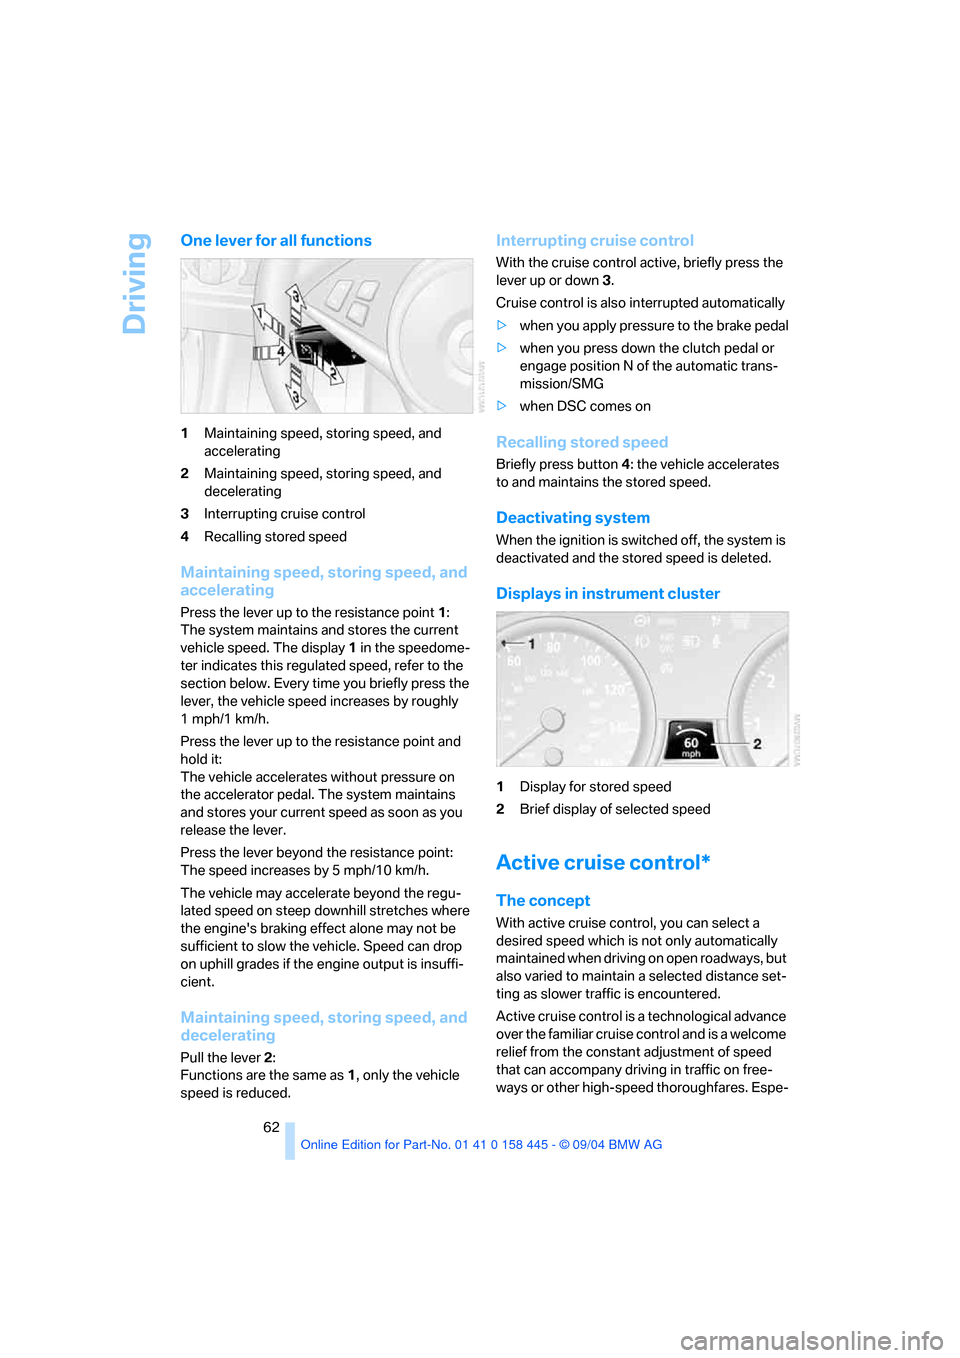
1Maintaining speed, storing speed, and
accelerating
2Maintaining speed, storing speed, and
decelerating
3Interrupting cruise control
4Recalling stored speed
Maintaining speed, storing speed, and
accelerating
Press the lever up to the resistance point1:
The system maintains and stores the current
vehicle speed. The display 1 in the speedome-
ter indicates this regulated speed, refer to the
section below. Every time you briefly press the
lever, the vehicle speed increases by roughly
1mph/1km/h.
Press the lever up to the resistance point and
hold it:
The vehicle accelerates without pressure on
the accelerator pedal. The system maintains
and stores your current speed as soon as you
release the lever.
Press the lever beyond the resistance point:
The speed increases by 5 mph/10 km/h.
The vehicle may accelerate beyond the regu-
lated speed on steep downhill stretches where
the engine's braking effect alone may not be
sufficient to slow the vehicle. Speed can drop
on uphill grades if the engine output is insuffi-
cient.
Maintaining speed, storing speed, and
decelerating
Pull the lever2:
Functions are the same as 1, only the vehicle
speed is reduced.
Interrupting cruise control
With the cruise control active, briefly press the
lever up or down3.
Cruise control is also interrupted automatically
>when you apply pressure to the brake pedal
>when you press down the clutch pedal or
engage position N of the automatic trans-
mission/SMG
>when DSC comes on
Recalling stored speed
Briefly press button4: the vehicle accelerates
to and maintains the stored speed.
Deactivating system
When the ignition is switched off, the system is
deactivated and the stored speed is deleted.
Displays in instrument cluster
1Display for stored speed
2Brief display of selected speed
Active cruise control*
The concept
With active cruise control, you can select a
desired speed which is not only automatically
maintained when driving on open roadways, but
also varied to maintain a selected distance set-
ting as slower traffic is encountered.
Active cruise control is a technological advance
over the familiar cruise control and is a welcome
relief from the constant adjustment of speed
that can accompany driving in traffic on free-
ways or other high-speed thoroughfares. Espe-
Page 66 of 217
Controls
65Reference
At a glance
Driving tips
Communications
Navigation
Entertainment
Mobility
Deactivate system
Press the lever up or down while the system is
active3. The displays in the instrument cluster
disappear. You can use the system again as
required.
In addition, the system is deactivated automati-
cally:
>When you apply pressure to the brake pedal
>When you select the automatic transmis-
sion's/SMG neutral position N
>When the manual transmission is in neutral
>When you deactivate the DSC Dynamic
Stability Control
>When you actuate the parking brake during
driving
>When the system reduces the speed to
below 20 mph/30 km/h due to a traffic situ-
ation
The system deactivates automatically
when the speed is set to below 20 mph/
30 km/h. An acoustic signal sounds and a mes-
sage appears on the Control Display. The active
intervention of the driver is required.<
When you switch off the ignition, the stored
desired speed is deleted.
Resume to stored desired speed and
distance setting
Press button4 when the system is deactivated.
The displays appear in the instrument cluster.
The system is reactivated and uses the last
stored desired speed and distance setting.
Fine adjustment of desired speed
In the activated state, the desired speed
increases by 1 mph/1 km/h each time button4
is pressed briefly.
Select distance
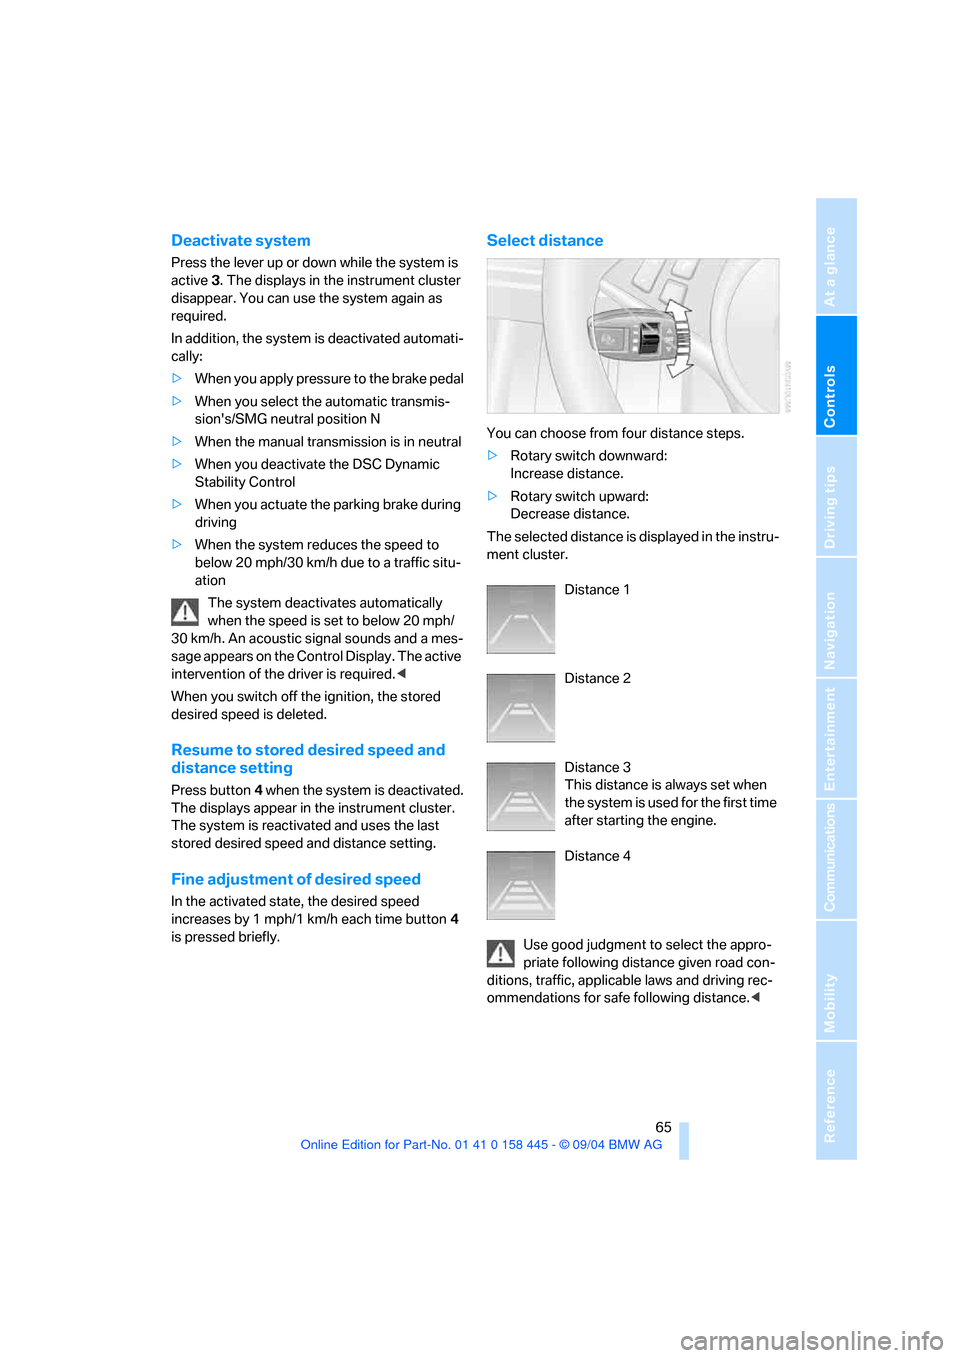
You can choose from four distance steps.
>Rotary switch downward:
Increase distance.
>Rotary switch upward:
Decrease distance.
The selected distance is displayed in the instru-
ment cluster.
Distance 1
Distance 2
Distance 3
This distance is always set when
the system is used for the first time
after starting the engine.
Distance 4
Use good judgment to select the appro-
priate following distance given road con-
ditions, traffic, applicable laws and driving rec-
ommendations for safe following distance.<
Page 68 of 217
Controls
67Reference
At a glance
Driving tips
Communications
Navigation
Entertainment
Mobility
Active cruise control may brake when you
reduce the stored desired speed; however, the
driver must constantly monitor traffic and inter-
vene if necessary.
When you switch off the engine or ignition,
active cruise control is fully switched off, too,
and any settings you have selected are can-
celed.
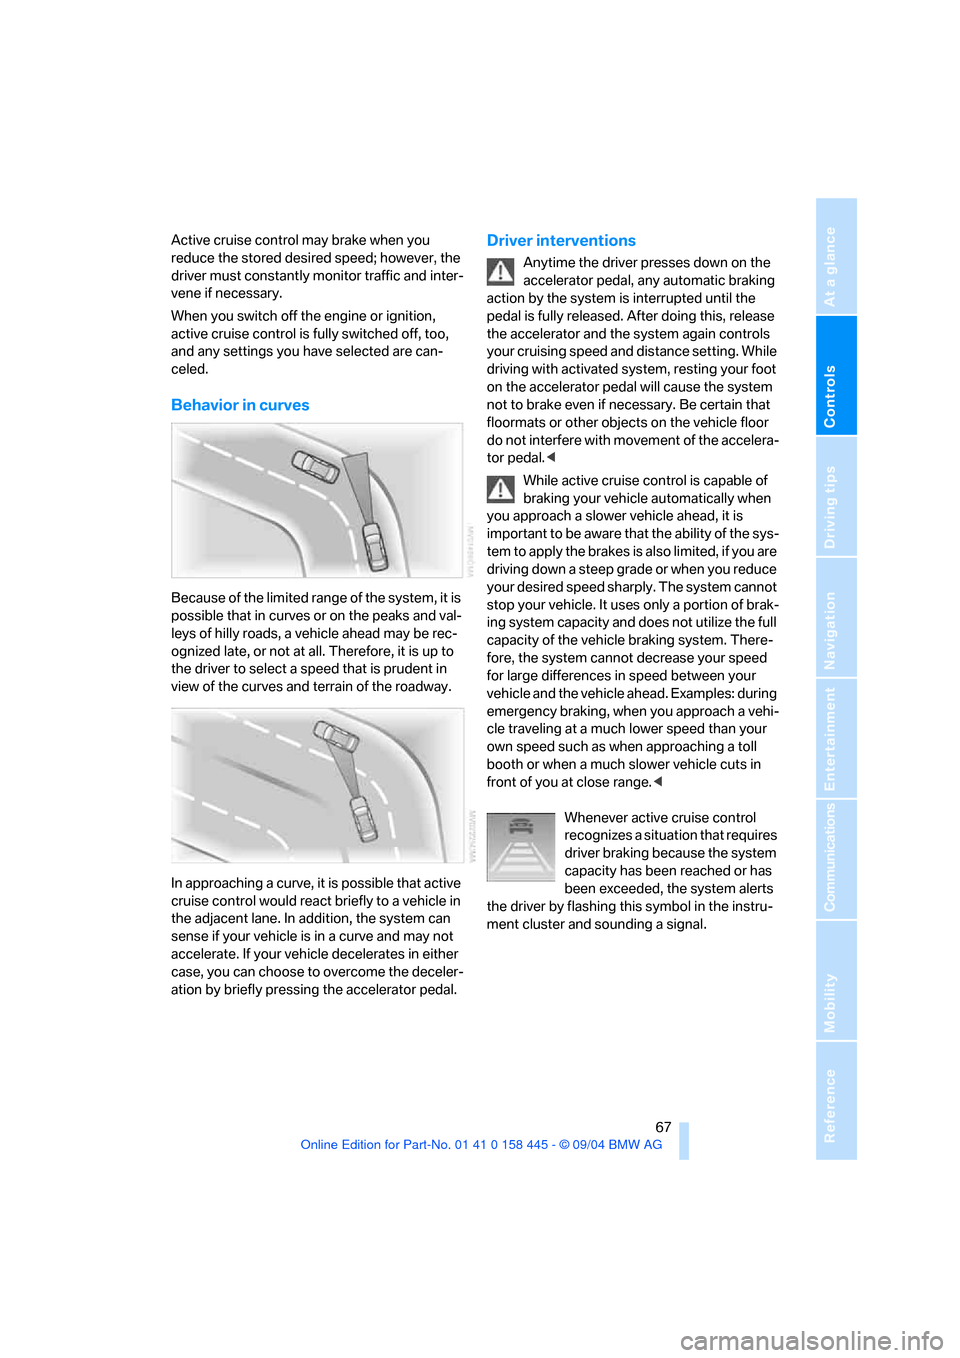
Behavior in curves
Because of the limited range of the system, it is
possible that in curves or on the peaks and val-
leys of hilly roads, a vehicle ahead may be rec-
ognized late, or not at all. Therefore, it is up to
the driver to select a speed that is prudent in
view of the curves and terrain of the roadway.
In approaching a curve, it is possible that active
cruise control would react briefly to a vehicle in
the adjacent lane. In addition, the system can
sense if your vehicle is in a curve and may not
accelerate. If your vehicle decelerates in either
case, you can choose to overcome the deceler-
ation by briefly pressing the accelerator pedal.
Driver interventions
Anytime the driver presses down on the
accelerator pedal, any automatic braking
action by the system is interrupted until the
pedal is fully released. After doing this, release
the accelerator and the system again controls
your cruising speed and distance setting. While
driving with activated system, resting your foot
on the accelerator pedal will cause the system
not to brake even if necessary. Be certain that
floormats or other objects on the vehicle floor
do not interfere with movement of the accelera-
tor pedal.<
While active cruise control is capable of
braking your vehicle automatically when
you approach a slower vehicle ahead, it is
important to be aware that the ability of the sys-
tem to apply the brakes is also limited, if you are
driving down a steep grade or when you reduce
your desired speed sharply. The system cannot
stop your vehicle. It uses only a portion of brak-
ing system capacity and does not utilize the full
capacity of the vehicle braking system. There-
fore, the system cannot decrease your speed
for large differences in speed between your
vehicle and the vehicle ahead. Examples: during
emergency braking, when you approach a vehi-
cle traveling at a much lower speed than your
own speed such as when approaching a toll
booth or when a much slower vehicle cuts in
front of you at close range.<
Whenever active cruise control
recognizes a situation that requires
driver braking because the system
capacity has been reached or has
been exceeded, the system alerts
the driver by flashing this symbol in the instru-
ment cluster and sounding a signal.
Page 70 of 217
Controls
69Reference
At a glance
Driving tips
Communications
Navigation
Entertainment
Mobility
Everything under control
Odometer, outside
temperature display, clock
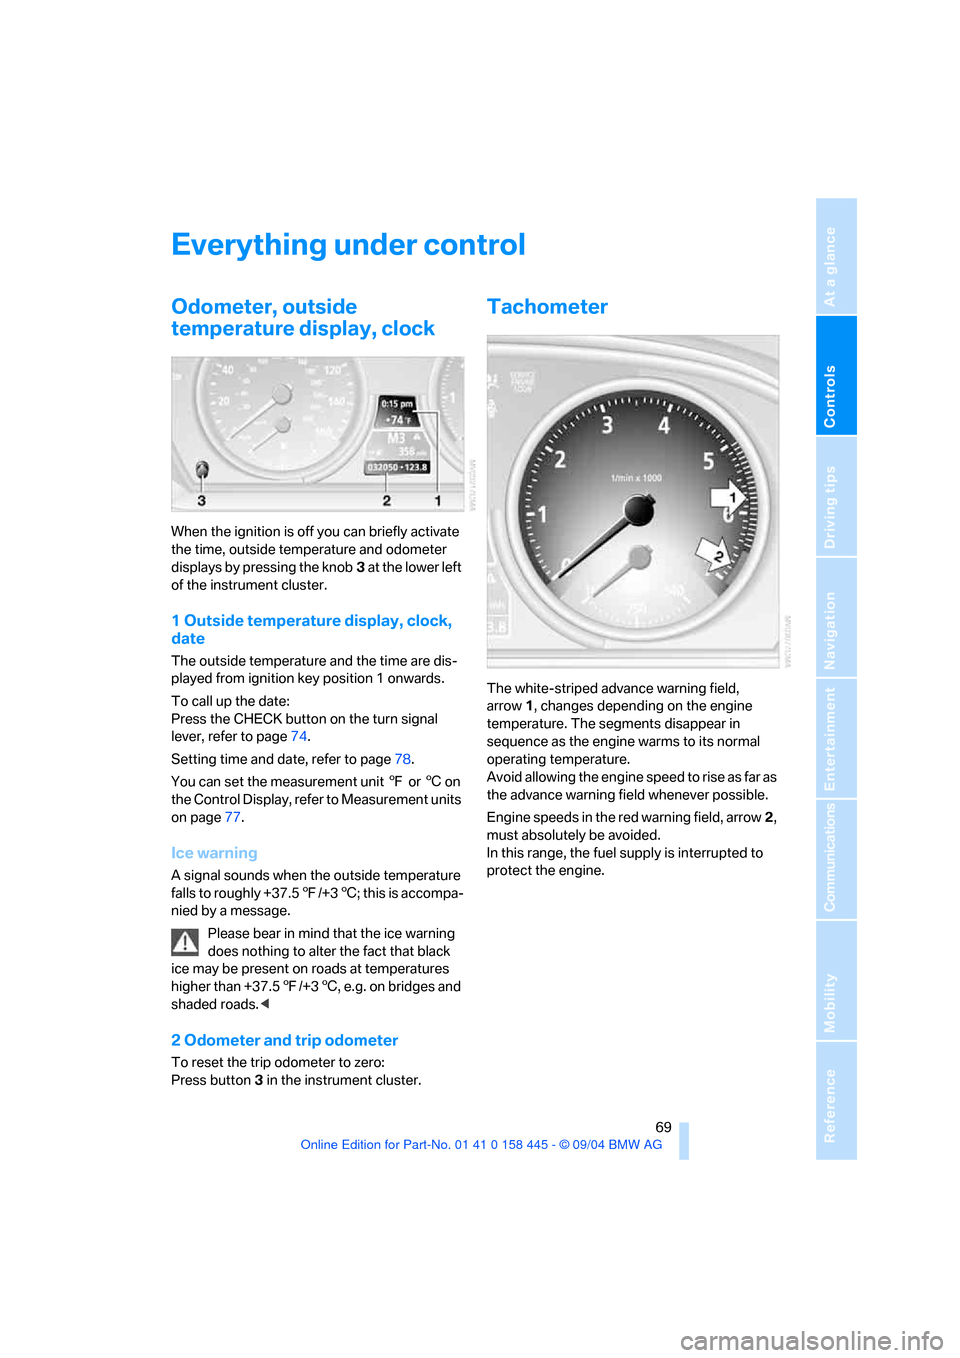
When the ignition is off you can briefly activate
the time, outside temperature and odometer
displays by pressing the knob3 at the lower left
of the instrument cluster.
1 Outside temperature display, clock,
date
The outside temperature and the time are dis-
played from ignition key position 1 onwards.
To call up the date:
Press the CHECK button on the turn signal
lever, refer to page74.
Setting time and date, refer to page78.
You can set the measurement unit 7 or 6 on
the Control Display, refer to Measurement units
on page77.
Ice warning
A signal sounds when the outside temperature
falls to roughly +37.57/+36; this is accompa-
nied by a message.
Please bear in mind that the ice warning
does nothing to alter the fact that black
ice may be present on roads at temperatures
higher than +37.57/+36, e.g. on bridges and
shaded roads.<
2 Odometer and trip odometer
To reset the trip odometer to zero:
Press button3 in the instrument cluster.
Tachometer
The white-striped advance warning field,
arrow1, changes depending on the engine
temperature. The segments disappear in
sequence as the engine warms to its normal
operating temperature.
Avoid allowing the engine speed to rise as far as
the advance warning field whenever possible.
Engine speeds in the red warning field, arrow2,
must absolutely be avoided.
In this range, the fuel supply is interrupted to
protect the engine.
Page 71 of 217
Everything under control
70
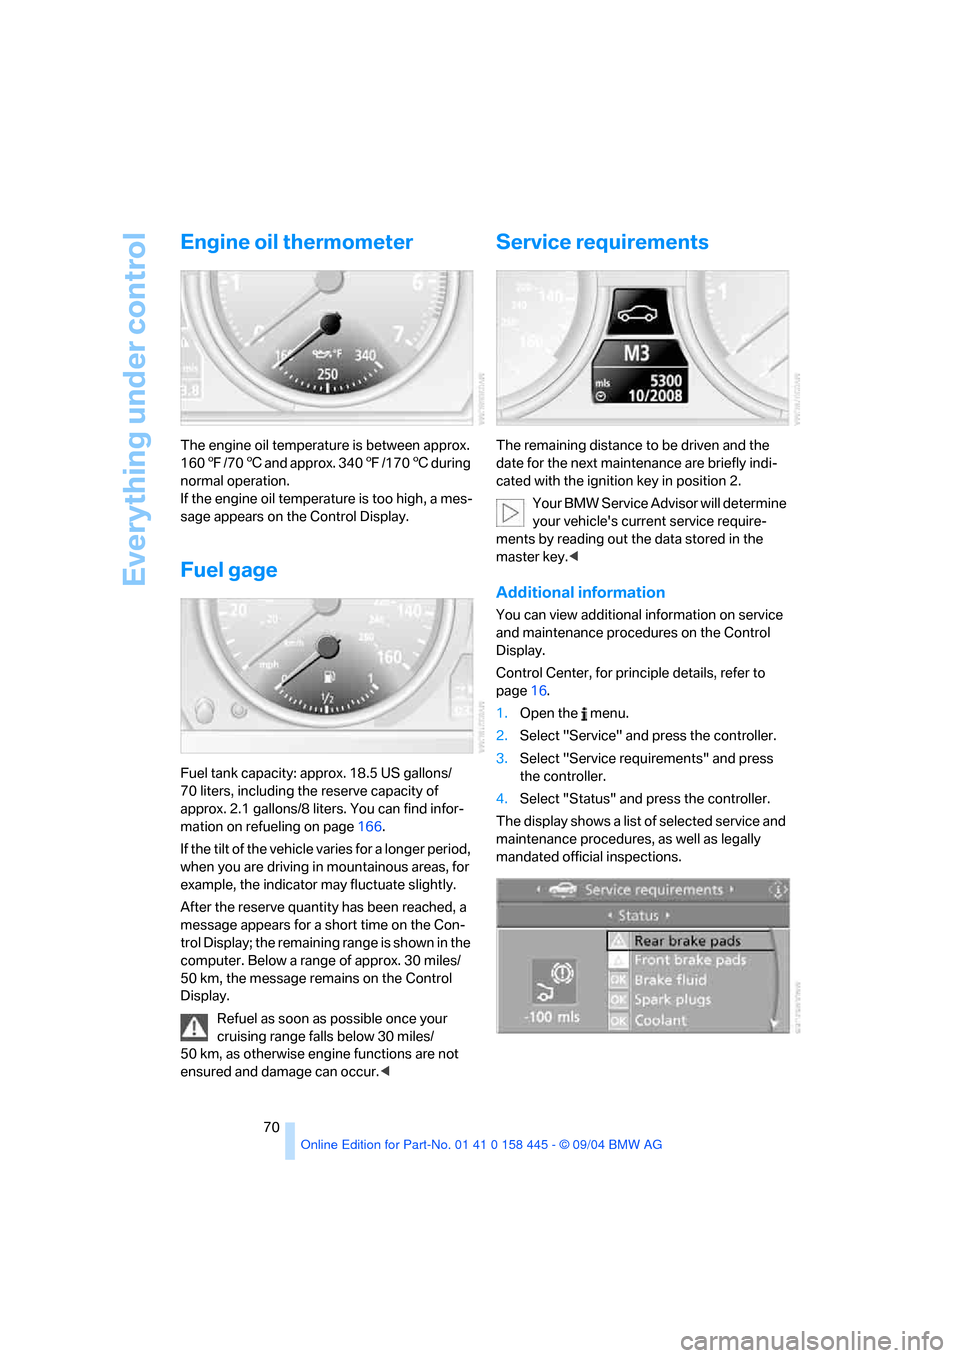
Engine oil thermometer
The engine oil temperature is between approx.
1607/706 and approx. 3407/1706 during
normal operation.
If the engine oil temperature is too high, a mes-
sage appears on the Control Display.
Fuel gage
Fuel tank capacity: approx. 18.5 US gallons/
70 liters, including the reserve capacity of
approx. 2.1 gallons/8 liters. You can find infor-
mation on refueling on page166.
If the tilt of the vehicle varies for a longer period,
when you are driving in mountainous areas, for
example, the indicator may fluctuate slightly.
After the reserve quantity has been reached, a
message appears for a short time on the Con-
trol Display; the remaining range is shown in the
computer. Below a range of approx. 30 miles/
50 km, the message remains on the Control
Display.
Refuel as soon as possible once your
cruising range falls below 30 miles/
50 km, as otherwise engine functions are not
ensured and damage can occur.<
Service requirements
The remaining distance to be driven and the
date for the next maintenance are briefly indi-
cated with the ignition key in position 2.
Your BMW Service Advisor will determine
your vehicle's current service require-
ments by reading out the data stored in the
master key.<
Additional information
You can view additional information on service
and maintenance procedures on the Control
Display.
Control Center, for principle details, refer to
page16.
1.Open the menu.
2.Select "Service" and press the controller.
3.Select "Service requirements" and press
the controller.
4.Select "Status" and press the controller.
The display shows a list of selected service and
maintenance procedures, as well as legally
mandated official inspections.