2005 BMW 645CI COUPE&CONVERTIBLE display
[x] Cancel search: displayPage 91 of 217
Technology for comfort, convenience and safety
90
Care instructions
You can find everything you need to know on
this topic by consulting the Caring for your vehi-
cle brochure.
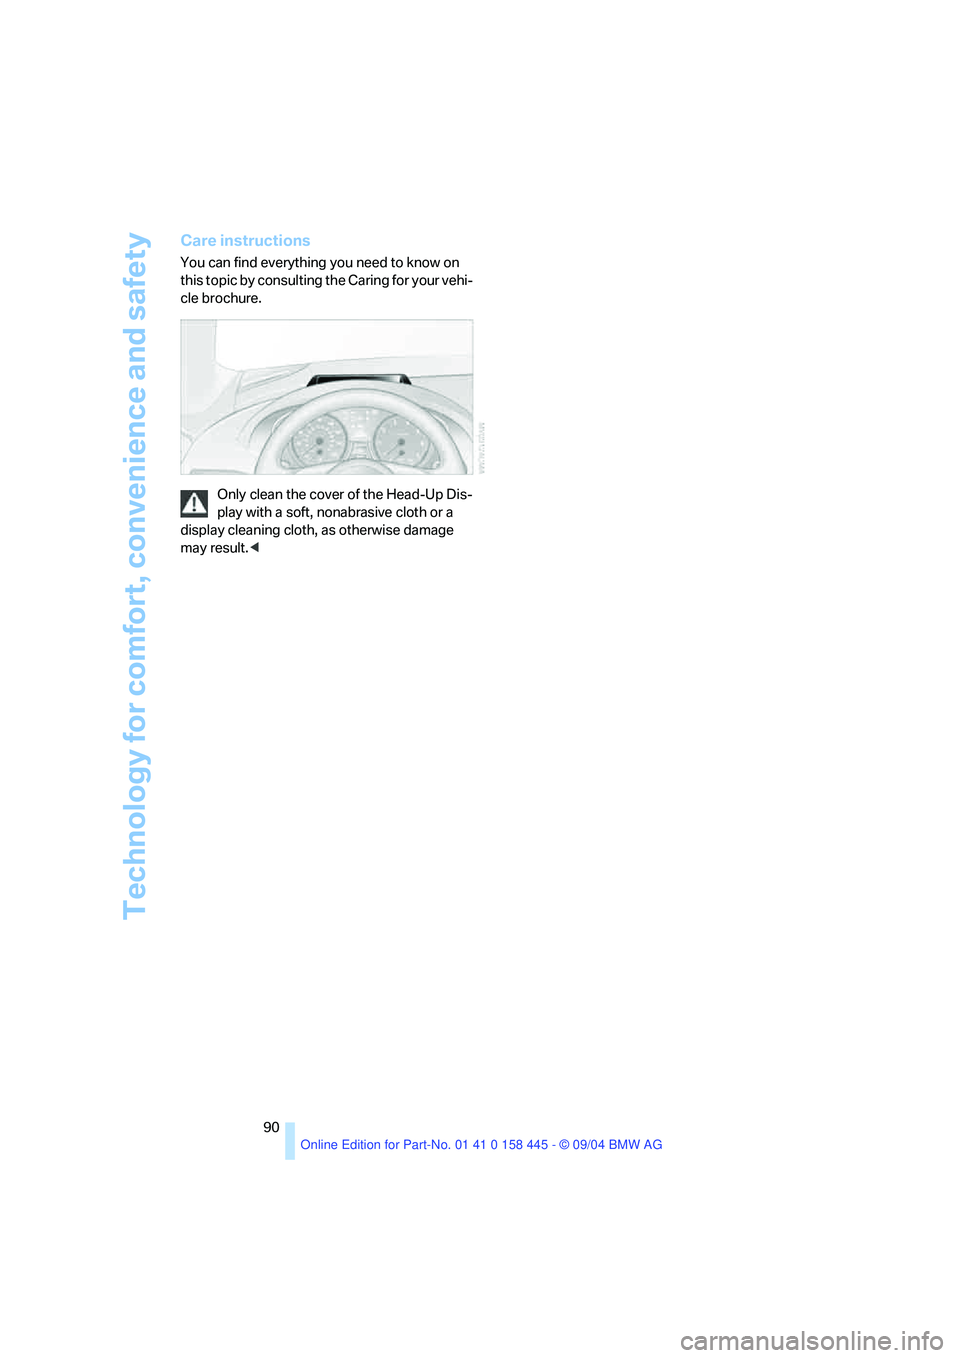
Only clean the cover of the Head-Up Dis-
play with a soft, nonabrasive cloth or a
display cleaning cloth, as otherwise damage
may result.<
Page 92 of 217
Controls
91Reference
At a glance
Driving tips
Communications
Navigation
Entertainment
Mobility
Lamps
Parking lamps/low beams
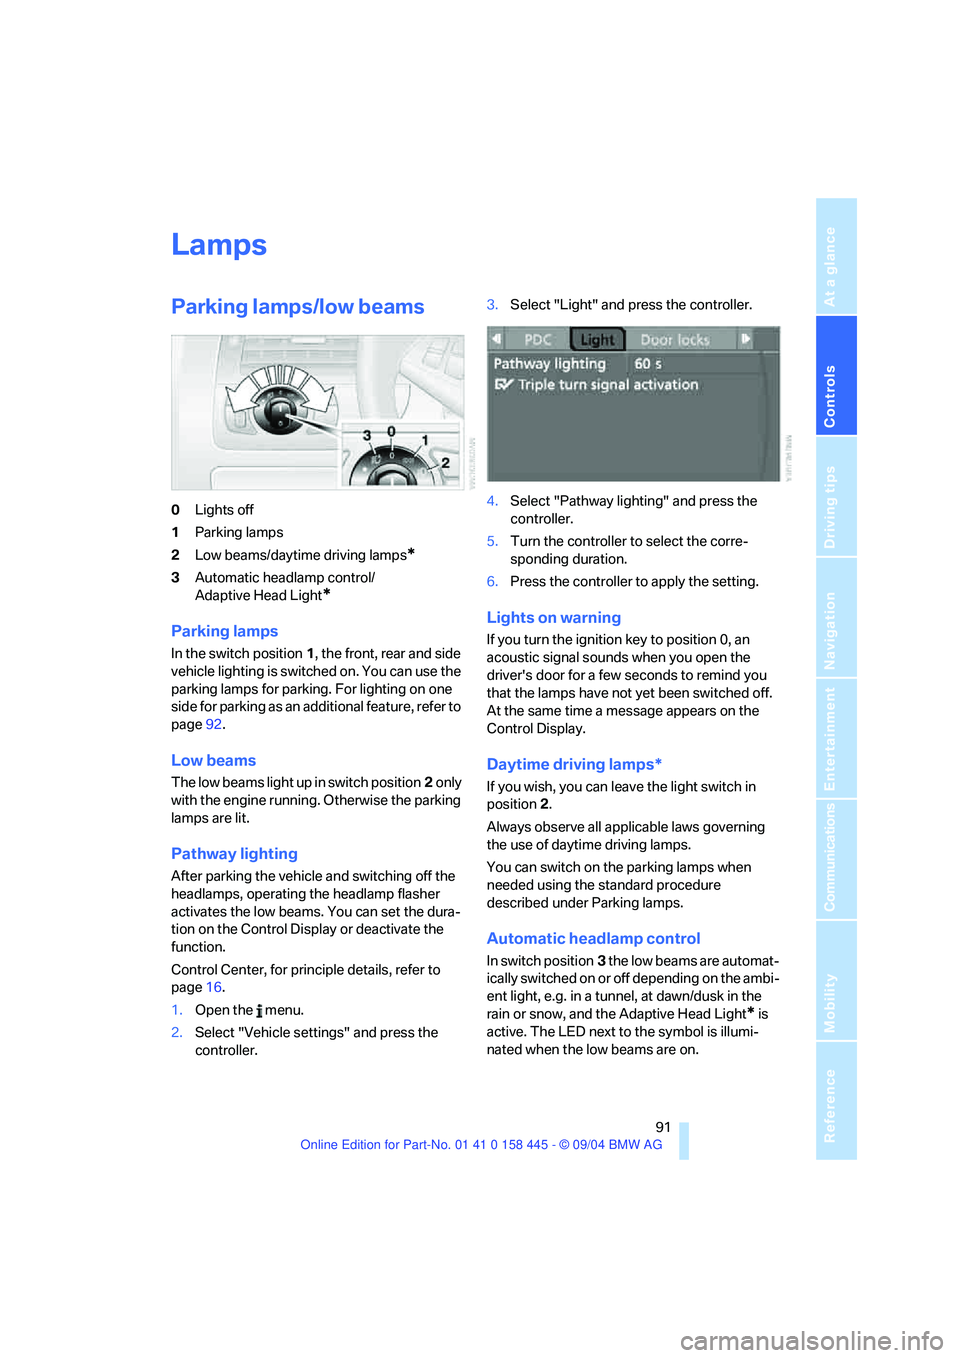
0Lights off
1Parking lamps
2Low beams/daytime driving lamps
*
3Automatic headlamp control/
Adaptive Head Light
*
Parking lamps
In the switch position1, the front, rear and side
vehicle lighting is switched on. You can use the
parking lamps for parking. For lighting on one
side for parking as an additional feature, refer to
page92.
Low beams
The low beams light up in switch position2 only
with the engine running. Otherwise the parking
lamps are lit.
Pathway lighting
After parking the vehicle and switching off the
headlamps, operating the headlamp flasher
activates the low beams. You can set the dura-
tion on the Control Display or deactivate the
function.
Control Center, for principle details, refer to
page16.
1.Open the menu.
2.Select "Vehicle settings" and press the
controller.3.Select "Light" and press the controller.
4.Select "Pathway lighting" and press the
controller.
5.Turn the controller to select the corre-
sponding duration.
6.Press the controller to apply the setting.
Lights on warning
If you turn the ignition key to position 0, an
acoustic signal sounds when you open the
driver's door for a few seconds to remind you
that the lamps have not yet been switched off.
At the same time a message appears on the
Control Display.
Daytime driving lamps*
If you wish, you can leave the light switch in
position2.
Always observe all applicable laws governing
the use of daytime driving lamps.
You can switch on the parking lamps when
needed using the standard procedure
described under Parking lamps.
Automatic headlamp control
In switch position3 the low beams are automat-
ically switched on or off depending on the ambi-
ent light, e.g. in a tunnel, at dawn/dusk in the
rain or snow, and the Adaptive Head Light
* is
active. The LED next to the symbol is illumi-
nated when the low beams are on.
Page 96 of 217
Controls
95Reference
At a glance
Driving tips
Communications
Navigation
Entertainment
Mobility
The current setting for air distribution is dis-
played on the Control Display.
A congenial climate
For almost all conditions, the AUTO program
offers the optimal air distribution and air vol-
ume. Select an interior temperature you find
pleasant.
The following section contains more detailed
information on the available setting options.
AUTO program
The AUTO program handles the
adjustment of air distribution to the
windshield and side windows, in
the direction of the upper body, and in the foot-
well, as well as the adjustment of the air volume.
It also adapts your instructions for the tempera-
ture to outside influences throughout the year.
The cooling is switched on automatically with
the AUTO program. At the same time, a con-
densation sensor controls the program in such
a way that window condensation is prevented
as much as possible.
Temperature adjustment
By rotating, you can set a desired
temperature for the driver's side
and the passenger side.
After you start to drive, this system
ensures that the selected temperature is
achieved as quickly as possible. It then main-
tains this temperature, regardless of the sea-
son.
Defrosting windows and removing
condensation
This program quickly removes ice
and condensation from the wind-
shield and front side windows.
Air volume, manual
You can adjust the air volume by
turning. You can reactivate the
automatic mode for the air volume
with the AUTO button.
Switching cooling function on and off
manually
The cooling function cools and
dehumidifies the incoming air
before reheating it as needed
according to the temperature setting. Depend-
ing on the weather, the windshield may fog over
briefly when the engine is started.
The air conditioner can operate only when the
engine is running. The AUTO program auto-
matically switches on the air conditioner.
Maximum cooling
This program quickly provides
maximum cooling.
The system switches to the recir-
culated-air mode and the air flows
at maximum air volume only from the vent out-
lets for the upper body area. For this reason you
should ensure that these vent outlets are open
before selecting this program.
AUC automatic recirculated-air
control/recirculated air mode
You can respond to unpleasant
odors or pollutants in the immedi-
ate environment by temporarily
suspending the supply of outside air. The sys-
tem then recirculates the air currently within the
vehicle. In AUC mode, a sensor detects pollut-
ants in the outside air and controls the shut-off
automatically.
Press the button repeatedly to run through the
following control sequence:
>LED off: outside air flows into the vehicle
continuously.
>Right LED on, AUC mode: the system
detects pollutants in the outside air and
responds by blocking the supply of outside
air when required.
>Left LED on, recirculated-air mode: the
supply of outside air into the vehicle is shut
off continuously.
If condensation starts to form on the
inside window surfaces during operation
in the recirculated-air mode, you should switch
Page 98 of 217
Controls
97Reference
At a glance
Driving tips
Communications
Navigation
Entertainment
Mobility
To select the front passenger area:
Move the controller to the right.
Pressing the AUTO button raises and
lowers the air distribution settings on the
Control Display.<
Adapting temperature in upper body
region
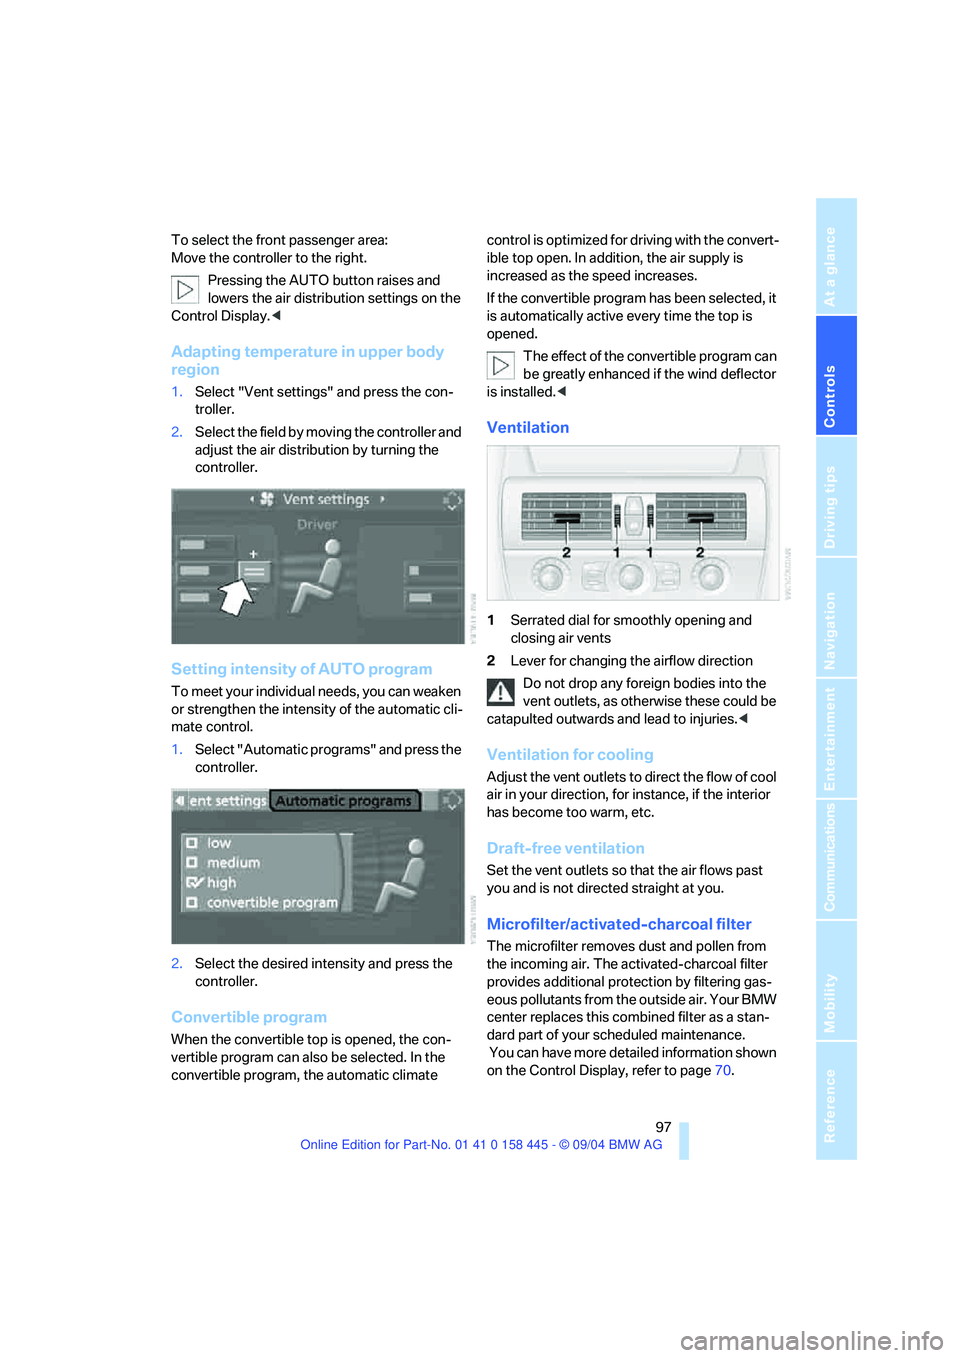
1.Select "Vent settings" and press the con-
troller.
2.Select the field by moving the controller and
adjust the air distribution by turning the
controller.
Setting intensity of AUTO program
To meet your individual needs, you can weaken
or strengthen the intensity of the automatic cli-
mate control.
1.Select "Automatic programs" and press the
controller.
2.Select the desired intensity and press the
controller.
Convertible program
When the convertible top is opened, the con-
vertible program can also be selected. In the
convertible program, the automatic climate control is optimized for driving with the convert-
ible top open. In addition, the air supply is
increased as the speed increases.
If the convertible program has been selected, it
is automatically active every time the top is
opened.
The effect of the convertible program can
be greatly enhanced if the wind deflector
is installed.<
Ventilation
1Serrated dial for smoothly opening and
closing air vents
2Lever for changing the airflow direction
Do not drop any foreign bodies into the
vent outlets, as otherwise these could be
catapulted outwards and lead to injuries.<
Ventilation for cooling
Adjust the vent outlets to direct the flow of cool
air in your direction, for instance, if the interior
has become too warm, etc.
Draft-free ventilation
Set the vent outlets so that the air flows past
you and is not directed straight at you.
Microfilter/activated-charcoal filter
The microfilter removes dust and pollen from
the incoming air. The activated-charcoal filter
provides additional protection by filtering gas-
eous pollutants from the outside air. Your BMW
center replaces this combined filter as a stan-
dard part of your scheduled maintenance.
You can have more detailed information shown
on the Control Display, refer to page70.
Page 115 of 217
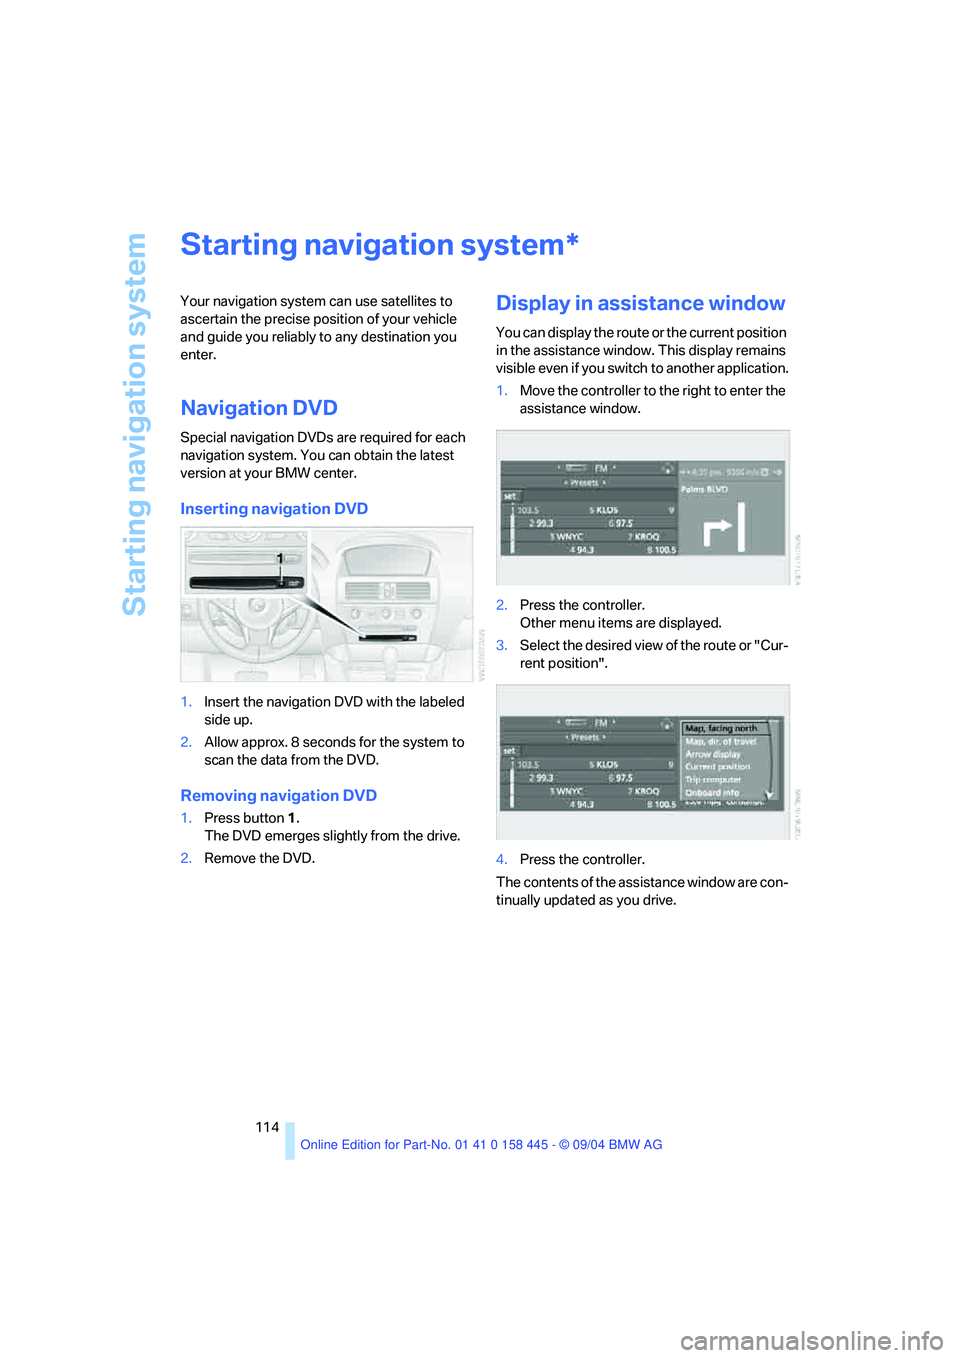
Starting navigation system
114
Starting navigation system
Your navigation system can use satellites to
ascertain the precise position of your vehicle
and guide you reliably to any destination you
enter.
Navigation DVD
Special navigation DVDs are required for each
navigation system. You can obtain the latest
version at your BMW center.
Inserting navigation DVD
1.Insert the navigation DVD with the labeled
side up.
2.Allow approx. 8 seconds for the system to
scan the data from the DVD.
Removing navigation DVD
1.Press button 1.
The DVD emerges slightly from the drive.
2.Remove the DVD.
Display in assistance window
You can display the route or the current position
in the assistance window. This display remains
visible even if you switch to another application.
1.Move the controller to the right to enter the
assistance window.
2.Press the controller.
Other menu items are displayed.
3.Select the desired view of the route or "Cur-
rent position".
4.Press the controller.
The contents of the assistance window are con-
tinually updated as you drive.
*
Page 117 of 217
Destination entry
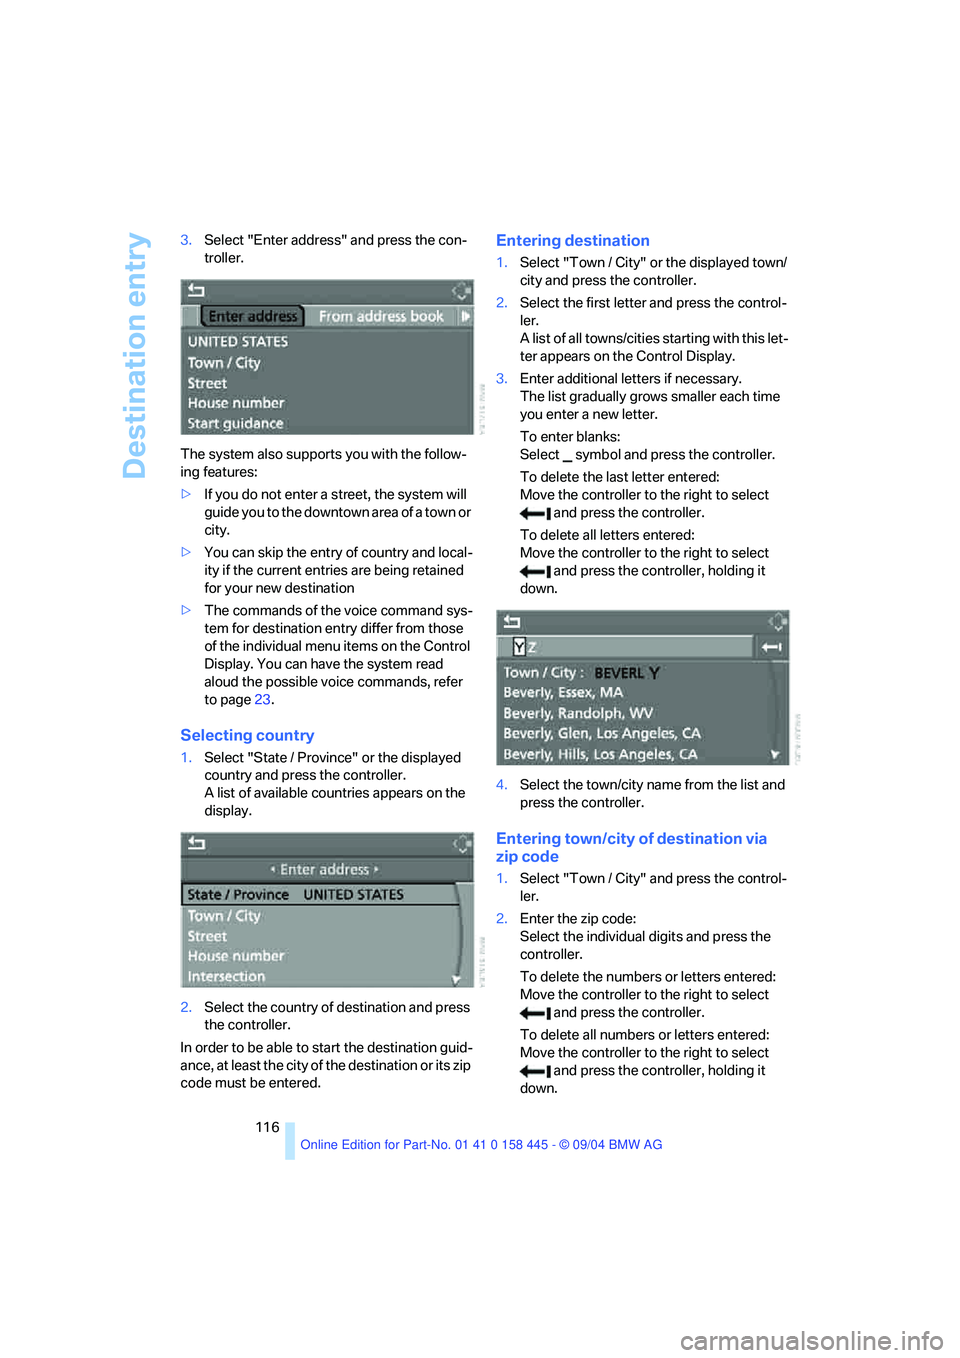
116 3.Select "Enter address" and press the con-
troller.
The system also supports you with the follow-
ing features:
>If you do not enter a street, the system will
guide you to the downtown area of a town or
city.
>You can skip the entry of country and local-
ity if the current entries are being retained
for your new destination
>The commands of the voice command sys-
tem for destination entry differ from those
of the individual menu items on the Control
Display. You can have the system read
aloud the possible voice commands, refer
to page23.
Selecting country
1.Select "State / Province" or the displayed
country and press the controller.
A list of available countries appears on the
display.
2.Select the country of destination and press
the controller.
In order to be able to start the destination guid-
ance, at least the city of the destination or its zip
code must be entered.
Entering destination
1.Select "Town / City" or the displayed town/
city and press the controller.
2.Select the first letter and press the control-
ler.
A list of all towns/cities starting with this let-
ter appears on the Control Display.
3.Enter additional letters if necessary.
The list gradually grows smaller each time
you enter a new letter.
To enter blanks:
Select symbol and press the controller.
To delete the last letter entered:
Move the controller to the right to select
and press the controller.
To delete all letters entered:
Move the controller to the right to select
and press the controller, holding it
down.
4.Select the town/city name from the list and
press the controller.
Entering town/city of destination via
zip code
1.Select "Town / City" and press the control-
ler.
2.Enter the zip code:
Select the individual digits and press the
controller.
To delete the numbers or letters entered:
Move the controller to the right to select
and press the controller.
To delete all numbers or letters entered:
Move the controller to the right to select
and press the controller, holding it
down.
Page 118 of 217
Navigation
Driving tips
117Reference
At a glance
Controls
Communications
Entertainment
Mobility
3.Select the zip code and press the controller.
The corresponding town/city of destination
is displayed.
4.Select the town/city of destination and
press the controller.
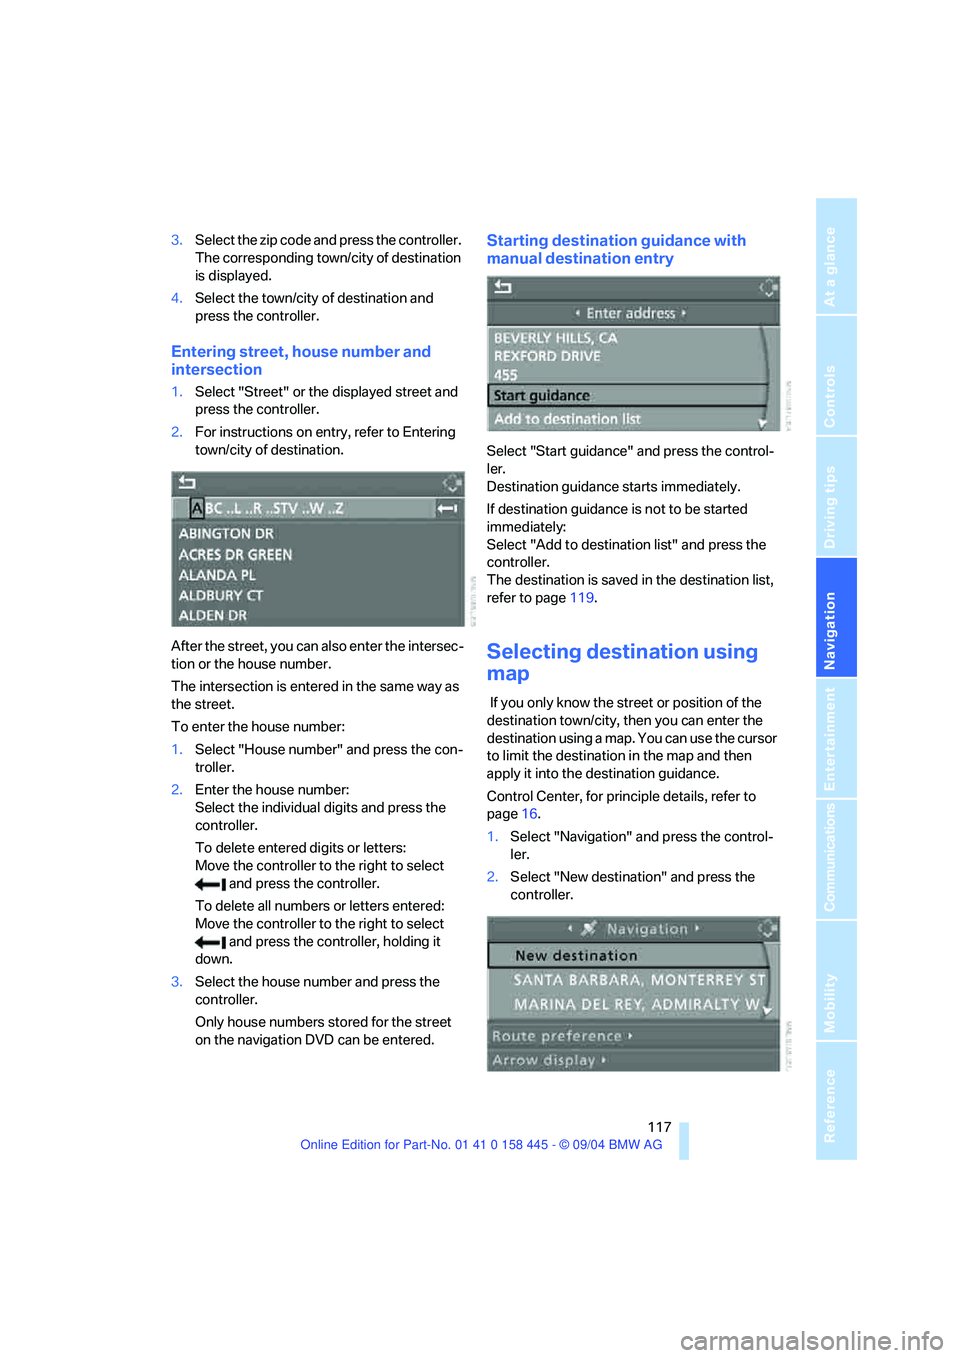
Entering street, house number and
intersection
1.Select "Street" or the displayed street and
press the controller.
2.For instructions on entry, refer to Entering
town/city of destination.
After the street, you can also enter the intersec-
tion or the house number.
The intersection is entered in the same way as
the street.
To enter the house number:
1.Select "House number" and press the con-
troller.
2.Enter the house number:
Select the individual digits and press the
controller.
To delete entered digits or letters:
Move the controller to the right to select
and press the controller.
To delete all numbers or letters entered:
Move the controller to the right to select
and press the controller, holding it
down.
3.Select the house number and press the
controller.
Only house numbers stored for the street
on the navigation DVD can be entered.
Starting destination guidance with
manual destination entry
Select "Start guidance" and press the control-
ler.
Destination guidance starts immediately.
If destination guidance is not to be started
immediately:
Select "Add to destination list" and press the
controller.
The destination is saved in the destination list,
refer to page119.
Selecting destination using
map
If you only know the street or position of the
destination town/city, then you can enter the
destination using a map. You can use the cursor
to limit the destination in the map and then
apply it into the destination guidance.
Control Center, for principle details, refer to
page16.
1.Select "Navigation" and press the control-
ler.
2.Select "New destination" and press the
controller.
Page 119 of 217
Destination entry
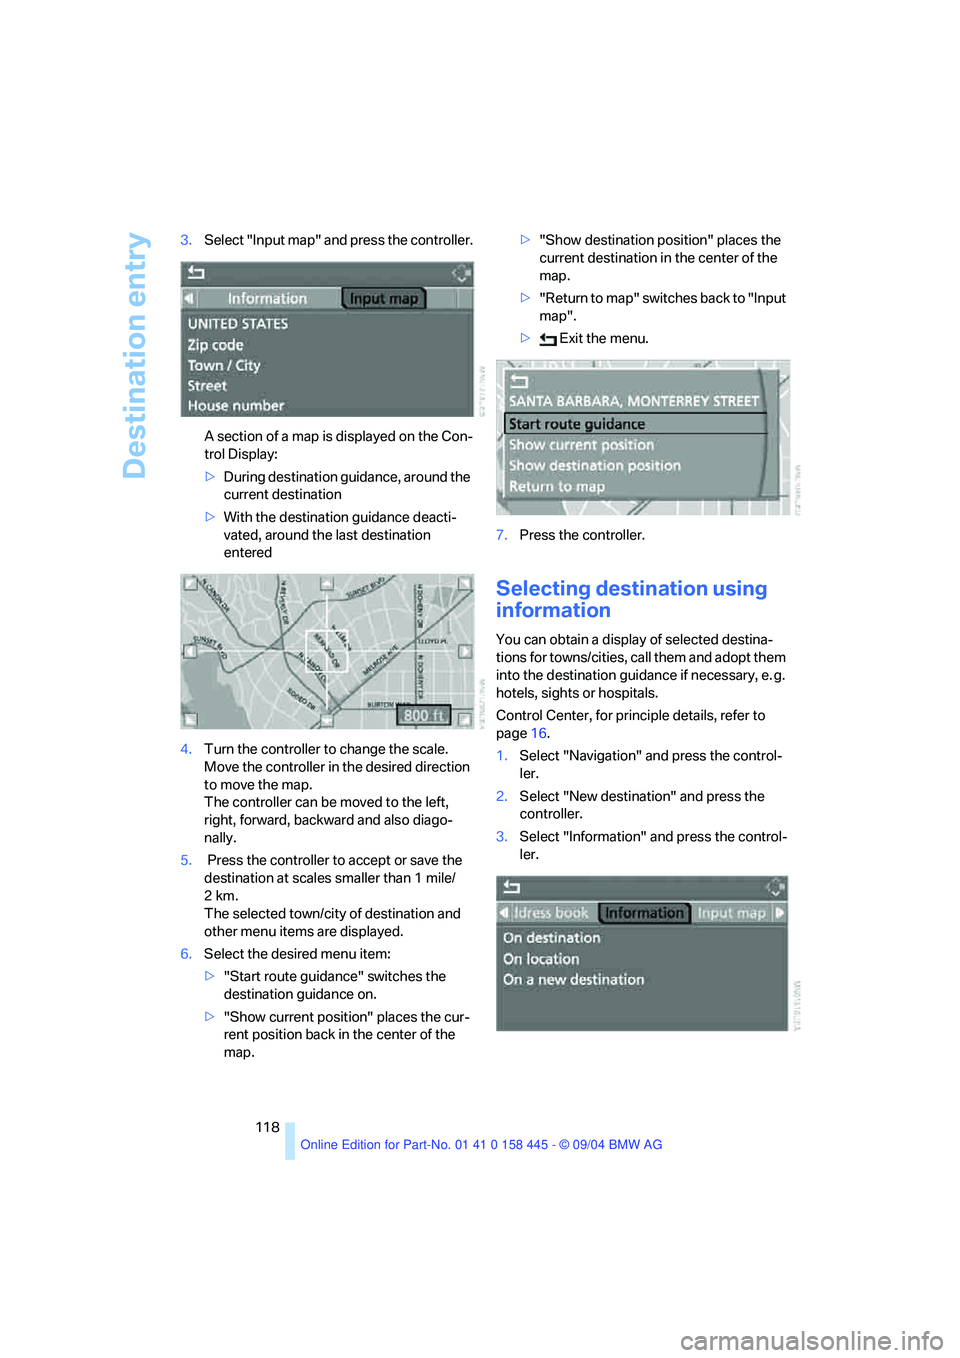
118 3.Select "Input map" and press the controller.
A section of a map is displayed on the Con-
trol Display:
>During destination guidance, around the
current destination
>With the destination guidance deacti-
vated, around the last destination
entered
4.Turn the controller to change the scale.
Move the controller in the desired direction
to move the map.
The controller can be moved to the left,
right, forward, backward and also diago-
nally.
5. Press the controller to accept or save the
destination at scales smaller than 1 mile/
2km.
The selected town/city of destination and
other menu items are displayed.
6.Select the desired menu item:
>"Start route guidance" switches the
destination guidance on.
>"Show current position" places the cur-
rent position back in the center of the
map.>"Show destination position" places the
current destination in the center of the
map.
>" R e t ur n t o m a p " s w i t c he s b a c k t o " I n p u t
map".
> Exit the menu.
7.Press the controller.
Selecting destination using
information
You can obtain a display of selected destina-
tions for towns/cities, call them and adopt them
into the destination guidance if necessary, e. g.
hotels, sights or hospitals.
Control Center, for principle details, refer to
page16.
1.Select "Navigation" and press the control-
ler.
2.Select "New destination" and press the
controller.
3.Select "Information" and press the control-
ler.