2005 BMW 645CI COUPE&CONVERTIBLE warning
[x] Cancel search: warningPage 92 of 217
Controls
91Reference
At a glance
Driving tips
Communications
Navigation
Entertainment
Mobility
Lamps
Parking lamps/low beams
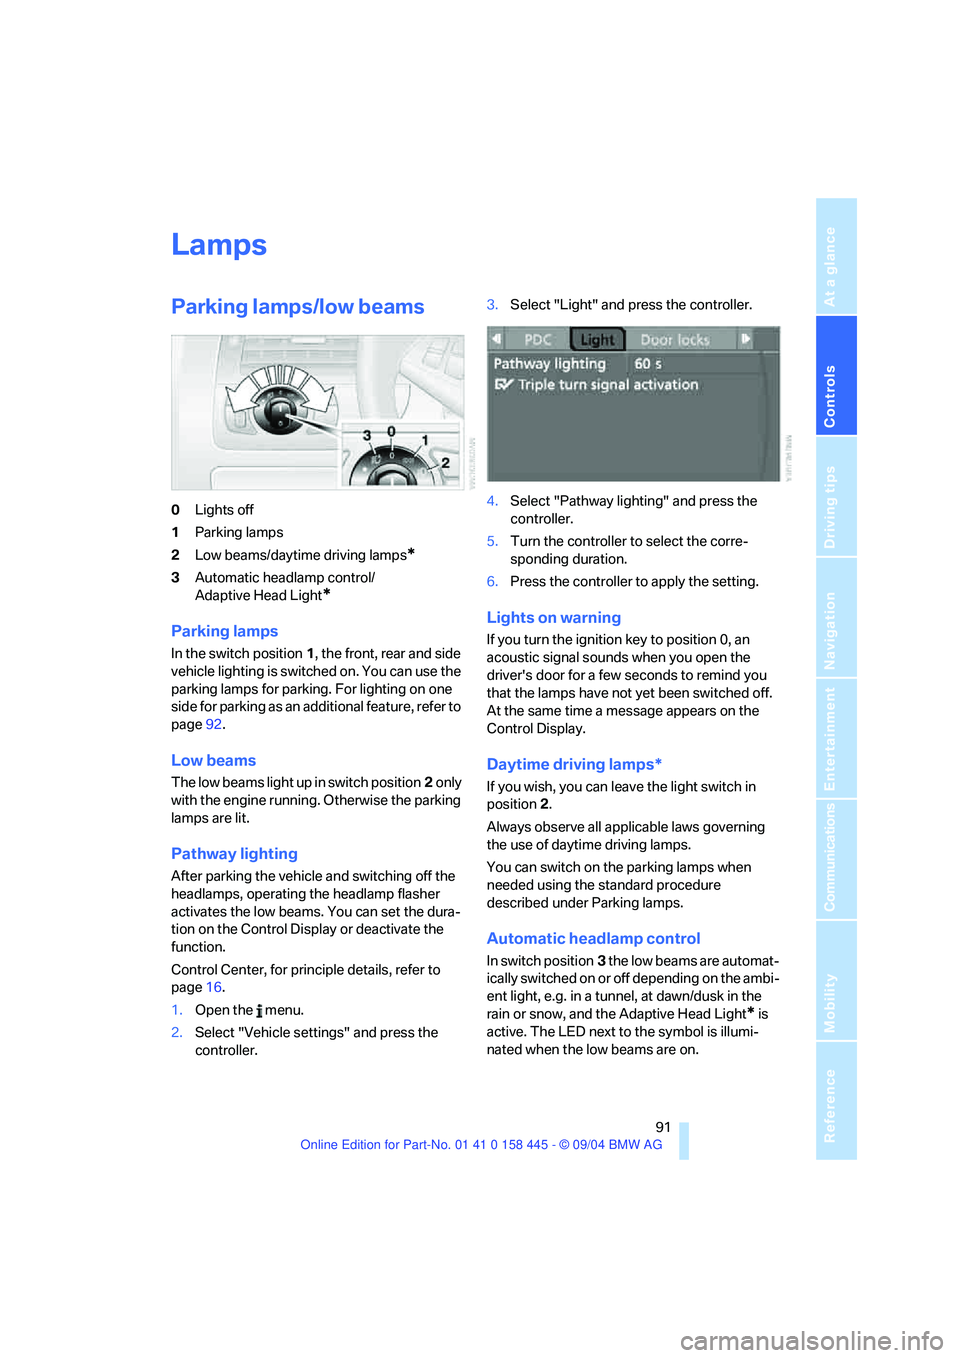
0Lights off
1Parking lamps
2Low beams/daytime driving lamps
*
3Automatic headlamp control/
Adaptive Head Light
*
Parking lamps
In the switch position1, the front, rear and side
vehicle lighting is switched on. You can use the
parking lamps for parking. For lighting on one
side for parking as an additional feature, refer to
page92.
Low beams
The low beams light up in switch position2 only
with the engine running. Otherwise the parking
lamps are lit.
Pathway lighting
After parking the vehicle and switching off the
headlamps, operating the headlamp flasher
activates the low beams. You can set the dura-
tion on the Control Display or deactivate the
function.
Control Center, for principle details, refer to
page16.
1.Open the menu.
2.Select "Vehicle settings" and press the
controller.3.Select "Light" and press the controller.
4.Select "Pathway lighting" and press the
controller.
5.Turn the controller to select the corre-
sponding duration.
6.Press the controller to apply the setting.
Lights on warning
If you turn the ignition key to position 0, an
acoustic signal sounds when you open the
driver's door for a few seconds to remind you
that the lamps have not yet been switched off.
At the same time a message appears on the
Control Display.
Daytime driving lamps*
If you wish, you can leave the light switch in
position2.
Always observe all applicable laws governing
the use of daytime driving lamps.
You can switch on the parking lamps when
needed using the standard procedure
described under Parking lamps.
Automatic headlamp control
In switch position3 the low beams are automat-
ically switched on or off depending on the ambi-
ent light, e.g. in a tunnel, at dawn/dusk in the
rain or snow, and the Adaptive Head Light
* is
active. The LED next to the symbol is illumi-
nated when the low beams are on.
Page 140 of 217
Navigation
Entertainment
Driving tips
139Reference
At a glance
Controls
Communications
Mobility
The stations of the last selection criterion are
displayed again after a short time.
The stations are stored for the remote control
currently in use.
Changing a memory location
Control Center, for principle details, refer to
page16.
1.Select "Presets" and press the controller.
2.Select the desired station.
3.Press the controller.
Other menu items are displayed.
4.Select "Store" and press the controller.
5.Turn the controller until the desired mem-
ory position is selected.
The number of the memory position
appears beside the name or frequency of
the station.
6.Press the controller.
The station is stored.
RDS Radio Data System
RDS transmits additional information in the FM
frequency range. RDS stations have the follow-
ing properties:
>In the case of broadcasting networks that
transmit over a number of frequencies,
there is an automatic switch to the fre-
quency with the best reception quality.
>If the reception conditions are good, the
station names are shown on the Control
Display. If the reception is weak or dis-
rupted, it can take some time before the
station names appear.
Weather Band*
Weather Radio is a service of the National Oce-
anic and Atmospheric Administration – NOAA –
of the U.S. Department of Commerce. Weather
messages are repeated every four to six min-
utes and are routinely revised every one to three
hours, or more frequently if needed. Most of the
stations operate 24 hours daily. During severe
weather, National Weather Service forecasters
can interrupt the routine weather broadcasts
and substitute special warning messages. If you
have a question concerning NOAA Weather
Radio, please contact your nearest National
Weather Service Office, or write to National
Weather Service – Attn: W/OM11 –, National
Oceanic and Atmospheric Administration,
1325 East-West Highway, Silver Spring, MD.
20910.
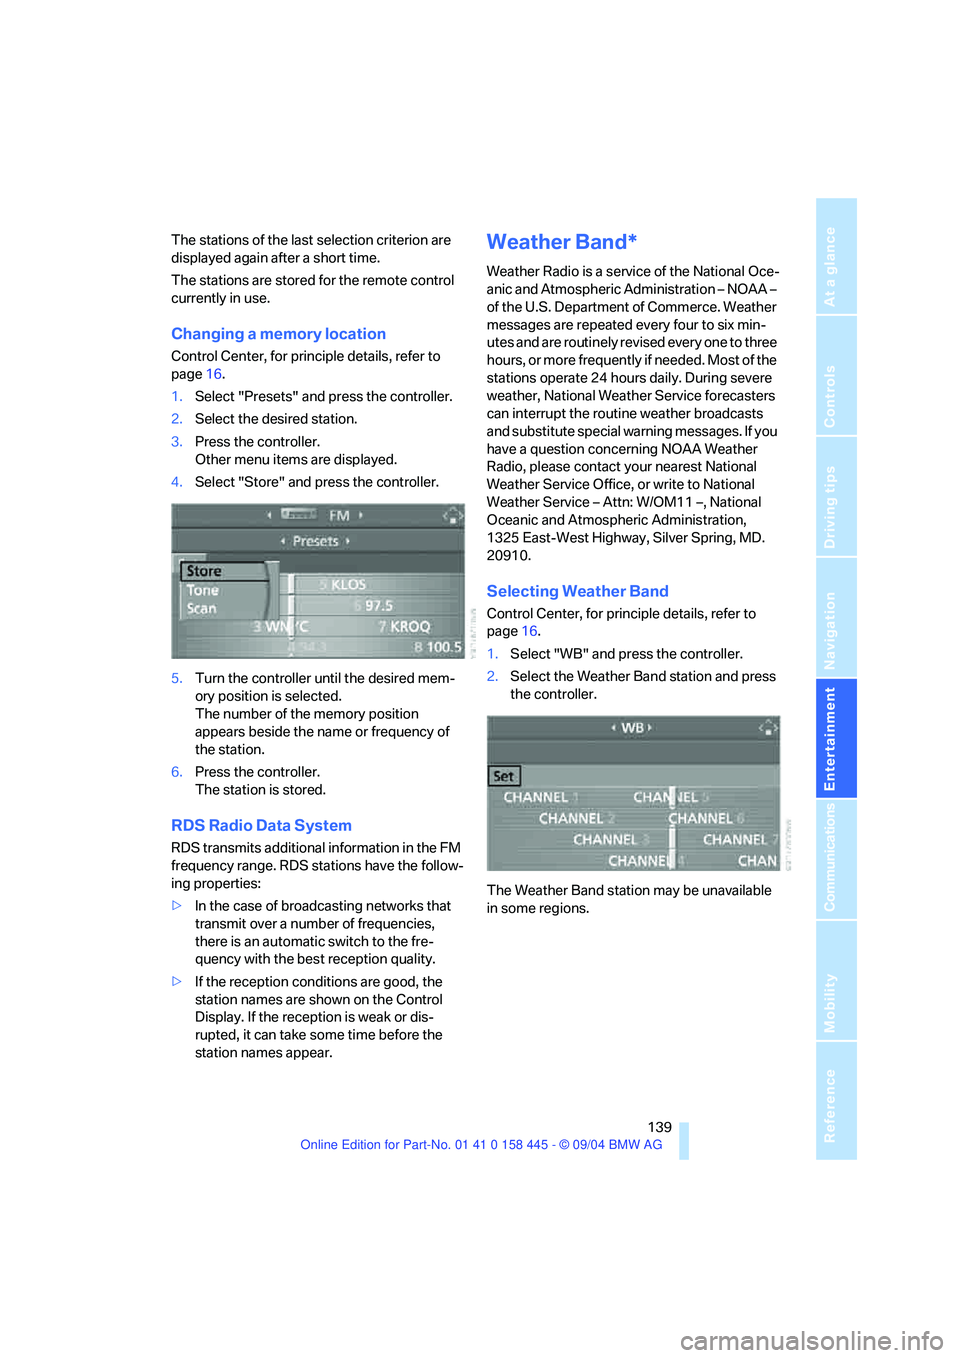
Selecting Weather Band
Control Center, for principle details, refer to
page16.
1.Select "WB" and press the controller.
2.Select the Weather Band station and press
the controller.
The Weather Band station may be unavailable
in some regions.
Page 177 of 217
Under the hood
176
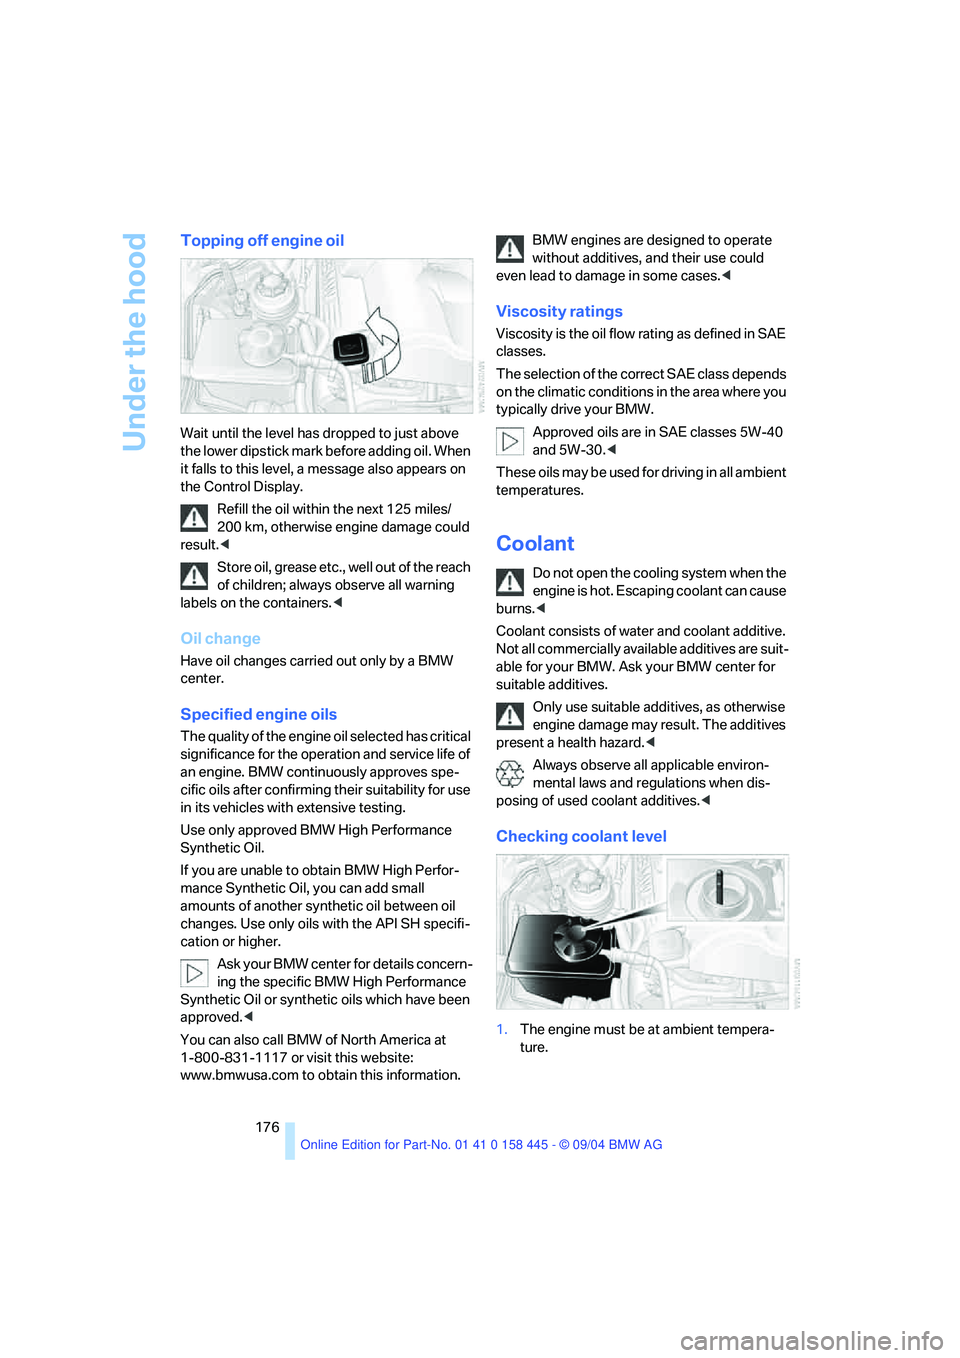
Topping off engine oil
Wait until the level has dropped to just above
the lower dipstick mark before adding oil. When
it falls to this level, a message also appears on
the Control Display.
Refill the oil within the next 125 miles/
200 km, otherwise engine damage could
result.<
Store oil, grease etc., well out of the reach
of children; always observe all warning
labels on the containers.<
Oil change
Have oil changes carried out only by a BMW
center.
Specified engine oils
The quality of the engine oil selected has critical
significance for the operation and service life of
an engine. BMW continuously approves spe-
cific oils after confirming their suitability for use
in its vehicles with extensive testing.
Use only approved BMW High Performance
Synthetic Oil.
If you are unable to obtain BMW High Perfor-
mance Synthetic Oil, you can add small
amounts of another synthetic oil between oil
changes. Use only oils with the API SH specifi-
cation or higher.
Ask your BMW center for details concern-
ing the specific BMW High Performance
Synthetic Oil or synthetic oils which have been
approved.<
You can also call BMW of North America at
1-800-831-1117 or visit this website:
www.bmwusa.com to obtain this information.BMW engines are designed to operate
without additives, and their use could
even lead to damage in some cases.<
Viscosity ratings
Viscosity is the oil flow rating as defined in SAE
classes.
The selection of the correct SAE class depends
on the climatic conditions in the area where you
typically drive your BMW.
Approved oils are in SAE classes 5W-40
and 5W-30.<
These oils may be used for driving in all ambient
temperatures.
Coolant
Do not open the cooling system when the
engine is hot. Escaping coolant can cause
burns.<
Coolant consists of water and coolant additive.
Not all commercially available additives are suit-
able for your BMW. Ask your BMW center for
suitable additives.
Only use suitable additives, as otherwise
engine damage may result. The additives
present a health hazard.<
Always observe all applicable environ-
mental laws and regulations when dis-
posing of used coolant additives.<
Checking coolant level
1.The engine must be at ambient tempera-
ture.
Page 178 of 217
Mobility
177Reference
At a glance
Controls
Driving tips
Communications
Navigation
Entertainment
2.Turn the cap of the expansion tank counter-
clockwise to allow any accumulated pres-
sure to escape, then continue turning to
open.
3.The coolant level is correct when it lies
between the Min and Max mark, also refer to
the drawing next the filler neck.
4.If the coolant is low, slowly add coolant up to
the specified level – do not overfill.
5.Turn the cap until it clicks.
6.Have the reason for the coolant loss elimi-
nated as soon as possible.
Brake system
Malfunction
Brake fluid
The warning lamp lights up in red
in spite of the handbrake being
released; a message appears on the
Control Display.
Stop the vehicle immediately.
The brake fluid in the reservoir has fallen to
below the minimum level. At the same time, a
significantly longer brake pedal path may be
noticeable. Have the system checked immedi-
ately by a BMW center.
Warning lamp for Canadian models.
When you continue driving, an increased
brake pedal path can be necessary, and
significantly longer braking distances might be
required. Please adapt your driving style
accordingly.<
Brake pads
The warning lamp lights up in red
in spite of the handbrake being
released; a message appears on the
Control Display. The brake pads have reached
their minimum pad thickness. Have the brake
pads replaced as soon as possible.Warning lamp for Canadian models.
For your own safety: use only brake pads
that BMW has approved for your particu-
lar vehicle model. As BMW cannot assess the
suitability of other brake pads for use on your
vehicle, BMW is unable to assume continued
responsibility for the vehicle's operating safety
if non-approved pads are installed.<
Page 187 of 217
Giving and receiving assistance
186
Warning triangle*
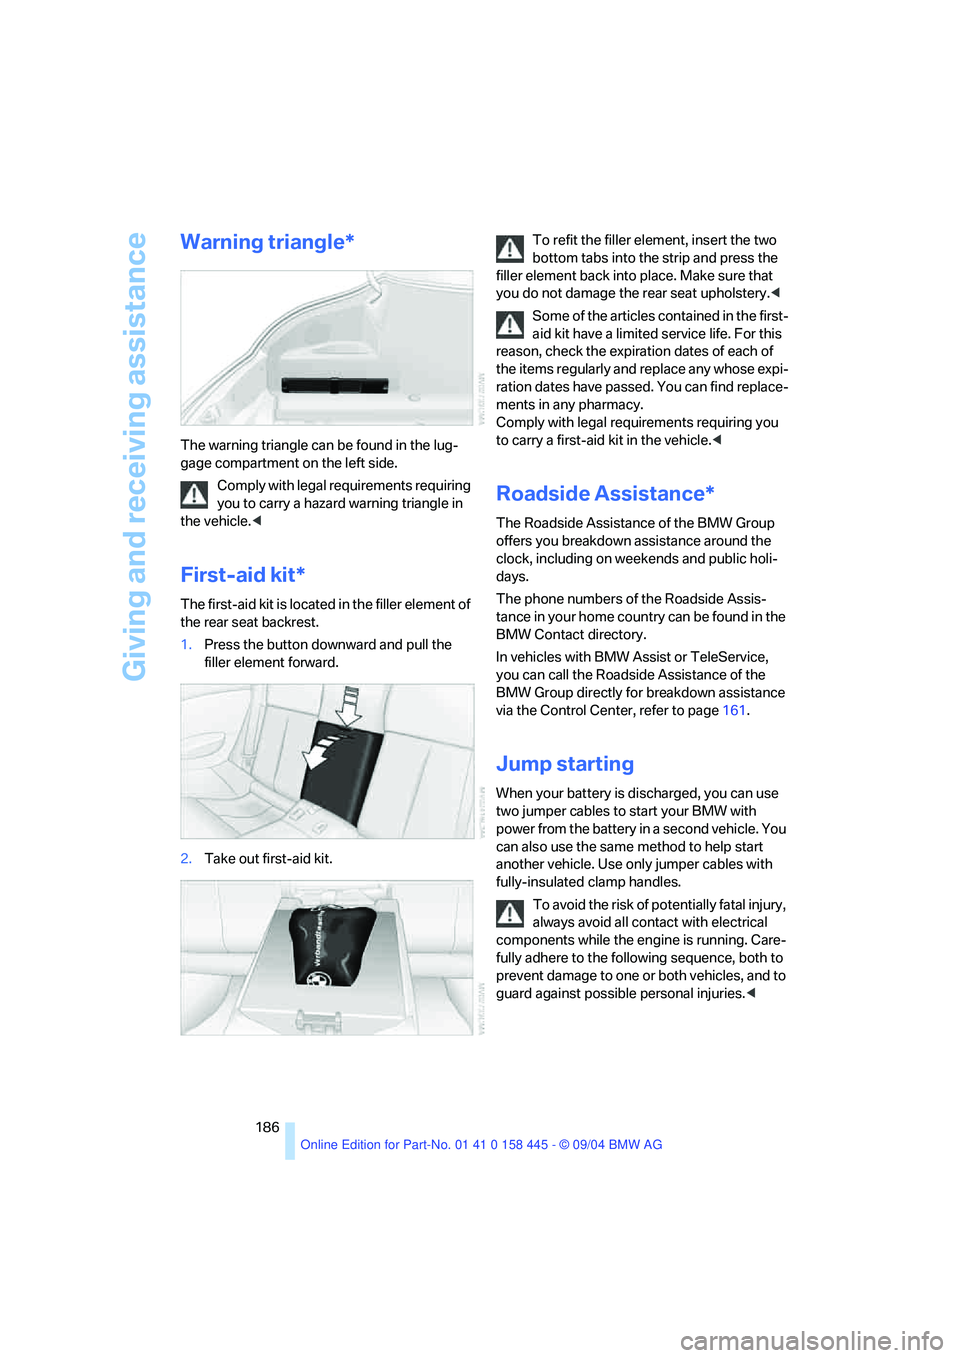
The warning triangle can be found in the lug-
gage compartment on the left side.
Comply with legal requirements requiring
you to carry a hazard warning triangle in
the vehicle.<
First-aid kit*
The first-aid kit is located in the filler element of
the rear seat backrest.
1.Press the button downward and pull the
filler element forward.
2.Take out first-aid kit.To refit the filler element, insert the two
bottom tabs into the strip and press the
filler element back into place. Make sure that
you do not damage the rear seat upholstery.<
Some of the articles contained in the first-
aid kit have a limited service life. For this
reason, check the expiration dates of each of
the items regularly and replace any whose expi-
ration dates have passed. You can find replace-
ments in any pharmacy.
Comply with legal requirements requiring you
to carry a first-aid kit in the vehicle.<
Roadside Assistance*
The Roadside Assistance of the BMW Group
offers you breakdown assistance around the
clock, including on weekends and public holi-
days.
The phone numbers of the Roadside Assis-
tance in your home country can be found in the
BMW Contact directory.
In vehicles with BMW Assist or TeleService,
you can call the Roadside Assistance of the
BMW Group directly for breakdown assistance
via the Control Center, refer to page161.
Jump starting
When your battery is discharged, you can use
two jumper cables to start your BMW with
power from the battery in a second vehicle. You
can also use the same method to help start
another vehicle. Use only jumper cables with
fully-insulated clamp handles.
To avoid the risk of potentially fatal injury,
always avoid all contact with electrical
components while the engine is running. Care-
fully adhere to the following sequence, both to
prevent damage to one or both vehicles, and to
guard against possible personal injuries.<
Page 189 of 217
Giving and receiving assistance
188
Towing and tow-starting
Always observe all applicable towing laws
and regulations.<
Never allow passengers to ride in a towed
vehicle for any reason.<
Use tow fitting
The threaded tow fitting is stored in the tool kit
mounted on the inside of the luggage compart-
ment under the floor mat, refer to page180, and
should always remain in the vehicle. It can be
screwed in at the front or rear of the BMW.
To avoid damage to the tow fitting and the
vehicle, observe the following: only use
the tow fitting that comes with the vehicle and
screw it in as far as possible. Use the tow fitting
for towing only on roads. Avoid lateral strains on
the tow fitting, e.g. do not the lift vehicle by the
tow fitting.<
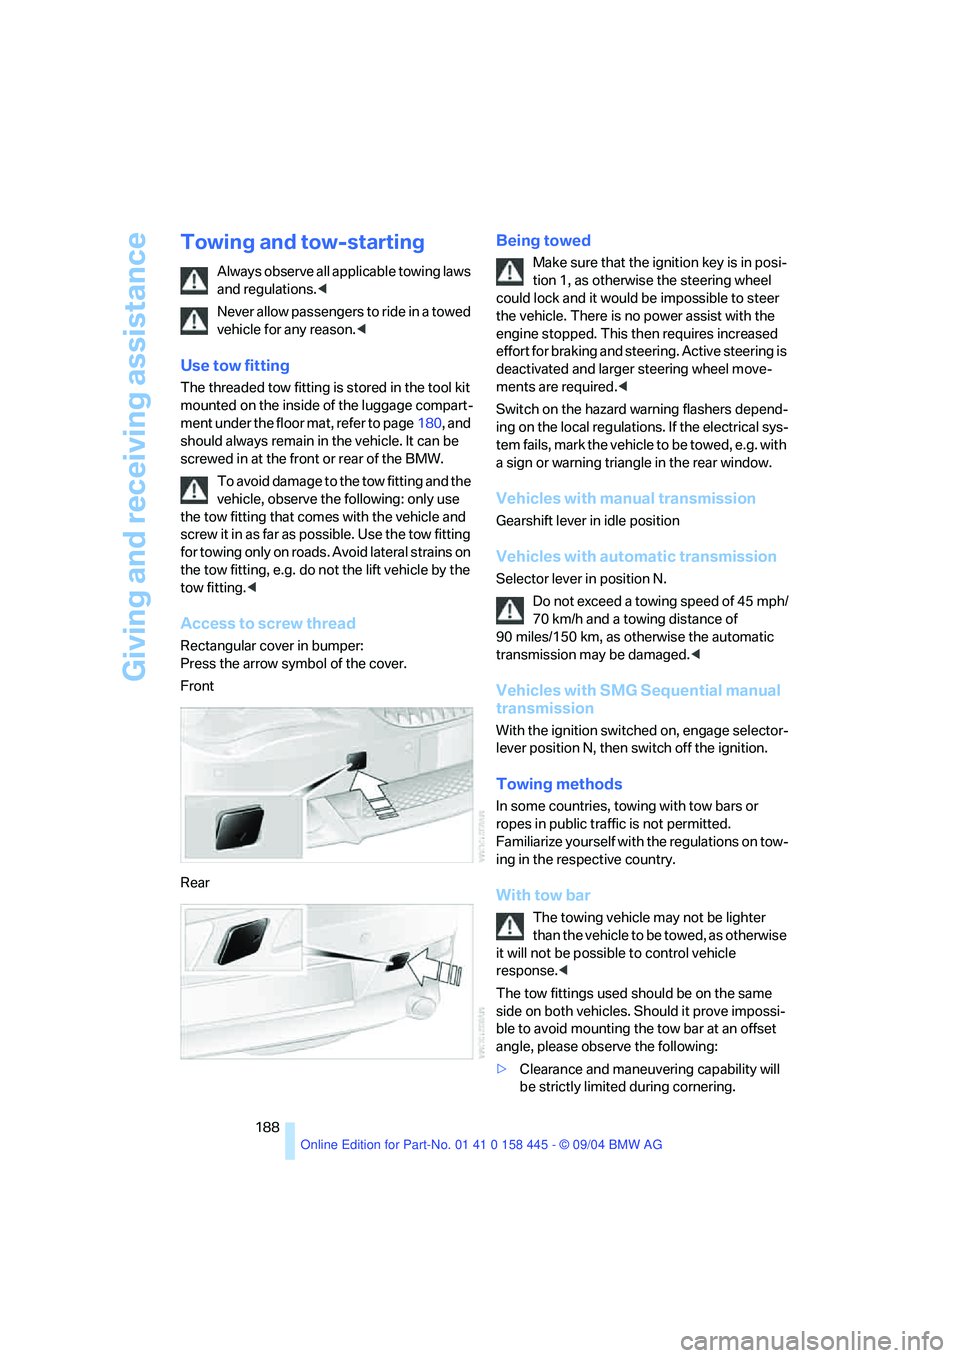
Access to screw thread
Rectangular cover in bumper:
Press the arrow symbol of the cover.
Front
Rear
Being towed
Make sure that the ignition key is in posi-
tion 1, as otherwise the steering wheel
could lock and it would be impossible to steer
the vehicle. There is no power assist with the
engine stopped. This then requires increased
effort for braking and steering. Active steering is
deactivated and larger steering wheel move-
ments are required.<
Switch on the hazard warning flashers depend-
ing on the local regulations. If the electrical sys-
tem fails, mark the vehicle to be towed, e.g. with
a sign or warning triangle in the rear window.
Vehicles with manual transmission
Gearshift lever in idle position
Vehicles with automatic transmission
Selector lever in position N.
Do not exceed a towing speed of 45 mph/
70 km/h and a towing distance of
90 miles/150 km, as otherwise the automatic
transmission may be damaged.<
Vehicles with SMG Sequential manual
transmission
With the ignition switched on, engage selector-
lever position N, then switch off the ignition.
Towing methods
In some countries, towing with tow bars or
ropes in public traffic is not permitted.
Familiarize yourself with the regulations on tow-
ing in the respective country.
With tow bar
The towing vehicle may not be lighter
than the vehicle to be towed, as otherwise
it will not be possible to control vehicle
response.<
The tow fittings used should be on the same
side on both vehicles. Should it prove impossi-
ble to avoid mounting the tow bar at an offset
angle, please observe the following:
>Clearance and maneuvering capability will
be strictly limited during cornering.
Page 190 of 217
Mobility
189Reference
At a glance
Controls
Driving tips
Communications
Navigation
Entertainment
>When mounted at an angle, the tow bar will
exert lateral forces, tending to push the
vehicle sideways.
Secure the tow bar to the tow fitting only.
Otherwise to other vehicle parts could
result.<
With tow rope
When starting off in the towing vehicle, make
sure that the tow rope is taut.
To avoid jerking and the associated
stresses on vehicle components when
towing, always use nylon ropes or nylon straps.
Secure the tow rope to the tow fitting only. Oth-
erwise damage to other vehicle parts could
result.<
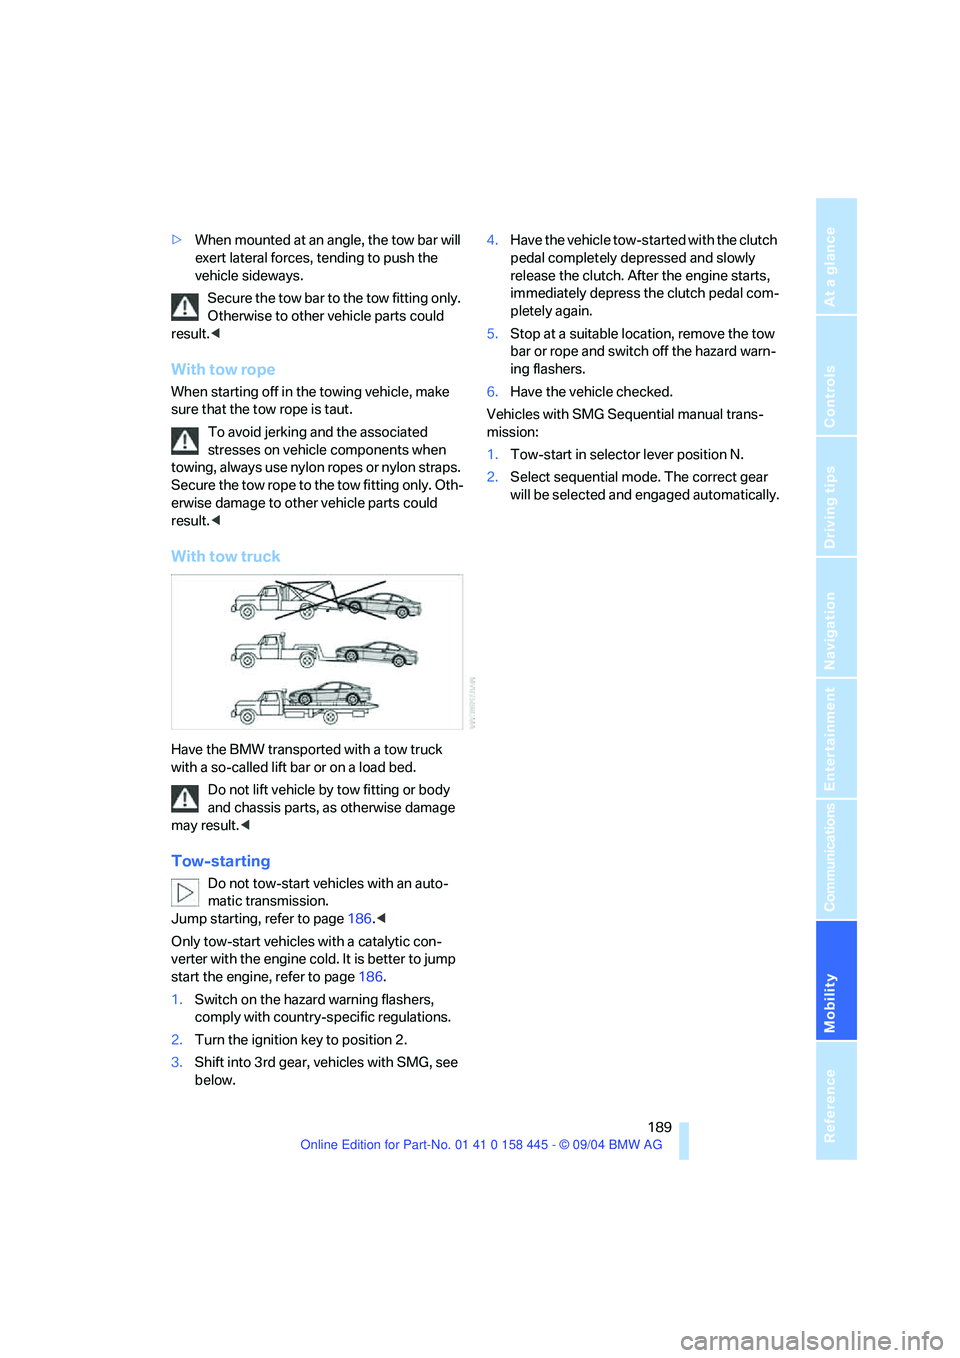
With tow truck
Have the BMW transported with a tow truck
with a so-called lift bar or on a load bed.
Do not lift vehicle by tow fitting or body
and chassis parts, as otherwise damage
may result.<
Tow-starting
Do not tow-start vehicles with an auto-
matic transmission.
Jump starting, refer to page186.<
Only tow-start vehicles with a catalytic con-
verter with the engine cold. It is better to jump
start the engine, refer to page186.
1.Switch on the hazard warning flashers,
comply with country-specific regulations.
2.Turn the ignition key to position 2.
3.Shift into 3rd gear, vehicles with SMG, see
below.4.Have the vehicle tow-started with the clutch
pedal completely depressed and slowly
release the clutch. After the engine starts,
immediately depress the clutch pedal com-
pletely again.
5.Stop at a suitable location, remove the tow
bar or rope and switch off the hazard warn-
ing flashers.
6.Have the vehicle checked.
Vehicles with SMG Sequential manual trans-
mission:
1.Tow-start in selector lever position N.
2.Select sequential mode. The correct gear
will be selected and engaged automatically.
Page 200 of 217
199Reference
At a glance
Controls
Driving tips
Communications
Navigation
Entertainment
Mobility
Everything from A to Z
Index
"..." Identifies Control Display
texts used to select
individual functions,
pointing out where these are
located.
A
ABS Antilock Brake
System81
– indicator lamp83
– malfunction83
ACC, refer to Active cruise
control62
Acceleration assistant with
SMG59
Accessories, refer to Your
individual vehicle5
Activated-charcoal filter97
"Activation time" for
independent ventilation98
Active cruise control62
– indicator lamps64
– malfunction68
– selecting distance65
Active roll stabilization83
Active steering85
– initializing system86
– warning lamp85
Adapting temperature in
upper body region97
Adaptive brake lamps, refer to
Brake Force Display86
Adaptive Head Light92
"Add digits" for portable
phone153
"Address book" for
navigation120
Address for navigation
– deleting121
– entering115
– selecting120
– storing current position120"Add to destination list"117
Adhesive bandages, refer to
First-aid kit186
Adjusting the temperature
with automatic climate
control95
Adjusting the thigh support45
Adjusting tone during audio
operation, refer to Tone
control133
"After opening door"46
"After unlocking"46
Airbags86
– deactivating, Coupe52
– sitting safely44
– warning lamp87
Air distribution
– automatic95
– manual96
Airing, refer to Ventilation97
Air recirculation, refer to AUC
Automatic recirculated-air
control95
"Air recirculation on / off"51
Air vents, refer to
Ventilation94
Air volume95
AKI, refer to Fuel
specifications167
Alarm system34
– avoiding unintentional
alarms35
– interior motion sensor35
– switching off alarm34
– switching off tilt alarm
sensor and interior motion
sensor35
– tilt alarm sensor35
All around the center
console14
All around the steering
wheel10
"All channels"141"All doors"29
All-season tires, refer to
Winter tires172
"AM", reception
range133,136
Antenna for portable
phone150
Antifreeze
– coolant176
– washer fluid61
Antilock Brake System
ABS81
– indicator lamp83
Anti-theft alarm system, refer
to Alarm system34
Anti-theft system29
Anti-trapping mechanism
– glass sunroof38
– power windows37
Approved axle loads, refer to
Weights192
Approved gross vehicle
weight, refer to Weights192
Armrest, refer to Center
armrest102
Arrival time
– refer to Computer75
– refer to Starting destination
guidance124
"Arrow display" during
Navigation127
Ashtray103
Assist, refer to BMW
Assist159
Assistance systems, refer to
Driving stability control
systems81
Assistance window20
"Assist. window off"21
AUC Automatic recirculated-
air control95
"Audio"133