2005 BMW 645CI COUPE&CONVERTIBLE service
[x] Cancel search: servicePage 72 of 217
Controls
71Reference
At a glance
Driving tips
Communications
Navigation
Entertainment
Mobility
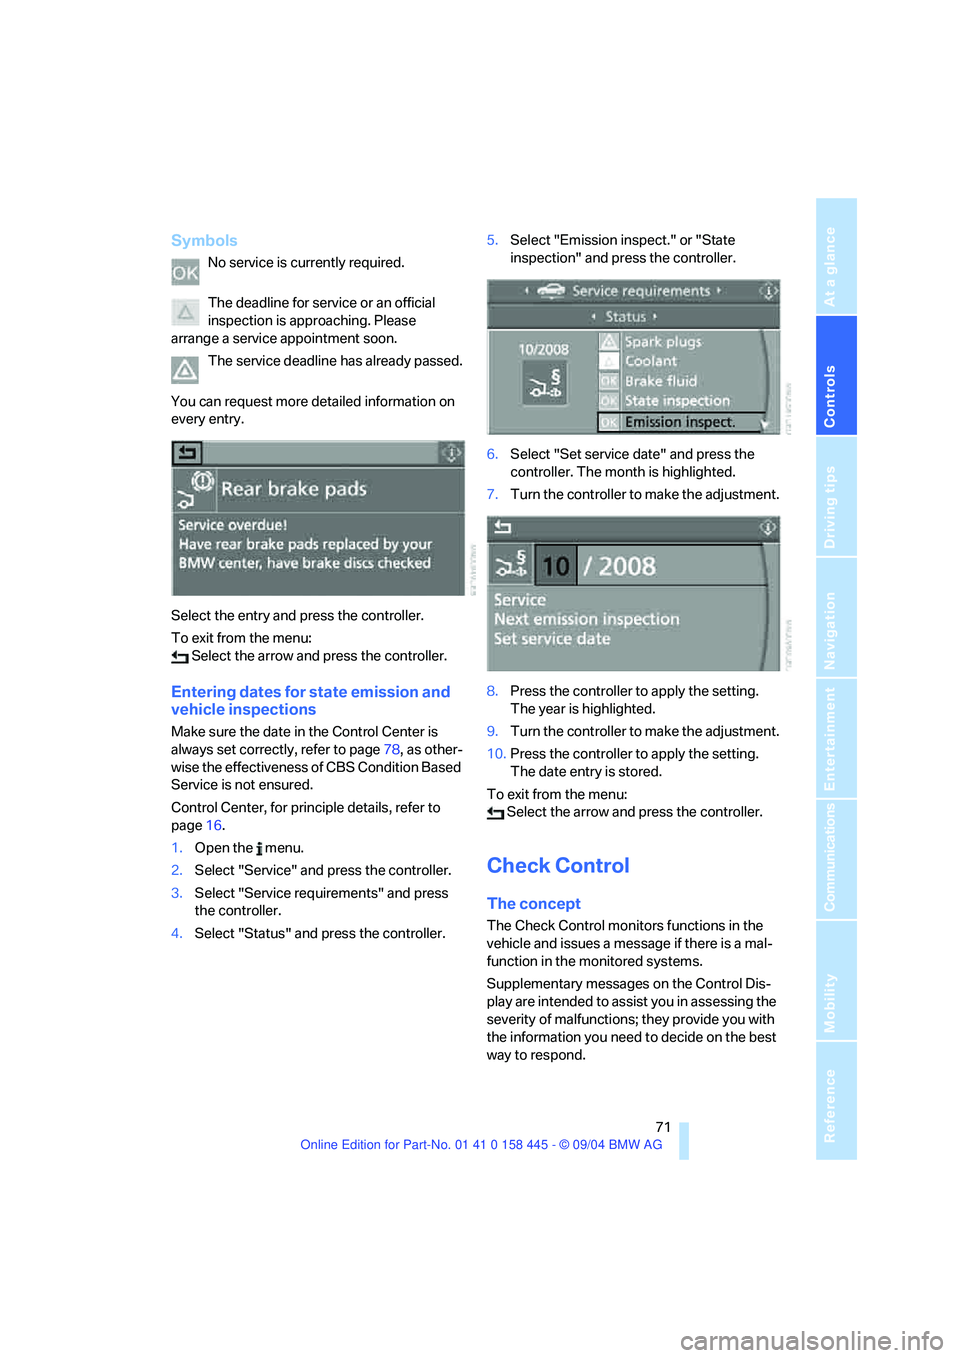
Symbols
No service is currently required.
The deadline for service or an official
inspection is approaching. Please
arrange a service appointment soon.
The service deadline has already passed.
You can request more detailed information on
every entry.
Select the entry and press the controller.
To exit from the menu:
Select the arrow and press the controller.
Entering dates for state emission and
vehicle inspections
Make sure the date in the Control Center is
always set correctly, refer to page78, as other-
wise the effectiveness of CBS Condition Based
Service is not ensured.
Control Center, for principle details, refer to
page16.
1.Open the menu.
2.Select "Service" and press the controller.
3.Select "Service requirements" and press
the controller.
4.Select "Status" and press the controller.5.Select "Emission inspect." or "State
inspection" and press the controller.
6.Select "Set service date" and press the
controller. The month is highlighted.
7.Turn the controller to make the adjustment.
8.Press the controller to apply the setting.
The year is highlighted.
9.Turn the controller to make the adjustment.
10.Press the controller to apply the setting.
The date entry is stored.
To exit from the menu:
Select the arrow and press the controller.
Check Control
The concept
The Check Control monitors functions in the
vehicle and issues a message if there is a mal-
function in the monitored systems.
Supplementary messages on the Control Dis-
play are intended to assist you in assessing the
severity of malfunctions; they provide you with
the information you need to decide on the best
way to respond.
Page 74 of 217
Controls
73Reference
At a glance
Driving tips
Communications
Navigation
Entertainment
Mobility
Displaying stored messages
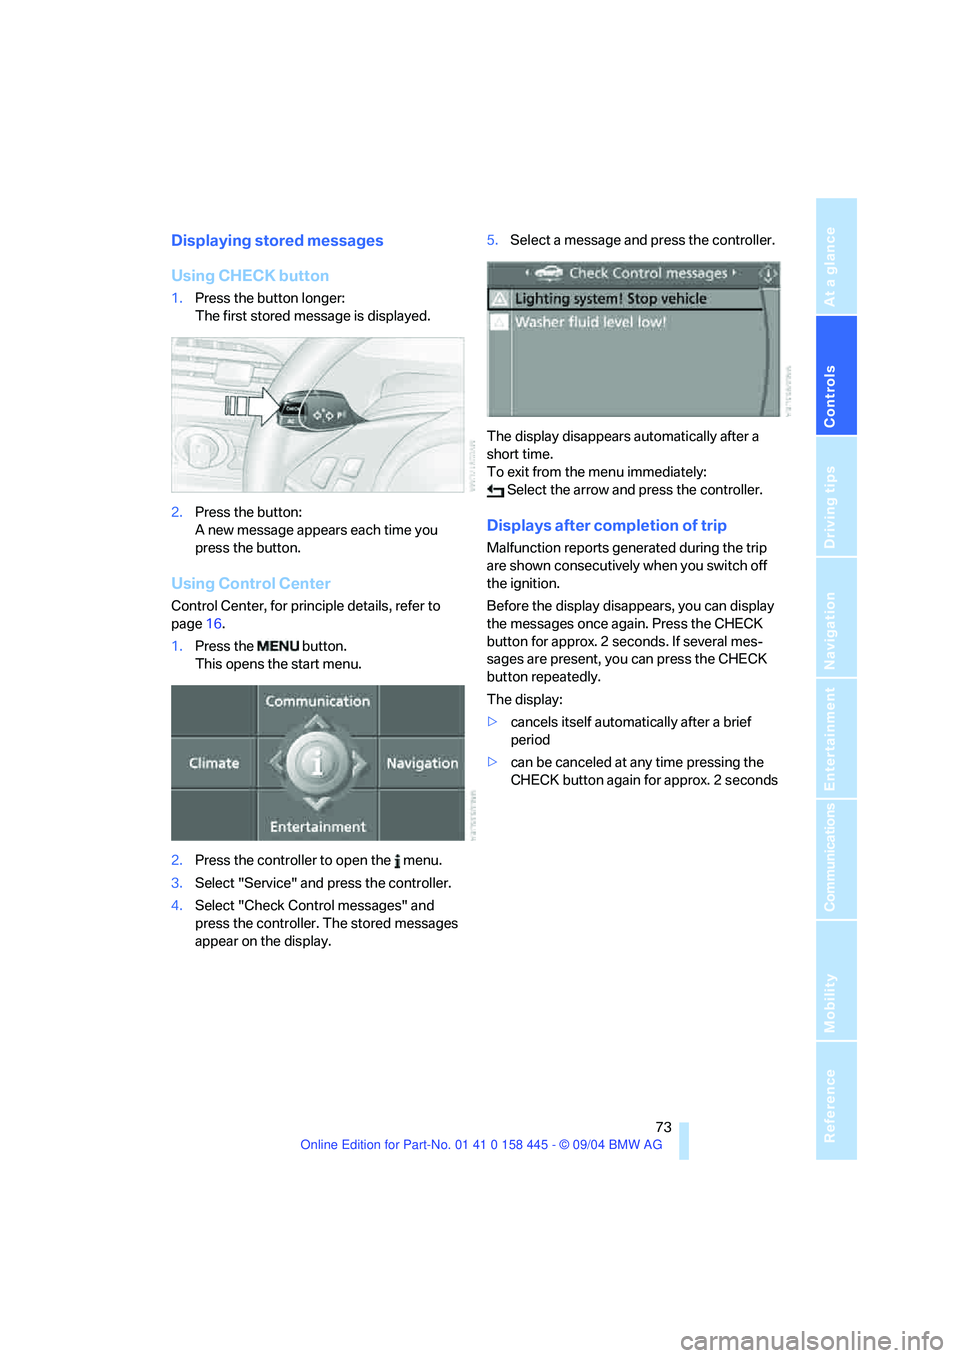
Using CHECK button
1.Press the button longer:
The first stored message is displayed.
2.Press the button:
A new message appears each time you
press the button.
Using Control Center
Control Center, for principle details, refer to
page16.
1.Press the button.
This opens the start menu.
2.Press the controller to open the menu.
3.Select "Service" and press the controller.
4.Select "Check Control messages" and
press the controller. The stored messages
appear on the display.5.Select a message and press the controller.
The display disappears automatically after a
short time.
To exit from the menu immediately:
Select the arrow and press the controller.
Displays after completion of trip
Malfunction reports generated during the trip
are shown consecutively when you switch off
the ignition.
Before the display disappears, you can display
the messages once again. Press the CHECK
button for approx. 2 seconds. If several mes-
sages are present, you can press the CHECK
button repeatedly.
The display:
>cancels itself automatically after a brief
period
>can be canceled at any time pressing the
CHECK button again for approx. 2 seconds
Page 88 of 217
Controls
87Reference
At a glance
Driving tips
Communications
Navigation
Entertainment
Mobility
Do not apply adhesive materials to the
cover panels of the airbags, cover them or
modify them in any other way.
Do not attempt to remove the airbag retention
system from the vehicle. Never modify or
tamper with either the wiring or the individual
components in the airbag system. This cate-
gory includes the upholstery in the center of the
steering wheel, on the instrument panel, the
side trim panels on the doors and on the Coupe,
the roof pillars along with the sides of the head-
liner. Do not attempt to remove or dismantle the
steering wheel.
Do not touch the individual components
directly after the system has been triggered,
because there is a danger of burns.
If you note any indication of system malfunc-
tion, if you wish to have an airbag deactivated,
or if the airbag retention system is triggered in
response to an accident, you should always
entrust all inspection, repair and dismantling
operations to your BMW center. Unprofessional
attempts to service the system could lead to
failure in an emergency or undesired airbag
activation, either of which could result in per-
sonal injury.<
Airbag warning information is also provided on
the sun visors.
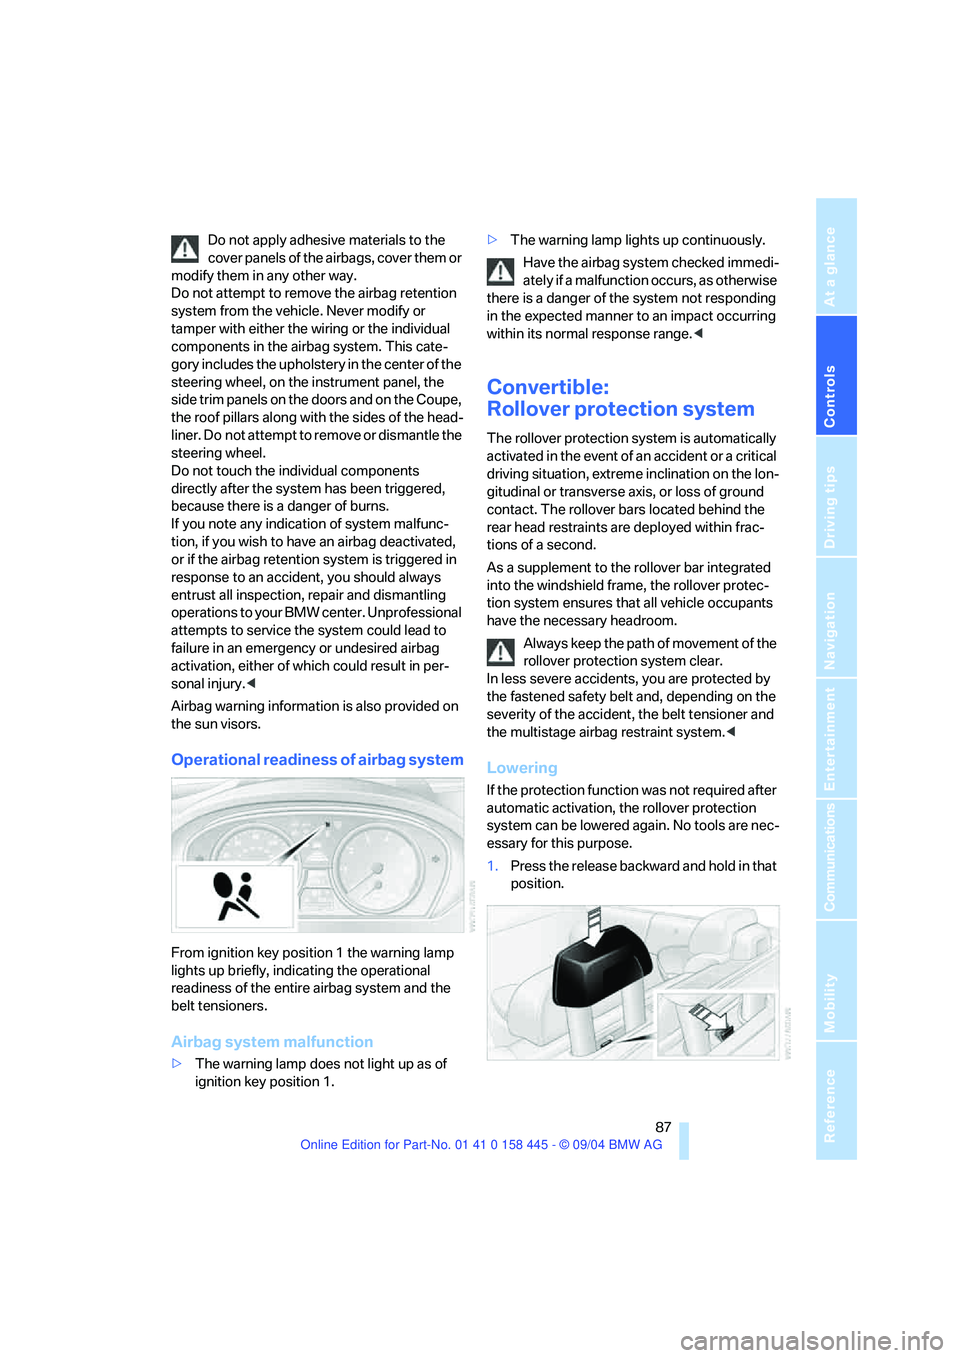
Operational readiness of airbag system
From ignition key position 1 the warning lamp
lights up briefly, indicating the operational
readiness of the entire airbag system and the
belt tensioners.
Airbag system malfunction
>The warning lamp does not light up as of
ignition key position 1.>The warning lamp lights up continuously.
Have the airbag system checked immedi-
ately if a malfunction occurs, as otherwise
there is a danger of the system not responding
in the expected manner to an impact occurring
within its normal response range.<
Convertible:
Rollover protection system
The rollover protection system is automatically
activated in the event of an accident or a critical
driving situation, extreme inclination on the lon-
gitudinal or transverse axis, or loss of ground
contact. The rollover bars located behind the
rear head restraints are deployed within frac-
tions of a second.
As a supplement to the rollover bar integrated
into the windshield frame, the rollover protec-
tion system ensures that all vehicle occupants
have the necessary headroom.
Always keep the path of movement of the
rollover protection system clear.
In less severe accidents, you are protected by
the fastened safety belt and, depending on the
severity of the accident, the belt tensioner and
the multistage airbag restraint system.<
Lowering
If the protection function was not required after
automatic activation, the rollover protection
system can be lowered again. No tools are nec-
essary for this purpose.
1.Press the release backward and hold in that
position.
Page 89 of 217
Technology for comfort, convenience and safety
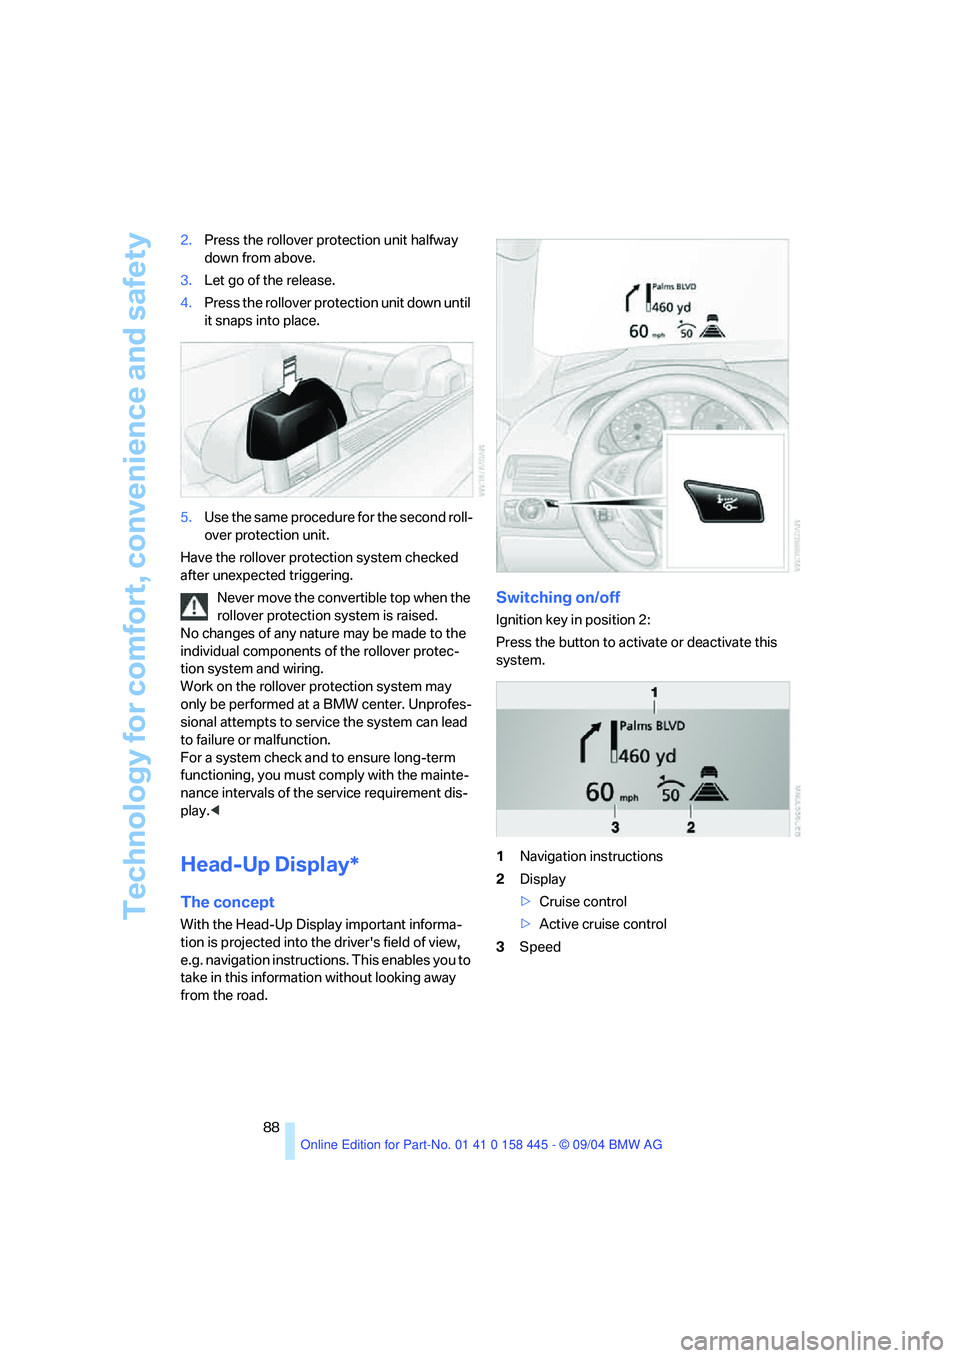
88 2.Press the rollover protection unit halfway
down from above.
3.Let go of the release.
4.Press the rollover protection unit down until
it snaps into place.
5.Use the same procedure for the second roll-
over protection unit.
Have the rollover protection system checked
after unexpected triggering.
Never move the convertible top when the
rollover protection system is raised.
No changes of any nature may be made to the
individual components of the rollover protec-
tion system and wiring.
Work on the rollover protection system may
only be performed at a BMW center. Unprofes-
sional attempts to service the system can lead
to failure or malfunction.
For a system check and to ensure long-term
functioning, you must comply with the mainte-
nance intervals of the service requirement dis-
play.<
Head-Up Display*
The concept
With the Head-Up Display important informa-
tion is projected into the driver's field of view,
e.g. navigation instructions. This enables you to
take in this information without looking away
from the road.
Switching on/off
Ignition key in position 2:
Press the button to activate or deactivate this
system.
1Navigation instructions
2Display
>Cruise control
>Active cruise control
3Speed
Page 109 of 217

Things to remember when driving
108
Things to remember when driving
Breaking-in
Moving parts need time to adjust to one
another. To ensure that your vehicle continues
to provide optimized economy of operation
throughout an extended service life, we request
that you devote careful attention to the follow-
ing section.
Engine and differential
Up to 1,200 miles/2,000 km:
You should attempt to vary both vehicle and
engine speeds. Until the break-in period has
been completed, you should also refrain from
exceeding an engine speed of 4,500 rpm or a
driving speed of 100 mph/160 km/h.
Always obey all official speed limits.
Avoid full-throttle operation and use of the
transmission's kick-down mode during these
initial miles.
Once you have driven 1,200 miles/2,000 km,
the engine and vehicle speeds can be gradually
increased.
SMG Sequential manual transmission
Do not use the acceleration assistant during the
break-in period, refer to page59.
Tires
Due to technical factors associated with their
manufacture, tires do not achieve their full trac-
tion potential until after an initial break-in
period. Therefore, drive reservedly during the
first 200 miles/300 km.
Brake system
Brakes require an initial break-in period of
approx. 300 miles/500 km to achieve optimized
contact and wear patterns between brake pads
and rotors.
Clutch
The function of the clutch is only at its opti-
mized level after a distance driven of approx.
300 miles/500 km. During this break-in period,
engage the clutch gently.
After component replacement
You should also comply with these break-in
procedures should the components mentioned
above need to be replaced at a later point.
General driving notes
Close the luggage compartment lid
Operate the vehicle only when the lug-
gage compartment lid is completely
closed. Otherwise, exhaust fumes could pene-
trate to the interior of the vehicle.<
If special circumstances should make it abso-
lutely necessary to operate the vehicle with the
luggage compartment lid open:
1.Coupe: close both windows and the glass
sunroof.
Convertible: with closed top, close all win-
dows.
2.Adjust the automatic climate control to sup-
ply a high air volume, refer to page95.
Hot exhaust system
As in all vehicles equipped with a catalytic
converter, extremely high temperatures
are generated in this vehicle. Do not remove the
heat shields installed adjacent to various sec-
tions of the exhaust system, and never apply
undercoating to them. When driving, standing
at idle and while parking, take care to avoid pos-
sible contact between the hot exhaust system
and any highly flammable materials such as hay,
leaves, grass, etc. Such contact could lead to a
fire, and with it the risk of serious property dam-
age as well as personal injury.<
Page 140 of 217
Navigation
Entertainment
Driving tips
139Reference
At a glance
Controls
Communications
Mobility
The stations of the last selection criterion are
displayed again after a short time.
The stations are stored for the remote control
currently in use.
Changing a memory location
Control Center, for principle details, refer to
page16.
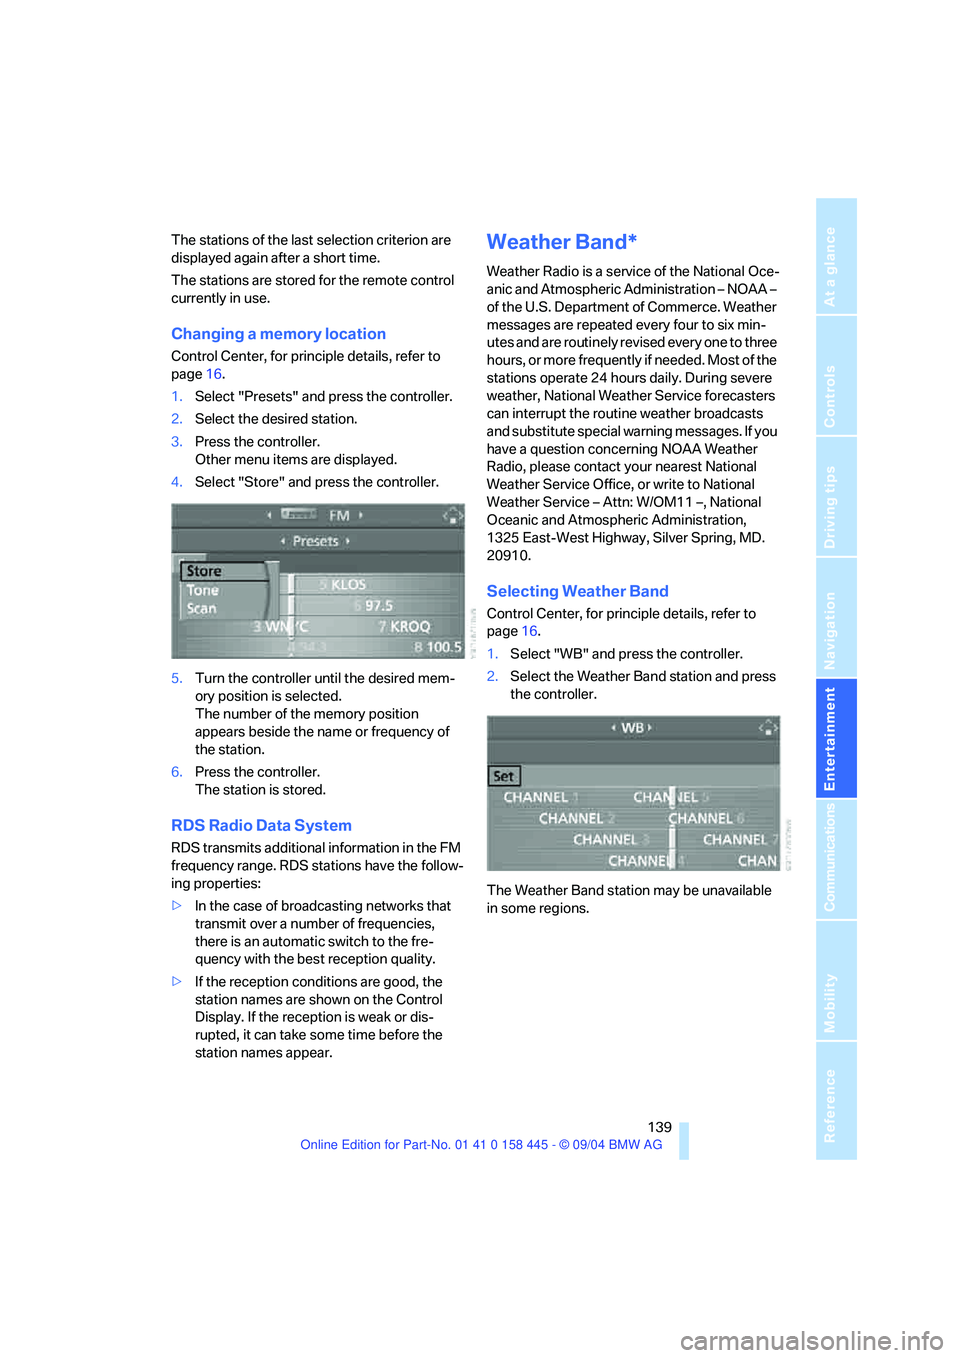
1.Select "Presets" and press the controller.
2.Select the desired station.
3.Press the controller.
Other menu items are displayed.
4.Select "Store" and press the controller.
5.Turn the controller until the desired mem-
ory position is selected.
The number of the memory position
appears beside the name or frequency of
the station.
6.Press the controller.
The station is stored.
RDS Radio Data System
RDS transmits additional information in the FM
frequency range. RDS stations have the follow-
ing properties:
>In the case of broadcasting networks that
transmit over a number of frequencies,
there is an automatic switch to the fre-
quency with the best reception quality.
>If the reception conditions are good, the
station names are shown on the Control
Display. If the reception is weak or dis-
rupted, it can take some time before the
station names appear.
Weather Band*
Weather Radio is a service of the National Oce-
anic and Atmospheric Administration – NOAA –
of the U.S. Department of Commerce. Weather
messages are repeated every four to six min-
utes and are routinely revised every one to three
hours, or more frequently if needed. Most of the
stations operate 24 hours daily. During severe
weather, National Weather Service forecasters
can interrupt the routine weather broadcasts
and substitute special warning messages. If you
have a question concerning NOAA Weather
Radio, please contact your nearest National
Weather Service Office, or write to National
Weather Service – Attn: W/OM11 –, National
Oceanic and Atmospheric Administration,
1325 East-West Highway, Silver Spring, MD.
20910.
Selecting Weather Band
Control Center, for principle details, refer to
page16.
1.Select "WB" and press the controller.
2.Select the Weather Band station and press
the controller.
The Weather Band station may be unavailable
in some regions.
Page 143 of 217
Radio
142
Storing channel
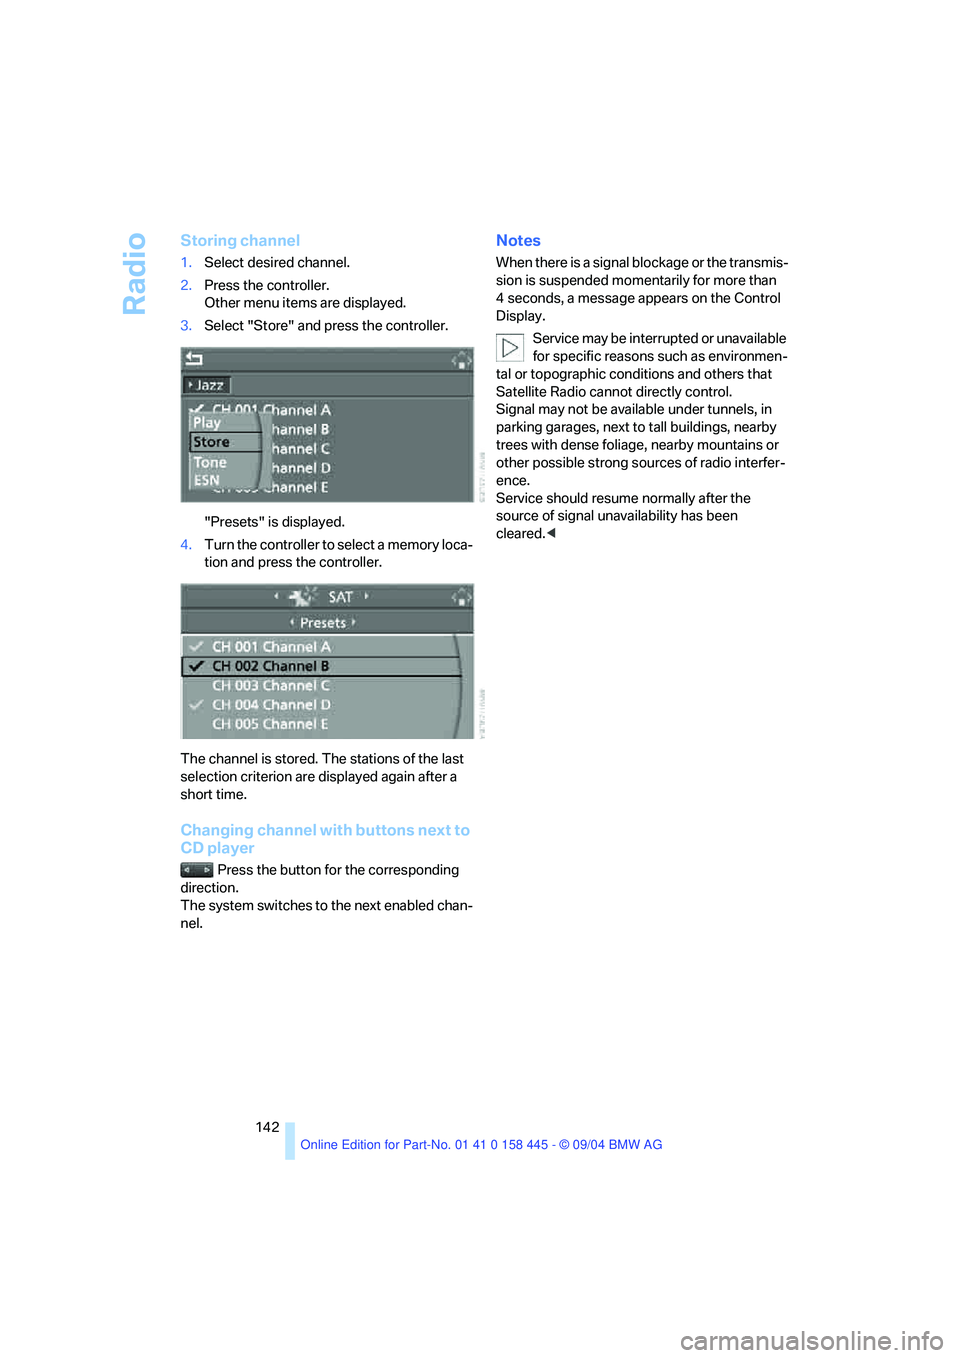
1.Select desired channel.
2.Press the controller.
Other menu items are displayed.
3.Select "Store" and press the controller.
"Presets" is displayed.
4.Turn the controller to select a memory loca-
tion and press the controller.
The channel is stored. The stations of the last
selection criterion are displayed again after a
short time.
Changing channel with buttons next to
CD player
Press the button for the corresponding
direction.
The system switches to the next enabled chan-
nel.
Notes
When there is a signal blockage or the transmis-
sion is suspended momentarily for more than
4 seconds, a message appears on the Control
Display.
Service may be interrupted or unavailable
for specific reasons such as environmen-
tal or topographic conditions and others that
Satellite Radio cannot directly control.
Signal may not be available under tunnels, in
parking garages, next to tall buildings, nearby
trees with dense foliage, nearby mountains or
other possible strong sources of radio interfer-
ence.
Service should resume normally after the
source of signal unavailability has been
cleared.<
Page 150 of 217
Communications
This chapter summarizes how to operate
your BMW portable phone via the
Control Center or voice control and how
to use BMW Assist or TeleService.
Communications