2005 BMW 645CI COUPE&CONVERTIBLE ECU
[x] Cancel search: ECUPage 2 of 217
645CiOwner's Manual for Vehicle
Congratulations, and thank you for choosing a BMW.
Thorough familiarity with your vehicle will provide you with
enhanced control and security when you drive it. We therefore
have this request:
Please take the time to read this Owner's Manual and familiarize
yourself with the information that we have compiled for you
before starting off in your new vehicle. It contains important data
and instructions intended to assist you in gaining maximum use
and satisfaction from your BMW's unique range of technical fea-
tures. The manual also contains information on maintenance
designed to enhance operating safety and contribute to main-
taining the value of your BMW throughout an extended service
life.
This Owner's Manual should be considered a permanent part of
this vehicle. It should stay with the vehicle when sold to provide
the next owner with important operating, safety and maintenance
information.
This manual is supplemented by a Service and Warranty Informa-
tion Booklet for US models or a Warranty and Service Guide
Booklet for Canadian models.
We wish you an enjoyable driving experience.
BMW AG
Page 29 of 217

Opening and closing
28
Opening and closing
The key set
1Every master key with remote control con-
tains an extended-life battery as a power
supply, which is charged automatically in
the ignition lock as you drive. You should
use each master key at least twice a year in
order to maintain the charge condition.
Depending on which master key is detected
by the vehicle during unlocking, different
settings in the vehicle are requested and
executed, refer to Key Memory below.
2Spare key for storage in a safe place, such
as in your wallet.
This key does not fit in the locks of the lug-
gage compartment lid and the hotel func-
tion, refer to page32. This is an advantage
when valet parking at a hotel, for example.
The key is not intended for constant use.
New keys
New, additional or replacement keys are avail-
able at your BMW center.
Key Memory
How the system functions
Doubtless you have often reflected on how
great it would be if you could configure your
vehicle's various adjustment settings to meet
your own personal requirements. BMW has
designed several freely selectable options into
the vehicle during its development. You can set
these as desired via the Control Center.You can have up to four different basic settings
adjusted for four different persons for the spe-
cific keys. The only requirement is that each
person uses his or her own master key with
remote control.
When your vehicle is unlocked with the remote
control, the vehicle recognizes the individual
key by means of a data exchange and makes
adjustments accordingly.
Scope of Key Memory
>When unlocking with the remote control,
either unlock only the driver's door or the
entire vehicle, refer to page29.
>Locking the vehicle after a short time or
after starting to drive, refer to page31
>Assigning the programmable function but-
tons on the steering wheel, refer to page51.
>Settings for the display on the Control Dis-
play:
>Brightness of the Control Display, refer
to page77
>Units of measure for consumption,
route/distances, temperature and pres-
sure, refer to page77
>Language on the Control Display, refer
to page78
>12h/24h clock mode, refer to page78
>Date format, refer to page79.
>Displaying optical warning for the PDC Park
Distance Control
*, refer to page80.
>Selection and brightness of the display for
the Head-Up Display
*, refer to page89.
>Air distribution, temperature and intensity
for the automatic climate control, refer to
page96.
>Setting the language information for the
destination guidance of the navigation sys-
tem
*, refer to page126.
Page 35 of 217
Opening and closing
34 If special circumstances should make it abso-
lutely necessary to operate the vehicle with the
luggage compartment lid open:
1.Coupe: close both windows and the glass
sunroof
*.
Convertible: with closed top, close all win-
dows.
2.Increase the air volume of the automatic
climate control to a high level, refer to
page95.
Luggage compartment
There are four lashing eyes on the inner corners
of the luggage compartment for securing lug-
gage nets
* or securing straps to fix luggage in
position.
Also refer to Securing cargo, page111.
Convertible: increasing luggage
compartment capacity
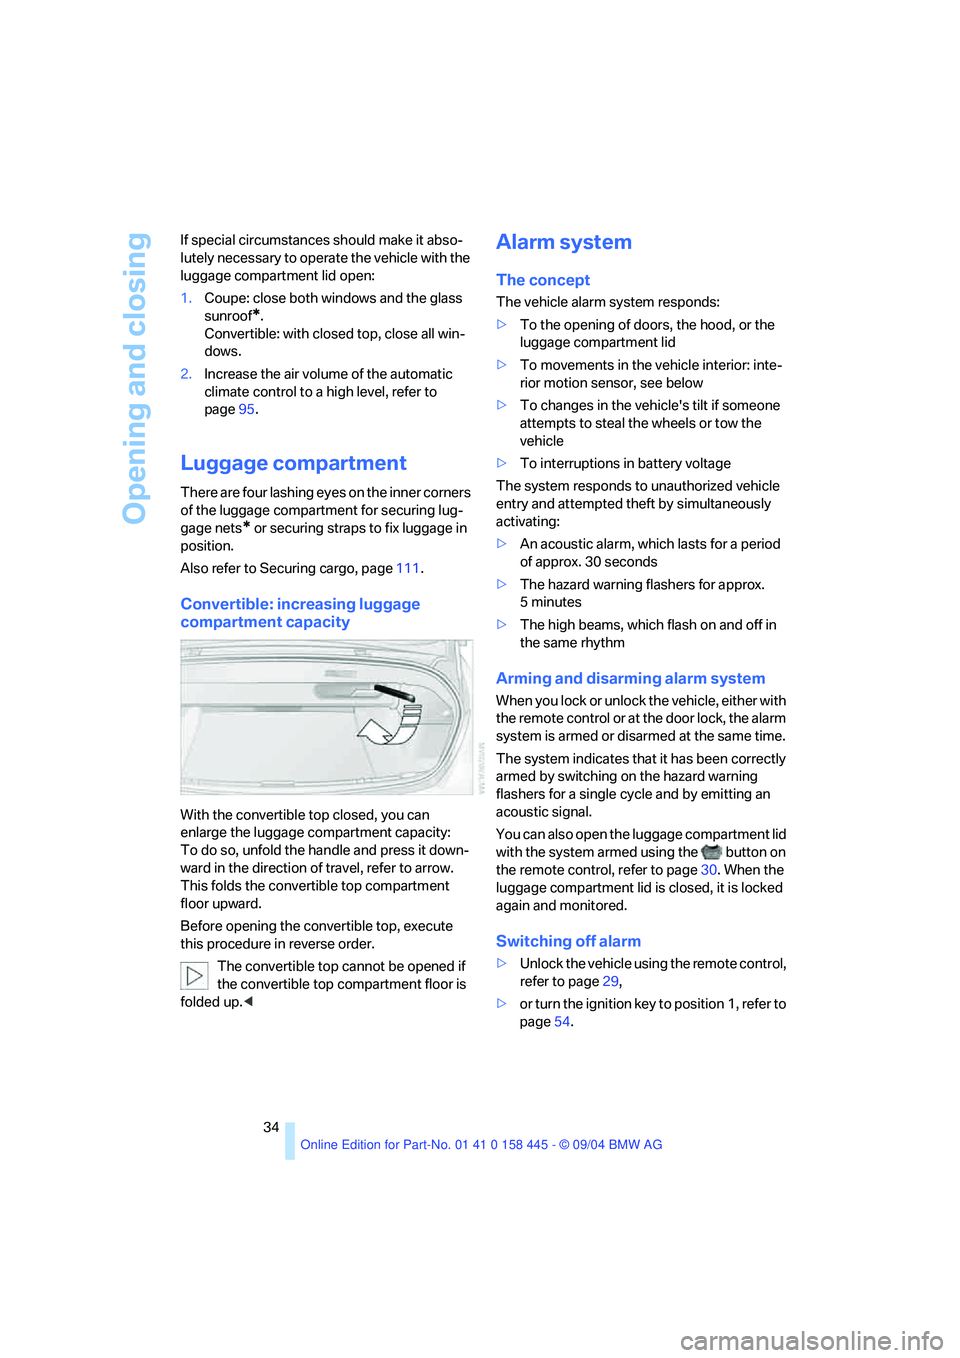
With the convertible top closed, you can
enlarge the luggage compartment capacity:
To do so, unfold the handle and press it down-
ward in the direction of travel, refer to arrow.
This folds the convertible top compartment
floor upward.
Before opening the convertible top, execute
this procedure in reverse order.
The convertible top cannot be opened if
the convertible top compartment floor is
folded up.<
Alarm system
The concept
The vehicle alarm system responds:
>To the opening of doors, the hood, or the
luggage compartment lid
>To movements in the vehicle interior: inte-
rior motion sensor, see below
>To changes in the vehicle's tilt if someone
attempts to steal the wheels or tow the
vehicle
>To interruptions in battery voltage
The system responds to unauthorized vehicle
entry and attempted theft by simultaneously
activating:
>An acoustic alarm, which lasts for a period
of approx. 30 seconds
>The hazard warning flashers for approx.
5minutes
>The high beams, which flash on and off in
the same rhythm
Arming and disarming alarm system
When you lock or unlock the vehicle, either with
the remote control or at the door lock, the alarm
system is armed or disarmed at the same time.
The system indicates that it has been correctly
armed by switching on the hazard warning
flashers for a single cycle and by emitting an
acoustic signal.
You can also open the luggage compartment lid
with the system armed using the button on
the remote control, refer to page30. When the
luggage compartment lid is closed, it is locked
again and monitored.
Switching off alarm
>Unlock the vehicle using the remote control,
refer to page29,
>or turn the ignition key to position 1, refer to
page54.
Page 40 of 217
Controls
39Reference
At a glance
Driving tips
Communications
Navigation
Entertainment
Mobility
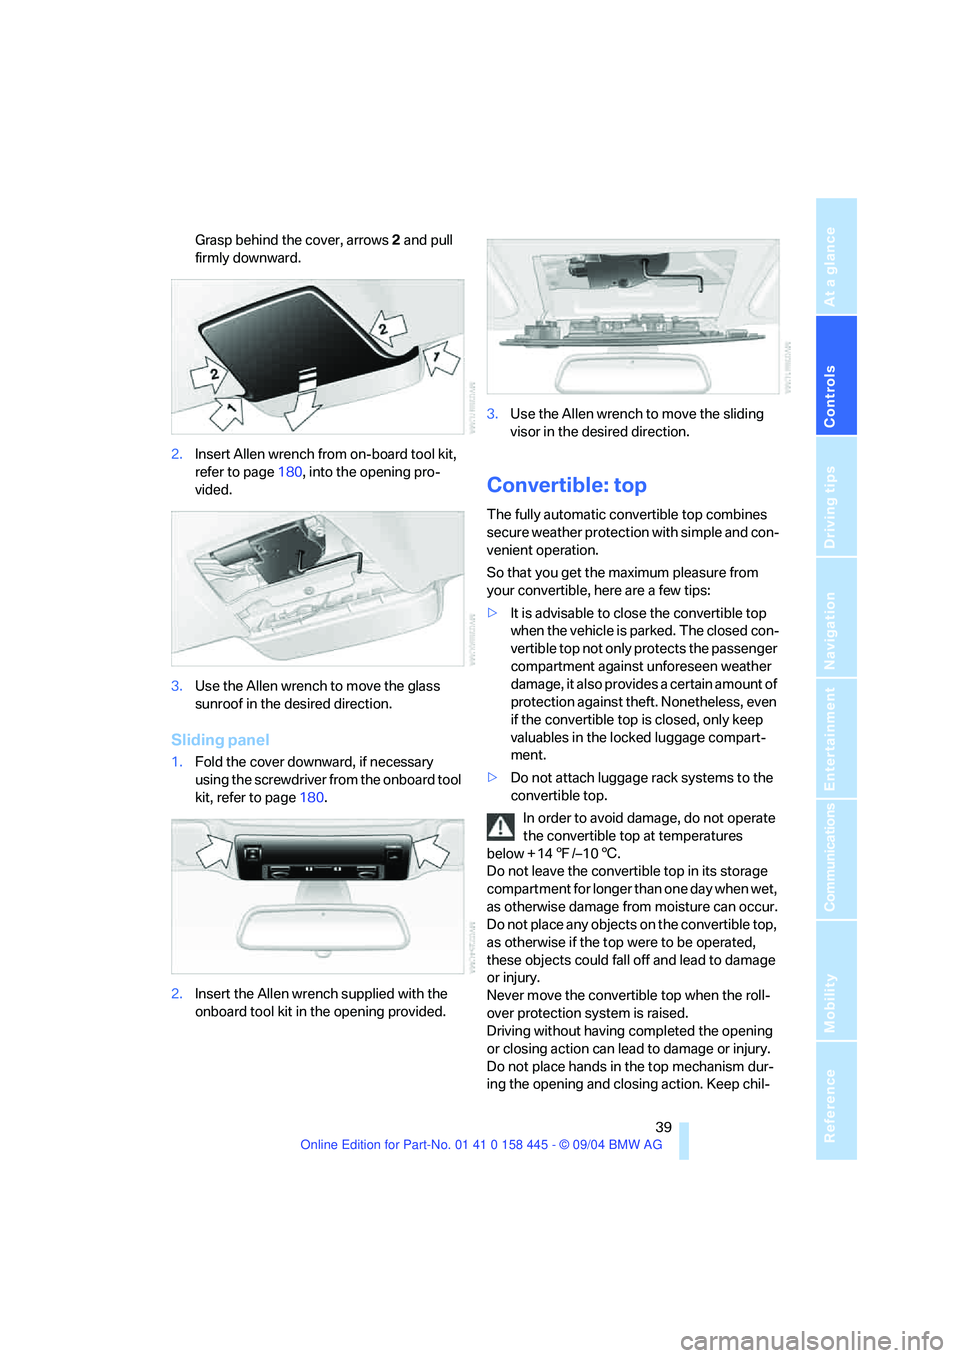
Grasp behind the cover, arrows2 and pull
firmly downward.
2.Insert Allen wrench from on-board tool kit,
refer to page180, into the opening pro-
vided.
3.Use the Allen wrench to move the glass
sunroof in the desired direction.
Sliding panel
1.Fold the cover downward, if necessary
using the screwdriver from the onboard tool
kit, refer to page180.
2.Insert the Allen wrench supplied with the
onboard tool kit in the opening provided.3.Use the Allen wrench to move the sliding
visor in the desired direction.
Convertible: top
The fully automatic convertible top combines
secure weather protection with simple and con-
venient operation.
So that you get the maximum pleasure from
your convertible, here are a few tips:
>It is advisable to close the convertible top
when the vehicle is parked. The closed con-
vertible top not only protects the passenger
compartment against unforeseen weather
damage, it also provides a certain amount of
protection against theft. Nonetheless, even
if the convertible top is closed, only keep
valuables in the locked luggage compart-
ment.
>Do not attach luggage rack systems to the
convertible top.
In order to avoid damage, do not operate
the convertible top at temperatures
below + 147/–106.
Do not leave the convertible top in its storage
compartment for longer than one day when wet,
as otherwise damage from moisture can occur.
Do not place any objects on the convertible top,
as otherwise if the top were to be operated,
these objects could fall off and lead to damage
or injury.
Never move the convertible top when the roll-
over protection system is raised.
Driving without having completed the opening
or closing action can lead to damage or injury.
Do not place hands in the top mechanism dur-
ing the opening and closing action. Keep chil-
Page 44 of 217
Controls
43Reference
At a glance
Driving tips
Communications
Navigation
Entertainment
Mobility
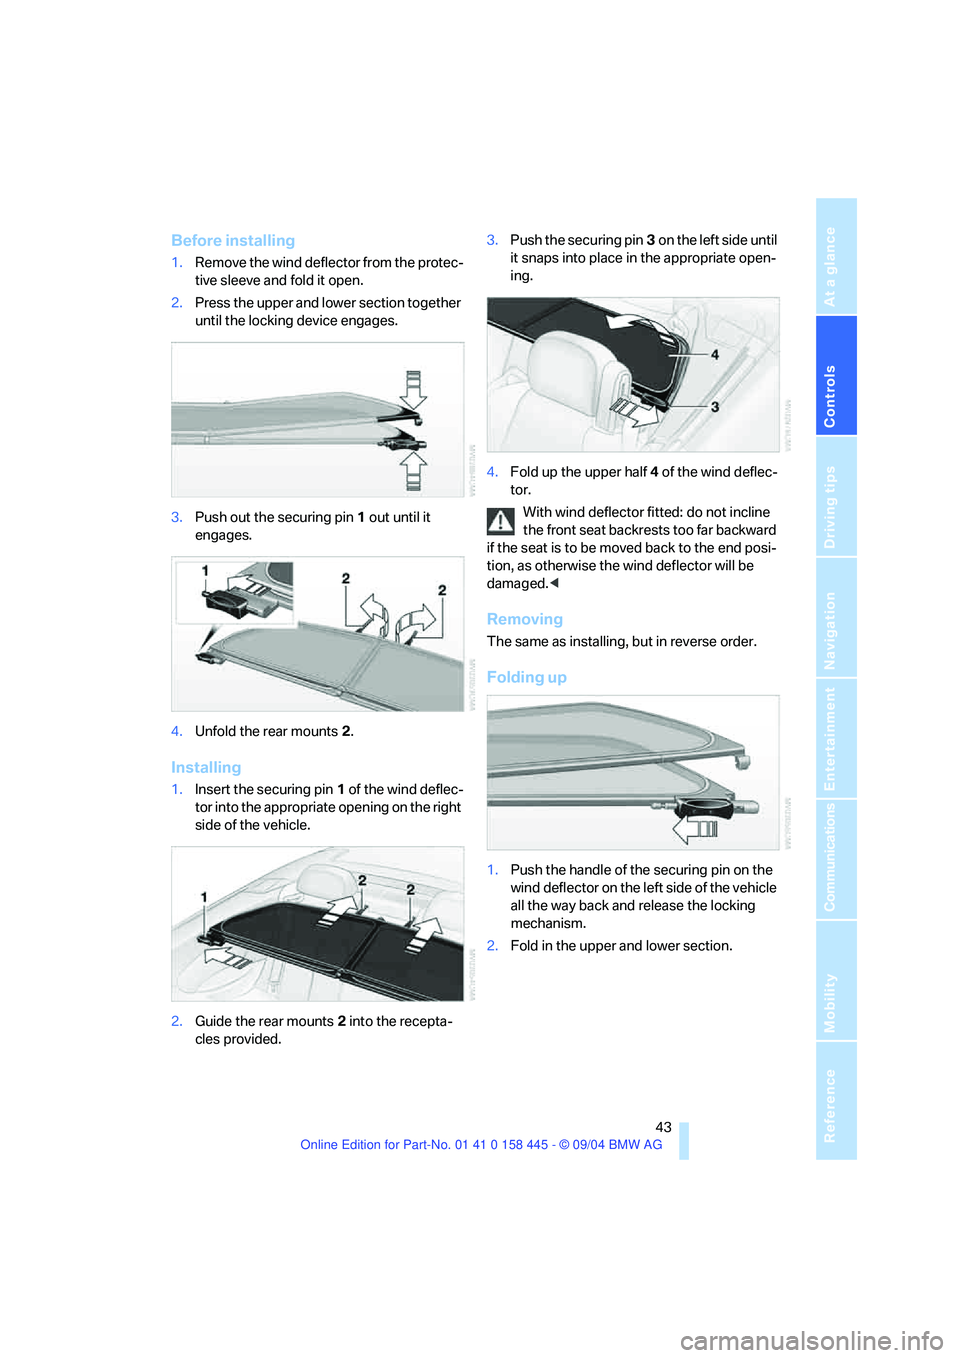
Before installing
1.Remove the wind deflector from the protec-
tive sleeve and fold it open.
2.Press the upper and lower section together
until the locking device engages.
3.Push out the securing pin1 out until it
engages.
4.Unfold the rear mounts2.
Installing
1.Insert the securing pin 1 of the wind deflec-
tor into the appropriate opening on the right
side of the vehicle.
2.Guide the rear mounts2 into the recepta-
cles provided.3.Push the securing pin3 o n t he l ef t s id e u n t il
it snaps into place in the appropriate open-
ing.
4.Fold up the upper half4 of the wind deflec-
tor.
With wind deflector fitted: do not incline
the front seat backrests too far backward
if the seat is to be moved back to the end posi-
tion, as otherwise the wind deflector will be
damaged.<
Removing
The same as installing, but in reverse order.
Folding up
1.Push the handle of the securing pin on the
wind deflector on the left side of the vehicle
all the way back and release the locking
mechanism.
2.Fold in the upper and lower section.
Page 53 of 217
Transporting children safely
52
Transporting children safely
The right place for children
Children always in the rear
Accident research shows that the safest place
for children in a vehicle is in the rear seat.
Older children should be tightly secured with a
safety belt, after they have outgrown a booster
seat that is appropriate for their age, height and
weight.
Child-restraint system in the rear
Children under 13 years of age and chil-
dren less than 5 ft/150 cm tall should
always ride in the rear and the restraint systems
should be secured with the vehicle's safety
belts.<
Younger children should be secured in an
appropriate forward-facing child-restraint sys-
tem that has first been properly secured. We
strongly urge you to carefully read and comply
with the instructions for installation and use
provided by the child-restraint's manufacturer
whenever you use such a device.
All rear sitting positions in your vehicle meet the
recommendations of SAE J1819, an industry-
recommended practice for securing child-
restraint systems in motor vehicles.
Exception for front passenger seat
Should it become necessary to use
a child-restraint system on the front pas-
senger seat, the airbags on the passenger's
side must be deactivated. Deactivating the front
passenger airbag is only possible on the Coupe.
Your BMW center will be glad to advise you.<
Never install a rearward-facing child-
restraint system in the front passenger
seat of this vehicle if the passenger airbag is not
deactivated. If you do so, the child could be
severely injured when the airbag is triggered.
Your vehicle is equipped with an airbag supple-
mental restraint system for the front passenger.
Because the backrest on any rearward-facing child-restraint system – of the kind designed for
infants under 1 year and 20 Ibs./9 kg – would be
within the airbag's deployment range, you
should never mount such a system in the front
passenger seat, since the impact of the airbag
against the child restraint's backrest could lead
to serious or fatal injuries.<
Installing child-restraint
systems
Before installing any child-restraint system or
child seat, read the following:
Observe the child-restraint system man-
ufacturer's instructions for installation
and use. Otherwise the degree of protection
can be reduced.
After an accident, have all parts of the child-
restraint system and of the relevant vehicle
safety belt system checked by a BMW center
and replaced if necessary.<
Commercially-available child-restraint systems
are designed to be secured with a lap belt or
with the lap belt portion of a combination lap/
shoulder belt. Improperly or inadequately
installed restraint systems can increase the risk
of injury to children. Always read and follow the
instructions that come with the system.
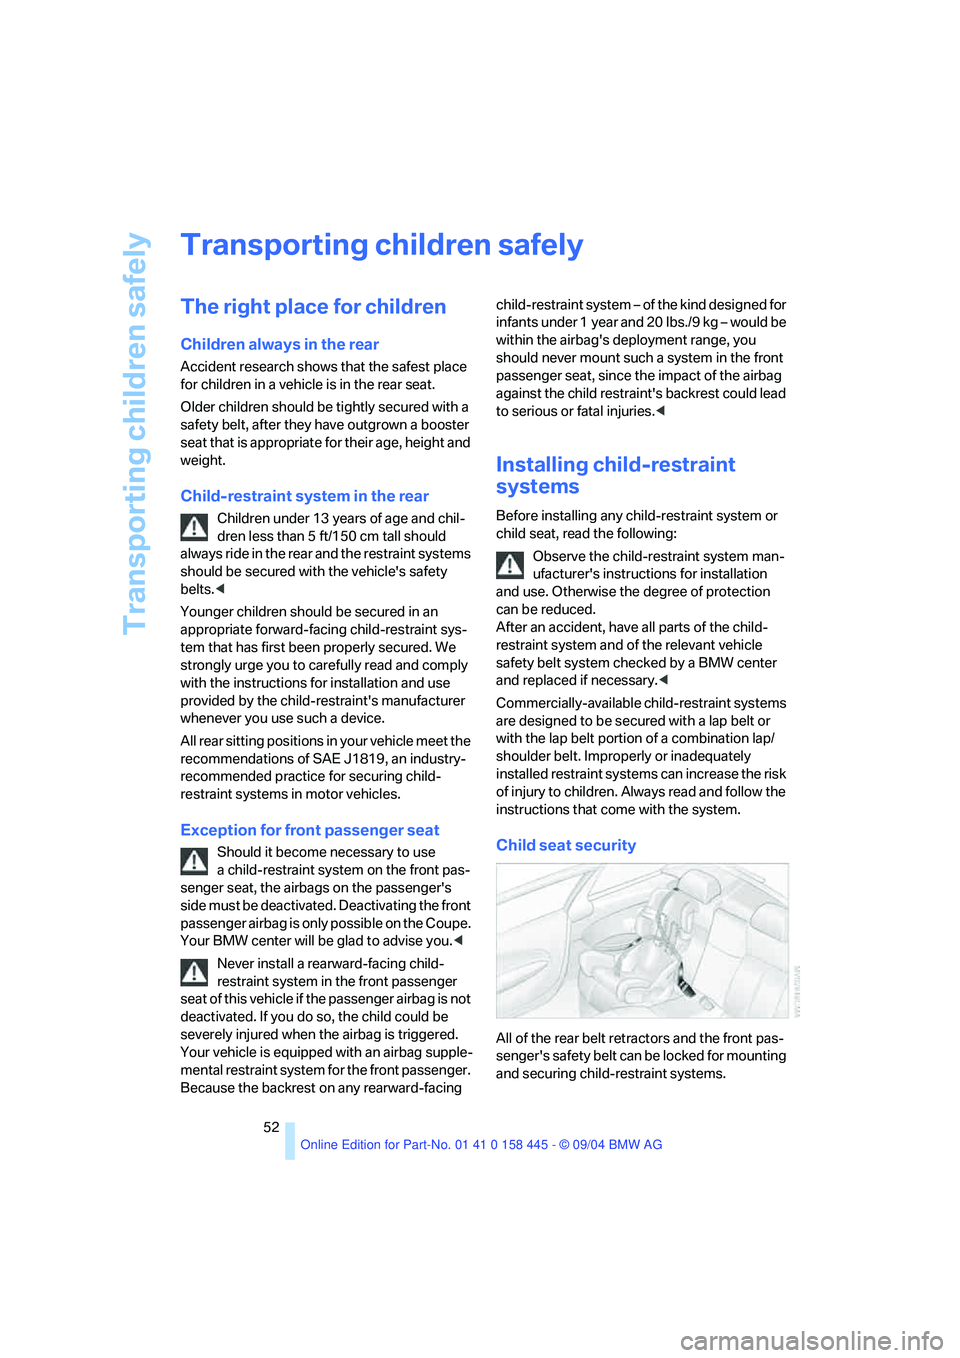
Child seat security
All of the rear belt retractors and the front pas-
senger's safety belt can be locked for mounting
and securing child-restraint systems.
Page 54 of 217
Controls
53Reference
At a glance
Driving tips
Communications
Navigation
Entertainment
Mobility
Information regarding this is located near the
buckle latch of each safety belt.
To lock safety belt
Pull the entire length of the belt from the belt
retractor. Allow the reel to retract the belt
somewhat and engage the buckle, then tighten
the belt against the child-restraint system. The
retraction mechanism is now locked.
To unlock safety belt
Release the buckle, remove the child-restraint
system and allow the belt retractor to reel the
belt completely in.
Coupe: child-restraint system with
tether strap
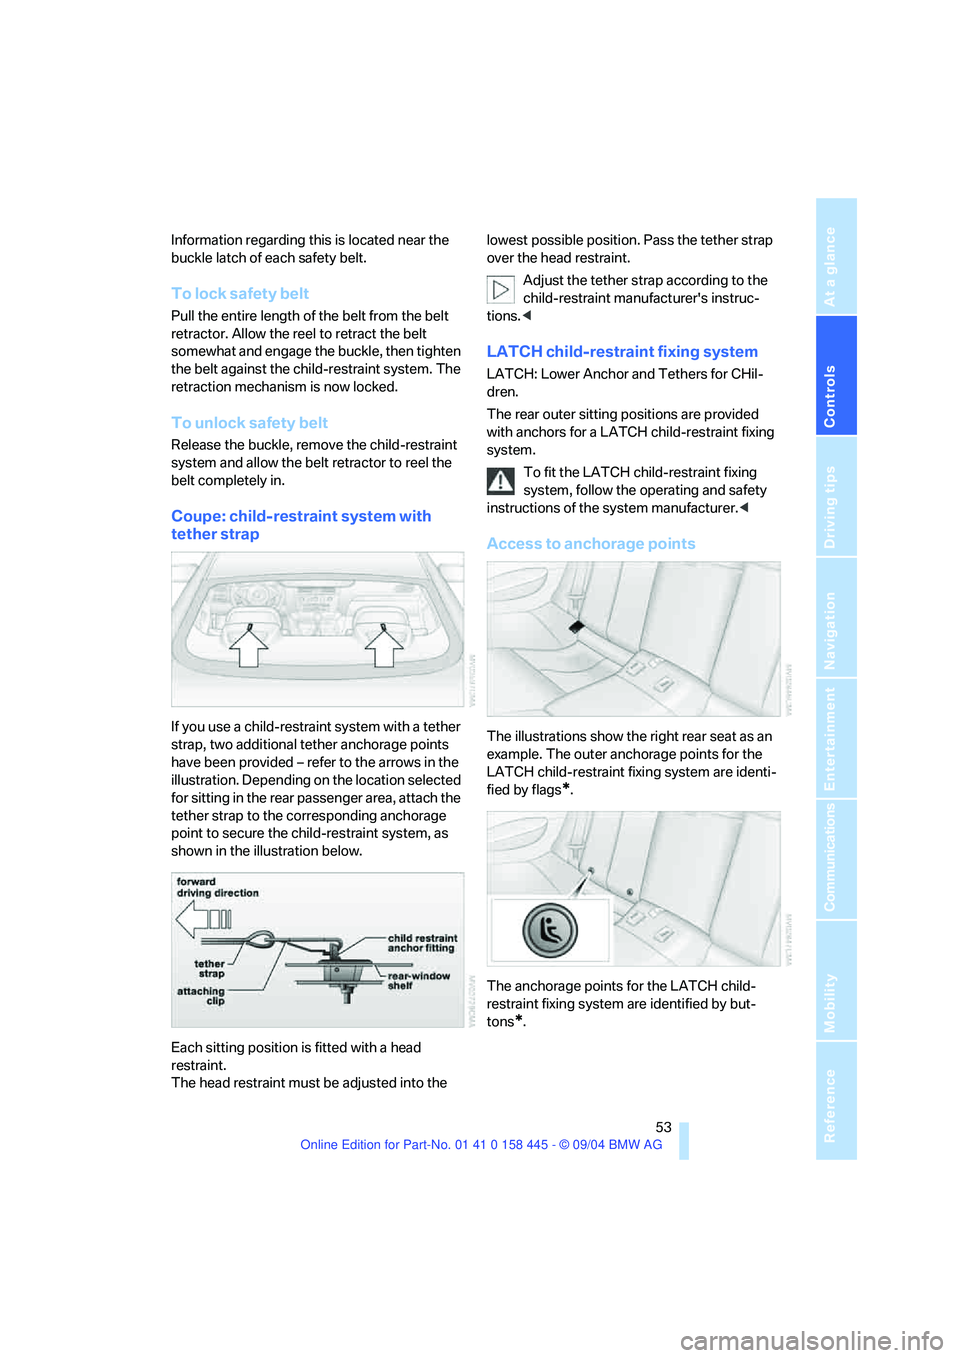
If you use a child-restraint system with a tether
strap, two additional tether anchorage points
have been provided – refer to the arrows in the
illustration. Depending on the location selected
for sitting in the rear passenger area, attach the
tether strap to the corresponding anchorage
point to secure the child-restraint system, as
shown in the illustration below.
Each sitting position is fitted with a head
restraint.
The head restraint must be adjusted into the lowest possible position. Pass the tether strap
over the head restraint.
Adjust the tether strap according to the
child-restraint manufacturer's instruc-
tions.<
LATCH child-restraint fixing system
LATCH: Lower Anchor and Tethers for CHil-
dren.
The rear outer sitting positions are provided
with anchors for a LATCH child-restraint fixing
system.
To fit the LATCH child-restraint fixing
system, follow the operating and safety
instructions of the system manufacturer.<
Access to anchorage points
The illustrations show the right rear seat as an
example. The outer anchorage points for the
LATCH child-restraint fixing system are identi-
fied by flags
*.
The anchorage points for the LATCH child-
restraint fixing system are identified by but-
tons
*.
Page 57 of 217
Driving
56 Vehicles with manual or SMG transmission:
When parking on inclines, engage the hand-
brake, as even engaging the first or reverse gear
might not under certain circumstances secure
the vehicle against moving.
Vehicles with automatic transmission
*:
Engage selector-lever position P.<
To prevent corrosion and one-sided brak-
ing action, occasionally engage the hand-
brake lightly when the vehicle is slowly coming
to a stop if the traffic conditions are suitable.<
Manual transmission
When shifting into 5th/6th gear, press the
selector lever toward the right, otherwise
an inadvertent shift into 3rd or 4th gear could
damage the engine.<
Reverse gear
Select only when the vehicle is stationary.
When pressing the gearshift lever to the left,
overcome some resistance.
The backup lamps automatically switch on in
ignition key position 2.
SMG Sequential manual
transmission*
The concept
The SMG Sequential manual transmission is an
automated manual transmission in which an
electrohydraulic system handles the clutching
and gear changes.You operate the SMG using the selector lever in
the center console and two shift paddles on the
steering wheel.
It offers the following functions:
>Choice of manual or automatic mode:
Sequential mode or Drive mode
>Options of two drive programs: Normal or
Sport, refer to Dynamic Driving Control
page59
>Automatic downshifting and protection
against incorrect shifting even in sequential
operation
>Kick-down function in the Drive mode
>Acceleration assistant, refer to page59.
The SMG is operational in ignition key
position 2.
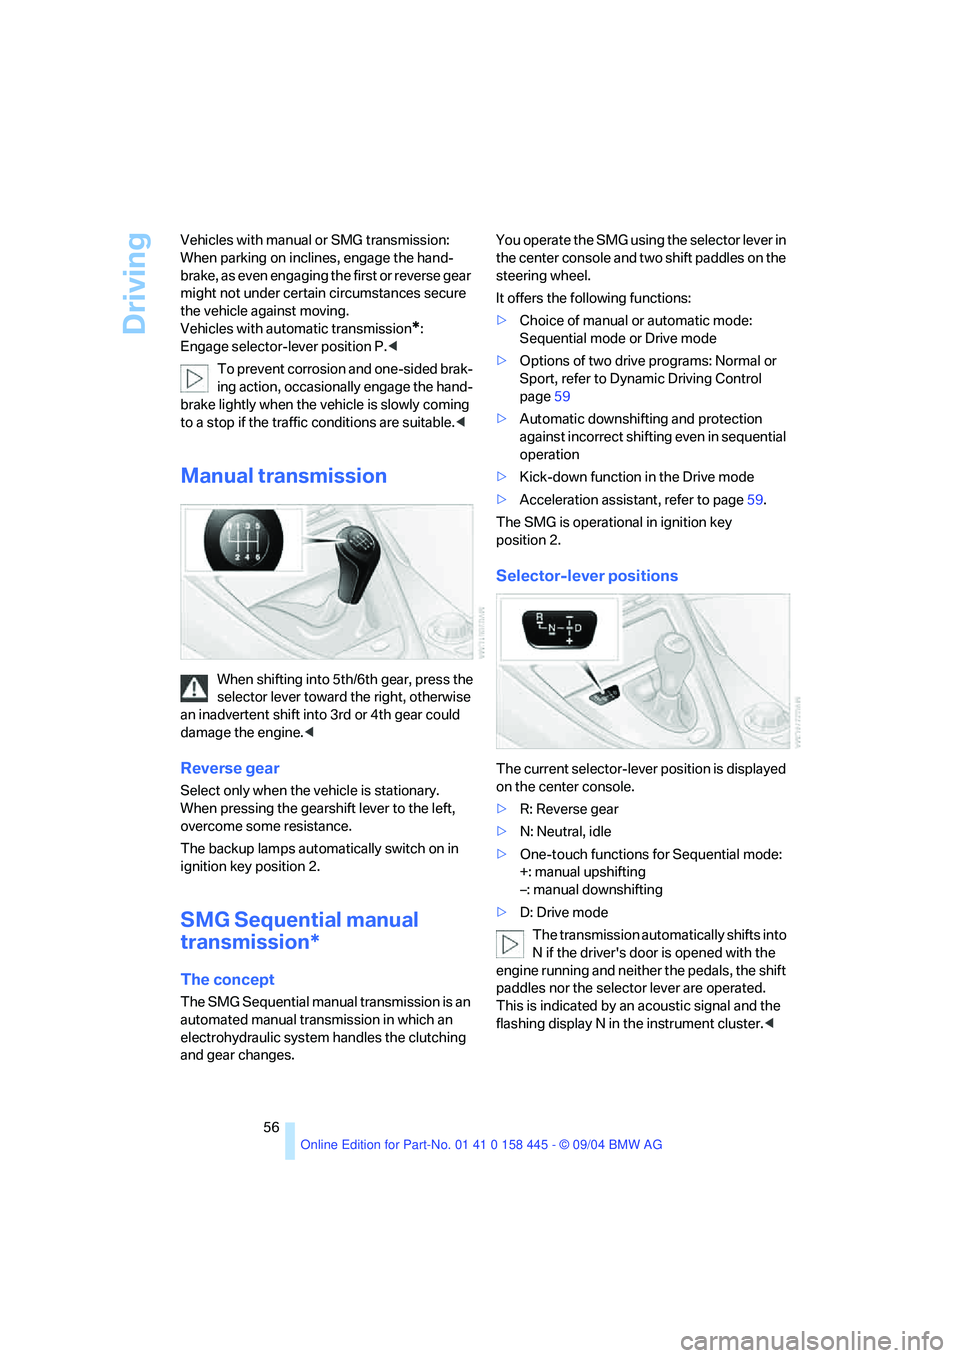
Selector-lever positions
The current selector-lever position is displayed
on the center console.
>R: Reverse gear
>N: Neutral, idle
>One-touch functions for Sequential mode:
+: manual upshifting
–: manual downshifting
>D: Drive mode
The transmission automatically shifts into
N if the driver's door is opened with the
engine running and neither the pedals, the shift
paddles nor the selector lever are operated.
This is indicated by an acoustic signal and the
flashing display N in the instrument cluster.<