2005 BMW 645CI COUPE&CONVERTIBLE rear entertainment
[x] Cancel search: rear entertainmentPage 56 of 217

Controls
55Reference
At a glance
Driving tips
Communications
Navigation
Entertainment
Mobility
SMG Sequential manual transmission*
and automatic transmission*
Your BMW is equipped with the convenience
starting feature. It is sufficient to turn the igni-
tion key only briefly to position 3 and then
release it right away. The system responds by
automatically engaging the starter for a certain
period and allowing it to run until the engine
starts, after which it then disengages automati-
cally.
SMG Sequential manual transmission*
1.Press the brake pedal.
2.Engage selector-lever position N.
3.Start the engine.
If the engine does not start, engage the
last gear selected again, refer to instru-
ment cluster display, and then shift into posi-
tion N.<
Automatic transmission with
Steptronic*
1.Press the brake pedal.
2.Engage selector-lever position P or N.
3.Start the engine.
Switching off engine
Do not remove the ignition key while the
vehicle is rolling, as otherwise the steer-
ing wheel lock will immobilize the steering.
When leaving the vehicle, remove the ignition
key and lock the steering.
When parking on a downhill incline, apply the
handbrake, as otherwise the vehicle could roll
away.<
Manual transmission
1.Turn the ignition key to position 1 or 0.
2.Shift into first gear or reverse.
SMG Sequential manual transmission*
1.Engage a drive position.
2.Turn the ignition key to position 1 or 0.
A signal sounds on stopping the engine.
Automatic transmission with
Steptronic*
1.Engage selector-lever position P.
2.Turn the ignition key to position 1 or 0.
Handbrake
The handbrake is primarily intended to prevent
the vehicle from rolling while parked; it brakes
the rear wheels.
Indicator lamp
The indicator lamp lights up, and an
acoustic signal also sounds when start-
ing off. The handbrake is engaged.
Indicator lamp for Canadian models.
Engaging
The lever engages automatically.
Releasing
Pull slightly upward, press the button and lower
the lever.
If exceptional circumstances should
make it necessary to engage the hand-
brake while the vehicle is in motion, do not pull it
too strongly. In doing so, continuously press the
button of the handbrake lever.
Strong application of the handbrake can lead to
overbraking of the rear axle and associated
'fishtailing' of the vehicle rear end.
The brake lamps do not light up when the hand-
brake is engaged.
Page 62 of 217
Controls
61Reference
At a glance
Driving tips
Communications
Navigation
Entertainment
Mobility
The system reverts to operation at normal
speed whenever the vehicle is stationary.
Rain sensor
Wiper operation is controlled automatically as a
function of the rain intensity. The rain sensor is
located on the windshield, directly in front of the
interior rearview mirror.
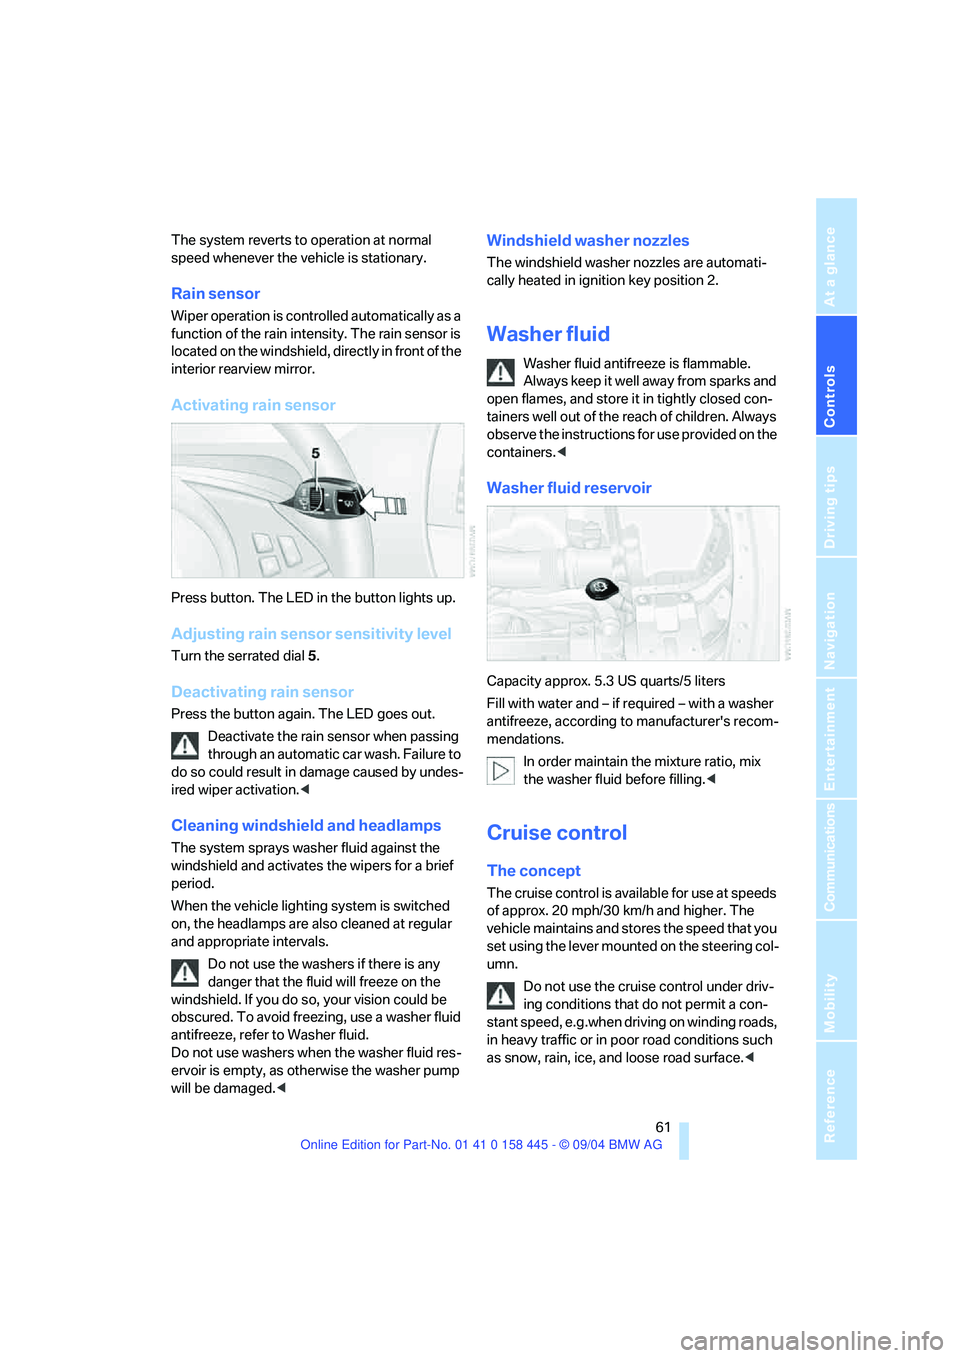
Activating rain sensor
Press button. The LED in the button lights up.
Adjusting rain sensor sensitivity level
Turn the serrated dial 5.
Deactivating rain sensor
Press the button again. The LED goes out.
Deactivate the rain sensor when passing
through an automatic car wash. Failure to
do so could result in damage caused by undes-
ired wiper activation.<
Cleaning windshield and headlamps
The system sprays washer fluid against the
windshield and activates the wipers for a brief
period.
When the vehicle lighting system is switched
on, the headlamps are also cleaned at regular
and appropriate intervals.
Do not use the washers if there is any
danger that the fluid will freeze on the
windshield. If you do so, your vision could be
obscured. To avoid freezing, use a washer fluid
antifreeze, refer to Washer fluid.
Do not use washers when the washer fluid res-
ervoir is empty, as otherwise the washer pump
will be damaged.<
Windshield washer nozzles
The windshield washer nozzles are automati-
cally heated in ignition key position 2.
Washer fluid
Washer fluid antifreeze is flammable.
Always keep it well away from sparks and
open flames, and store it in tightly closed con-
tainers well out of the reach of children. Always
observe the instructions for use provided on the
containers.<
Washer fluid reservoir
Capacity approx. 5.3 US quarts/5 liters
Fill with water and – if required – with a washer
antifreeze, according to manufacturer's recom-
mendations.
In order maintain the mixture ratio, mix
the washer fluid before filling.<
Cruise control
The concept
The cruise control is available for use at speeds
of approx. 20 mph/30 km/h and higher. The
vehicle maintains and stores the speed that you
set using the lever mounted on the steering col-
umn.
Do not use the cruise control under driv-
ing conditions that do not permit a con-
stant speed, e.g.when driving on winding roads,
in heavy traffic or in poor road conditions such
as snow, rain, ice, and loose road surface.<
Page 82 of 217

Controls
81Reference
At a glance
Driving tips
Communications
Navigation
Entertainment
Mobility
1.Press button.
This opens the start menu.
2.Press the controller to open the menu.
3.Select "Vehicle settings" and press the
controller.
4.Select "PDC" and press the controller.
5.Select "Monitor display on" and press the
controller.
The PDC screen is activated.
The display appears on the Control Display as
soon as PDC is activated.
The setting is stored for the remote control cur-
rently in use.
System limits
Even with PDC, final responsibility for
estimating the distance between the
vehicle and any obstructions always remains
with the driver. Even when sensors are involved,
there is a blind spot in which objects cannot be
detected. The system is also subject to the
physical limits that apply to all forms of ultra-
sonic measurement, such as those encoun-
tered with thin and wedge-shaped objects, etc.
Low objects already displayed, e.g. a curb, can
also disappear from the detection area of the sensors again before a continuous tone
sounds.
Loud noises from outside and inside your vehi-
cle may prevent you from hearing the PDC sig-
nal tone.<
Do not apply high pressure spray to the
sensors for a prolonged period of time.
Keep the spray at least 4 in/10 cm away from
the sensors.<
Driving stability control
systems
Your BMW is equipped with an extended array
of systems designed to enhance and maintain
vehicle stability under extreme conditions.
ABS Antilock Brake System
ABS prevents the wheels from locking during
braking. Safe steering response is maintained
even during hard braking. This increases active
driving safety.
ABS is operational every time you start the
engine. For information on safe braking, refer to
page109.
CBC Cornering Brake Control
This system provides further enhancements to
vehicle stability and steering response when
braking while cornering or when braking during
a lane change.
Electronic brake-force distribution
This system controls the brake system's appli-
cation pressure at the rear wheels to ensure
stable deceleration.
DBC Dynamic Brake Control
When you apply the brakes rapidly, this system
automatically produces the maximum braking
force boost and thus helps to achieve the short-
est possible braking distance during panic
stops. This system exploits all of the benefits
provided by ABS.
Page 84 of 217

Controls
83Reference
At a glance
Driving tips
Communications
Navigation
Entertainment
Mobility
To control
The indicator lamp flashes:
DSC or DTC controls the drive forces
and brake forces.
The indicator lamp comes on:
DSC and DTC are deactivated together via the
button DTC.
The indicator lamp comes on: DTC is
activated via the DTC button.
Malfunction in the driving-stability
control systems
The brake system warning lamp lights
up in red, appearing together with the
indicator lamps for ABS and DSC. A
message appears on the Control Dis-
play. The driving-stability control sys-
tems have failed. Conventional braking
efficiency remains available without
limitations.
While you may continue, you should remember
to proceed cautiously and drive defensively
while avoiding full brake applications.
Have the system checked as soon as possible.
Display of the previously described
malfunction on Canadian models.
The DSC indicator lamp lights up. A
message appears on the Control Dis-
play. A malfunction has occurred in
DSC and DTC.
The stability maintenance functions are no
longer available. The vehicle remains opera-
tional.
Have the system checked as soon as possible.
The warning lamp for the brake system
lights up in yellow. A message appears
on the Control Display. DBC has failed.
Have the system checked as soon as possible.Display of the previously described
malfunction on Canadian models.
Active roll stabilization*
The concept
Active roll stabilization minimizes body roll and
optimizes vehicle stability during cornering and
evasive maneuvers.
Dynamic stabilizers at the front and rear axles
form the basis for active roll stabilization. Sus-
pension compliance adapts to suit driving con-
ditions, varying from performance-oriented
during cornering to smooth and comfort-ori-
ented when the vehicle is proceeding in a
straight line. During vehicle operation, the sys-
tem continuously runs through closed-loop
control cycles lasting only fractions of a second.
The system assumes operational status each
time you start the engine.
Malfunction
The warning lamp lights up and a mes-
sage appears on the Control Display.
There is a malfunction in the system.
Have the system checked as soon as possible.
If there is a malfunction in the system,
please remember to adapt your speed
accordingly, especially in curves.
The suspension will be noticeably softer and
the vehicle will display a greater tendency to tilt
during cornering and in crosswinds.
If a message stating that you should stop
appears on the Control Display, stop and switch
off the engine as soon as possible. In this case
the oil level in the reservoir may have dropped
below the minimum, possibly owing to a leak in
the hydraulic system. Do not continue driving.
Contact your BMW center.<
Page 88 of 217
Controls
87Reference
At a glance
Driving tips
Communications
Navigation
Entertainment
Mobility
Do not apply adhesive materials to the
cover panels of the airbags, cover them or
modify them in any other way.
Do not attempt to remove the airbag retention
system from the vehicle. Never modify or
tamper with either the wiring or the individual
components in the airbag system. This cate-
gory includes the upholstery in the center of the
steering wheel, on the instrument panel, the
side trim panels on the doors and on the Coupe,
the roof pillars along with the sides of the head-
liner. Do not attempt to remove or dismantle the
steering wheel.
Do not touch the individual components
directly after the system has been triggered,
because there is a danger of burns.
If you note any indication of system malfunc-
tion, if you wish to have an airbag deactivated,
or if the airbag retention system is triggered in
response to an accident, you should always
entrust all inspection, repair and dismantling
operations to your BMW center. Unprofessional
attempts to service the system could lead to
failure in an emergency or undesired airbag
activation, either of which could result in per-
sonal injury.<
Airbag warning information is also provided on
the sun visors.
Operational readiness of airbag system
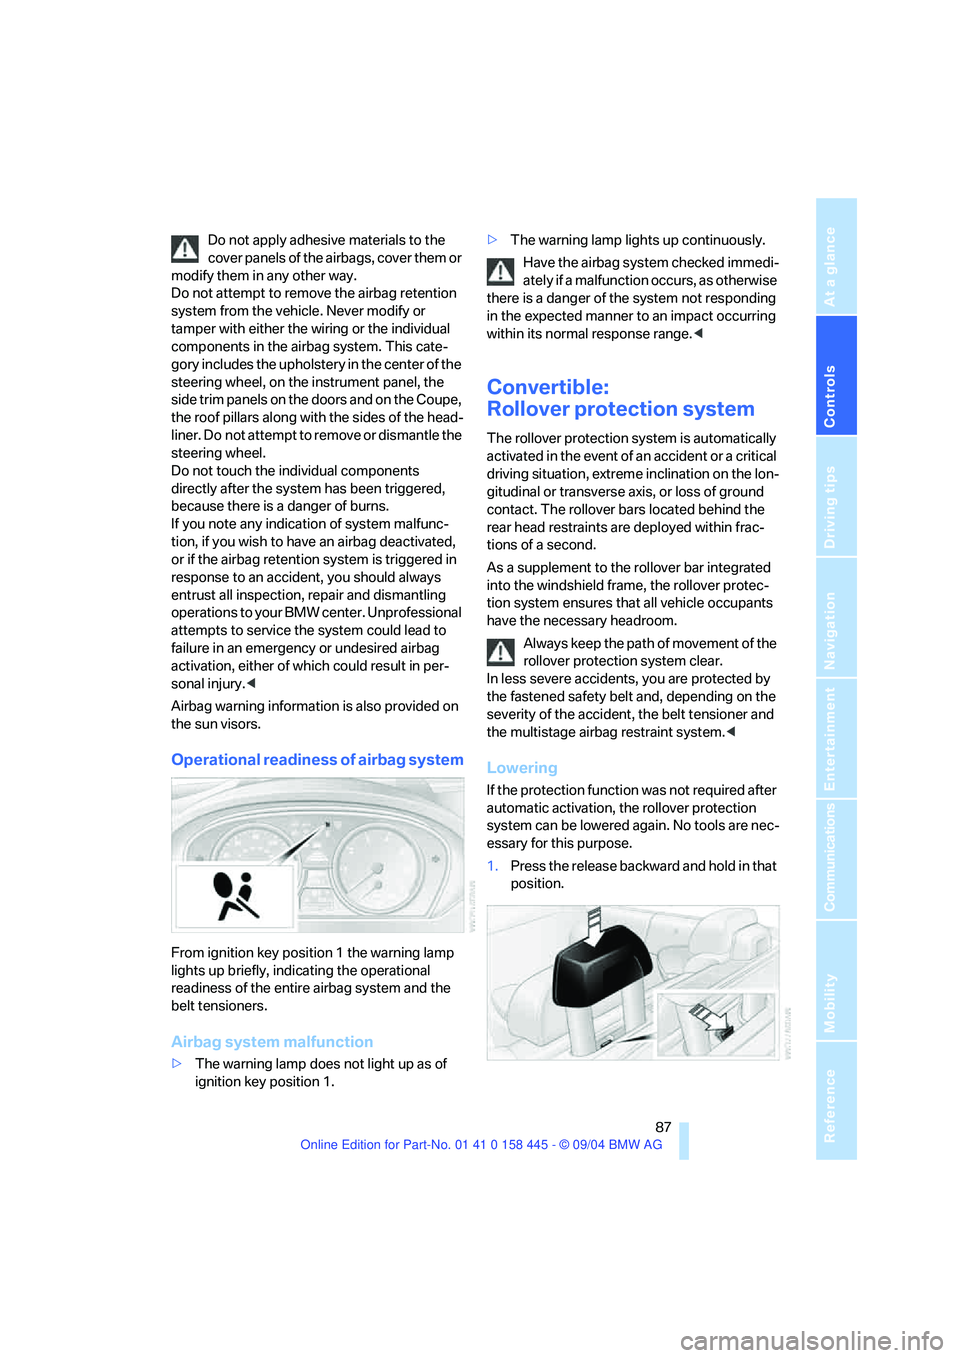
From ignition key position 1 the warning lamp
lights up briefly, indicating the operational
readiness of the entire airbag system and the
belt tensioners.
Airbag system malfunction
>The warning lamp does not light up as of
ignition key position 1.>The warning lamp lights up continuously.
Have the airbag system checked immedi-
ately if a malfunction occurs, as otherwise
there is a danger of the system not responding
in the expected manner to an impact occurring
within its normal response range.<
Convertible:
Rollover protection system
The rollover protection system is automatically
activated in the event of an accident or a critical
driving situation, extreme inclination on the lon-
gitudinal or transverse axis, or loss of ground
contact. The rollover bars located behind the
rear head restraints are deployed within frac-
tions of a second.
As a supplement to the rollover bar integrated
into the windshield frame, the rollover protec-
tion system ensures that all vehicle occupants
have the necessary headroom.
Always keep the path of movement of the
rollover protection system clear.
In less severe accidents, you are protected by
the fastened safety belt and, depending on the
severity of the accident, the belt tensioner and
the multistage airbag restraint system.<
Lowering
If the protection function was not required after
automatic activation, the rollover protection
system can be lowered again. No tools are nec-
essary for this purpose.
1.Press the release backward and hold in that
position.
Page 92 of 217
Controls
91Reference
At a glance
Driving tips
Communications
Navigation
Entertainment
Mobility
Lamps
Parking lamps/low beams
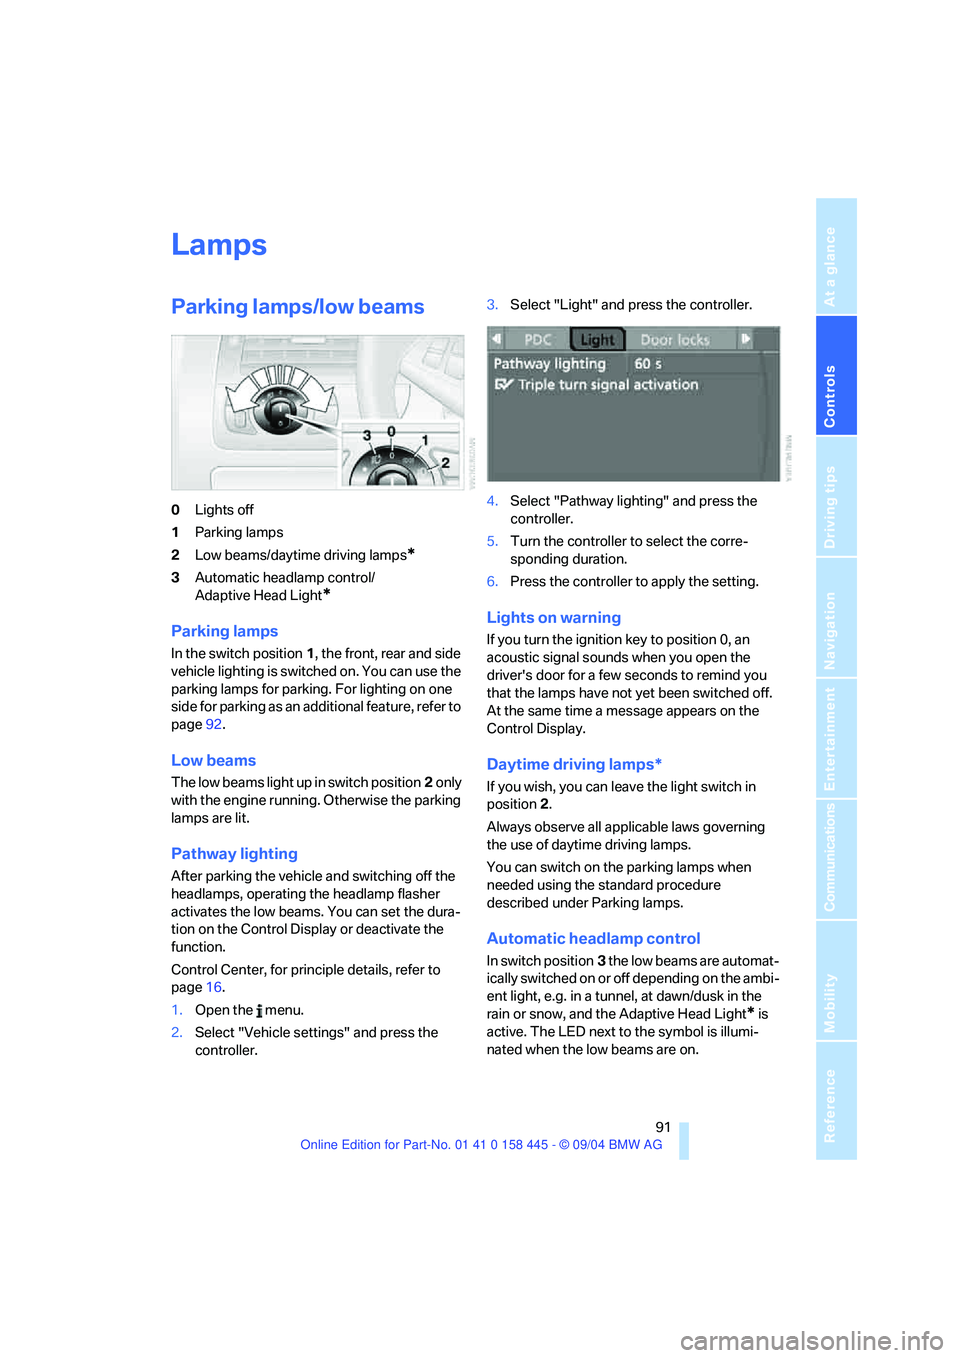
0Lights off
1Parking lamps
2Low beams/daytime driving lamps
*
3Automatic headlamp control/
Adaptive Head Light
*
Parking lamps
In the switch position1, the front, rear and side
vehicle lighting is switched on. You can use the
parking lamps for parking. For lighting on one
side for parking as an additional feature, refer to
page92.
Low beams
The low beams light up in switch position2 only
with the engine running. Otherwise the parking
lamps are lit.
Pathway lighting
After parking the vehicle and switching off the
headlamps, operating the headlamp flasher
activates the low beams. You can set the dura-
tion on the Control Display or deactivate the
function.
Control Center, for principle details, refer to
page16.
1.Open the menu.
2.Select "Vehicle settings" and press the
controller.3.Select "Light" and press the controller.
4.Select "Pathway lighting" and press the
controller.
5.Turn the controller to select the corre-
sponding duration.
6.Press the controller to apply the setting.
Lights on warning
If you turn the ignition key to position 0, an
acoustic signal sounds when you open the
driver's door for a few seconds to remind you
that the lamps have not yet been switched off.
At the same time a message appears on the
Control Display.
Daytime driving lamps*
If you wish, you can leave the light switch in
position2.
Always observe all applicable laws governing
the use of daytime driving lamps.
You can switch on the parking lamps when
needed using the standard procedure
described under Parking lamps.
Automatic headlamp control
In switch position3 the low beams are automat-
ically switched on or off depending on the ambi-
ent light, e.g. in a tunnel, at dawn/dusk in the
rain or snow, and the Adaptive Head Light
* is
active. The LED next to the symbol is illumi-
nated when the low beams are on.
Page 104 of 217
Controls
103Reference
At a glance
Driving tips
Communications
Navigation
Entertainment
Mobility
Cup holders
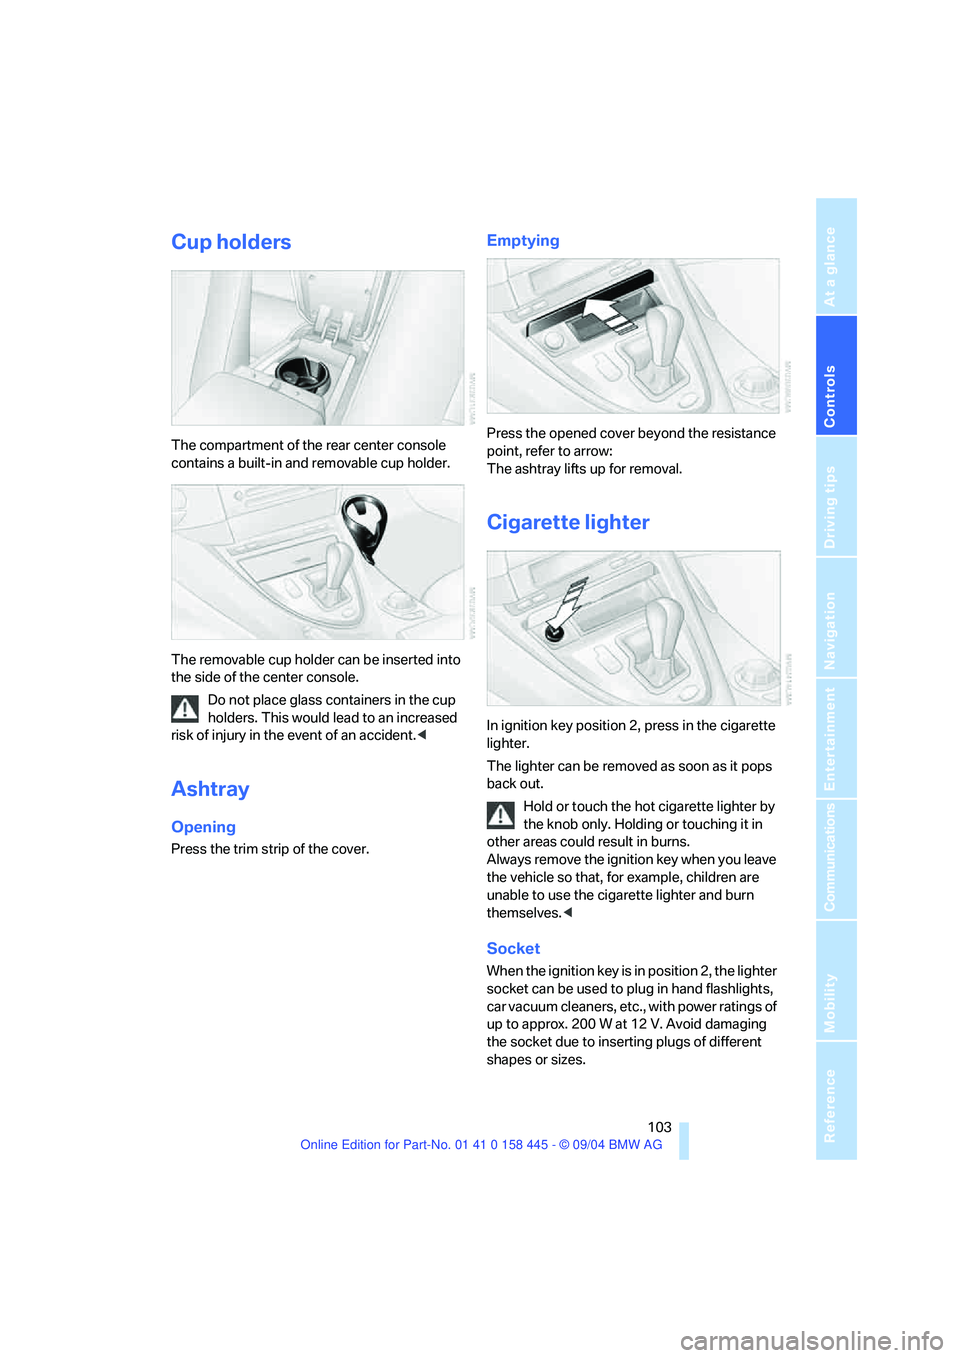
The compartment of the rear center console
contains a built-in and removable cup holder.
The removable cup holder can be inserted into
the side of the center console.
Do not place glass containers in the cup
holders. This would lead to an increased
risk of injury in the event of an accident.<
Ashtray
Opening
Press the trim strip of the cover.
Emptying
Press the opened cover beyond the resistance
point, refer to arrow:
The ashtray lifts up for removal.
Cigarette lighter
In ignition key position 2, press in the cigarette
lighter.
The lighter can be removed as soon as it pops
back out.
Hold or touch the hot cigarette lighter by
the knob only. Holding or touching it in
other areas could result in burns.
Always remove the ignition key when you leave
the vehicle so that, for example, children are
unable to use the cigarette lighter and burn
themselves.<
Socket
When the ignition key is in position 2, the lighter
socket can be used to plug in hand flashlights,
car vacuum cleaners, etc., with power ratings of
up to approx. 200 W at 12 V. Avoid damaging
the socket due to inserting plugs of different
shapes or sizes.
Page 112 of 217
Driving tips
111Reference
At a glance
Controls
Communications
Navigation
Entertainment
Mobility
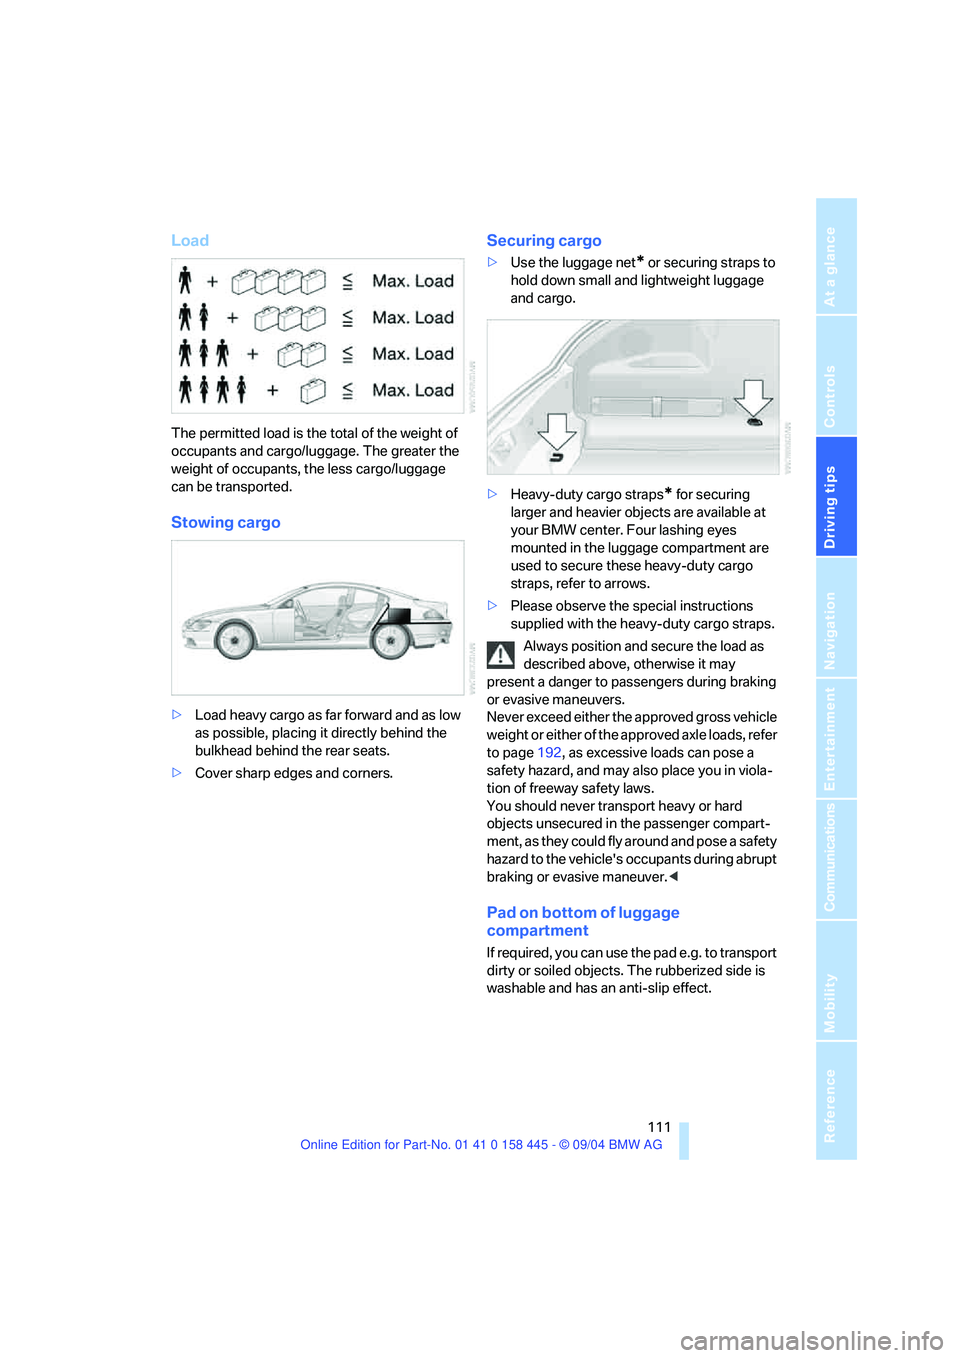
Load
The permitted load is the total of the weight of
occupants and cargo/luggage. The greater the
weight of occupants, the less cargo/luggage
can be transported.
Stowing cargo
>Load heavy cargo as far forward and as low
as possible, placing it directly behind the
bulkhead behind the rear seats.
>Cover sharp edges and corners.
Securing cargo
>Use the luggage net* or securing straps to
hold down small and lightweight luggage
and cargo.
>Heavy-duty cargo straps
* for securing
larger and heavier objects are available at
your BMW center. Four lashing eyes
mounted in the luggage compartment are
used to secure these heavy-duty cargo
straps, refer to arrows.
>Please observe the special instructions
supplied with the heavy-duty cargo straps.
Always position and secure the load as
described above, otherwise it may
present a danger to passengers during braking
or evasive maneuvers.
Never exceed either the approved gross vehicle
weight or either of the approved axle loads, refer
to page192, as excessive loads can pose a
safety hazard, and may also place you in viola-
tion of freeway safety laws.
You should never transport heavy or hard
objects unsecured in the passenger compart-
ment, as they could fly around and pose a safety
hazard to the vehicle's occupants during abrupt
braking or evasive maneuver.<
Pad on bottom of luggage
compartment
If required, you can use the pad e.g. to transport
dirty or soiled objects. The rubberized side is
washable and has an anti-slip effect.