2005 BMW 645CI CONVERTIBLE start stop button
[x] Cancel search: start stop buttonPage 32 of 217
Controls
31Reference
At a glance
Driving tips
Communications
Navigation
Entertainment
Mobility
this remote control during an extended drive;
this will recharge the battery, refer to page28.
For US owners only
The transmitter and receiver units comply with
part 15 of the FCC/Federal Communication
Commission regulations. Operation is gov-
erned by the following:
FCC ID:
LX8766S
LX8766E
LX8CAS
Compliance statement:
This device complies with part 15 of the FCC
Rules. Operation is subject to the following two
conditions:
>This device may not cause harmful interfer-
ence, and
>this device must accept any interference
received, including interference that may
cause undesired operation.
Any unauthorized modifications or
changes to these devices could void the
user's authority to operate this equipment.<
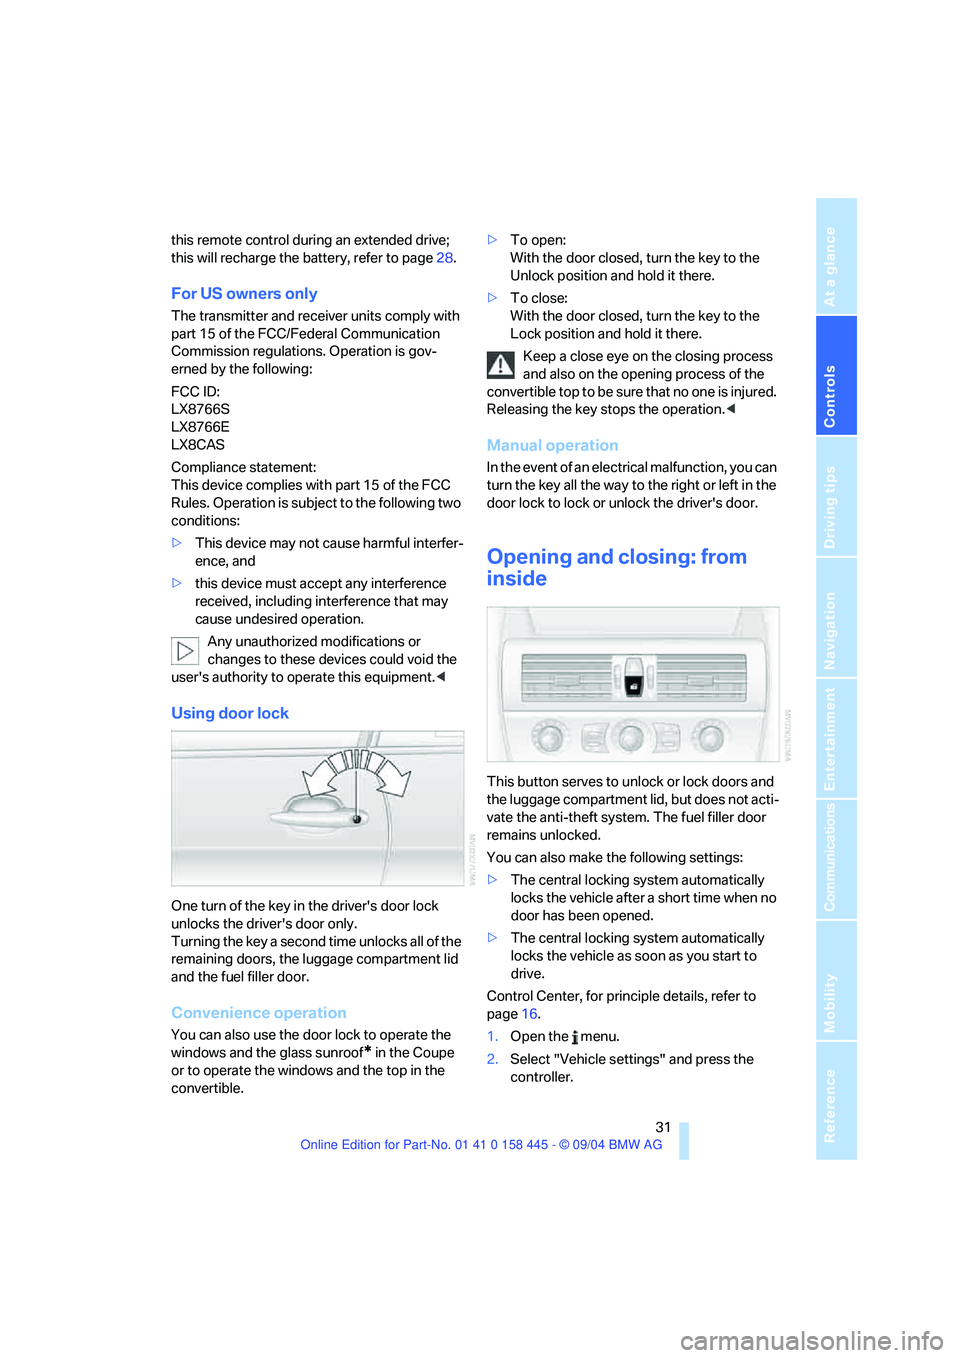
Using door lock
One turn of the key in the driver's door lock
unlocks the driver's door only.
Turning the key a second time unlocks all of the
remaining doors, the luggage compartment lid
and the fuel filler door.
Convenience operation
You can also use the door lock to operate the
windows and the glass sunroof
* in the Coupe
or to operate the windows and the top in the
convertible.>To open:
With the door closed, turn the key to the
Unlock position and hold it there.
>To close:
With the door closed, turn the key to the
Lock position and hold it there.
Keep a close eye on the closing process
and also on the opening process of the
convertible top to be sure that no one is injured.
Releasing the key stops the operation.<
Manual operation
In the event of an electrical malfunction, you can
turn the key all the way to the right or left in the
door lock to lock or unlock the driver's door.
Opening and closing: from
inside
This button serves to unlock or lock doors and
the luggage compartment lid, but does not acti-
vate the anti-theft system. The fuel filler door
remains unlocked.
You can also make the following settings:
>The central locking system automatically
locks the vehicle after a short time when no
door has been opened.
>The central locking system automatically
locks the vehicle as soon as you start to
drive.
Control Center, for principle details, refer to
page16.
1.Open the menu.
2.Select "Vehicle settings" and press the
controller.
Page 41 of 217
Opening and closing
40 dren away from the travel path of the convert-
ible top.
For safety reasons, only operate the convertible
top when the vehicle is at a standstill.<
If you have initiated top operation with the
vehicle at a stop and then start to drive,
e.g. at a traffic light, you can continue the ini-
tiated operation up to a speed of 20 mph/
30 km/h:
To do so, press and hold the corresponding
button.<
Partial vacuums that occur at higher
speeds in the passenger compartment
can make the convertible top flap. Use the auto-
matic climate control to increase the air supply
so that a partial vacuum in the vehicle does not
occur.<
Prior to opening and closing
>Read carefully and comply with the safety
precautions that appear above.
>Ensure that the convertible top compart-
ment floor in the luggage compartment is
folded down, refer to page34, as otherwise
the convertible top cannot be opened.
>Ensure that the luggage compartment lid is
closed.
Opening and closing
With the ignition key in position 1 or greater,
refer to page54, and the vehicle stationary:
So as not to place an excessive load on
the battery, only operate the convertible
top with the engine running, if possible.
Before closing the convertible top, remove for-
eign bodies from the windshield frame, as these
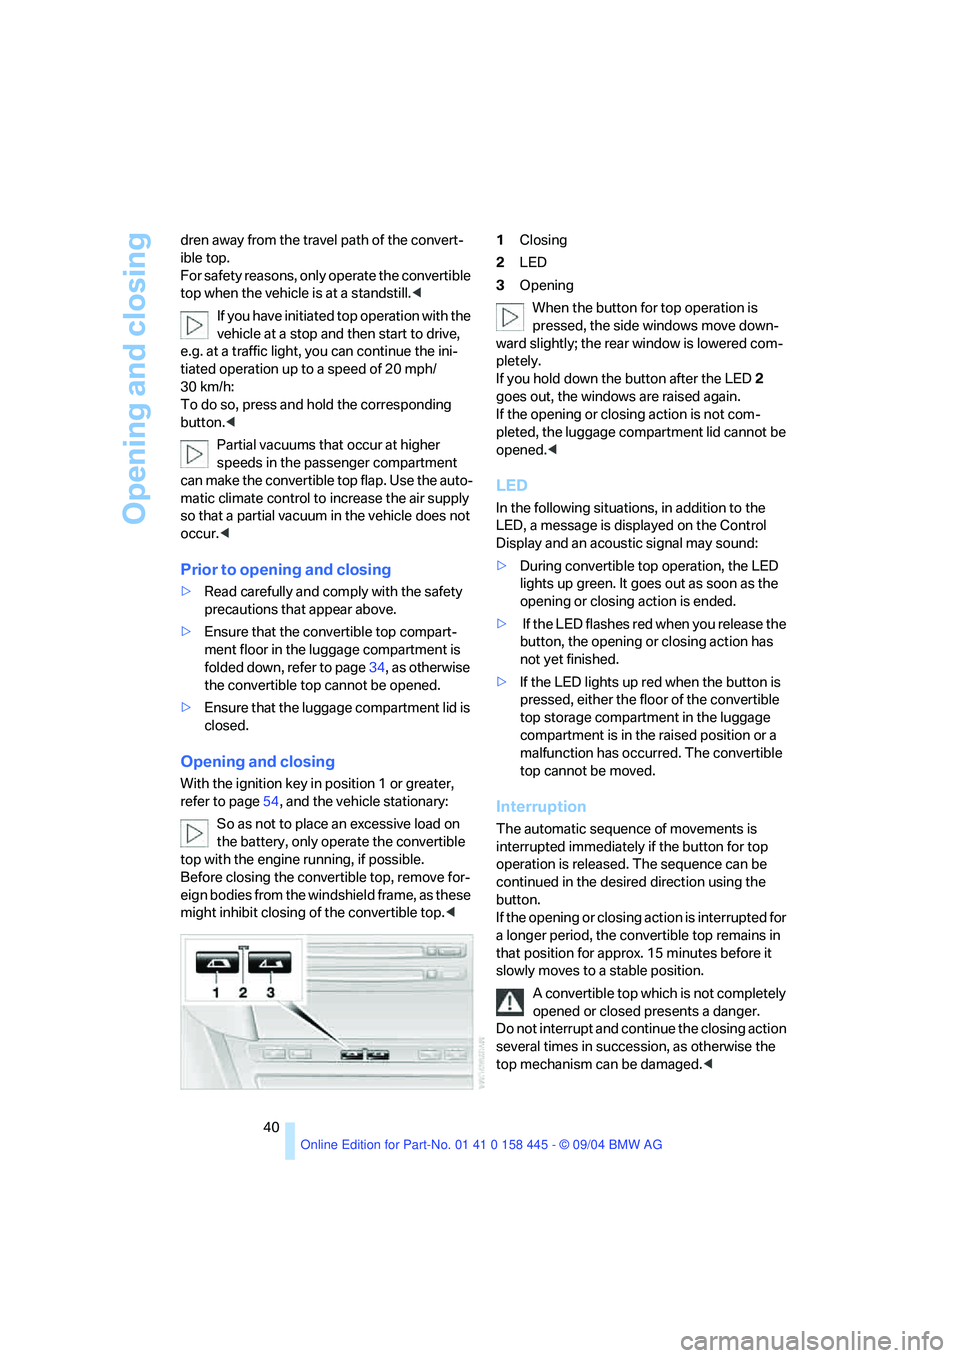
might inhibit closing of the convertible top.<1Closing
2LED
3Opening
When the button for top operation is
pressed, the side windows move down-
ward slightly; the rear window is lowered com-
pletely.
If you hold down the button after the LED2
goes out, the windows are raised again.
If the opening or closing action is not com-
pleted, the luggage compartment lid cannot be
opened.<
LED
In the following situations, in addition to the
LED, a message is displayed on the Control
Display and an acoustic signal may sound:
>During convertible top operation, the LED
lights up green. It goes out as soon as the
opening or closing action is ended.
> If the LED flashes red when you release the
button, the opening or closing action has
not yet finished.
>If the LED lights up red when the button is
pressed, either the floor of the convertible
top storage compartment in the luggage
compartment is in the raised position or a
malfunction has occurred. The convertible
top cannot be moved.
Interruption
The automatic sequence of movements is
interrupted immediately if the button for top
operation is released. The sequence can be
continued in the desired direction using the
button.
If the opening or closing action is interrupted for
a longer period, the convertible top remains in
that position for approx. 15 minutes before it
slowly moves to a stable position.
A convertible top which is not completely
opened or closed presents a danger.
Do not interrupt and continue the closing action
several times in succession, as otherwise the
top mechanism can be damaged.<
Page 49 of 217
Adjustments
48
Adjusting tilt angle
Swivel the head restraints.
Entry to the rear
Before starting to drive, fold backrests
back, otherwise there is the danger of
accident due to an unexpected movement of
the seat.<
Coupe: releasing backrest
Pull the lever upward and fold the backrest for-
ward.
The lever is designed in such a way that the
safety belt can be stored there. This enables
you to fasten the safety belt more conveniently.
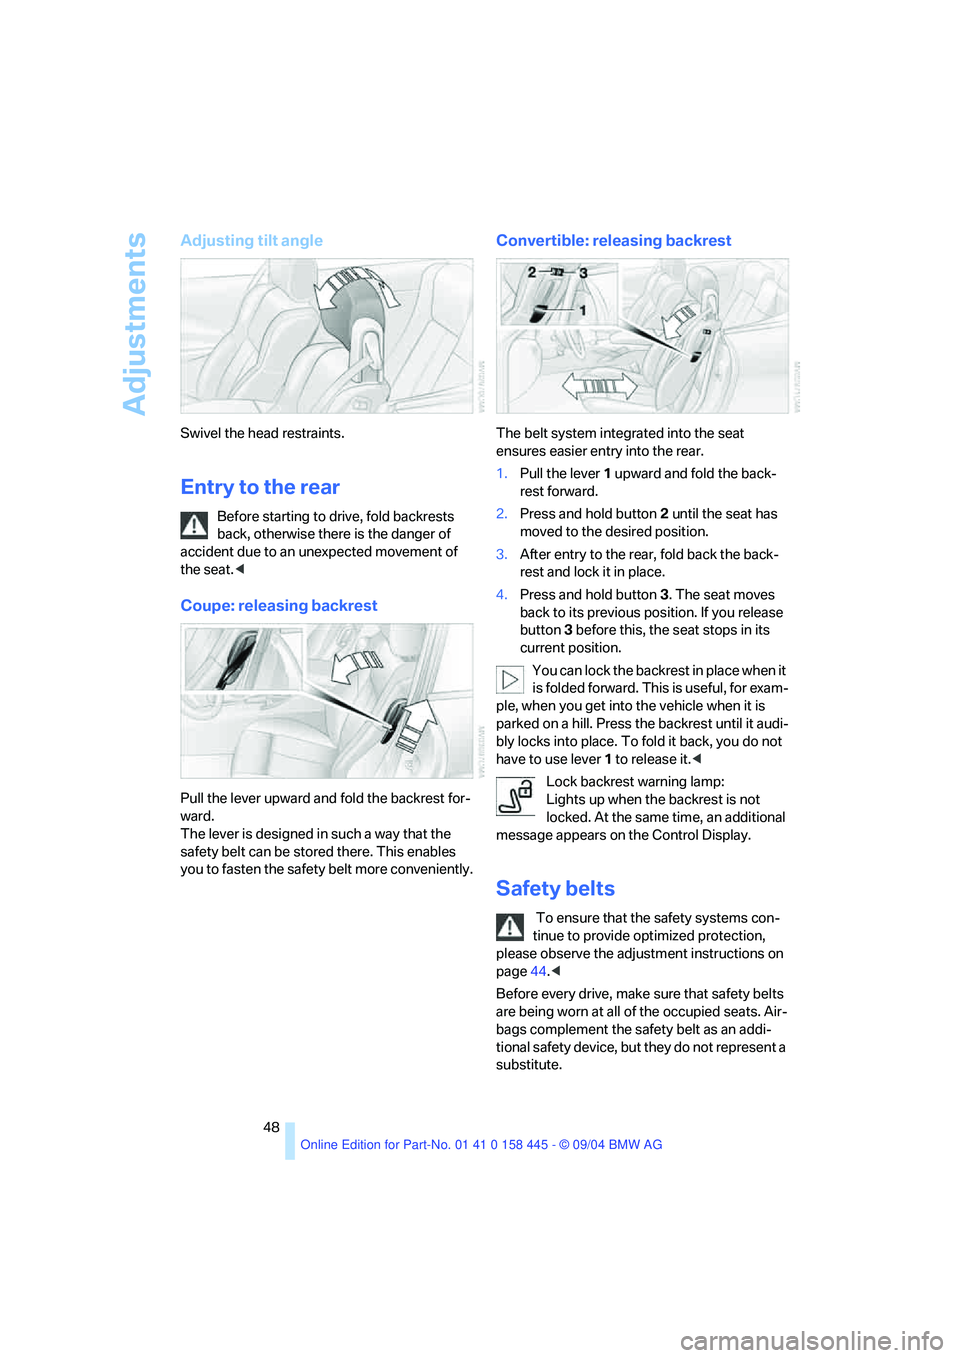
Convertible: releasing backrest
The belt system integrated into the seat
ensures easier entry into the rear.
1.Pull the lever 1 upward and fold the back-
rest forward.
2.Press and hold button 2 until the seat has
moved to the desired position.
3.After entry to the rear, fold back the back-
rest and lock it in place.
4.Press and hold button 3. The seat moves
back to its previous position. If you release
button 3 before this, the seat stops in its
current position.
You can lock the backrest in place when it
is folded forward. This is useful, for exam-
ple, when you get into the vehicle when it is
parked on a hill. Press the backrest until it audi-
bly locks into place. To fold it back, you do not
have to use lever 1 to release it.<
Lock backrest warning lamp:
Lights up when the backrest is not
locked. At the same time, an additional
message appears on the Control Display.
Safety belts
To ensure that the safety systems con-
tinue to provide optimized protection,
please observe the adjustment instructions on
page44.<
Before every drive, make sure that safety belts
are being worn at all of the occupied seats. Air-
bags complement the safety belt as an addi-
tional safety device, but they do not represent a
substitute.
Page 56 of 217
Controls
55Reference
At a glance
Driving tips
Communications
Navigation
Entertainment
Mobility
SMG Sequential manual transmission*
and automatic transmission*
Your BMW is equipped with the convenience
starting feature. It is sufficient to turn the igni-
tion key only briefly to position 3 and then
release it right away. The system responds by
automatically engaging the starter for a certain
period and allowing it to run until the engine
starts, after which it then disengages automati-
cally.
SMG Sequential manual transmission*
1.Press the brake pedal.
2.Engage selector-lever position N.
3.Start the engine.
If the engine does not start, engage the
last gear selected again, refer to instru-
ment cluster display, and then shift into posi-
tion N.<
Automatic transmission with
Steptronic*
1.Press the brake pedal.
2.Engage selector-lever position P or N.
3.Start the engine.
Switching off engine
Do not remove the ignition key while the
vehicle is rolling, as otherwise the steer-
ing wheel lock will immobilize the steering.
When leaving the vehicle, remove the ignition
key and lock the steering.
When parking on a downhill incline, apply the
handbrake, as otherwise the vehicle could roll
away.<
Manual transmission
1.Turn the ignition key to position 1 or 0.
2.Shift into first gear or reverse.
SMG Sequential manual transmission*
1.Engage a drive position.
2.Turn the ignition key to position 1 or 0.
A signal sounds on stopping the engine.
Automatic transmission with
Steptronic*
1.Engage selector-lever position P.
2.Turn the ignition key to position 1 or 0.
Handbrake
The handbrake is primarily intended to prevent
the vehicle from rolling while parked; it brakes
the rear wheels.
Indicator lamp
The indicator lamp lights up, and an
acoustic signal also sounds when start-
ing off. The handbrake is engaged.
Indicator lamp for Canadian models.
Engaging
The lever engages automatically.
Releasing
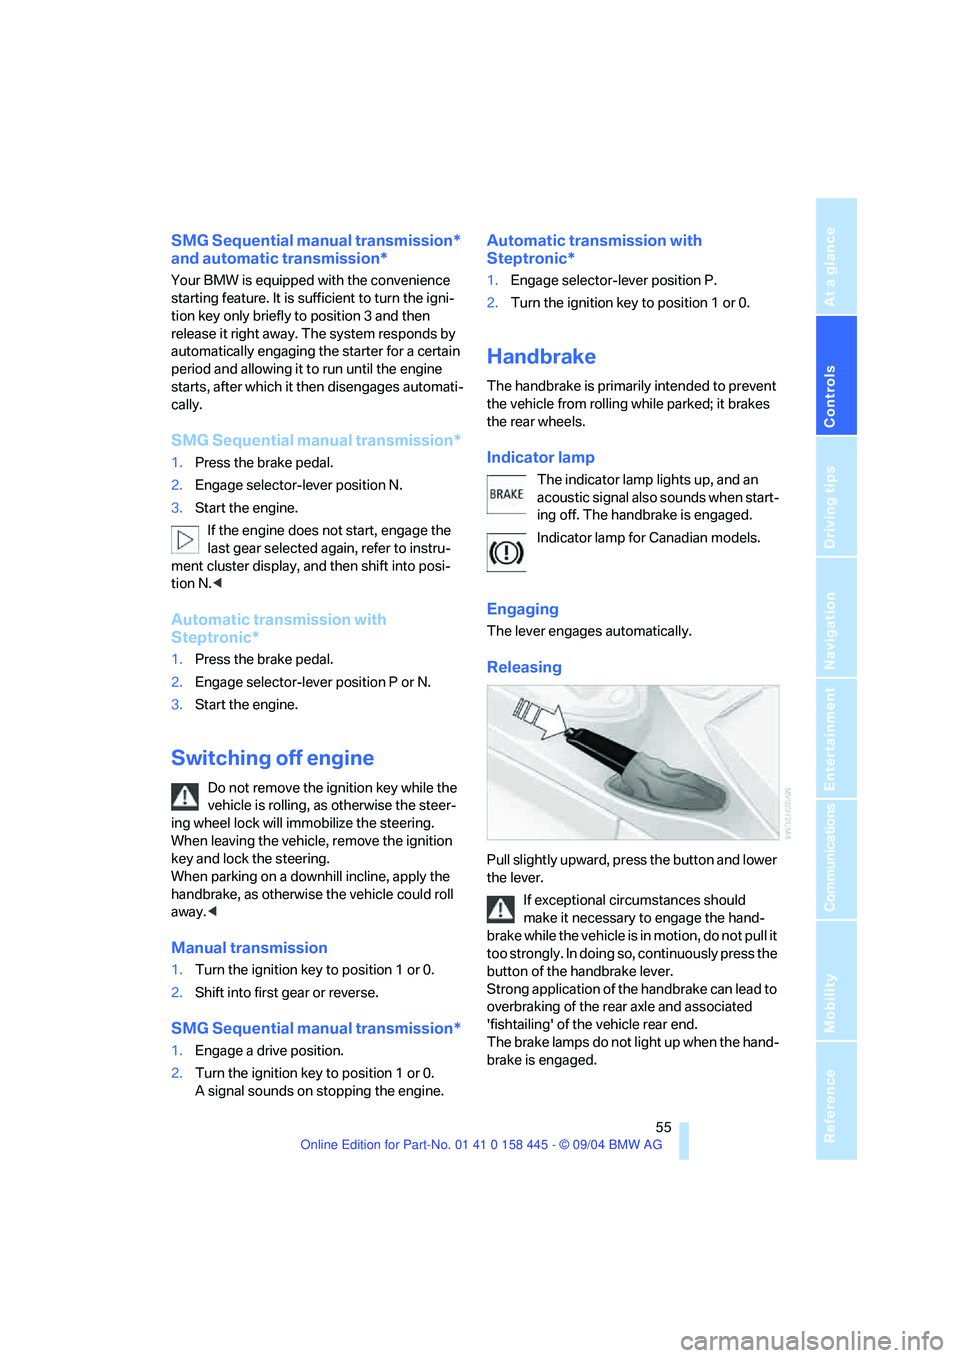
Pull slightly upward, press the button and lower
the lever.
If exceptional circumstances should
make it necessary to engage the hand-
brake while the vehicle is in motion, do not pull it
too strongly. In doing so, continuously press the
button of the handbrake lever.
Strong application of the handbrake can lead to
overbraking of the rear axle and associated
'fishtailing' of the vehicle rear end.
The brake lamps do not light up when the hand-
brake is engaged.
Page 78 of 217
Controls
77Reference
At a glance
Driving tips
Communications
Navigation
Entertainment
Mobility
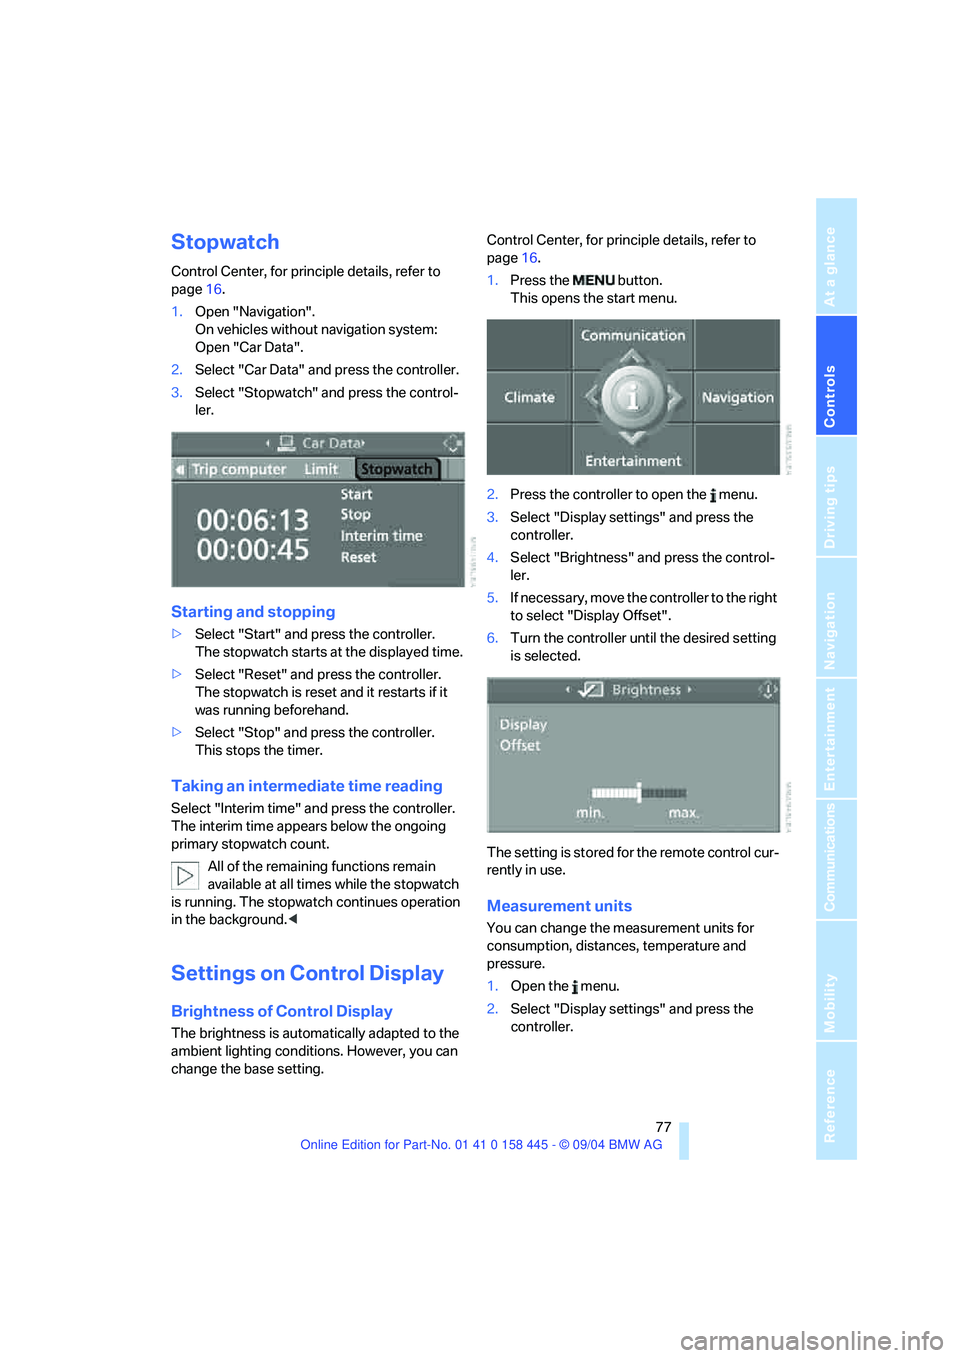
Stopwatch
Control Center, for principle details, refer to
page16.
1.Open "Navigation".
On vehicles without navigation system:
Open "Car Data".
2.Select "Car Data" and press the controller.
3.Select "Stopwatch" and press the control-
ler.
Starting and stopping
>Select "Start" and press the controller.
The stopwatch starts at the displayed time.
>Select "Reset" and press the controller.
The stopwatch is reset and it restarts if it
was running beforehand.
>Select "Stop" and press the controller.
This stops the timer.
Taking an intermediate time reading
Select "Interim time" and press the controller.
The interim time appears below the ongoing
primary stopwatch count.
All of the remaining functions remain
available at all times while the stopwatch
is running. The stopwatch continues operation
in the background.<
Settings on Control Display
Brightness of Control Display
The brightness is automatically adapted to the
ambient lighting conditions. However, you can
change the base setting.Control Center, for principle details, refer to
page16.
1.Press the button.
This opens the start menu.
2.Press the controller to open the menu.
3.Select "Display settings" and press the
controller.
4.Select "Brightness" and press the control-
ler.
5.If necessary, move the controller to the right
to select "Display Offset".
6.Turn the controller until the desired setting
is selected.
The setting is stored for the remote control cur-
rently in use.
Measurement units
You can change the measurement units for
consumption, distances, temperature and
pressure.
1.Open the menu.
2.Select "Display settings" and press the
controller.
Page 82 of 217
Controls
81Reference
At a glance
Driving tips
Communications
Navigation
Entertainment
Mobility
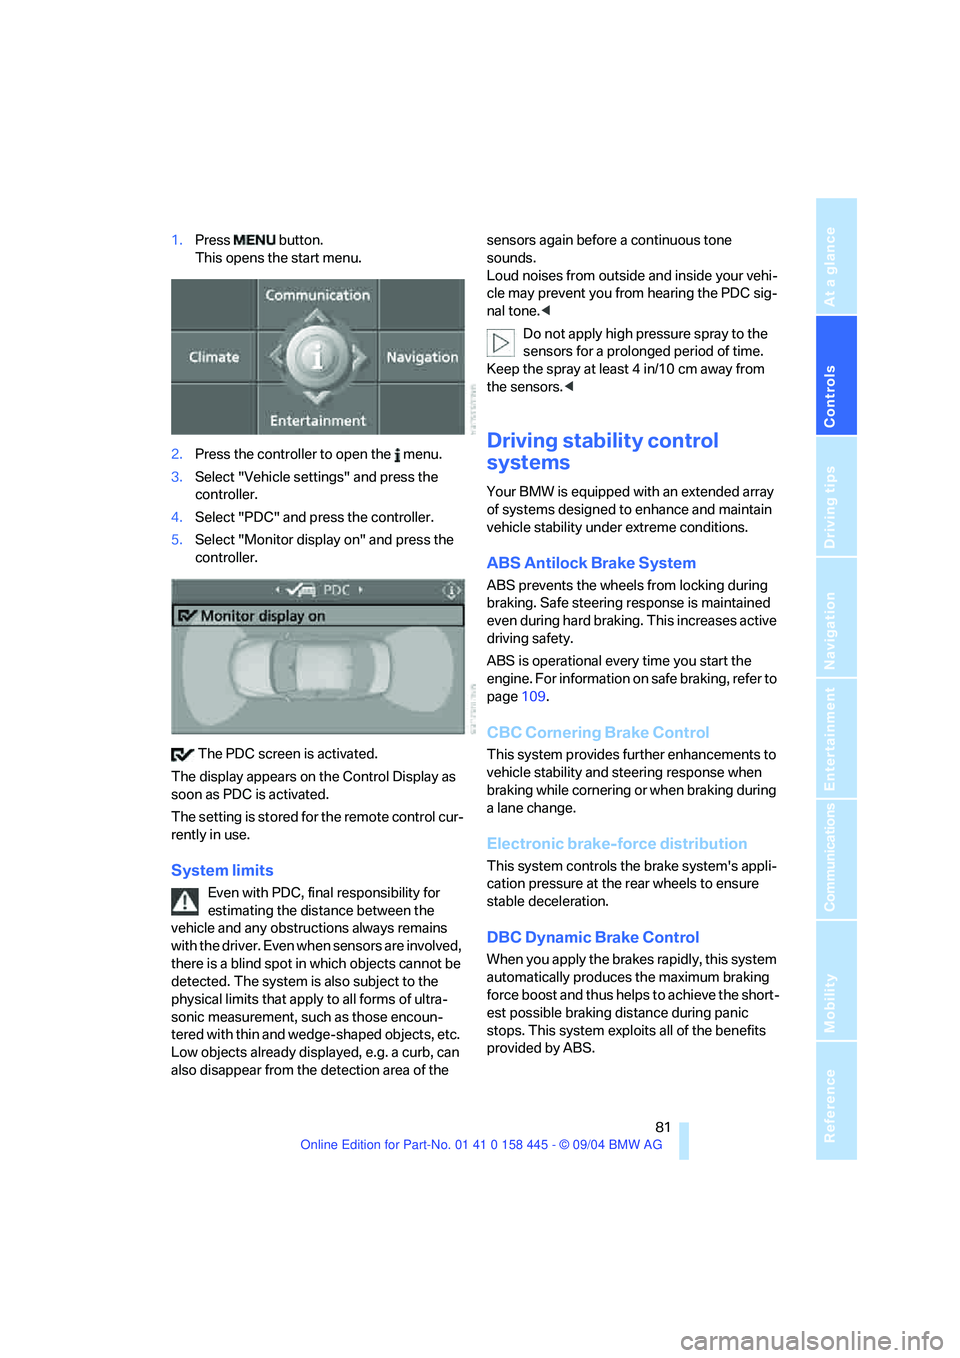
1.Press button.
This opens the start menu.
2.Press the controller to open the menu.
3.Select "Vehicle settings" and press the
controller.
4.Select "PDC" and press the controller.
5.Select "Monitor display on" and press the
controller.
The PDC screen is activated.
The display appears on the Control Display as
soon as PDC is activated.
The setting is stored for the remote control cur-
rently in use.
System limits
Even with PDC, final responsibility for
estimating the distance between the
vehicle and any obstructions always remains
with the driver. Even when sensors are involved,
there is a blind spot in which objects cannot be
detected. The system is also subject to the
physical limits that apply to all forms of ultra-
sonic measurement, such as those encoun-
tered with thin and wedge-shaped objects, etc.
Low objects already displayed, e.g. a curb, can
also disappear from the detection area of the sensors again before a continuous tone
sounds.
Loud noises from outside and inside your vehi-
cle may prevent you from hearing the PDC sig-
nal tone.<
Do not apply high pressure spray to the
sensors for a prolonged period of time.
Keep the spray at least 4 in/10 cm away from
the sensors.<
Driving stability control
systems
Your BMW is equipped with an extended array
of systems designed to enhance and maintain
vehicle stability under extreme conditions.
ABS Antilock Brake System
ABS prevents the wheels from locking during
braking. Safe steering response is maintained
even during hard braking. This increases active
driving safety.
ABS is operational every time you start the
engine. For information on safe braking, refer to
page109.
CBC Cornering Brake Control
This system provides further enhancements to
vehicle stability and steering response when
braking while cornering or when braking during
a lane change.
Electronic brake-force distribution
This system controls the brake system's appli-
cation pressure at the rear wheels to ensure
stable deceleration.
DBC Dynamic Brake Control
When you apply the brakes rapidly, this system
automatically produces the maximum braking
force boost and thus helps to achieve the short-
est possible braking distance during panic
stops. This system exploits all of the benefits
provided by ABS.
Page 84 of 217
Controls
83Reference
At a glance
Driving tips
Communications
Navigation
Entertainment
Mobility
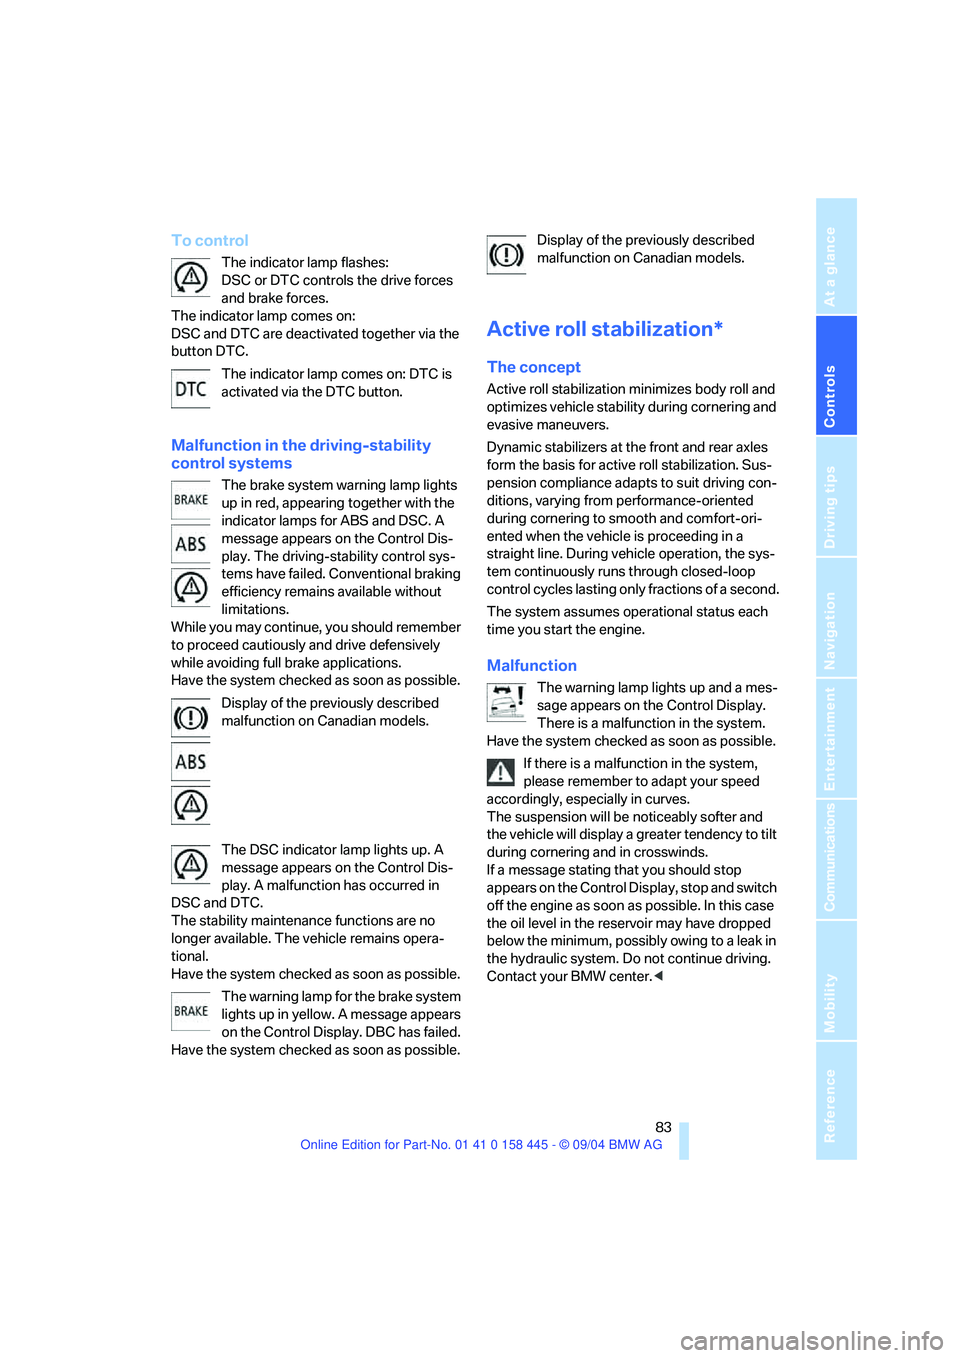
To control
The indicator lamp flashes:
DSC or DTC controls the drive forces
and brake forces.
The indicator lamp comes on:
DSC and DTC are deactivated together via the
button DTC.
The indicator lamp comes on: DTC is
activated via the DTC button.
Malfunction in the driving-stability
control systems
The brake system warning lamp lights
up in red, appearing together with the
indicator lamps for ABS and DSC. A
message appears on the Control Dis-
play. The driving-stability control sys-
tems have failed. Conventional braking
efficiency remains available without
limitations.
While you may continue, you should remember
to proceed cautiously and drive defensively
while avoiding full brake applications.
Have the system checked as soon as possible.
Display of the previously described
malfunction on Canadian models.
The DSC indicator lamp lights up. A
message appears on the Control Dis-
play. A malfunction has occurred in
DSC and DTC.
The stability maintenance functions are no
longer available. The vehicle remains opera-
tional.
Have the system checked as soon as possible.
The warning lamp for the brake system
lights up in yellow. A message appears
on the Control Display. DBC has failed.
Have the system checked as soon as possible.Display of the previously described
malfunction on Canadian models.
Active roll stabilization*
The concept
Active roll stabilization minimizes body roll and
optimizes vehicle stability during cornering and
evasive maneuvers.
Dynamic stabilizers at the front and rear axles
form the basis for active roll stabilization. Sus-
pension compliance adapts to suit driving con-
ditions, varying from performance-oriented
during cornering to smooth and comfort-ori-
ented when the vehicle is proceeding in a
straight line. During vehicle operation, the sys-
tem continuously runs through closed-loop
control cycles lasting only fractions of a second.
The system assumes operational status each
time you start the engine.
Malfunction
The warning lamp lights up and a mes-
sage appears on the Control Display.
There is a malfunction in the system.
Have the system checked as soon as possible.
If there is a malfunction in the system,
please remember to adapt your speed
accordingly, especially in curves.
The suspension will be noticeably softer and
the vehicle will display a greater tendency to tilt
during cornering and in crosswinds.
If a message stating that you should stop
appears on the Control Display, stop and switch
off the engine as soon as possible. In this case
the oil level in the reservoir may have dropped
below the minimum, possibly owing to a leak in
the hydraulic system. Do not continue driving.
Contact your BMW center.<
Page 97 of 217
A congenial climate
96 it off while also increasing the air volume as
required.
The recirculated-air mode should not be used
over a longer period of time, as the air quality
inside the vehicle deteriorates continuously.<
Residual heat mode
Press the button when the motor is
switched off and warm.
The heat stored in the engine is
used to heat the passenger com-
partment, e.g. when stopped at a school to pick
up a child.
You can adjust the automatic climate control
settings as of ignition key position 1.
Provided that the engine has warmed to its nor-
mal operating temperature and the battery is
charged, you can use this function for up to
15 minutes after switching off the ignition. The
LED in the button lights up to confirm compli-
ance with both of these conditions.
Switching off automatic climate control
The air volume, the heater and the
cooling function are all switched
off.
You can restart the automatic cli-
mate control by pressing any of its buttons
except the REST button.
Settings using Control Center
Ignition key:
>In vehicles with separate drives for audio
CDs and navigation DVDs, ignition key in
position 2.
>In vehicles with one drive for audio CDs,
ignition key in position 1.
Control Center, for principle details, refer to
page16.1.Press the button.
This opens the start menu.
2.Move the controller to the left to open "Cli-
mate".
You can set the following:
>Manual air distribution, separate for driver's
side and passenger side
>Adapting temperature in upper body region
>Intensity of the AUTO program
The settings are stored for the remote control
currently in use.
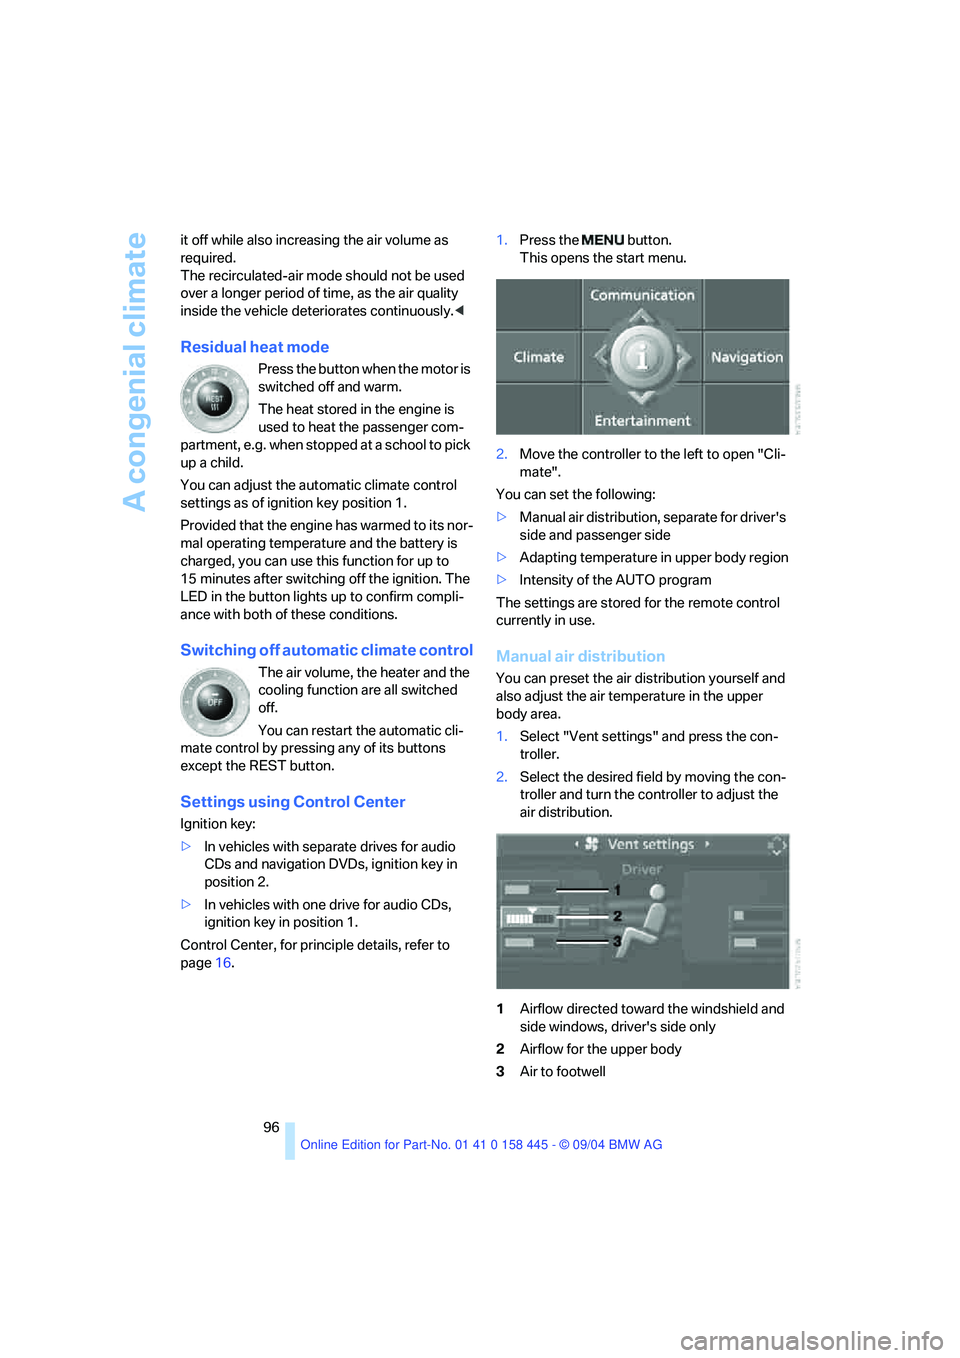
Manual air distribution
You can preset the air distribution yourself and
also adjust the air temperature in the upper
body area.
1.Select "Vent settings" and press the con-
troller.
2.Select the desired field by moving the con-
troller and turn the controller to adjust the
air distribution.
1Airflow directed toward the windshield and
side windows, driver's side only
2Airflow for the upper body
3Air to footwell