2005 BMW 645CI CONVERTIBLE ABS
[x] Cancel search: ABSPage 35 of 217
Opening and closing
34 If special circumstances should make it abso-
lutely necessary to operate the vehicle with the
luggage compartment lid open:
1.Coupe: close both windows and the glass
sunroof
*.
Convertible: with closed top, close all win-
dows.
2.Increase the air volume of the automatic
climate control to a high level, refer to
page95.
Luggage compartment
There are four lashing eyes on the inner corners
of the luggage compartment for securing lug-
gage nets
* or securing straps to fix luggage in
position.
Also refer to Securing cargo, page111.
Convertible: increasing luggage
compartment capacity
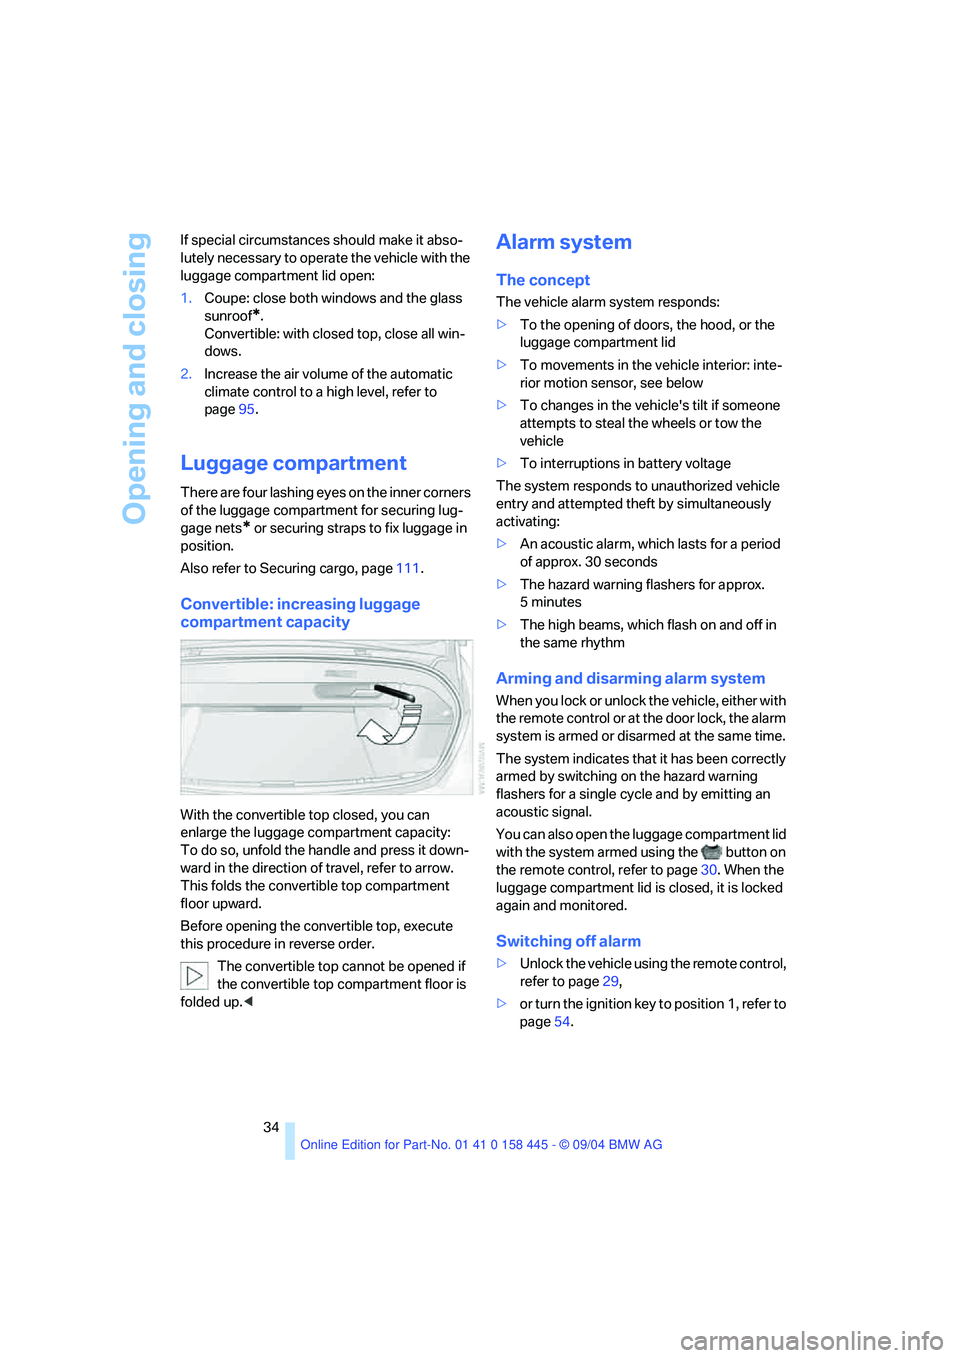
With the convertible top closed, you can
enlarge the luggage compartment capacity:
To do so, unfold the handle and press it down-
ward in the direction of travel, refer to arrow.
This folds the convertible top compartment
floor upward.
Before opening the convertible top, execute
this procedure in reverse order.
The convertible top cannot be opened if
the convertible top compartment floor is
folded up.<
Alarm system
The concept
The vehicle alarm system responds:
>To the opening of doors, the hood, or the
luggage compartment lid
>To movements in the vehicle interior: inte-
rior motion sensor, see below
>To changes in the vehicle's tilt if someone
attempts to steal the wheels or tow the
vehicle
>To interruptions in battery voltage
The system responds to unauthorized vehicle
entry and attempted theft by simultaneously
activating:
>An acoustic alarm, which lasts for a period
of approx. 30 seconds
>The hazard warning flashers for approx.
5minutes
>The high beams, which flash on and off in
the same rhythm
Arming and disarming alarm system
When you lock or unlock the vehicle, either with
the remote control or at the door lock, the alarm
system is armed or disarmed at the same time.
The system indicates that it has been correctly
armed by switching on the hazard warning
flashers for a single cycle and by emitting an
acoustic signal.
You can also open the luggage compartment lid
with the system armed using the button on
the remote control, refer to page30. When the
luggage compartment lid is closed, it is locked
again and monitored.
Switching off alarm
>Unlock the vehicle using the remote control,
refer to page29,
>or turn the ignition key to position 1, refer to
page54.
Page 42 of 217
Controls
41Reference
At a glance
Driving tips
Communications
Navigation
Entertainment
Mobility
If the opening or closing action is not
completed, the luggage compartment lid
cannot be opened.<
Convenience operation with the
remote control and via the door lock
Refer to pages30 and31.
Manual closing in the event of an
electrical malfunction
Only close the convertible top manually if
absolutely necessary; never open it man-
ually. The convertible top compartment lid can-
not be locked in the event of an electrical mal-
function and would open while the vehicle is
being driven.
Improper handling can lead to damage.<
Before closing
1.Open the luggage compartment lid.
2.Take the Allen wrench and the screwdriver
from the on-board tool kit, refer to
page180.
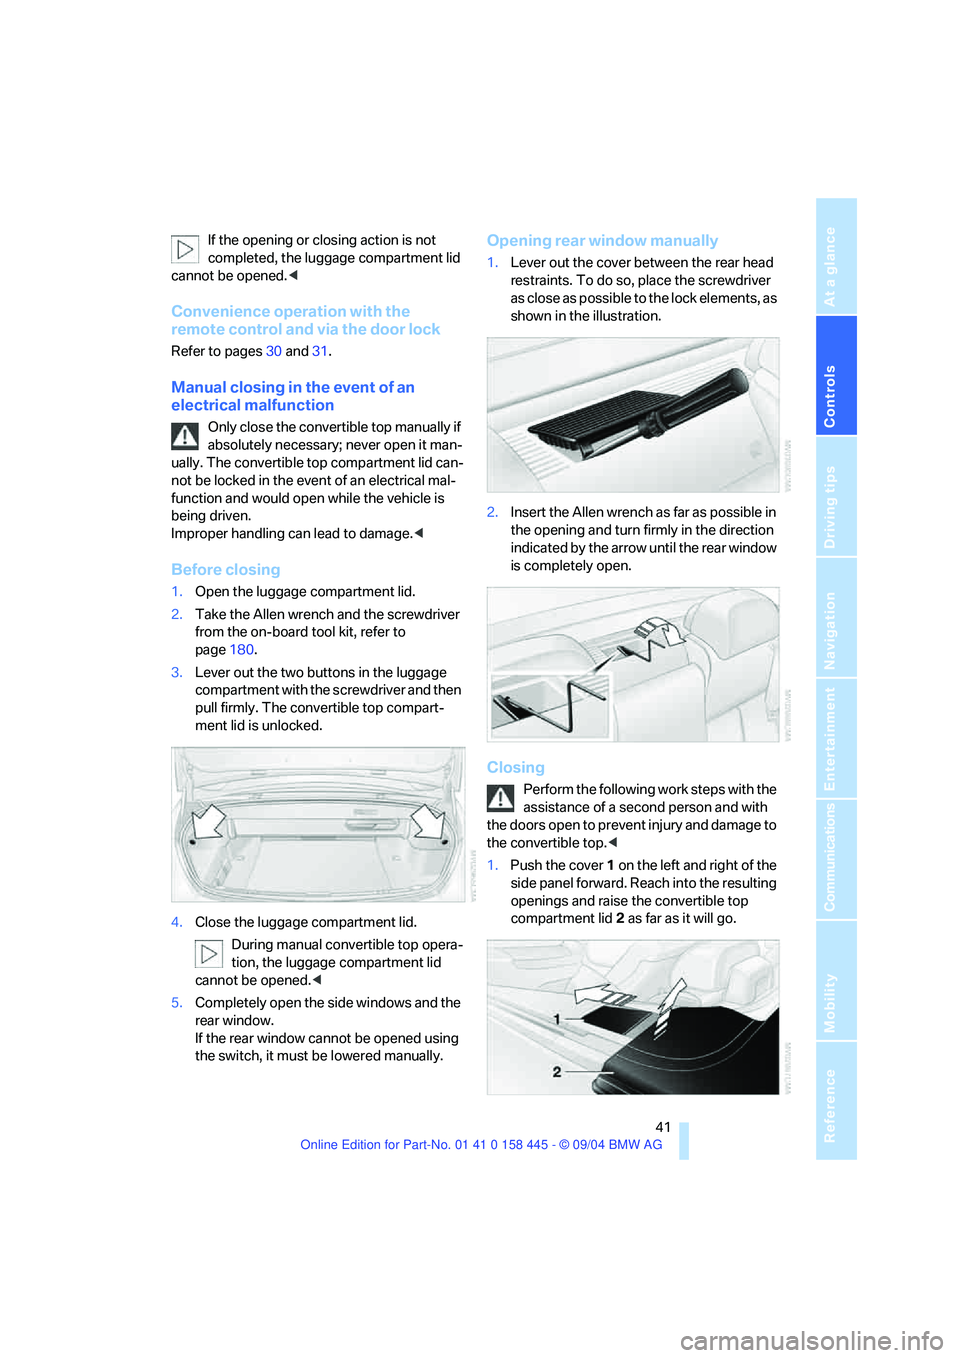
3.Lever out the two buttons in the luggage
compartment with the screwdriver and then
pull firmly. The convertible top compart-
ment lid is unlocked.
4.Close the luggage compartment lid.
During manual convertible top opera-
tion, the luggage compartment lid
cannot be opened.<
5.Completely open the side windows and the
rear window.
If the rear window cannot be opened using
the switch, it must be lowered manually.
Opening rear window manually
1.Lever out the cover between the rear head
restraints. To do so, place the screwdriver
as close as possible to the lock elements, as
shown in the illustration.
2.Insert the Allen wrench as far as possible in
the opening and turn firmly in the direction
indicated by the arrow until the rear window
is completely open.
Closing
Perform the following work steps with the
assistance of a second person and with
the doors open to prevent injury and damage to
the convertible top.<
1.Push the cover 1 on the left and right of the
side panel forward. Reach into the resulting
openings and raise the convertible top
compartment lid2 as far as it will go.
Page 65 of 217
Driving
64
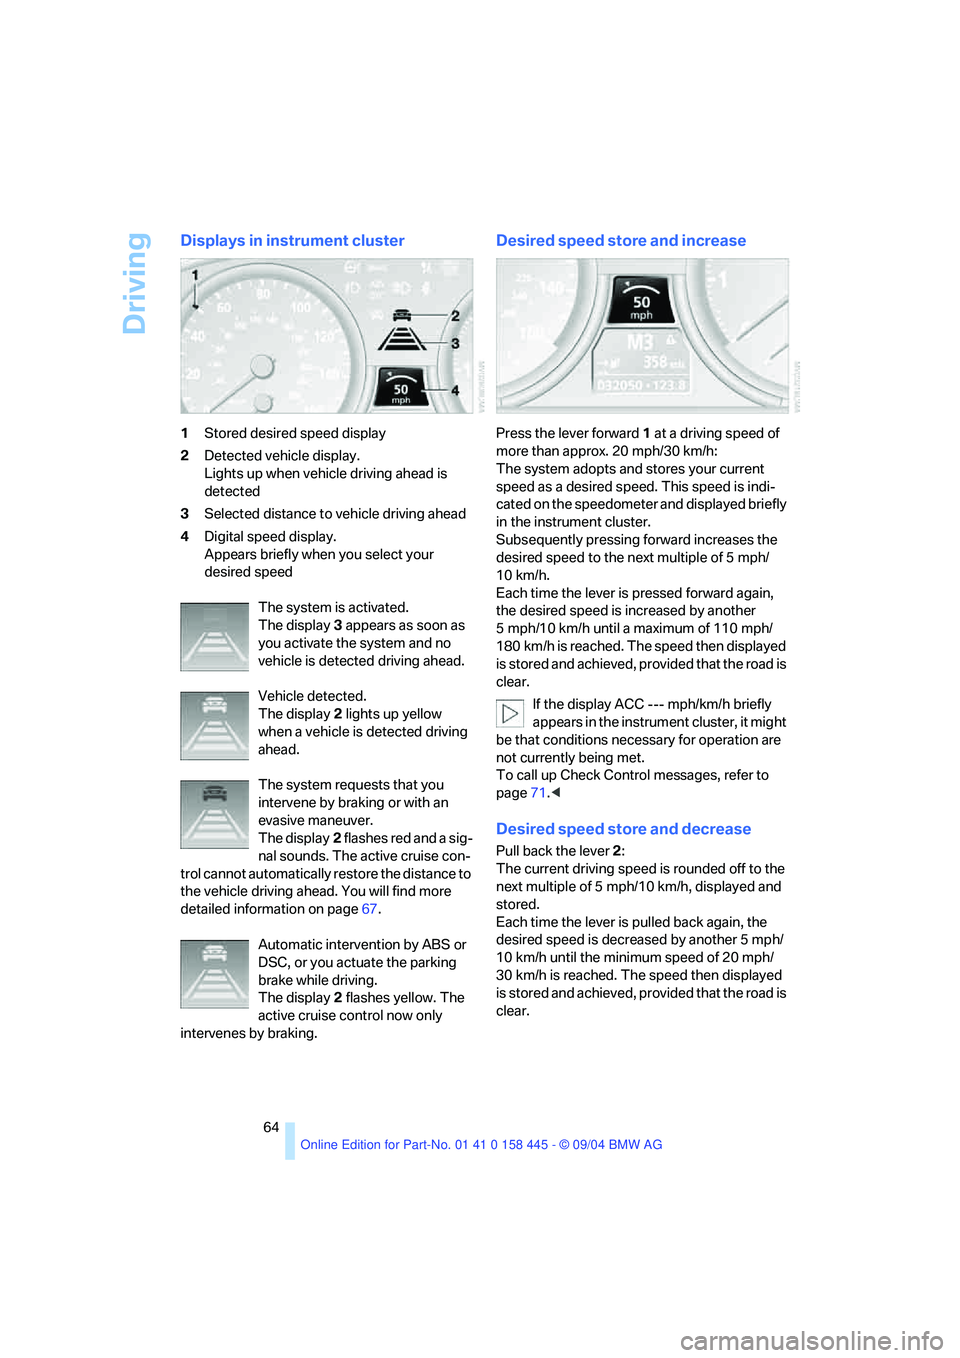
Displays in instrument cluster
1Stored desired speed display
2Detected vehicle display.
Lights up when vehicle driving ahead is
detected
3Selected distance to vehicle driving ahead
4Digital speed display.
Appears briefly when you select your
desired speed
The system is activated.
The display3 appears as soon as
you activate the system and no
vehicle is detected driving ahead.
Vehicle detected.
The display2 lights up yellow
when a vehicle is detected driving
ahead.
The system requests that you
intervene by braking or with an
evasive maneuver.
The display2 flashes red and a sig-
nal sounds. The active cruise con-
trol cannot automatically restore the distance to
the vehicle driving ahead. You will find more
detailed information on page67.
Automatic intervention by ABS or
DSC, or you actuate the parking
brake while driving.
The display2 flashes yellow. The
active cruise control now only
intervenes by braking.
Desired speed store and increase
Press the lever forward1 at a driving speed of
more than approx. 20 mph/30 km/h:
The system adopts and stores your current
speed as a desired speed. This speed is indi-
cated on the speedometer and displayed briefly
in the instrument cluster.
Subsequently pressing forward increases the
desired speed to the next multiple of 5 mph/
10 km/h.
Each time the lever is pressed forward again,
the desired speed is increased by another
5 mph/10 km/h until a maximum of 110 mph/
180 km/h is reached. The speed then displayed
is stored and achieved, provided that the road is
clear.
If the display ACC --- mph/km/h briefly
appears in the instrument cluster, it might
be that conditions necessary for operation are
not currently being met.
To call up Check Control messages, refer to
page71.<
Desired speed store and decrease
Pull back the lever2:
The current driving speed is rounded off to the
next multiple of 5 mph/10 km/h, displayed and
stored.
Each time the lever is pulled back again, the
desired speed is decreased by another 5 mph/
10 km/h until the minimum speed of 20 mph/
30 km/h is reached. The speed then displayed
is stored and achieved, provided that the road is
clear.
Page 67 of 217
Driving
66
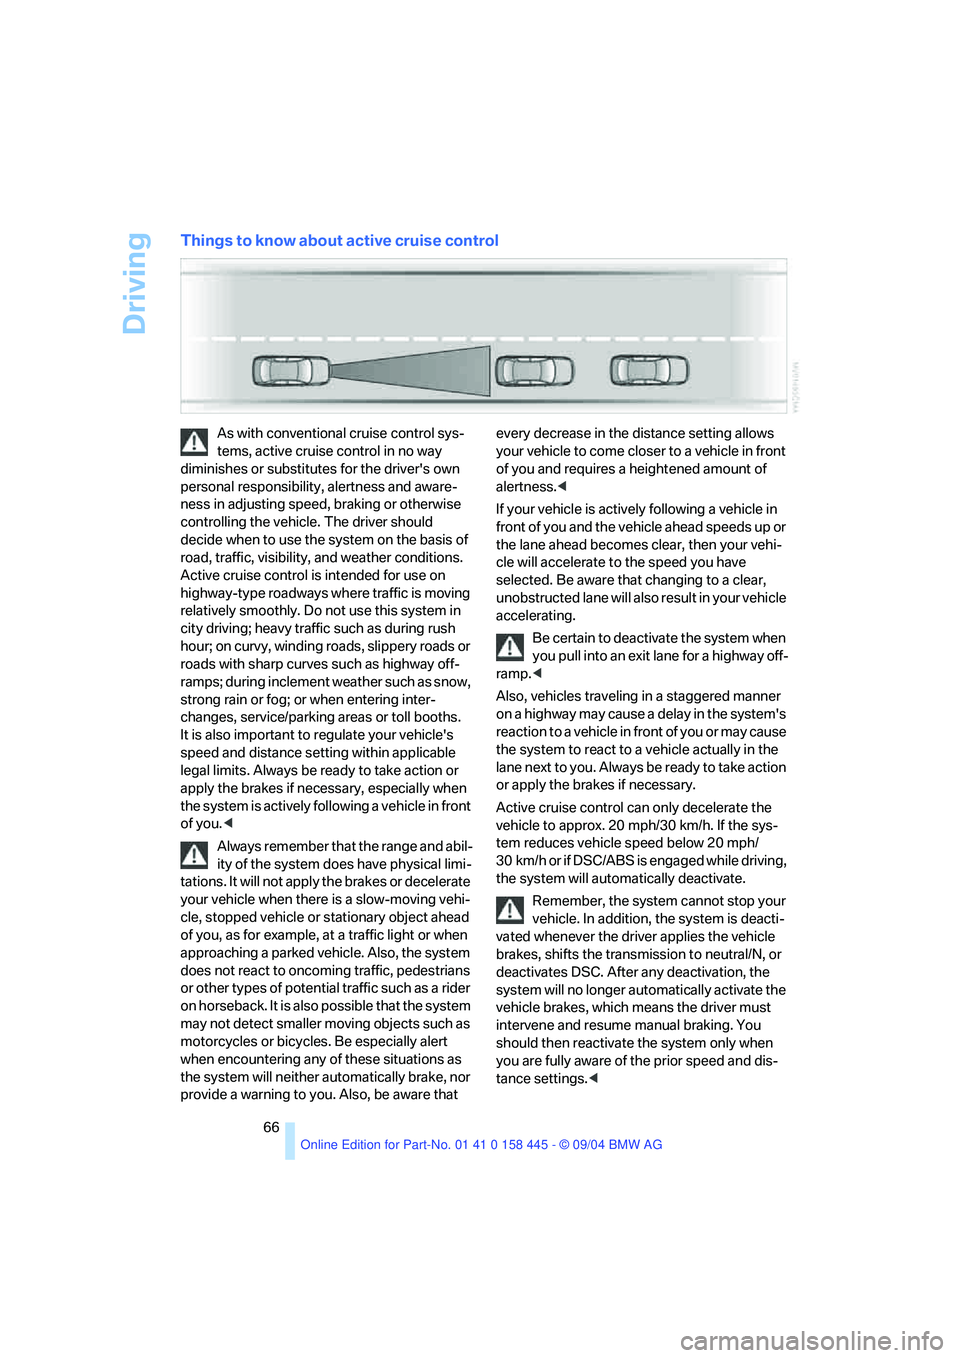
Things to know about active cruise control
As with conventional cruise control sys-
tems, active cruise control in no way
diminishes or substitutes for the driver's own
personal responsibility, alertness and aware-
ness in adjusting speed, braking or otherwise
controlling the vehicle. The driver should
decide when to use the system on the basis of
road, traffic, visibility, and weather conditions.
Active cruise control is intended for use on
highway-type roadways where traffic is moving
relatively smoothly. Do not use this system in
city driving; heavy traffic such as during rush
hour; on curvy, winding roads, slippery roads or
roads with sharp curves such as highway off-
ramps; during inclement weather such as snow,
strong rain or fog; or when entering inter-
changes, service/parking areas or toll booths.
It is also important to regulate your vehicle's
speed and distance setting within applicable
legal limits. Always be ready to take action or
apply the brakes if necessary, especially when
the system is actively following a vehicle in front
of you.<
Always remember that the range and abil-
ity of the system does have physical limi-
tations. It will not apply the brakes or decelerate
your vehicle when there is a slow-moving vehi-
cle, stopped vehicle or stationary object ahead
of you, as for example, at a traffic light or when
approaching a parked vehicle. Also, the system
does not react to oncoming traffic, pedestrians
or other types of potential traffic such as a rider
on horseback. It is also possible that the system
may not detect smaller moving objects such as
motorcycles or bicycles. Be especially alert
when encountering any of these situations as
the system will neither automatically brake, nor
provide a warning to you. Also, be aware that every decrease in the distance setting allows
your vehicle to come closer to a vehicle in front
of you and requires a heightened amount of
alertness.<
If your vehicle is actively following a vehicle in
front of you and the vehicle ahead speeds up or
the lane ahead becomes clear, then your vehi-
cle will accelerate to the speed you have
selected. Be aware that changing to a clear,
unobstructed lane will also result in your vehicle
accelerating.
Be certain to deactivate the system when
you pull into an exit lane for a highway off-
ramp.<
Also, vehicles traveling in a staggered manner
on a highway may cause a delay in the system's
reaction to a vehicle in front of you or may cause
the system to react to a vehicle actually in the
lane next to you. Always be ready to take action
or apply the brakes if necessary.
Active cruise control can only decelerate the
vehicle to approx. 20 mph/30 km/h. If the sys-
tem reduces vehicle speed below 20 mph/
30 km/h or if DSC/ABS is engaged while driving,
the system will automatically deactivate.
Remember, the system cannot stop your
vehicle. In addition, the system is deacti-
vated whenever the driver applies the vehicle
brakes, shifts the transmission to neutral/N, or
deactivates DSC. After any deactivation, the
system will no longer automatically activate the
vehicle brakes, which means the driver must
intervene and resume manual braking. You
should then reactivate the system only when
you are fully aware of the prior speed and dis-
tance settings.<
Page 70 of 217
Controls
69Reference
At a glance
Driving tips
Communications
Navigation
Entertainment
Mobility
Everything under control
Odometer, outside
temperature display, clock
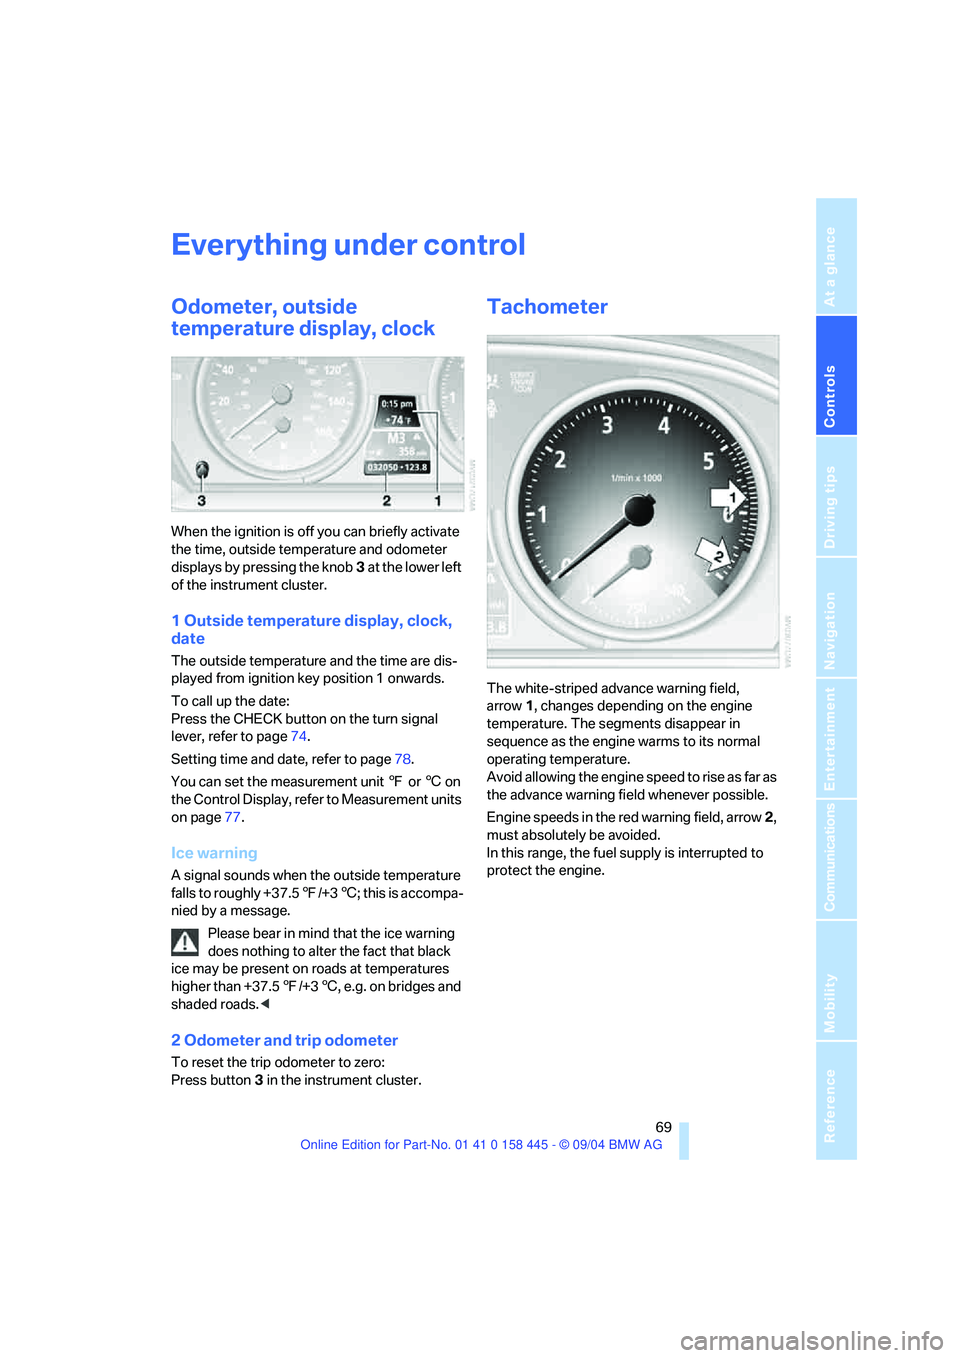
When the ignition is off you can briefly activate
the time, outside temperature and odometer
displays by pressing the knob3 at the lower left
of the instrument cluster.
1 Outside temperature display, clock,
date
The outside temperature and the time are dis-
played from ignition key position 1 onwards.
To call up the date:
Press the CHECK button on the turn signal
lever, refer to page74.
Setting time and date, refer to page78.
You can set the measurement unit 7 or 6 on
the Control Display, refer to Measurement units
on page77.
Ice warning
A signal sounds when the outside temperature
falls to roughly +37.57/+36; this is accompa-
nied by a message.
Please bear in mind that the ice warning
does nothing to alter the fact that black
ice may be present on roads at temperatures
higher than +37.57/+36, e.g. on bridges and
shaded roads.<
2 Odometer and trip odometer
To reset the trip odometer to zero:
Press button3 in the instrument cluster.
Tachometer
The white-striped advance warning field,
arrow1, changes depending on the engine
temperature. The segments disappear in
sequence as the engine warms to its normal
operating temperature.
Avoid allowing the engine speed to rise as far as
the advance warning field whenever possible.
Engine speeds in the red warning field, arrow2,
must absolutely be avoided.
In this range, the fuel supply is interrupted to
protect the engine.
Page 82 of 217
Controls
81Reference
At a glance
Driving tips
Communications
Navigation
Entertainment
Mobility
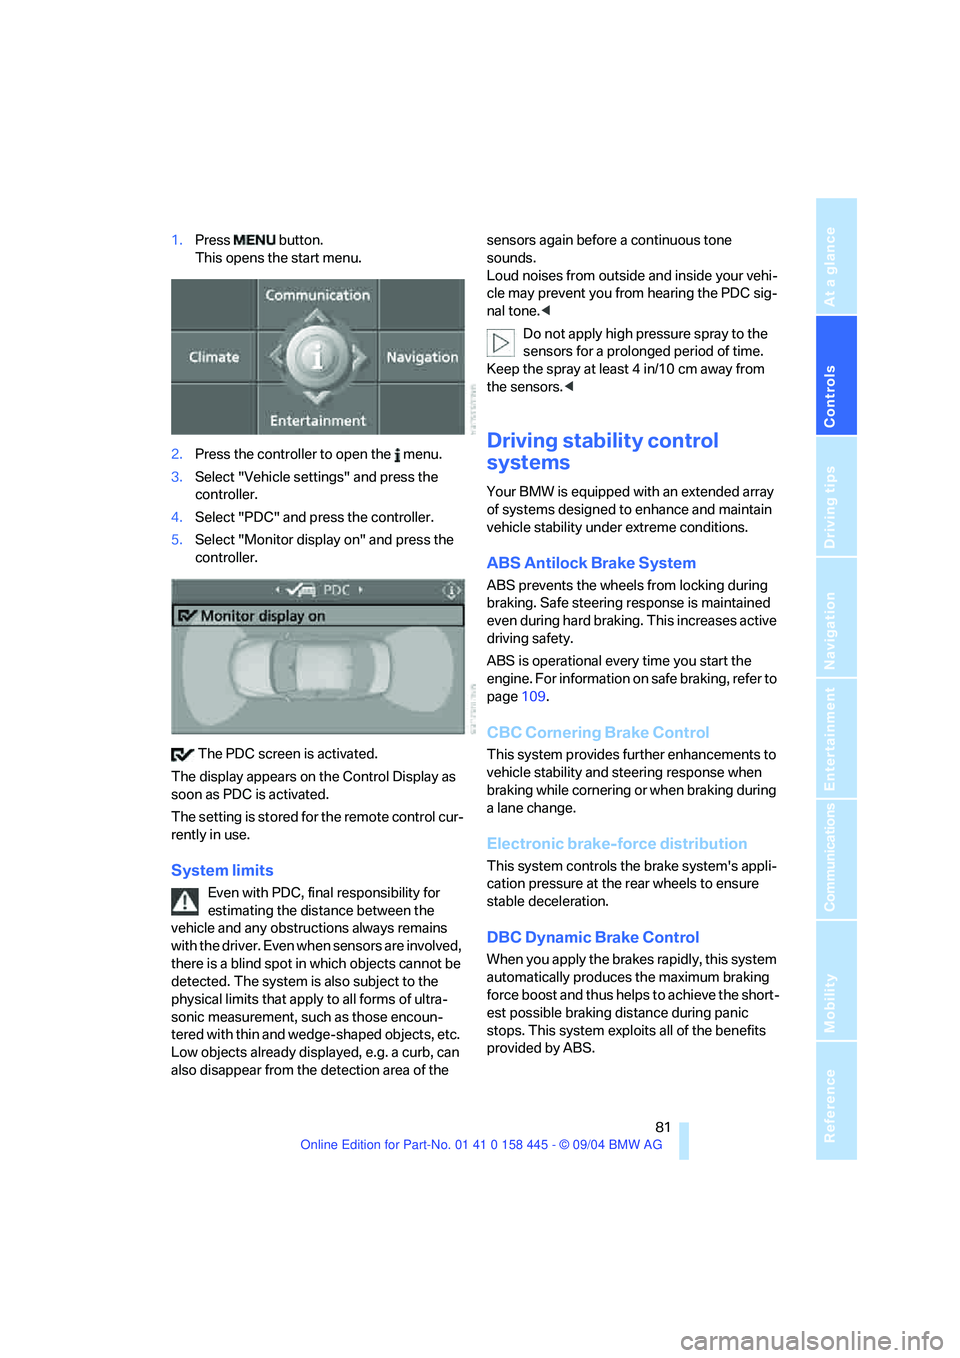
1.Press button.
This opens the start menu.
2.Press the controller to open the menu.
3.Select "Vehicle settings" and press the
controller.
4.Select "PDC" and press the controller.
5.Select "Monitor display on" and press the
controller.
The PDC screen is activated.
The display appears on the Control Display as
soon as PDC is activated.
The setting is stored for the remote control cur-
rently in use.
System limits
Even with PDC, final responsibility for
estimating the distance between the
vehicle and any obstructions always remains
with the driver. Even when sensors are involved,
there is a blind spot in which objects cannot be
detected. The system is also subject to the
physical limits that apply to all forms of ultra-
sonic measurement, such as those encoun-
tered with thin and wedge-shaped objects, etc.
Low objects already displayed, e.g. a curb, can
also disappear from the detection area of the sensors again before a continuous tone
sounds.
Loud noises from outside and inside your vehi-
cle may prevent you from hearing the PDC sig-
nal tone.<
Do not apply high pressure spray to the
sensors for a prolonged period of time.
Keep the spray at least 4 in/10 cm away from
the sensors.<
Driving stability control
systems
Your BMW is equipped with an extended array
of systems designed to enhance and maintain
vehicle stability under extreme conditions.
ABS Antilock Brake System
ABS prevents the wheels from locking during
braking. Safe steering response is maintained
even during hard braking. This increases active
driving safety.
ABS is operational every time you start the
engine. For information on safe braking, refer to
page109.
CBC Cornering Brake Control
This system provides further enhancements to
vehicle stability and steering response when
braking while cornering or when braking during
a lane change.
Electronic brake-force distribution
This system controls the brake system's appli-
cation pressure at the rear wheels to ensure
stable deceleration.
DBC Dynamic Brake Control
When you apply the brakes rapidly, this system
automatically produces the maximum braking
force boost and thus helps to achieve the short-
est possible braking distance during panic
stops. This system exploits all of the benefits
provided by ABS.
Page 84 of 217
Controls
83Reference
At a glance
Driving tips
Communications
Navigation
Entertainment
Mobility
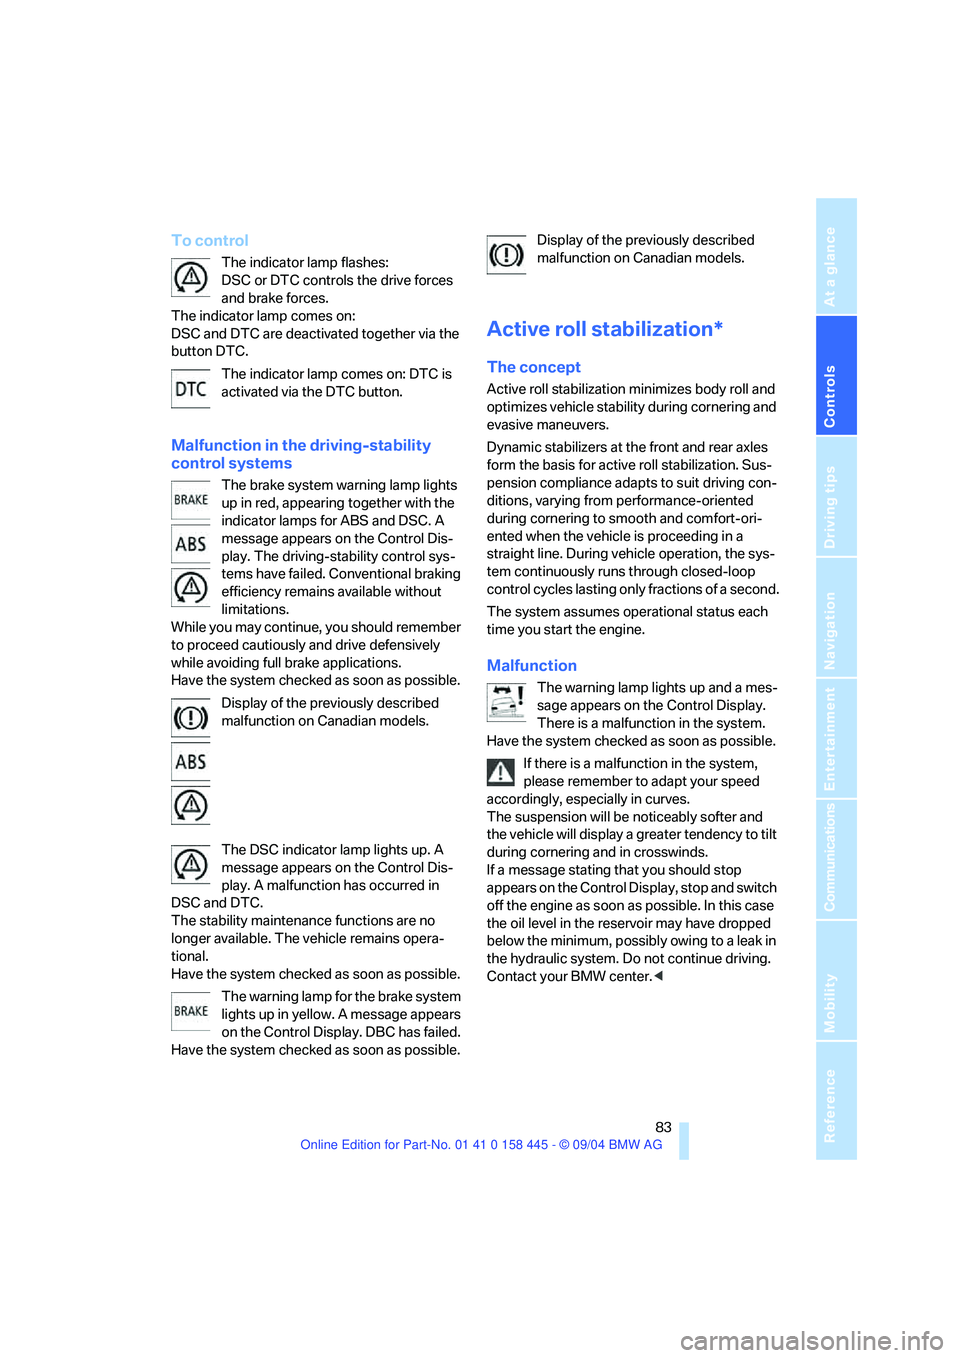
To control
The indicator lamp flashes:
DSC or DTC controls the drive forces
and brake forces.
The indicator lamp comes on:
DSC and DTC are deactivated together via the
button DTC.
The indicator lamp comes on: DTC is
activated via the DTC button.
Malfunction in the driving-stability
control systems
The brake system warning lamp lights
up in red, appearing together with the
indicator lamps for ABS and DSC. A
message appears on the Control Dis-
play. The driving-stability control sys-
tems have failed. Conventional braking
efficiency remains available without
limitations.
While you may continue, you should remember
to proceed cautiously and drive defensively
while avoiding full brake applications.
Have the system checked as soon as possible.
Display of the previously described
malfunction on Canadian models.
The DSC indicator lamp lights up. A
message appears on the Control Dis-
play. A malfunction has occurred in
DSC and DTC.
The stability maintenance functions are no
longer available. The vehicle remains opera-
tional.
Have the system checked as soon as possible.
The warning lamp for the brake system
lights up in yellow. A message appears
on the Control Display. DBC has failed.
Have the system checked as soon as possible.Display of the previously described
malfunction on Canadian models.
Active roll stabilization*
The concept
Active roll stabilization minimizes body roll and
optimizes vehicle stability during cornering and
evasive maneuvers.
Dynamic stabilizers at the front and rear axles
form the basis for active roll stabilization. Sus-
pension compliance adapts to suit driving con-
ditions, varying from performance-oriented
during cornering to smooth and comfort-ori-
ented when the vehicle is proceeding in a
straight line. During vehicle operation, the sys-
tem continuously runs through closed-loop
control cycles lasting only fractions of a second.
The system assumes operational status each
time you start the engine.
Malfunction
The warning lamp lights up and a mes-
sage appears on the Control Display.
There is a malfunction in the system.
Have the system checked as soon as possible.
If there is a malfunction in the system,
please remember to adapt your speed
accordingly, especially in curves.
The suspension will be noticeably softer and
the vehicle will display a greater tendency to tilt
during cornering and in crosswinds.
If a message stating that you should stop
appears on the Control Display, stop and switch
off the engine as soon as possible. In this case
the oil level in the reservoir may have dropped
below the minimum, possibly owing to a leak in
the hydraulic system. Do not continue driving.
Contact your BMW center.<
Page 87 of 217
Technology for comfort, convenience and safety
86
Initializing system
1.Start the engine.
2.With the vehicle stationary, turn the steer-
ing wheel from the straight-ahead position
to the left as far as it will go and then back to
the straight-ahead position.
3.Switch off the engine.
When you start the engine again, all the func-
tions of the active steering will be available once
again.
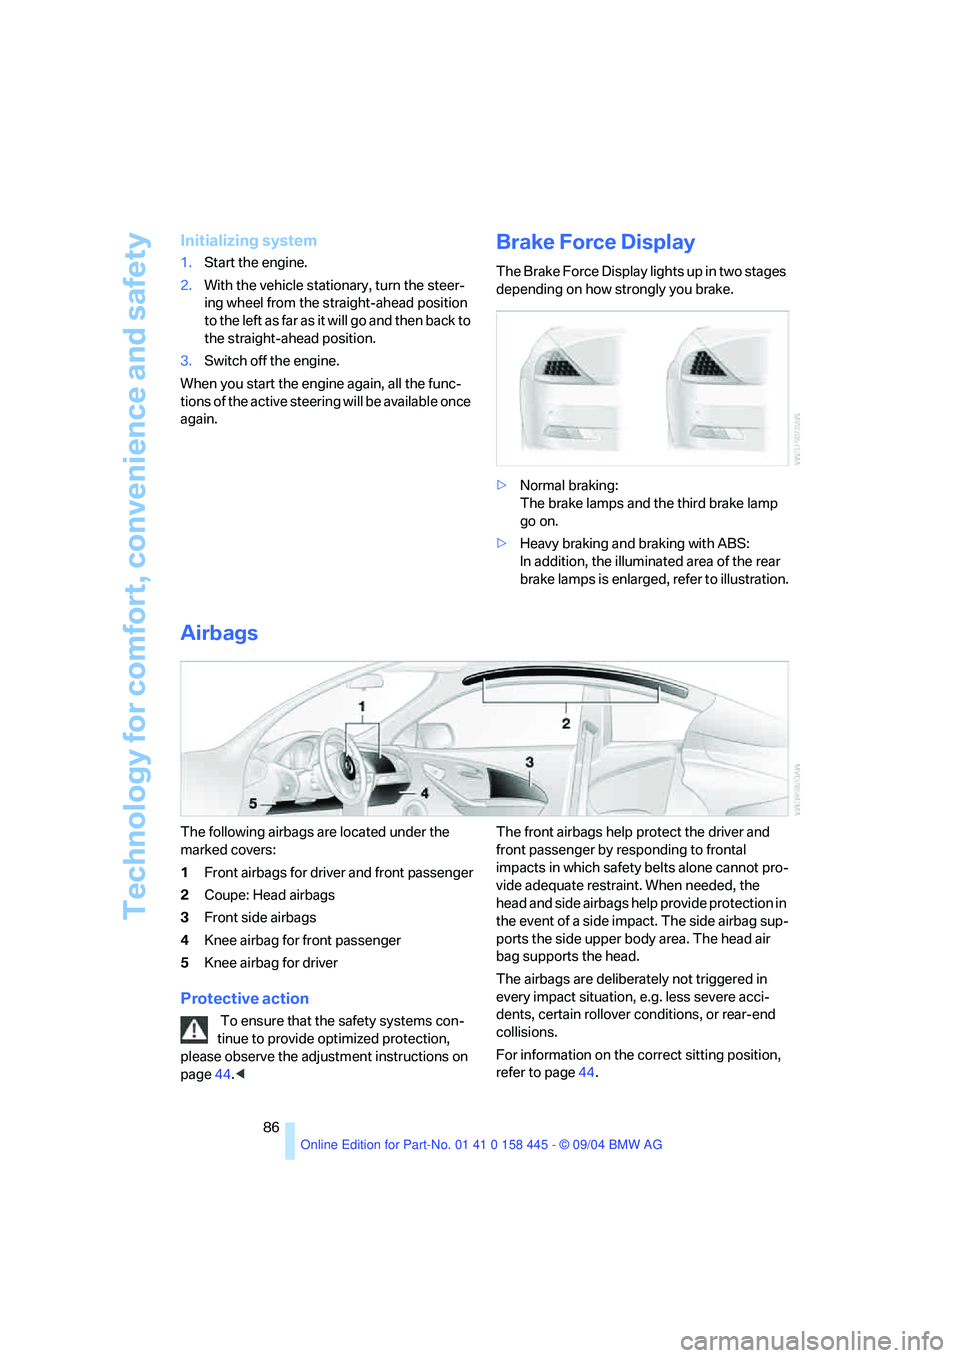
Brake Force Display
The Brake Force Display lights up in two stages
depending on how strongly you brake.
>Normal braking:
The brake lamps and the third brake lamp
go on.
>Heavy braking and braking with ABS:
In addition, the illuminated area of the rear
brake lamps is enlarged, refer to illustration.
Airbags
The following airbags are located under the
marked covers:
1Front airbags for driver and front passenger
2Coupe: Head airbags
3Front side airbags
4Knee airbag for front passenger
5Knee airbag for driver
Protective action
To ensure that the safety systems con-
tinue to provide optimized protection,
please observe the adjustment instructions on
page44.
impacts in which safety belts alone cannot pro-
vide adequate restraint. When needed, the
head and side airbags help provide protection in
the event of a side impact. The side airbag sup-
ports the side upper body area. The head air
bag supports the head.
The airbags are deliberately not triggered in
every impact situation, e.g. less severe acci-
dents, certain rollover conditions, or rear-end
collisions.
For information on the correct sitting position,
refer to page44.