Page 49 of 217

Adjustments
48
Adjusting tilt angle
Swivel the head restraints.
Entry to the rear
Before starting to drive, fold backrests
back, otherwise there is the danger of
accident due to an unexpected movement of
the seat.<
Coupe: releasing backrest
Pull the lever upward and fold the backrest for-
ward.
The lever is designed in such a way that the
safety belt can be stored there. This enables
you to fasten the safety belt more conveniently.
Convertible: releasing backrest
The belt system integrated into the seat
ensures easier entry into the rear.
1.Pull the lever 1 upward and fold the back-
rest forward.
2.Press and hold button 2 until the seat has
moved to the desired position.
3.After entry to the rear, fold back the back-
rest and lock it in place.
4.Press and hold button 3. The seat moves
back to its previous position. If you release
button 3 before this, the seat stops in its
current position.
You can lock the backrest in place when it
is folded forward. This is useful, for exam-
ple, when you get into the vehicle when it is
parked on a hill. Press the backrest until it audi-
bly locks into place. To fold it back, you do not
have to use lever 1 to release it.<
Lock backrest warning lamp:
Lights up when the backrest is not
locked. At the same time, an additional
message appears on the Control Display.
Safety belts
To ensure that the safety systems con-
tinue to provide optimized protection,
please observe the adjustment instructions on
page44.<
Before every drive, make sure that safety belts
are being worn at all of the occupied seats. Air-
bags complement the safety belt as an addi-
tional safety device, but they do not represent a
substitute.
Page 50 of 217

Controls
49Reference
At a glance
Driving tips
Communications
Navigation
Entertainment
Mobility
Fastening
Make sure you hear the latch plate engage in
the belt buckle.
Releasing
1.Hold the belt firmly.
2.Press the red button in the belt buckle.
3.Guide the belt into its reel.
The shoulder strap's anchorage point will be in
the correct position for adults of every build if
the seat is correctly adjusted, refer to page44.
Safety belt reminder for driver's seat
and passenger seat*
The indicator lamp lights up and a sig-
nal sounds. A message also appears on
the Control Display. Please check
whether safety belts are being worn correctly.
The safety belt reminder is operative at speeds
above approx. 5 mph/8 km/h. It can also be acti-
vated if objects are placed onto the passenger
seat.
Damage to safety belts
If the safety belts are damaged or
stretched in an accident: have the entire
belt system, including the tensioning mecha-
nisms, replaced at your BMW center. Have the
belt anchorage points inspected for damage at
the same time. Failure to observe this precau-
tion may prevent the safety belts from effec-
tively providing optimal protection when
needed.<
Heated seats
The temperature setting progresses one step
through its control sequence each time you
press the button. Maximum preselected tem-
perature with three lamps.
To switch off: press the button longer.
Mirrors
Adjusting exterior mirrors
The mirror on the passenger's side fea-
tures a lens with a more convex surface
than the mirror installed on the driver's side.
When estimating the distance between yourself
and other traffic, bear in mind that the objects
reflected in the mirror are closer than they
appear. This means that estimations of the dis-
tance to following traffic should not be regarded
as precise.<
Page 51 of 217

Adjustments
50 1Adjustments
2Switching over to the respective other mir-
ror or to the automatic parking function,
refer to Tilting down passenger's mirror,
page47
Storing the mirror positions, refer to Seat, mir-
ror and steering wheel memory, page46.
Adjusting manually
You can also adjust the mirrors manually if
necessary by pressing against the edges of
the mirror glass.
Outside mirrors, folding in and out
To prevent the exterior mirrors from being
damaged due to the width of the vehicle,
always fold them in by hand before entering an
automatic car wash.<
Automatic functions
>Both exterior mirrors are automatically
heated in ignition key position 2.
>When the vehicle is moving forward, the
interior and exterior mirrors dim as a func-
tion of the incoming light
*.
There are two photocells in the interior mirror to
control the automatic dimming of the interior mirror. One is integrated into the mirror glass,
refer to arrow, while the other is located at a
position slightly offset from this on the rear of
the mirror housing.
For trouble-free operation, keep the photocells
clean and do not cover the area between the
interior rearview mirror and the windshield. Also
do not attach stickers to the windshield in front
of the mirror.
Steering wheel
Adjustments
Do not adjust the steering wheel while the
vehicle is moving. There is a risk of acci-
dent from unexpected movement of the steer-
ing wheel.<
The steering wheel can be adjusted in four
directions.
Storing the steering-wheel position, refer to
Seat, mirror and steering wheel memory,
page46.
Easy entry/exit
To make it easier to enter and exit the vehicle,
the steering wheel temporarily moves into the
uppermost position.
Page 52 of 217

Controls
51Reference
At a glance
Driving tips
Communications
Navigation
Entertainment
Mobility
Steering wheel heater*
In ignition key position 2, press the button.
The indicator lamp in the button lights up when
the steering wheel heater is switched on.
Programmable buttons on steering
wheel
You can assign functions to the buttons individ-
ually:
Control Center, for principle details, refer to
page16.
1.Open the menu.
2.Select "Vehicle settings" and press the
controller.
3.Select "Steering wheel buttons" and press
the controller.The different functions are displayed:
>"Nav. voice instructions"
Voice instructions for the navigation
system
>"Air recirculation on / off"
Continuously shut off the supply of out-
side air, refer to AUC Automatic recircu-
lated-air control on page95
>"Mute on / off"
Mute the audio sources
>"Monitor on / off"
Switch the Control Display on/off
>"Telephone list"
Switch between Entertainment and
Telephone
>"Next entertainment source"
Change audio source
4.Select the desired function.
5.Press the controller.
6.Select button if necessary.
.
7.Press the controller.
The setting is stored for the remote control cur-
rently in use.
You can operate the selected function using the
corresponding button.
Operating function
Press the corresponding button on the steering
wheel.
Voice instructions of navigation system:
>To switch voice instructions on/off:
Maintain pressure on the button for several
seconds.
>To repeat the last voice instruction:
Press button.
Page 53 of 217

Transporting children safely
52
Transporting children safely
The right place for children
Children always in the rear
Accident research shows that the safest place
for children in a vehicle is in the rear seat.
Older children should be tightly secured with a
safety belt, after they have outgrown a booster
seat that is appropriate for their age, height and
weight.
Child-restraint system in the rear
Children under 13 years of age and chil-
dren less than 5 ft/150 cm tall should
always ride in the rear and the restraint systems
should be secured with the vehicle's safety
belts.<
Younger children should be secured in an
appropriate forward-facing child-restraint sys-
tem that has first been properly secured. We
strongly urge you to carefully read and comply
with the instructions for installation and use
provided by the child-restraint's manufacturer
whenever you use such a device.
All rear sitting positions in your vehicle meet the
recommendations of SAE J1819, an industry-
recommended practice for securing child-
restraint systems in motor vehicles.
Exception for front passenger seat
Should it become necessary to use
a child-restraint system on the front pas-
senger seat, the airbags on the passenger's
side must be deactivated. Deactivating the front
passenger airbag is only possible on the Coupe.
Your BMW center will be glad to advise you.<
Never install a rearward-facing child-
restraint system in the front passenger
seat of this vehicle if the passenger airbag is not
deactivated. If you do so, the child could be
severely injured when the airbag is triggered.
Your vehicle is equipped with an airbag supple-
mental restraint system for the front passenger.
Because the backrest on any rearward-facing child-restraint system – of the kind designed for
infants under 1 year and 20 Ibs./9 kg – would be
within the airbag's deployment range, you
should never mount such a system in the front
passenger seat, since the impact of the airbag
against the child restraint's backrest could lead
to serious or fatal injuries.<
Installing child-restraint
systems
Before installing any child-restraint system or
child seat, read the following:
Observe the child-restraint system man-
ufacturer's instructions for installation
and use. Otherwise the degree of protection
can be reduced.
After an accident, have all parts of the child-
restraint system and of the relevant vehicle
safety belt system checked by a BMW center
and replaced if necessary.<
Commercially-available child-restraint systems
are designed to be secured with a lap belt or
with the lap belt portion of a combination lap/
shoulder belt. Improperly or inadequately
installed restraint systems can increase the risk
of injury to children. Always read and follow the
instructions that come with the system.
Child seat security
All of the rear belt retractors and the front pas-
senger's safety belt can be locked for mounting
and securing child-restraint systems.
Page 54 of 217

Controls
53Reference
At a glance
Driving tips
Communications
Navigation
Entertainment
Mobility
Information regarding this is located near the
buckle latch of each safety belt.
To lock safety belt
Pull the entire length of the belt from the belt
retractor. Allow the reel to retract the belt
somewhat and engage the buckle, then tighten
the belt against the child-restraint system. The
retraction mechanism is now locked.
To unlock safety belt
Release the buckle, remove the child-restraint
system and allow the belt retractor to reel the
belt completely in.
Coupe: child-restraint system with
tether strap
If you use a child-restraint system with a tether
strap, two additional tether anchorage points
have been provided – refer to the arrows in the
illustration. Depending on the location selected
for sitting in the rear passenger area, attach the
tether strap to the corresponding anchorage
point to secure the child-restraint system, as
shown in the illustration below.
Each sitting position is fitted with a head
restraint.
The head restraint must be adjusted into the lowest possible position. Pass the tether strap
over the head restraint.
Adjust the tether strap according to the
child-restraint manufacturer's instruc-
tions.<
LATCH child-restraint fixing system
LATCH: Lower Anchor and Tethers for CHil-
dren.
The rear outer sitting positions are provided
with anchors for a LATCH child-restraint fixing
system.
To fit the LATCH child-restraint fixing
system, follow the operating and safety
instructions of the system manufacturer.<
Access to anchorage points
The illustrations show the right rear seat as an
example. The outer anchorage points for the
LATCH child-restraint fixing system are identi-
fied by flags
*.
The anchorage points for the LATCH child-
restraint fixing system are identified by but-
tons
*.
Page 55 of 217

Driving
54
Driving
Ignition lock
0 Steering locked
The key can only be inserted or removed in this
position.
After removing the key, turn the steering wheel
slightly until it locks.
Interlock on automatic transmission*
>Only move the selector lever from
position P with the engine running.
>To turn the key back to position 0 or to
remove it, first select the selector lever
position P.
1 Steering unlocked
A slight steering wheel movement often makes
it easier to turn the key from 0 to 1.
Some vehicle systems are ready for operation.
2 Ignition switched on
All vehicle systems are ready for operation.
3 Start engine
Starting engine
Do not run the engine in closed rooms, as
otherwise the inhaling of toxic exhaust
gases can cause unconsciousness and death.
The exhaust gases contain carbon monoxide,
an odorless and colorless, but highly toxic gas.
Never leave an unattended vehicle with the engine running, as such a vehicle represents a
potential safety hazard.
To prevent the vehicle from rolling, always
select neutral position or position N and apply
the handbrake before leaving the vehicle with
the engine running.<
When starting the engine, do not press the
accelerator pedal.
Do not allow the engine to warm up by leaving it
running while the vehicle remains stationary.
Instead, begin to drive immediately at a moder-
ate engine speed.
Special starting conditions
Press the accelerator pedal halfway down when
starting if
>the engine fails to start on the first attempt,
for instance, if it is very hot or cold
>the engine is started at very low tempera-
tures, below approx. + 57/– 156, at high
altitudes, above 3,300 ft/1,000 m
Avoid frequent starting in quick succes-
sion or repeated start attempts in which
the engine does not start. Otherwise, the fuel is
not burned or inadequately burned and there is
a danger of overheating and damaging the cat-
alytic converter.<
Manual transmission
1.Apply the handbrake.
2.Gearshift lever in neutral position.
3.Press the clutch pedal.
If the clutch pedal is not depressed,
the engine will not start.<
4.Start the engine.
Do not terminate the starting operation too
early, but after approx. 20 seconds at the
latest. When the engine starts, release the
ignition key immediately.
Page 56 of 217

Controls
55Reference
At a glance
Driving tips
Communications
Navigation
Entertainment
Mobility
SMG Sequential manual transmission*
and automatic transmission*
Your BMW is equipped with the convenience
starting feature. It is sufficient to turn the igni-
tion key only briefly to position 3 and then
release it right away. The system responds by
automatically engaging the starter for a certain
period and allowing it to run until the engine
starts, after which it then disengages automati-
cally.
SMG Sequential manual transmission*
1.Press the brake pedal.
2.Engage selector-lever position N.
3.Start the engine.
If the engine does not start, engage the
last gear selected again, refer to instru-
ment cluster display, and then shift into posi-
tion N.<
Automatic transmission with
Steptronic*
1.Press the brake pedal.
2.Engage selector-lever position P or N.
3.Start the engine.
Switching off engine
Do not remove the ignition key while the
vehicle is rolling, as otherwise the steer-
ing wheel lock will immobilize the steering.
When leaving the vehicle, remove the ignition
key and lock the steering.
When parking on a downhill incline, apply the
handbrake, as otherwise the vehicle could roll
away.<
Manual transmission
1.Turn the ignition key to position 1 or 0.
2.Shift into first gear or reverse.
SMG Sequential manual transmission*
1.Engage a drive position.
2.Turn the ignition key to position 1 or 0.
A signal sounds on stopping the engine.
Automatic transmission with
Steptronic*
1.Engage selector-lever position P.
2.Turn the ignition key to position 1 or 0.
Handbrake
The handbrake is primarily intended to prevent
the vehicle from rolling while parked; it brakes
the rear wheels.
Indicator lamp
The indicator lamp lights up, and an
acoustic signal also sounds when start-
ing off. The handbrake is engaged.
Indicator lamp for Canadian models.
Engaging
The lever engages automatically.
Releasing
Pull slightly upward, press the button and lower
the lever.
If exceptional circumstances should
make it necessary to engage the hand-
brake while the vehicle is in motion, do not pull it
too strongly. In doing so, continuously press the
button of the handbrake lever.
Strong application of the handbrake can lead to
overbraking of the rear axle and associated
'fishtailing' of the vehicle rear end.
The brake lamps do not light up when the hand-
brake is engaged.
 1
1 2
2 3
3 4
4 5
5 6
6 7
7 8
8 9
9 10
10 11
11 12
12 13
13 14
14 15
15 16
16 17
17 18
18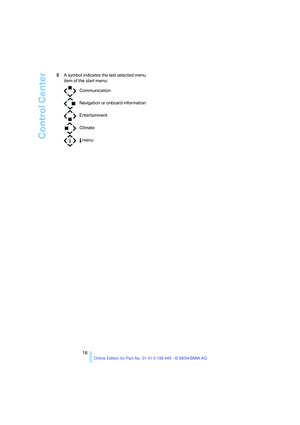 19
19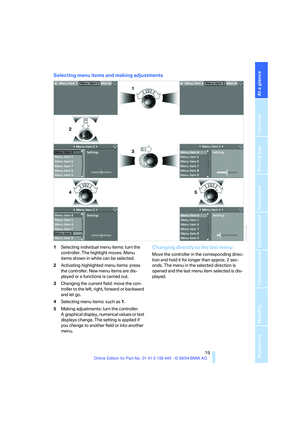 20
20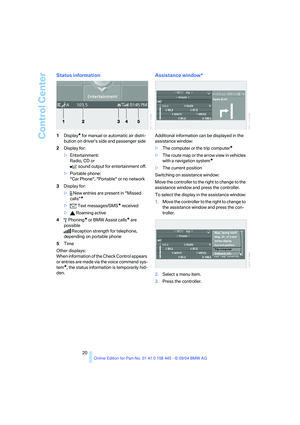 21
21 22
22 23
23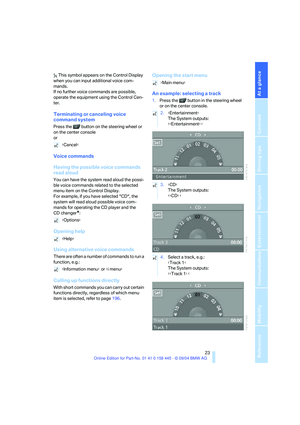 24
24 25
25 26
26 27
27 28
28 29
29 30
30 31
31 32
32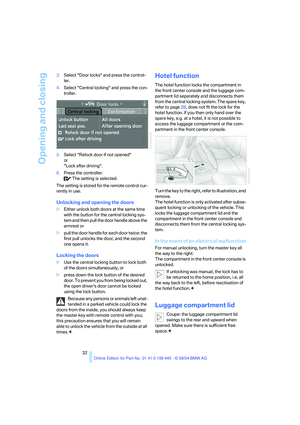 33
33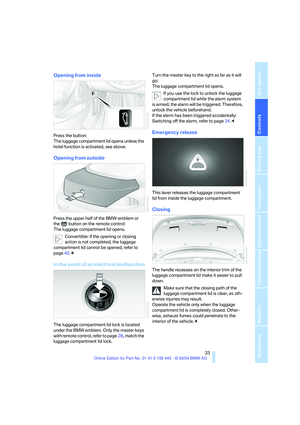 34
34 35
35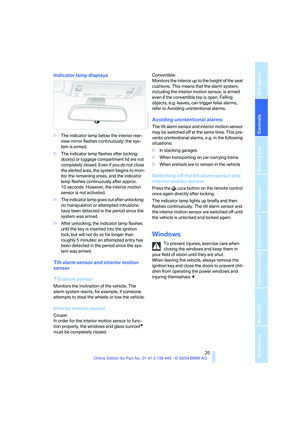 36
36 37
37 38
38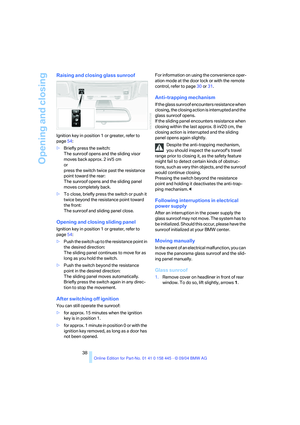 39
39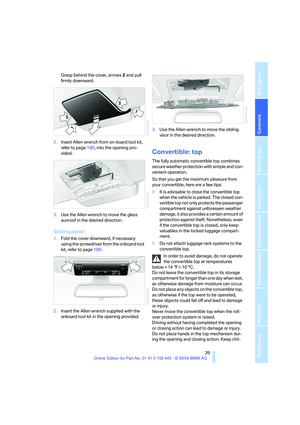 40
40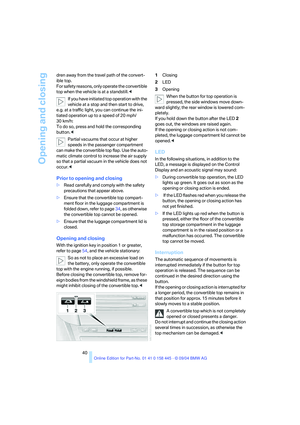 41
41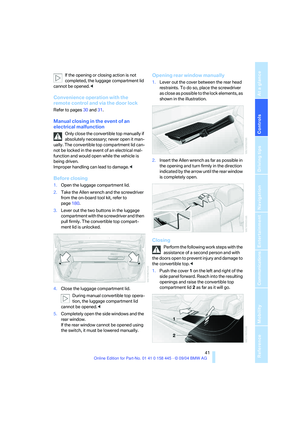 42
42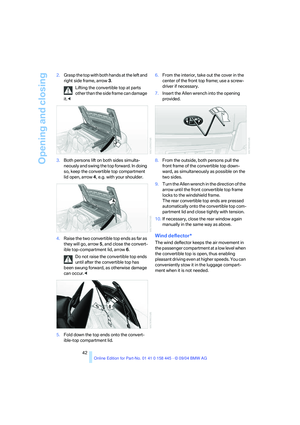 43
43 44
44 45
45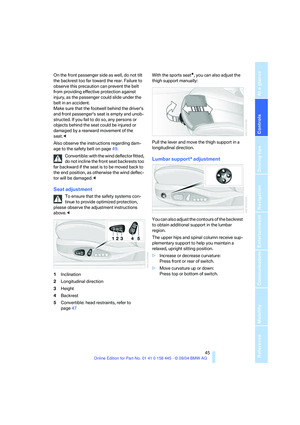 46
46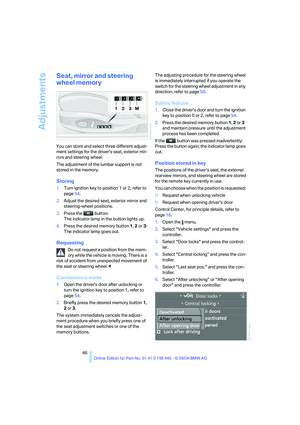 47
47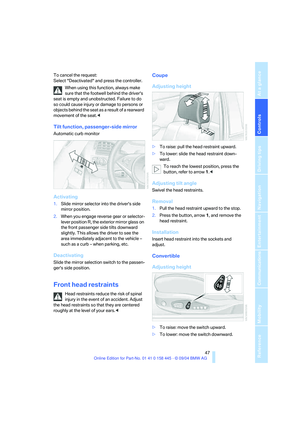 48
48 49
49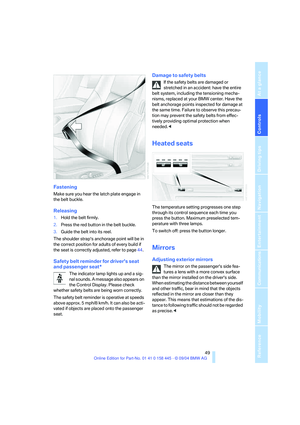 50
50 51
51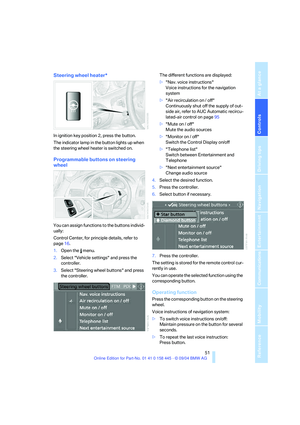 52
52 53
53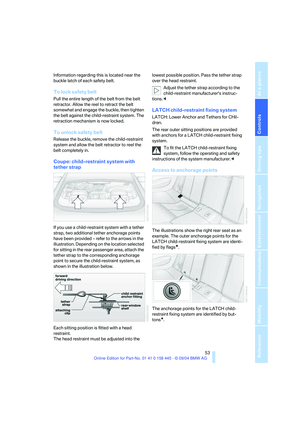 54
54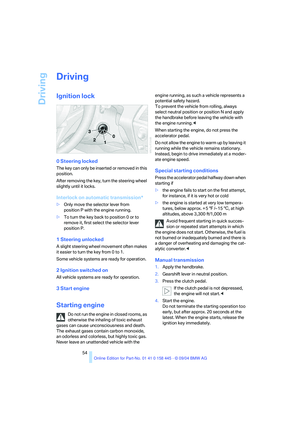 55
55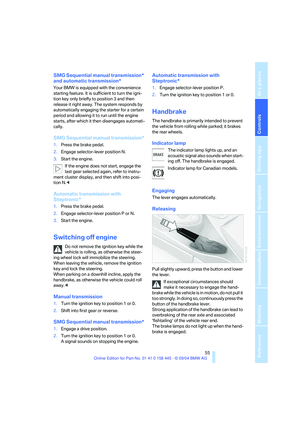 56
56 57
57 58
58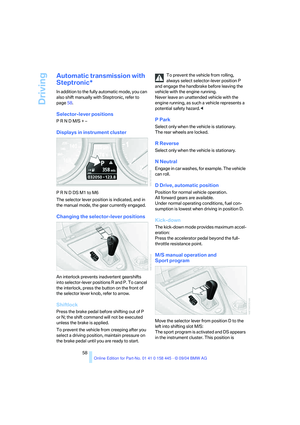 59
59 60
60 61
61 62
62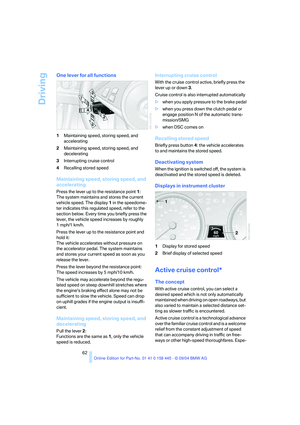 63
63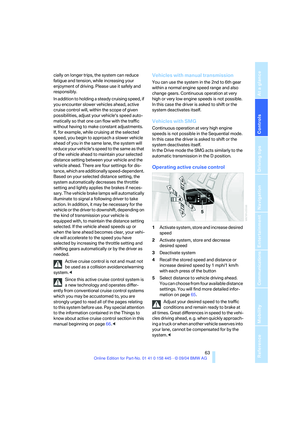 64
64 65
65 66
66 67
67 68
68 69
69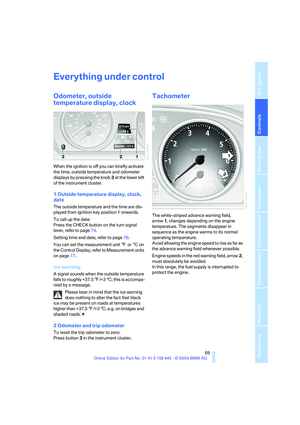 70
70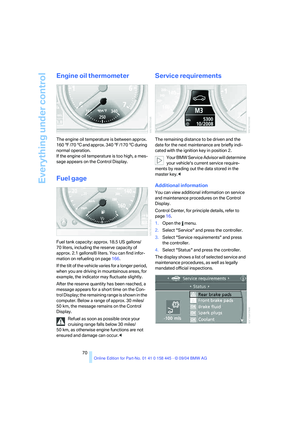 71
71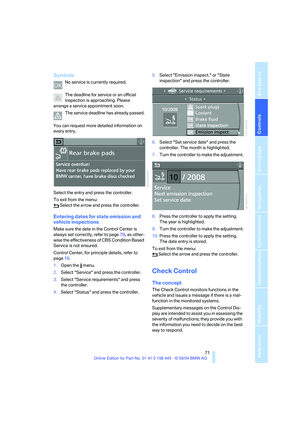 72
72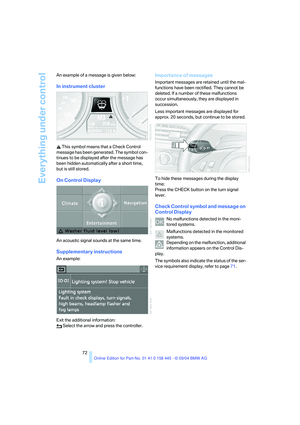 73
73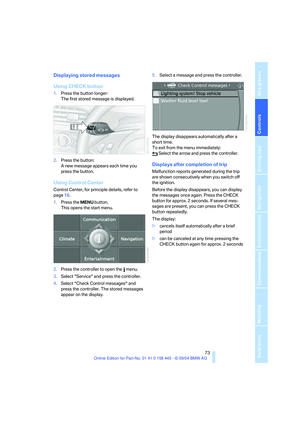 74
74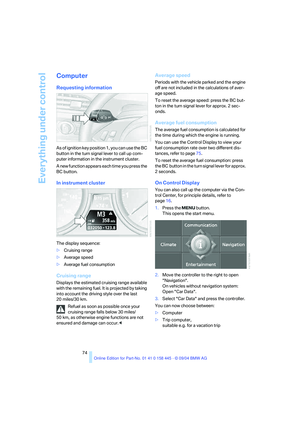 75
75 76
76 77
77 78
78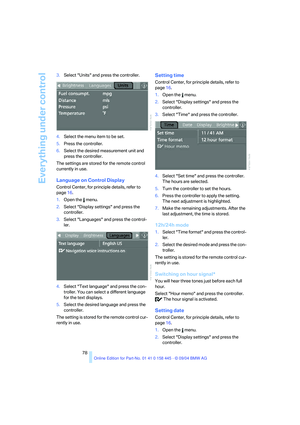 79
79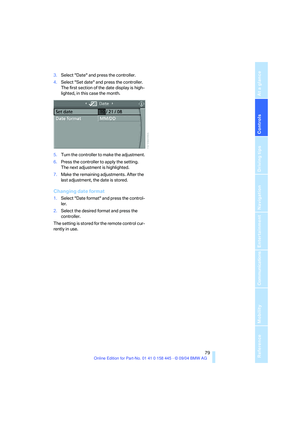 80
80 81
81 82
82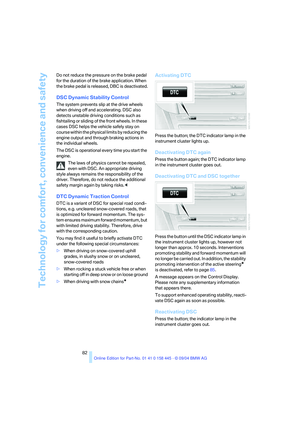 83
83 84
84 85
85 86
86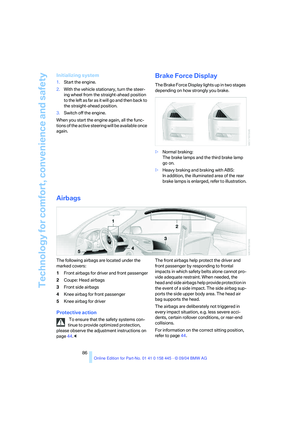 87
87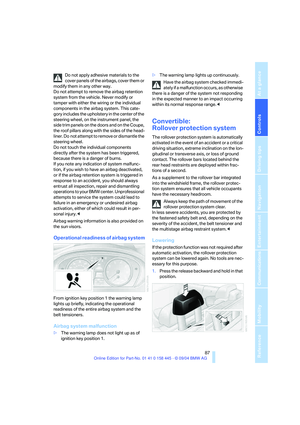 88
88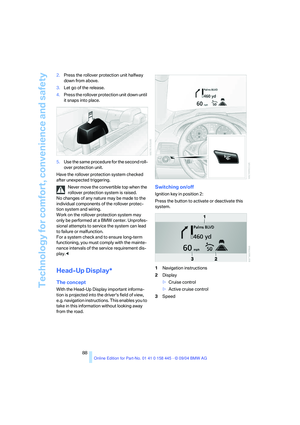 89
89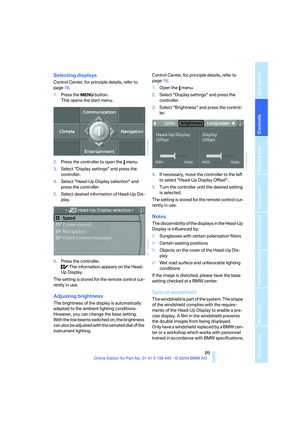 90
90 91
91 92
92 93
93 94
94 95
95 96
96 97
97 98
98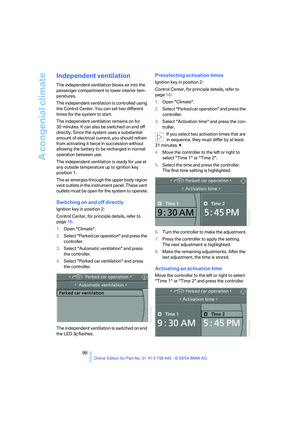 99
99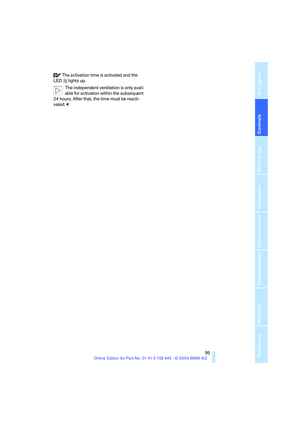 100
100 101
101 102
102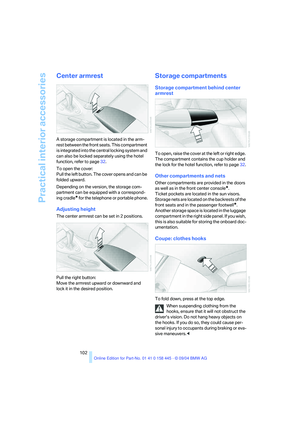 103
103 104
104 105
105 106
106 107
107 108
108 109
109 110
110 111
111 112
112 113
113 114
114 115
115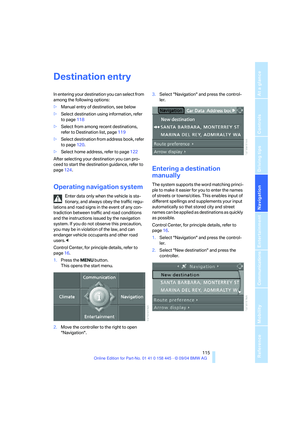 116
116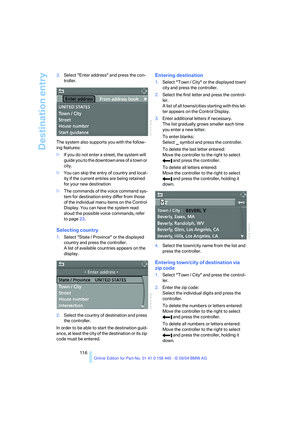 117
117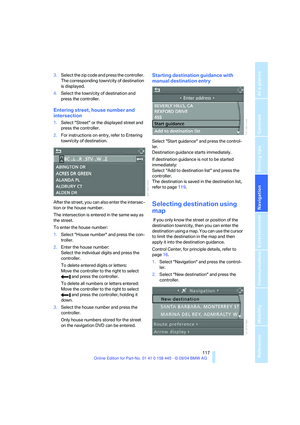 118
118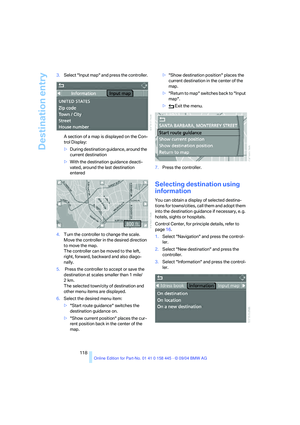 119
119 120
120 121
121 122
122 123
123 124
124 125
125 126
126 127
127 128
128 129
129 130
130 131
131 132
132 133
133 134
134 135
135 136
136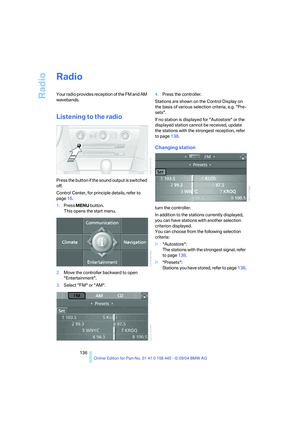 137
137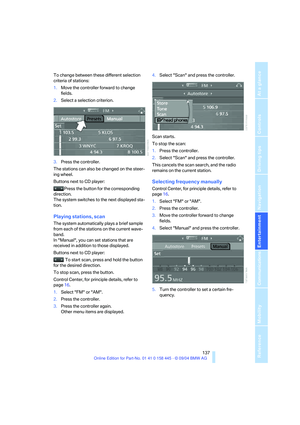 138
138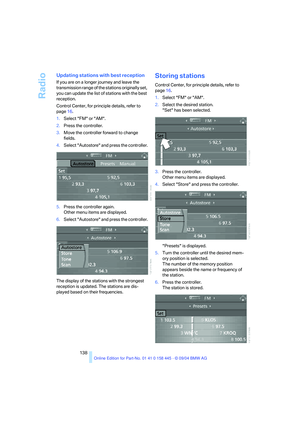 139
139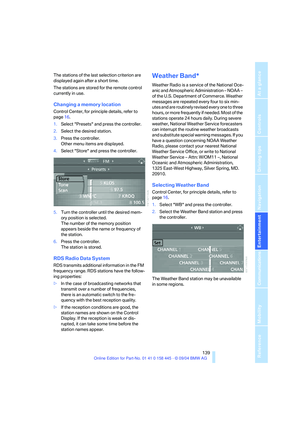 140
140 141
141 142
142 143
143 144
144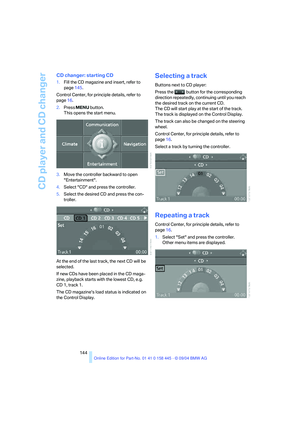 145
145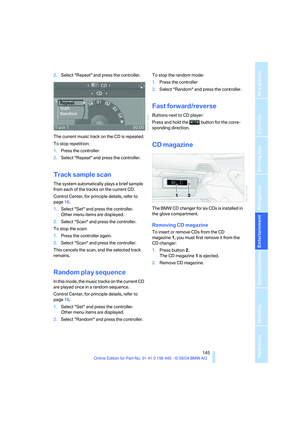 146
146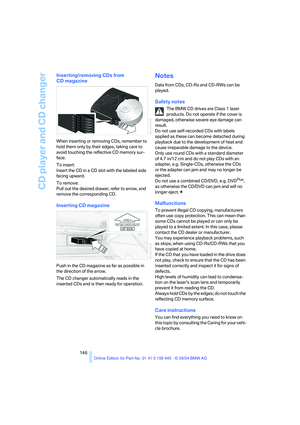 147
147 148
148 149
149 150
150 151
151 152
152 153
153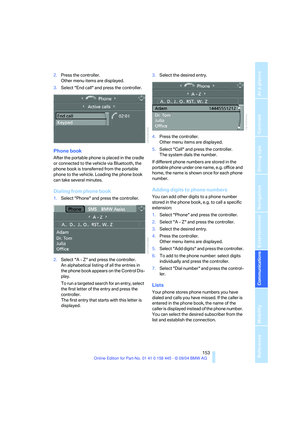 154
154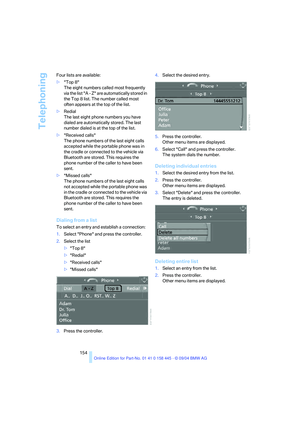 155
155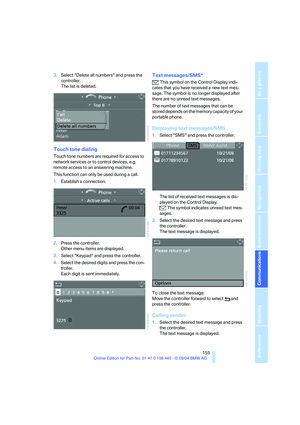 156
156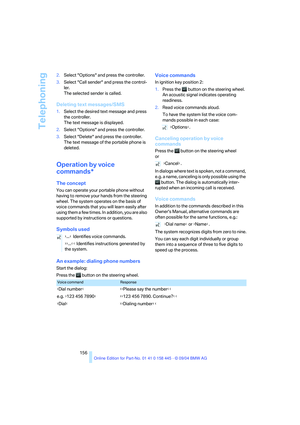 157
157 158
158 159
159 160
160 161
161 162
162 163
163 164
164 165
165 166
166 167
167 168
168 169
169 170
170 171
171 172
172 173
173 174
174 175
175 176
176 177
177 178
178 179
179 180
180 181
181 182
182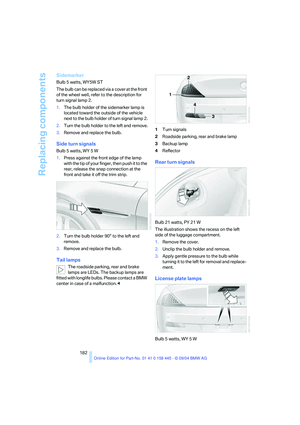 183
183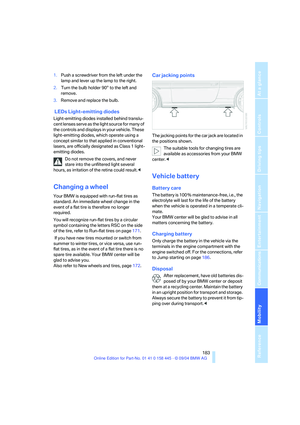 184
184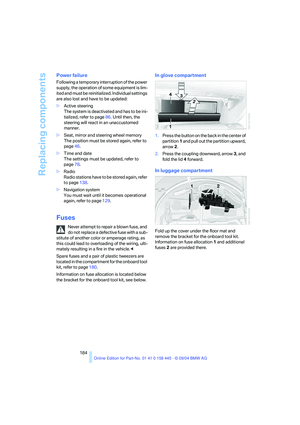 185
185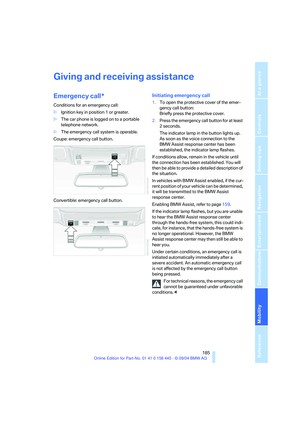 186
186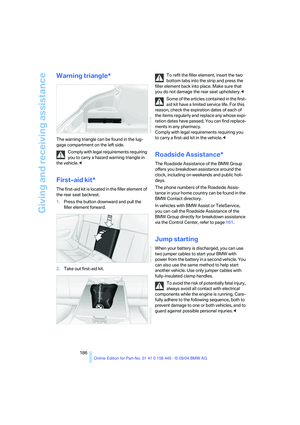 187
187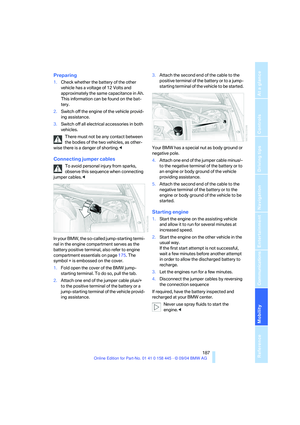 188
188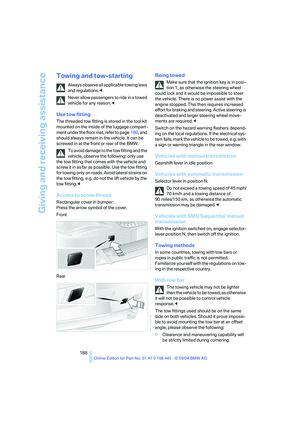 189
189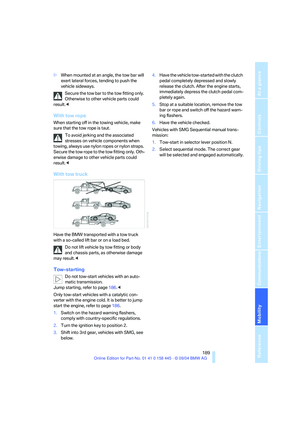 190
190 191
191 192
192 193
193 194
194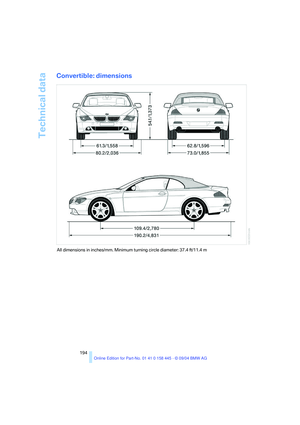 195
195 196
196 197
197 198
198 199
199 200
200 201
201 202
202 203
203 204
204 205
205 206
206 207
207 208
208 209
209 210
210 211
211 212
212 213
213 214
214 215
215 216
216