Page 89 of 190

89
After giving an ice warning, the
display returns to the previous
setting.<
The ice warning does not alter the
fact that surface ice can form at
temperatures above 37.57/+36, on
bridges or shaded road surfaces, for
instance.<
Average fuel consumptionIf you press the onboard computer but-
ton BC in the turn signal lever for longer
while the average fuel consumption is
being displayed, a new consumption
value is calculated from that point in
time.
If you wish, you can have the aver-
age fuel consumption displayed in
a different unit of measure.
based on the available fuel. The amount
of fuel remaining in the tank is mea-
sured, the estimated range is calcu-
lated taking into account the operating
conditions over the last 20 miles/30 km.
It is important that you refuel when
the cruising range falls below
approx. 35 miles/50 kilometers. Other-
wise, the engine cannot be guaranteed
to operate properly and damage may
result.<
Average speedAny time spent when the vehicle is sta-
tionary and the engine is shut off is
ignored for the calculation.
To reset the average speed: press the
onboard computer button BC in the
turn signal lever for approx. 2 seconds.
Computer
OverviewControlsMaintenanceRepairsDataIndex
Page 90 of 190
*The conceptPDC assists you when you back into a
parking space. Acoustic signals alert
you to the momentary distance to an")
90Technology for safety and driving convenience
Park Distance Control (PDC)*The conceptPDC assists you when you back into a
parking space. Acoustic signals alert
you to the momentary distance to an
object behind your vehicle. The system
features four ultrasonic sensors
mounted in your rear bumper. The mon-
itoring range for the two corner sensors
extends outward roughly 2 ft/60 cm,
while two centrally located sensors
detect objects at distances of up to
approx. 5 ft/1.50 m.
PDC is a parking aid that can
identify objects if they are
approached slowly, as is generally the
case when parking. Avoid driving
towards objects rapidly; due to underly-
ing physical principles, the system may
otherwise alert you too late for you to
take evasive steps.<
The system starts to operate automati-
cally approx. one second after you shift
into Reverse or move the selector lever
into the R position with the ignition key
in position 2.
Let this short period elapse before
driving backwards.<
PDC is deactivated when you shift back
out of Reverse.
You can have a signal set to con-
firm that the PDC has been acti-
vated. The signal then sounds when
you shift into Reverse or move the
selector lever into the R position.
indicated by a tone sounding at various
intervals. As the distance between vehi-
cle and object decreases, the intervals
between the tones become shorter. A
continuous tone indicates the pres-
ence of an object less than 1 ft/30 cm
away.
The warning signal is canceled after
approx. three seconds if the distance to
the object remains constant during this
time – if you are moving parallel to
a wall, for instance.
System malfunctions will be indicated
by a continuous high-pitched tone
when the system is activated the first
time. Please have the problem fixed by
your BMW center.
PDC does not replace the driver's
personal responsibility for evaluat-
ing the distance between the vehicle
and any objects. Always remember that
the sensors can neither detect nor pro-
vide warnings of obstacles located
within their blind angles. This applies
especially in those cases where the
system approaches the physical limits
of ultrasonic measurement, as occurs
with tow bars and trailer couplings, and
in the vicinity of thin or wedge-shaped
objects. Moreover, low objects that
have already been detected – such as a
curb edge – can disappear out of the
detection range of the sensors before a
continuous tone sounds.
Loud sources of sound from outside or
inside the vehicle could drown out the
PDC signal tone.<
Keep the sensors clean and free
of ice or snow in order to ensure
that they will continue to operate effec-
tively.
Do not apply high pressure spray to the
sensors for a prolonged period of time.
Always maintain a distance of more
than 4 in/10 cm.<
Page 91 of 190
The conceptDSC supports vehicle stability, even in
critical driving situations.
DSC is operational every time you start
the engine.
DSC contains the Dynamic Tracti")
91
Dynamic Stability Control (DSC)The conceptDSC supports vehicle stability, even in
critical driving situations.
DSC is operational every time you start
the engine.
DSC contains the Dynamic Traction
Control (DTC) and Cornering Brake
Control (CBC) functions.Indicator lamps
The indicator lamp in the instru-
ment cluster goes out shortly
after you switch on the ignition,
refer to page 19.
>The indicator lamp flashes: DSC is
actively controlling drive torque and
braking intervention
>The indicator lamp stays lit: DSC has
been switched off with the button;
DTC and DBC are operational. DTC
control intervention is not indicated.
The indicator lamp and the
brake warning lamp continu-
ously light up in yellow:
The DSC, DTC and DBC have
been switched off manually or
there is a system malfunction.
The vehicle will remain completely
operational, however, without DSC. In
the event of a fault, please consult your
BMW center.
Indicator and warning lamps for
Canadian models.
Deactivating the DSC/activating
the DTCTap the DSC button; the indicator lamp
comes on and stays on.
DSC is deactivated; DTC is operational.
In the following rare situations, it may
prove useful to activate the DTC for a
brief period:
>When rocking the vehicle or starting
off in deep snow or on loose surfaces
>When driving with snow chains
>When driving on snow-covered
grades, in deep snow, or on a snow-
covered surface that has been
packed down from being driven on.
OverviewControlsMaintenanceRepairsDataIndex
Page 92 of 190

92
Under these special circumstances
traction is increased by deactivating the
control systems that enhance traction
under normal conditions.Deactivating the DSC and the
DTCPress the DSC button as long as you
need to until the indicator lamp and the
yellow brake warning lamp light up, but
no more than 10 seconds.
The systems for enhancing stability and
traction are deactivated, and there is no
active braking intervention or torque
control.
To maintain vehicle stability,
always drive with the DSC acti-
vated whenever possible.
or the indicator lamps will go out. DTC
is deactivated.
The laws of physics cannot be
repealed even with DSC. An
appropriate driving style always
remains the responsibility of the driver.
We therefore urge you to avoid using
the additional safety margin of the sys-
tem as an excuse for taking risks.
Whenever the DTC is activated, the
DSC is switched off and performs minor
stabilizing intervention.
Do not make any modifications to the
DSC system. Allow only authorized
technicians to perform service proce-
dures on the DSC.<
Flat Tire Monitor*The conceptAs you drive, the Flat Tire Monitor
keeps track of pressure levels in all four
tires. The system alerts you whenever
the inflation pressure of a tire falls sig-
nificantly below the pressure of another
tire.
The system actually detects pressure
loss by monitoring differences in the
relative speeds of the four wheels. It
interprets variations outside specified
limits as severe pressure loss, and then
responds by generating a warning.Functional requirementsIn order for the Flat Tire Monitor to learn
the correct tire inflation pressure,
please do the following:
1. Check the tire inflation pressures in
all tires
2. Compare them with the tire inflation
pressure table, refer to page 130,
and correct them if necessary
3. Initialize the system.
Dynamic Stability Control (DSC)
Page 93 of 190

93
System limitations
The Flat Tire Monitor cannot pro-
vide you with advance warning of
sudden and severe tire damage caused
by external factors and does not detect
the balanced and very gradual pressure
loss that takes place in all four tires
over an extended period of time.<
On the other hand, the following situa-
tions can lead to a delayed detection of
pressure loss and even to the system
not functioning:
>Driving on snow-covered or slippery
roads
>Performance-oriented driving: slip at
the drive wheels, high levels of lateral
acceleration
>When driving with snow chains, false
warnings and undetected pressure
losses may occur
>When driving with a space-saver
spare tire, the Flat Tire Monitor can-
not function.
Initializing the system
Each time you correct the pres-
sure in a tire, or change a wheel or
tire, reinitialize the system immediately
afterwards. This requires a bit of driv-
ing.<
1. Before driving off, start the engine
but do not start driving
2. Press the button as long as you need
to, but no more than 10 seconds,
until the indicator lamp in the instru-
ment cluster lights up in yellow for a
few seconds
3. Drive off.
It takes a few minutes before the Flat
Tire Monitor can detect a flat tire and
issue a warning.
When driving with snow chains or
a space-saver spare tire, do not
initialize the system.<
Flat tire
The indicator lamp in the instru-
ment cluster lights up red. This
visual alert is accompanied by
an acoustic warning signal.
1. Carefully reduce speed and come to
a stop. Avoid sudden braking and
steering maneuvers
2. Determine which wheel is damaged
If this cannot be determined, con-
tact your BMW center.<
3. Replace the damaged wheel, refer to
Changing a wheel on page 157.
After replacing the damaged tire, initial-
ize the system.
Vehicles with Run Flat tires:
1. Carefully reduce your speed to under
50 mph / 80 km/h. Avoid sudden
braking and steering maneuvers. Do
not exceed a speed of 50 mph /
80 km/h
Flat Tire Monitor*
OverviewControlsMaintenanceRepairsDataIndex
Page 94 of 190
94
Because the sides of Run Flat
tires are reinforced, a drop in infla-
tion pressure usually cannot be
detected from the outside, refer to Run
Flat tires, page 135.<
2. To continue driving, follow the
instructions under Driving with a
damaged tire on page 135.
System malfunction
The indicator lamp in the instru-
ment cluster lights up yellow.
The Flat Tire Monitor is malfunc-
tioning or out of order. Please refer the
problem to your BMW center.
Brake force displayBrake force display indicates to the
road users behind you how hard you
are braking.
>Normal braking: the brake lamps
among the rear lamps and the center
brake lamp light up
>Hard braking or braking with ABS: in
addition, the illuminated rear lamp
surface is extended, refer to the pic-
ture.
Flat Tire Monitor*
Page 95 of 190

95 Lamps
Parking lamps/Low beamsParking lamps
The front, rear and side vehicle
lighting is switched on. You can
use the parking lamps to signal
the position of the vehicle when it is
parked. For lighting on one side for
parking as an additional feature, refer to
page 97.
Low beams
When the ignition is switched off
while the low beams are on, the
headlamps go out and only the
parking lamps remain on.
Follow me home lampsWhen you activate the headlamp
flasher after parking the vehicle with the
lamps turned off, the low-beam head-
lamps will come on for a short time.
You can also have this function
deactivated.
having turned the ignition key to posi-
tion 0, you will hear an acoustic signal
for a few seconds to remind you that
the lamps have not been switched off.Daytime driving lamps*If you desire, the light switch can be left
in the second position: when the igni-
tion is switched off, the external lighting
is also switched off.
You can have the activation set-
tings for the daytime driving lamps
programmed on your vehicle.<
Automatic headlamp control*
When the switch is set to this
position the system automati-
cally activates and cancels the
low beams in response to changes in
ambient light, for example in tunnels, at
dusk, and when it is raining or snowing.
The low-beam headlamps remain
on, regardless of the ambient
light, when you switch on the fog
lamps.<
Automatic headlamp control can-
not serve as a substitute for the
driver's judgement in determining when
the vehicle lights should be switched
on. For example, the sensors are not
able to detect fog. To avoid safety risks,
you should respond to these kinds of
low-visibility situations by switching the
headlamps on manually.<
You can have the sensitivity of
your vehicle's automatic head-
lamp control adjusted.<
OverviewControlsMaintenanceRepairsDataIndex
Page 96 of 190
96
Adaptive headlights*The conceptAdaptive headlights is a variable head-
lamp control system for dynamically
illuminating the road. Depending on the
steering angle and other factors the
light from the headlamps follows the
course of the road.Activating Adaptive headlights
With the ignition key in position
2, turn the light switch to the
automatic headlamp control
position, refer to page 95. The LED next
to the symbol lights up.
To avoid blinding oncoming traffic,
adaptive headlights are
>not active while reversing,
>active only towards the front passen-
ger side while the vehicle is at a
standstill.
System malfunctionThe LED next to the symbol for auto-
matic headlamp control flashes. The
adaptive headlight system is malfunc-
tioning or out of order. Have the system
checked as soon as possible.
Instrument lightingTurn the rotary dial with the parking/
low beam lamps on to adjust the illumi-
nation intensity.
 1
1 2
2 3
3 4
4 5
5 6
6 7
7 8
8 9
9 10
10 11
11 12
12 13
13 14
14 15
15 16
16 17
17 18
18 19
19 20
20 21
21 22
22 23
23 24
24 25
25 26
26 27
27 28
28 29
29 30
30 31
31 32
32 33
33 34
34 35
35 36
36 37
37 38
38 39
39 40
40 41
41 42
42 43
43 44
44 45
45 46
46 47
47 48
48 49
49 50
50 51
51 52
52 53
53 54
54 55
55 56
56 57
57 58
58 59
59 60
60 61
61 62
62 63
63 64
64 65
65 66
66 67
67 68
68 69
69 70
70 71
71 72
72 73
73 74
74 75
75 76
76 77
77 78
78 79
79 80
80 81
81 82
82 83
83 84
84 85
85 86
86 87
87 88
88 89
89 90
90 91
91 92
92 93
93 94
94 95
95 96
96 97
97 98
98 99
99 100
100 101
101 102
102 103
103 104
104 105
105 106
106 107
107 108
108 109
109 110
110 111
111 112
112 113
113 114
114 115
115 116
116 117
117 118
118 119
119 120
120 121
121 122
122 123
123 124
124 125
125 126
126 127
127 128
128 129
129 130
130 131
131 132
132 133
133 134
134 135
135 136
136 137
137 138
138 139
139 140
140 141
141 142
142 143
143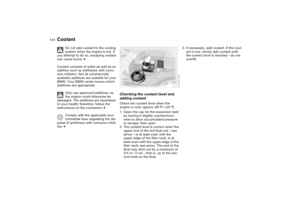 144
144 145
145 146
146 147
147 148
148 149
149 150
150 151
151 152
152 153
153 154
154 155
155 156
156 157
157 158
158 159
159 160
160 161
161 162
162 163
163 164
164 165
165 166
166 167
167 168
168 169
169 170
170 171
171 172
172 173
173 174
174 175
175 176
176 177
177 178
178 179
179 180
180 181
181 182
182 183
183 184
184 185
185 186
186 187
187 188
188 189
189
