Page 140 of 312
You can use the remote control to
select the entertainment source
(radio, CD player, or DVD player/
Auxiliary device). The selected
source will be shown in the display.
Make sure the rear control operation
has not been disabled with the RR
CTRL knob on the f ront panel.
When using the remote control,
point it at the rear control panel in
the ceiling.
ThePLAY/PROG,PAUSE,SKIP,
and FWD/REW buttons work the
same f unction as the f ront and rear
control panel buttons.
ThePLAY/PROG,PAUSE,SKIP,
and FWD/REW buttons work the
same f unction as the f ront and rear
control panel buttons. Using the Remote Control
To Play a CD or Radio
To Play a DVD
Rear Entertainment System
138
SOURCE SELECTION
BUTTONSSEEK/SKIP BUTTONS
DISP BUTTON
POWER (T/C) BUTTON
REW/FWD BUTTONS
STOP BUTTON
PAUSE BUTTON
TITLE/CAPTER BUTTON
SET-UP BUTTON
MENU BUTTON
RETURN BUTTON PLAY/PROG BUTTON
XM MODE BUTTON
Page 141 of 312

�µ�µ �µ�µ
�Ý �Û
Pressthisbutton
to stop playing a DVD.
Some DVDs have menus that allow
you to select a dubbed language,
subtitles, a chapter list, previews, etc.
Themenucontentswillvaryfrom
DVD to DVD.
Usethe,,,and buttons to select the desired
menu option. Then press ENT to
enter your selection. Use the and buttons to change
pages. You can also use the
numbered buttons to enter the two-
digit number of a menu option. You
do not have to press ENT. Press the
button again to close the window. To change the
color, contrast, aspect ratio, and
brightness of the video screen, press
the DISP button. The current setting
of one will be displayed on the
screen each time you press the
button. Use the and buttons to change the setting
as desired. The display will disappear
f rom the screen several seconds
af ter you stop adjusting the setting. In the MENU
selection mode, pressing the
RETURN button for less than 2
seconds changes the MENU display
to the previous page. Pressing the
RETURN button for more than 2
seconds while a DVD is playing
brings the system into the TITLE
enter mode. When you enter your
selection, the DVD player will start
playing f rom the selected title.
STOP Button
MENU and TITLE Buttons
DISP Button
RETURN Button
Rear Entertainment System
Features
139
Page 154 of 312

�µ�µ�µ�µ
�µ�µ
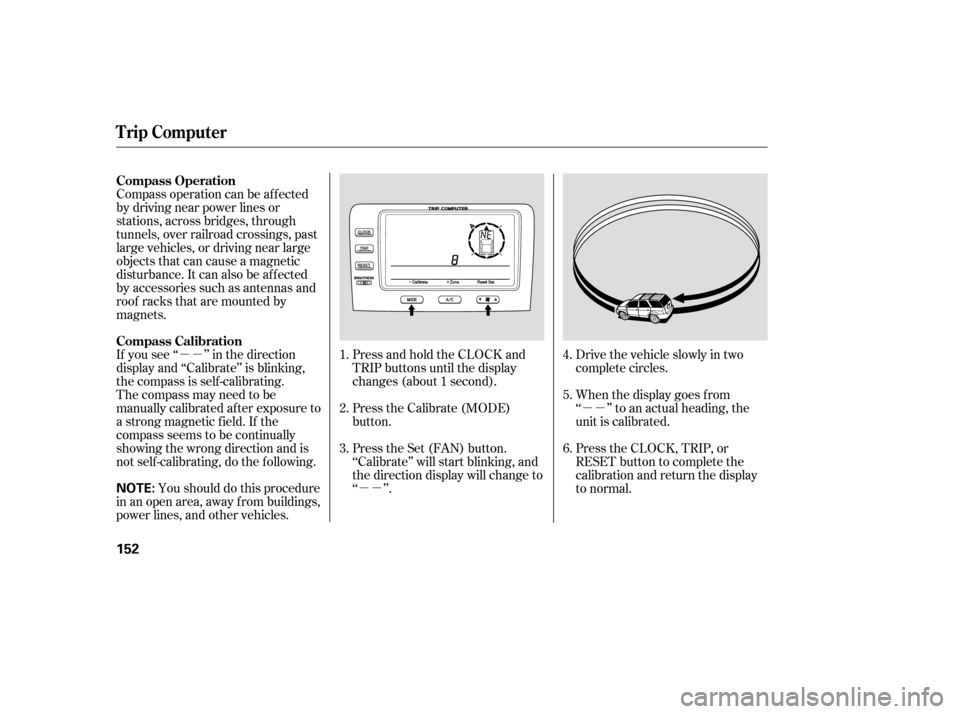
The compass may need to be
manually calibrated af ter exposure to
a strong magnetic field. If the
compassseemstobecontinually
showing the wrong direction and is
not self -calibrating, do the f ollowing. You should do this procedure
in an open area, away from buildings,
power lines, and other vehicles. Press and hold the CLOCK and
TRIP buttons until the display
changes (about 1 second).
Press the Calibrate (MODE)
button.
Press the Set (FAN) button.
‘‘Calibrate’’ will start blinking, and
the direction display will change to
‘‘ ’’.
Drive the vehicle slowly in two
complete circles.
When the display goes f rom
‘‘ ’’ to an actual heading, the
unit is calibrated.
Press the CLOCK, TRIP, or
RESET button to complete the
calibration and return the display
to normal.
Compass operation can be af f ected
by driving near power lines or
stations, across bridges, through
tunnels, over railroad crossings, past
large vehicles, or driving near large
objects that can cause a magnetic
disturbance. It can also be af f ected
by accessories such as antennas and
roof racks that are mounted by
magnets.
If you see ‘‘ ’’ in the direction
display and ‘‘Calibrate’’ is blinking,
the compass is self -calibrating.
1.
2.
3.4.
5.
6.
Compass Operation
Compass Calibration
Trip Computer
152
NOTE:
Page 155 of 312
In most areas, there is a variation
between magnetic north and true
north. Zone selection is required so
the compass can compensate f or this
variation. To check and select the
zone set into the compass, do the
f ollowing.Press and hold the CLOCK and
TRIP buttons until the display
changes (about 1 second). Press the Zone (A/C) button. The
zone the compass is currently set
to is displayed.
Find the zone f or your area on the
map.If the zone is incorrect, press and
hold the MODE button to get the
number to count down, or the A/C
button to get the number to count
up. If the zone is correct, continue
to step 5.
Press the Set (FAN) button to set
the zone selection.
Press the CLOCK, TRIP or
RESET button to exit the zone
selection and return display to
normal.
1. 2.
3.4.
5.
6.
CONT INUED
Compass Zone Select ion
Trip Computer
Features
153
Page 157 of 312

The Brightness control has seven
positions. In the middle f ive positions
the display will dim when you turn
on the parking lights or headlights.
Moving the control to the far left
position turns of f the display. It will
come back on f or several seconds if
you press any of the buttons.
In the f ar right (maximum
brightness) position, the display will
notdimwhenyouturnonthe
parking lights.
Always use a sof t cloth and mild
glass/plastic cleaner (such as
cleaners f or computer monitor
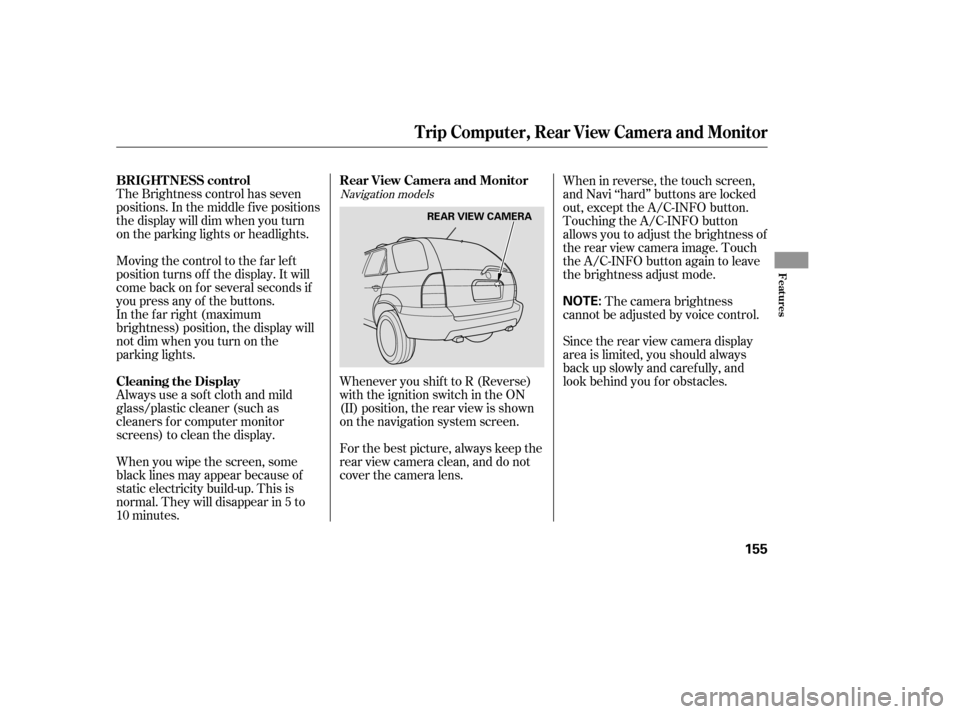
screens) to clean the display.Whenever you shif t to R (Reverse)
with the ignition switch in the ON
(II) position, the rear view is shown
on the navigation system screen.
For the best picture, always keep the
rear view camera clean, and do not
cover the camera lens.When in reverse, the touch screen,
and Navi ‘‘hard’’ buttons are locked
out, except the A/C-INFO button.
Touching the A/C-INFO button
allows you to adjust the brightness of
the rear view camera image. Touch
the A/C-INFO button again to leave
the brightness adjust mode.
The camera brightness
cannot be adjusted by voice control.
Since the rear view camera display
area is limited, you should always
back up slowly and caref ully, and
look behind you f or obstacles.
When you wipe the screen, some
black lines may appear because of
static electricity build-up. This is
normal. They will disappear in 5 to
10 minutes.Navigation models
BRIGHT NESS control
Cleaning the Display Rear View Camera and Monitor
Trip Computer, Rear View Camera and Monitor
Features
155
NOTE:
REAR VIEW CAMERA
Page 158 of 312

�µ
The HomeLink Universal
Transceiver built into your vehicle
canbeprogrammedtooperateupto
three remotely controlled devices
around your home, such as garage
doors, lighting, or home security
systems.
If you are training HomeLink to
operate a garage door or gate, you
should unplug the motor f or that
device during training. Repeatedly
pressing the remote control button
could burn out the motor.
HomeLink stores the code in a
permanent memory. There should
be no need to retrain HomeLink if
your vehicle’s battery goes dead or is
disconnected. If your garage door
opener was manuf actured bef ore
April 1982, you may not be able to
program HomeLink to operate it.
They do not have the saf ety f eature
that causes the motor to stop and reverse if an obstacle is detected
during closing, increasing the risk of
injury.
Always ref er to the opening
instructions and saf ety inf ormation
that came with your garage door
opener or other equipment you
intend to operate with HomeLink. If
you do not have this inf ormation,
contact the manuf acturer of the
equipment.
If you are training the second or
third buttons, go directly to step 1.If you just
received your vehicle and have not
trained any of the buttons in
HomeLink bef ore, you should erase
any previously learned codes bef ore
training the first button. To do this,
press and hold the two outside
buttons on the HomeLink
Transceiver for about 20 seconds,
until the red indicator f lashes.
Release the buttons, then proceed to
step 1.
General Inf ormation T raining HomeL ink
Important Saf ety Precautions
HomeL ink Universal T ransceiver
Bef ore you begin
156
Page 159 of 312

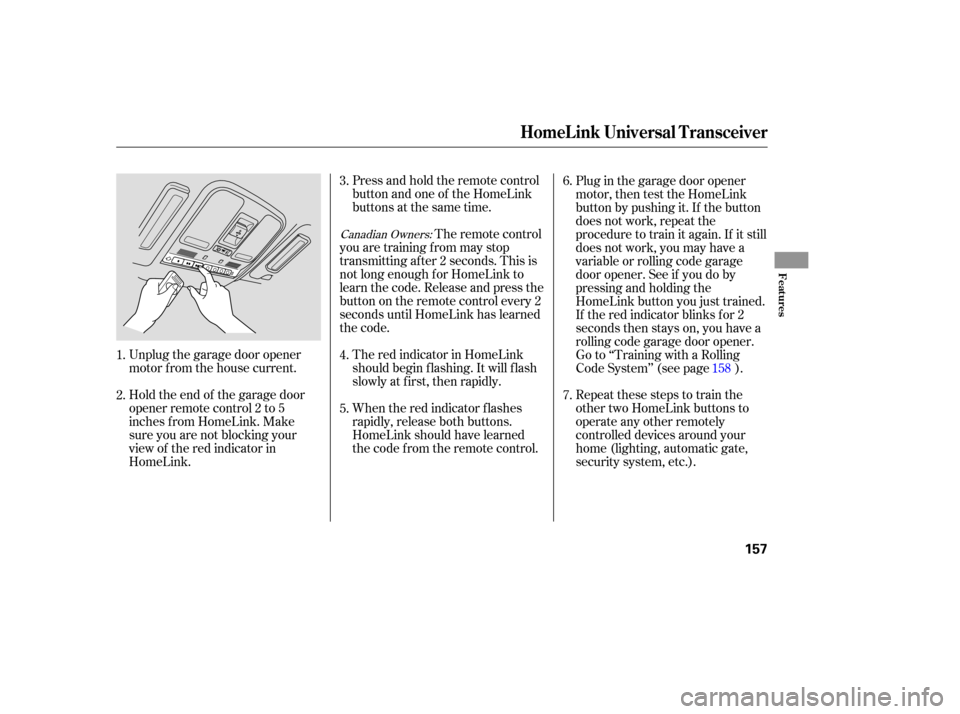
Unplug the garage door opener
motor f rom the house current.Press and hold the remote control
button and one of the HomeLink
buttons at the same time.
Holdtheendof thegaragedoor
opener remote control 2 to 5
inches f rom HomeLink. Make
sure you are not blocking your
view of the red indicator in
HomeLink. The remote control
you are training f rom may stop
transmitting after 2 seconds. This is
not long enough f or HomeLink to
learn the code. Release and press the
button on the remote control every 2
seconds until HomeLink has learned
the code.
The red indicator in HomeLink
should begin f lashing. It will f lash
slowly at first, then rapidly.
When the red indicator f lashes
rapidly, release both buttons.
HomeLink should have learned
the code f rom the remote control. Plug in the garage door opener
motor, then test the HomeLink
button by pushing it. If the button
does not work, repeat the
procedure to train it again. If it still
does not work, you may have a
variable or rolling code garage
door opener. See if you do by
pressing and holding the
HomeLink button you just trained.
If the red indicator blinks for 2
seconds then stays on, you have a
rolling code garage door opener.
Go to ‘‘Training with a Rolling
Code System’’ (see page ).
Repeat these steps to train the
other two HomeLink buttons to
operate any other remotely
controlled devices around your
home (lighting, automatic gate,
security system, etc.).
2. 3.
4.
1.
5.6.
7.
158
Canadian Owners:
HomeL ink Universal T ransceiver
Features
157
Page 161 of 312

Toerasethecodesstoredinallthree
buttons, press and hold the two
outside buttons until the red light
begins to f lash, then release the
buttons.
Youshoulderaseallthreecodes
bef ore selling the vehicle.
Totrainanalreadyprogrammed
HomeLink button with a new device,
you do not have to erase all the
memory. Train the selected button
over the existing memory code
f ollowing the steps under ‘‘Training
HomeLink’’.If you have problems with training
the HomeLink Universal Transceiver,
or would like inf ormation on home
products that can be operated by
HomeLink, call (800) 355-3515. On
the Internet, go to
www.homelink.com.
HomeLink
is a registered
trademark of Johnson Controls, Inc.
As required by the FCC:
This device complies with Part 15 of theFCC rules. Operation is subject to thef ollowing two conditions: (1) This devicemay not cause harmf ul interf erence, and(2) this device must accept anyinterf erence received, includinginterf erence that may cause undesiredoperation.
Changes or modif ications not expresslyapproved by the party responsible f orcompliance could void the user’sauthority to operate the equipment.
This device complies with IndustryCanada Standard RSS-210.Operation is subject to the f ollowing twoconditions: (1) this device may not causeinterf erence, and (2) this device mustaccept any interf erence that may causeundesired operation of the device.Erasing Codes Customer Assistance
Retraining a Button
HomeL ink Universal T ransceiver
Features
159