Page 32 of 83

4-4
Basic weight:
With oil and without fuel
Maximum load*:
Cold tire pressure:
up to 90 Kg (198 lb)
load*:
90 Kg (198 lb) ~
maximum load*:116 Kg ( 256 lb)
160 Kg ( 353 lb)
Front
Rear
* Load is the total weght of cargo, rider, passenger and accessories.
1.75 kg/cm2
25 PSI / 175 kpa2.0 kg/cm
2
28 PSI / 200Kpa
1.75 kg/cm2
25 PSI / 175 Kpa2.25 kg/cm
2
32 PSI / 225 Kpa
Proper loading of your motorcycle is important for the
handling, braking, and other performance and safety
characteristics of your motorcyle. Do not carry loosely
packed items that can shift. Securely pack your
heaviest items close to the center of the motorcycle,
and distribute the weight evenly from side to side.
Properly adjust the suspension for your load, and
check the condition and pressure of your tires. NEVER
OVERLOAD YOUR MOTORCYCLE. Make sure the total
weight of the cargo, rider, passenger, and accessories
(fairing, saddlebags, etc. if approved for this model)
does not exceed the maximum load of the motorcycle.
Operation of an overloaded motorcycle could cause
tire damage, an accident, or even injury.
WARNING:
Page 63 of 83

6-23
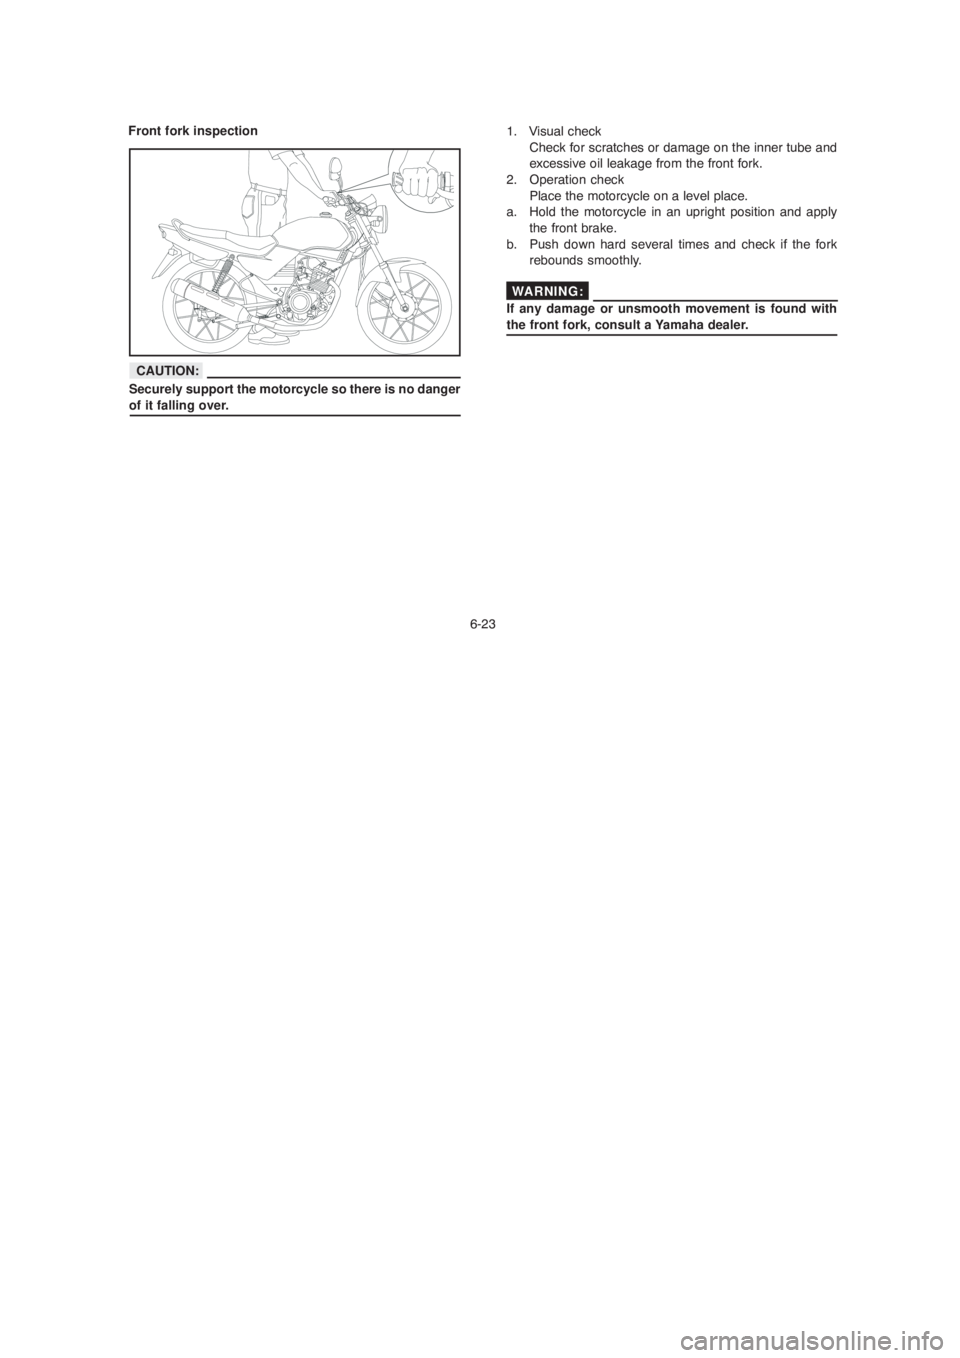
1. Visual check
Check for scratches or damage on the inner tube and
excessive oil leakage from the front fork.
2. Operation check
Place the motorcycle on a level place.
a. Hold the motorcycle in an upright position and apply
the front brake.
b. Push down hard several times and check if the fork
rebounds smoothly.
If any damage or unsmooth movement is found with
the front fork, consult a Yamaha dealer. Front fork inspection
Securely support the motorcycle so there is no danger
of it falling over.
CAUTION:
WARNING:
Page 64 of 83

6-24
Periodically inspect the condition of the steering. Worn out
or loose steering bearings may be dangerous. Place a stand
under the engine to raise the front wheel off the ground.
Hold the lower end of the front forks and try to move them
forward and backward. If any free play can be felt, ask a
Yamaha dealer to inspect and adjust the steering. Inspection
is easier if the front wheel is removed.
Securely support the motorcycle so there is no danger
of it falling over.Wheel bearings
If there is play in the front or rear wheel hub or if the wheel
does not turn smoothly, have a Yamaha dealer inspect the
wheel bearings. The wheel bearings should be inspected
according to the Maintenance Schedule.
Steering inspection
WARNING:
6-24
Periodically inspect the condition of the steering. Worn out
or loose steering bearings may be dangerous. Place a stand
under the engine to raise the front wheel off the ground.
Hold the lower end of the front forks and try to move them
forward and backward. If any free play can be felt, ask a
Yamaha dealer to inspect and adjust the steering. Inspection
is easier if the front wheel is removed.
Securely support the motorcycle so there is no danger
of it falling over. Wheel bearings
If there is play in the front or rear wheel hub or if the wheel
does not turn smoothly, have a Yamaha dealer inspect the
wheel bearings. The wheel bearings should be inspected
according to the Maintenance Schedule.
Steering inspection
WARNING:
Page 71 of 83
6-31
It is advisable to have a Yamaha dealer service the
wheel.
Securely support the motorcycle so there is no danger
of it falling over. Front wheel removal
1. Place the motorcycle on the centerstand.
2. Loosen the front brake cable by loosening the adjusting
bolt.
3. Remove the speedometer cable by loosening the cable
clip.
4. With the help of ar appropriete tool completely loose
the axle nut and remove it.
1. Lock nut 2. Clip 3. Axle nut
CAUTION:
Page 72 of 83

6-32
Front wheel installation
When installing the front wheel, reverse the removal
procedures.
Pay attention to the following points: 2. Make sure the slot in the brake shoe plate fits overthe stopper on the front fork outer tube.
3. Make sure the axle nut is properly torqued.
Axle nut torque: 45 N.m (4,5 Kgf.m, 32,5 lbf.ft)
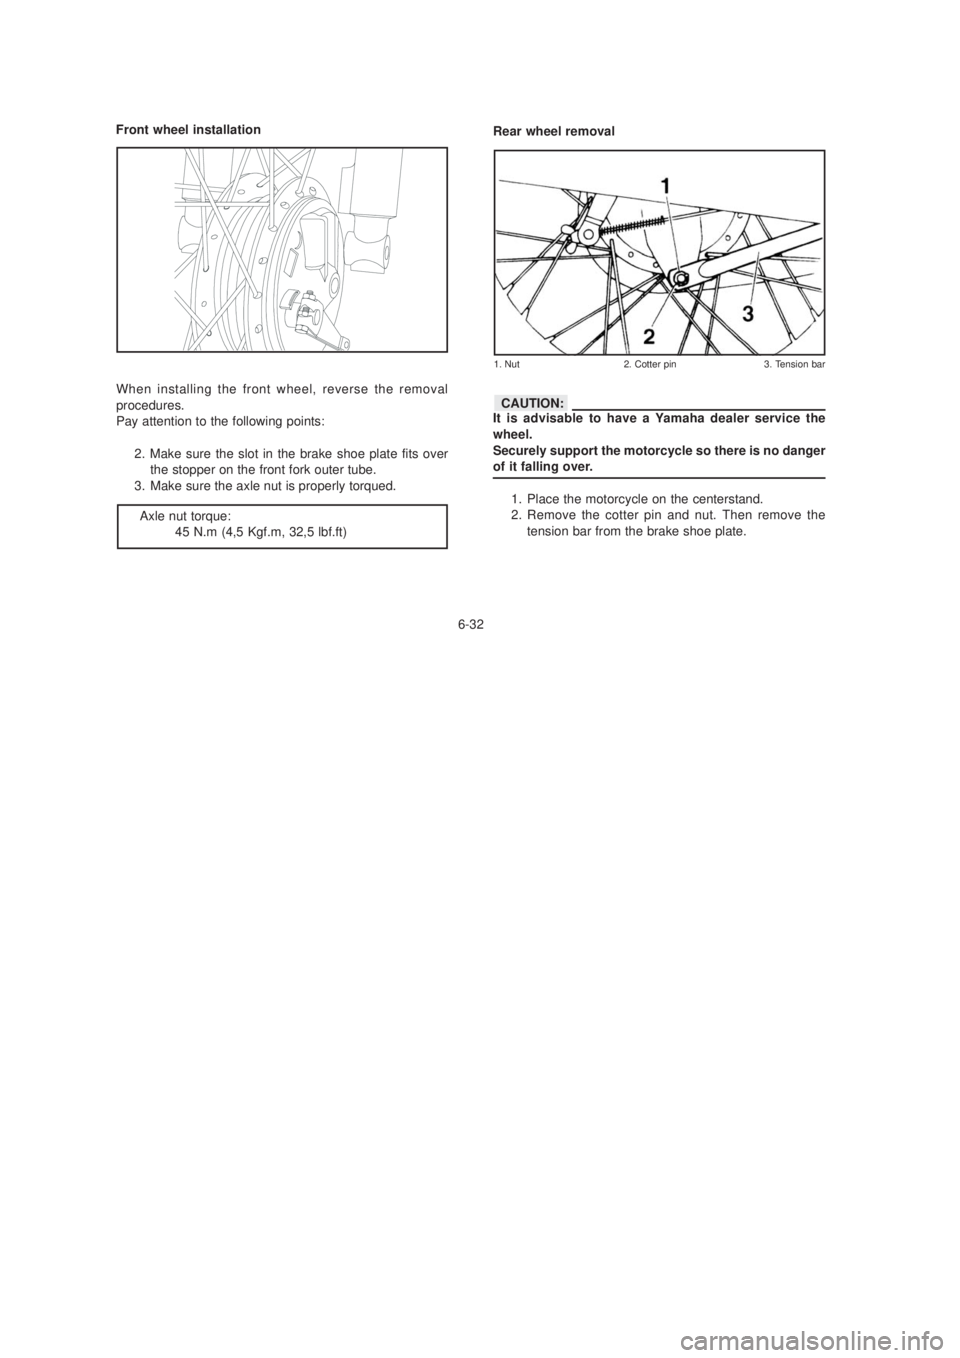
Rear wheel removal
It is advisable to have a Yamaha dealer service the
wheel.
Securely support the motorcycle so there is no danger
of it falling over. 1. Place the motorcycle on the centerstand.
2. Remove the cotter pin and nut. Then remove thetension bar from the brake shoe plate.
1. Nut 2. Cotter pin 3. Tension bar
CAUTION: