Page 7 of 122
AVALON_Navi_U (L/O 0408)
vii
2004 AVALON Navigation from Aug. ’04 Prod. (OM41413U)
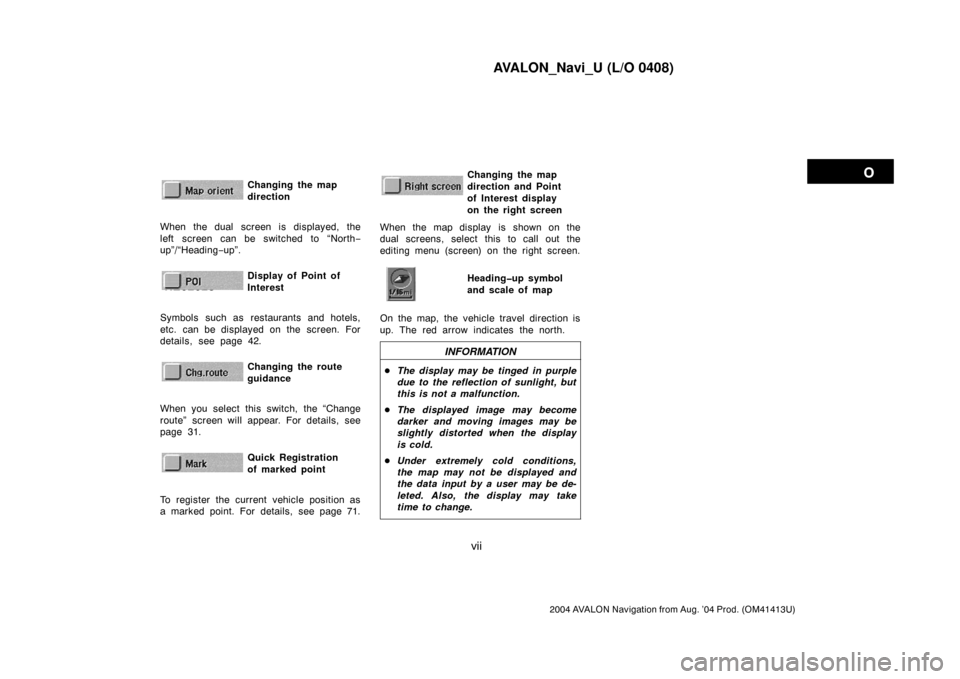
Changing the map
directionNZ02622
When the dual screen is displayed, the
left screen can be switched to “North−
up”/“Heading−up”.
Display of Point of
Interest
NZ02623
Symbols such as restaurants and hotels,
etc. can be displayed on the screen. For
details, see page 42.
Changing the route
guidance
NZ02624
When you select this switch, the “Change
route” screen will appear. For details, see
page 31.
Quick Registration
of marked point
NZ02625
To register the current vehicle position as
a marked point. For details, see page 71.
Changing the map
direction and Point
of Interest display
on the right screenNZ02626
When the map display is shown on the
dual screens, select this to call out the
editing menu (screen) on the right screen.
Heading�up symbol
and scale of map
On the map, the vehicle travel direction is
up. The red arrow indicates the north.
INFORMATION
�The display may be tinged in purple
due to the reflection of sunlight, but
this is not a malfunction.
�The displayed image may become
darker and moving images may be
slightly distorted when the display
is cold.
�Under extremely cold conditions,
the map may not be displayed and
the data input by a user may be de-
leted. Also, the display may take
time to change.
Page 15 of 122
AVALON_Navi_U (L/O 0408)
7
2004 AVALON Navigation from Aug. ’04 Prod. (OM41413U)
Inputting numbers are assigned to each
button of the keypad as follows:
Buttons
Inputting number
11
22
33
44
55
66
77
88
99
00
�&−
�To delete a previous input
number
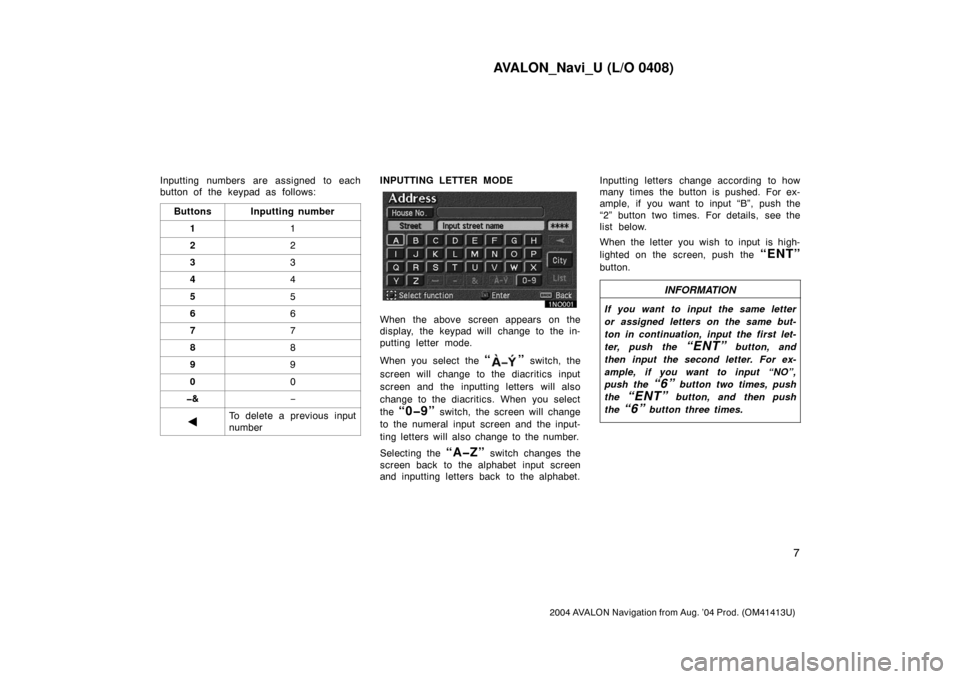
INPUTTING LETTER MODE
When the above screen appears on the
display, the keypad will change to the in-
putting letter mode.
When you select the
“” switch, the
screen will change to the diacritics input
screen and the inputting letters will also
change to the diacritics. When you select
the
“0�9” switch, the screen will change
to the numeral input screen and the input-
ting letters will also change to the number.
Selecting the
“A�Z” switch changes the
screen back to the alphabet input screen
and inputting letters back to the alphabet.Inputting letters change according to how
many times the button is pushed. For ex-
ample, if you want to input “B”, push the
“2” button two times. For details, see the
list below.
When the letter you wish to input is high-
lighted on the screen, push the
“ENT”
button.
INFORMATION
If you want to input the same letter
or assigned letters on the same but-
ton in continuation, input the first let-
ter, push the
“ENT” button, and
then input the second letter. For ex-
ample, if you want to input “NO”,
push the
“6” button two times, push
the
“ENT” button, and then push
the
“6” button three times.
Page 44 of 122
AVALON_Navi_U (L/O 0408)
36
2004 AVALON Navigation from Aug. ’04 Prod. (OM41413U)
The current street name will be displayed
in the bottom of the screen when the
setting of the current street name is on.
In some areas, the roads have not been
completely digitalized in our database yet.
For this reason, the route guidance may
guide the road that is not allowed to pass.You can use voice guidance while driv-
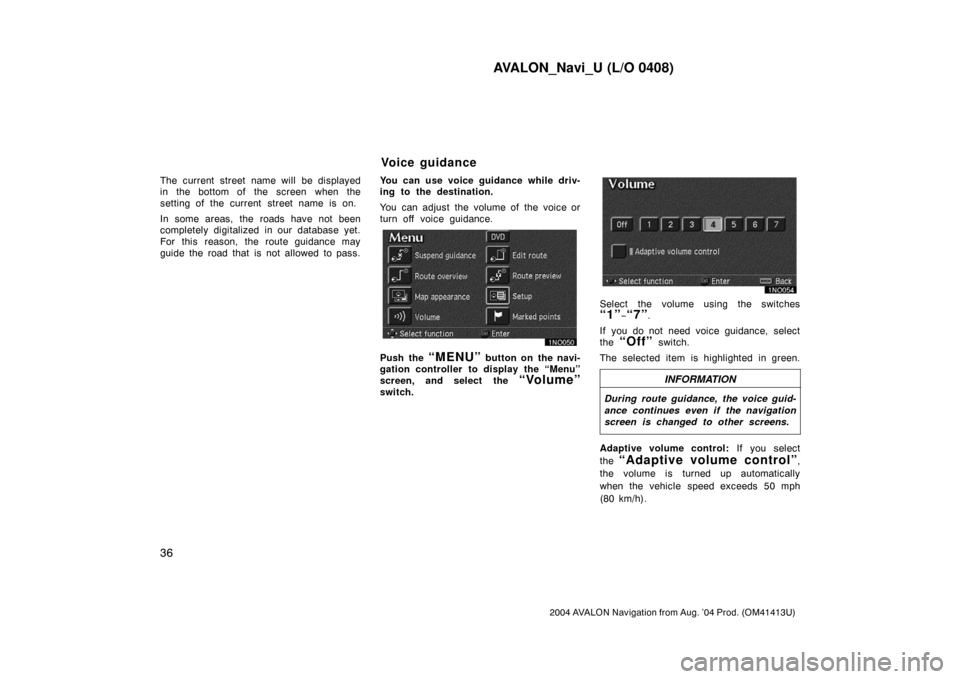
ing to the destination.
You can adjust the volume of the voice or
turn off voice guidance.
Push the “MENU” button on the navi-
gation controller to display the “Menu”
screen, and select the
“Volume”
switch.
Select the volume using the switches
“1”−“7”.
If you do not need voice guidance, select
the
“Off” switch.
The selected item is highlighted in green.
INFORMATION
During route guidance, the voice guid-
ance continues even if the navigation
screen is changed to other screens.
Adaptive volume control: If you select
the
“Adaptive volume control”,
the volume is turned up automatically
when the vehicle speed exceeds 50 mph
(80 km/h).
Voice guidance
Page 45 of 122
AVALON_Navi_U (L/O 0408)
37
2004 AVALON Navigation from Aug. ’04 Prod. (OM41413U)
To turn the system of the “Adaptive
volume control” on, select the
switch. The indicator will be highlighted.
SSNU187
The voice guidance provides various mes-
sages as you approach an intersection, or
other point where you need to maneuver
the vehicle.
1“Proceed about 5 miles.”
2“In a half of a mile, right turn.”
3“Right turn.”
4Beep sound only.
INFORMATION
On freeways, interstates or other
highways with higher speed limits,
the voice guidance will be made at
earlier points than on city streets in
order to allow time to maneuver.
Typical voice guidance
prompts
Page 53 of 122
AVALON_Navi_U (L/O 0408)
45
2004 AVALON Navigation from Aug. ’04 Prod. (OM41413U)
When there are 2 screens displayed, se-
lect
“Right screen” switch. You can
display the “Edit right screen”.
Select “Show POI icons”. POI icon
is displayed when the indicator next to the
is highlighted, and if not, the POI icon
is not displayed.You can change from the map screen to
a “Turn list” screen that displays the
list of the roads up to your destination.
This list can be used for a route guid-
ance.
1. Push the “MENU” button on the
navigation controller to display the
menu screen and select the
“Route
overview”
switch.
2. The screen will change to the “En-
tire route map” screen, push the
“ENT” button on the navigation
controller to display the menu
switches. And then select the
“Turn
list”
switch.
Tu r n l i s t
Page 98 of 122
AVALON_Navi_U (L/O 0408)
90
2004 AVALON Navigation from Aug. ’04 Prod. (OM41413U)
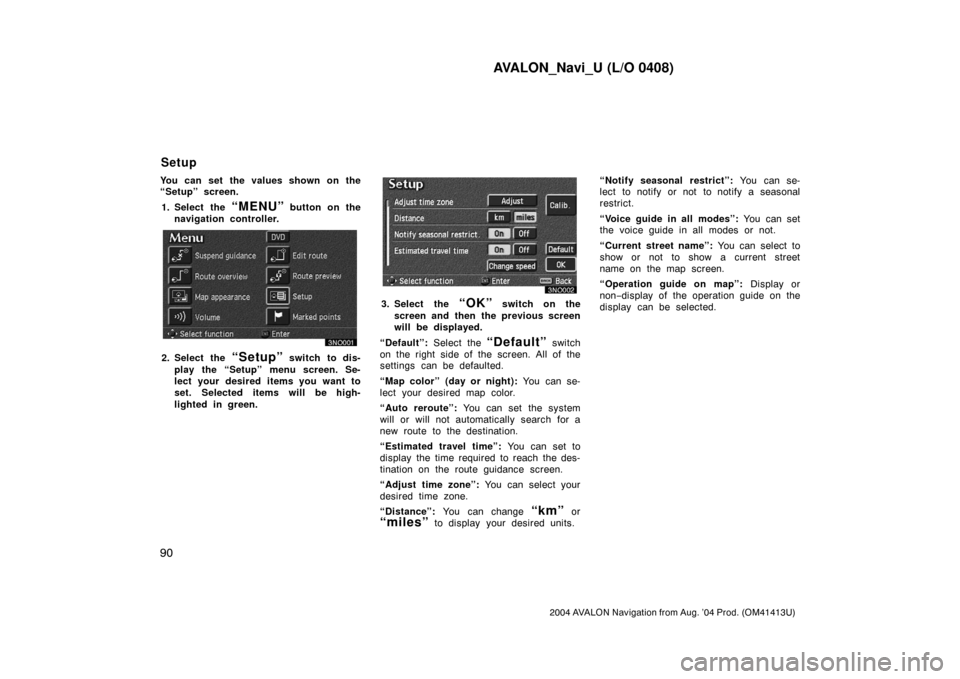
You can set the values shown on the
“Setup” screen.
1. Select the
“MENU” button on the
navigation controller.
2. Select the “Setup” switch to dis-
play the “Setup” menu screen. Se-
lect your desired items you want to
set. Selected items will be high-
lighted in green.
3. Select the “OK” switch on the
screen and then the previous screen
will be displayed.
“Default”: Select the
“Default” switch
on the right side of the screen. All of the
settings can be defaulted.
“Map color” (day or night): You can se-
lect your desired map color.
“Auto reroute”: You can set the system
will or will not automatically search for a
new route to the destination.
“Estimated travel time”: You can set to
display the time required to reach the des-
tination on the route guidance screen.
“Adjust time zone”: You can select your
desired time zone.
“Distance”: You can change
“km” or
“miles” to display your desired units.“Notify seasonal restrict”: You can se-
lect to notify or not to notify a seasonal
restrict.
“Voice guide in all modes”: You can set
the voice guide in all modes or not.
“Current street name”: You can select to
show or not to show a current street
name on the map screen.
“Operation guide on map”: Display or
non−display of the operation guide on the
display can be selected.
Setup
Page 100 of 122
AVALON_Navi_U (L/O 0408)
92
2004 AVALON Navigation from Aug. ’04 Prod. (OM41413U)
3. Select the “On” switch of “Auto
reroute”.
Selected switch is highlighted in green.
INFORMATION
If your vehicle leaves the guidance
route, the system searches for a new
route to the destination. The new
route may or may not take you back
to the previous route depending on
how far you are off the original guid-
ance route.
When the “Estimated travel time” fea-
ture is turned on, the time preferred to
reach the destination is displayed on
the route guidance screen.
To turn the “Estimated travel time”
mode “On”:
1. Push the
“MENU” button on the
navigation controller.
2. Select the “Setup” switch.
3. Select the “Change speed”
switch on the “Setup” screen.
Time to destination
Page 101 of 122
AVALON_Navi_U (L/O 0408)
93
2004 AVALON Navigation from Aug. ’04 Prod. (OM41413U)
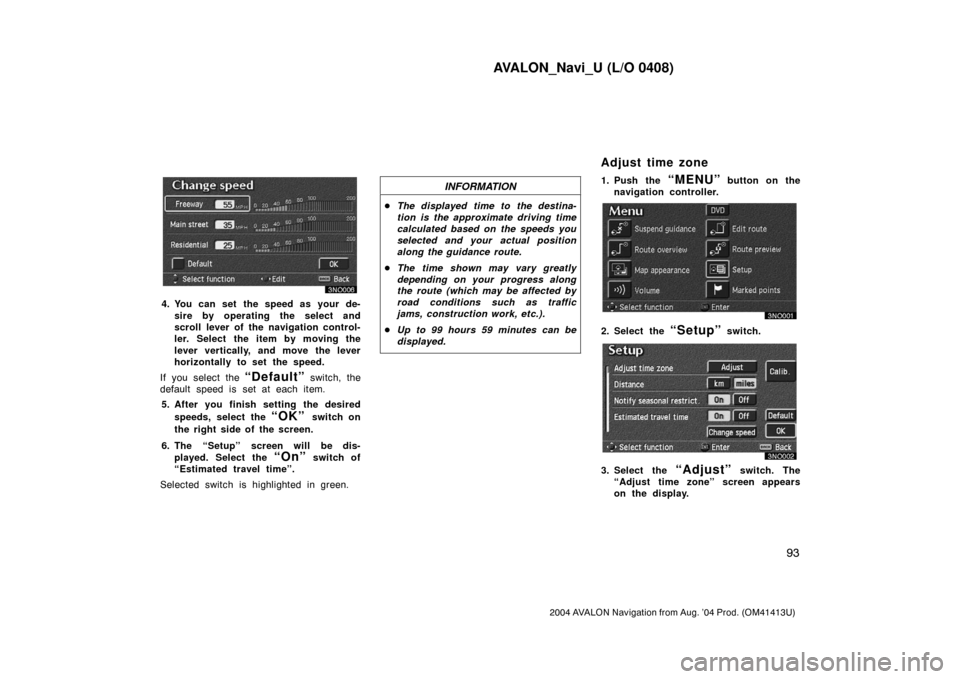
4. You can set the speed as your de-
sire by operating the select and
scroll lever of the navigation control-
ler. Select the item by moving the
lever vertically, and move the lever
horizontally to set the speed.
If you select the
“Default” switch, the
default speed is set at each item.
5. After you finish setting the desired
speeds, select the
“OK” switch on
the right side of the screen.
6. The “Setup” screen will be dis-
played. Select the
“On” switch of
“Estimated travel time”.
Selected switch is highlighted in green.
INFORMATION
�The displayed time to the destina-
tion is the approximate driving time
calculated based on the speeds you
selected and your actual position
along the guidance route.
�The time shown may vary greatly
depending on your progress along
the route (which may be affected by
road conditions such as traffic
jams, construction work, etc.).
�Up to 99 hours 59 minutes can be
displayed.
1. Push the “MENU” button on the
navigation controller.
2. Select the “Setup” switch.
3. Select the “Adjust” switch. The
“Adjust time zone” screen appears
on the display.
Adjust time zone