Page 356 of 491

9-5
In case of emergency
– CONTINUED –
Flat tires
If you have a flat tire while driving, never brake sud-
denly; keep driving straight ahead while gradually re-
ducing speed. Then slowly pull off the road to a safe
place. !Changing a flat tire
"Do not jack up the vehicle on an incline or a
loose road surface. The jack can come out of
the jacking point or sink into the ground and
this can result in a severe accident. " Use only the jack provided with your vehicle.
The jack supplied with the vehicle is designed
only for changing a tire. Never get under the ve-
hicle while supporting the vehicle with thisjack. " Always turn the engine off before raising the
flat tire off the ground using the jack. Never
swing or push the vehicle supported with the
jack. The jack can come out of the jacking point
due to a jolt and this can result in a severe acci-
dent. 1. Park on a hard, level surface, whenever possible,
then stop the engine.
2. Set the parking brake securely and shift a manual
transmission vehicle in reverse or an automatic trans-
mission vehicle in the “P” (Park) position.
3. Turn on the hazard warning flasher and have ev-
eryone get out of the vehicle.
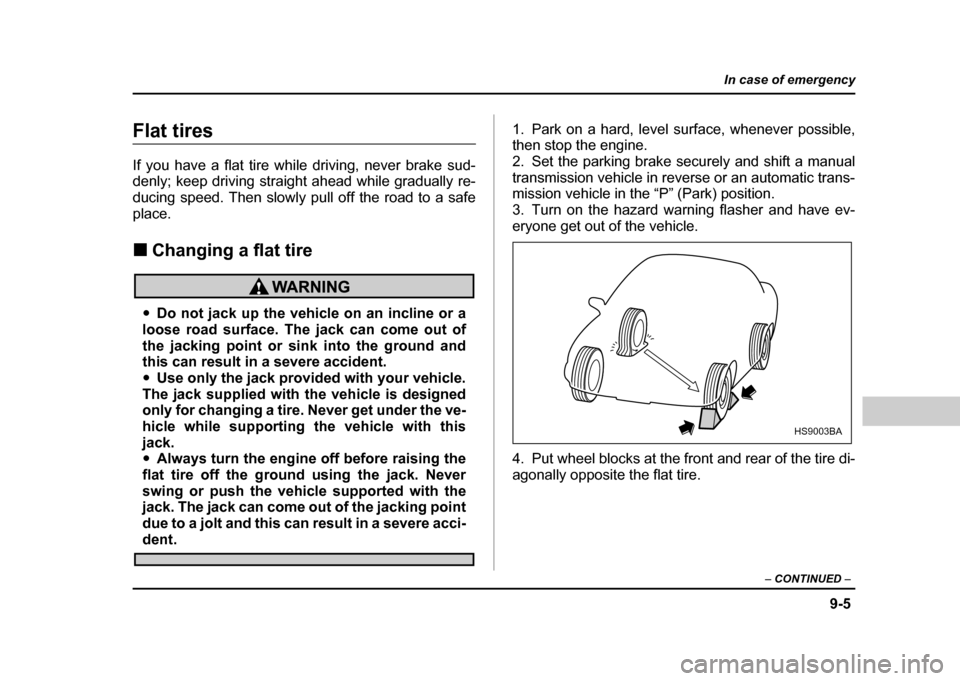
4. Put wheel blocks at the front and rear of the tire di-
agonally opposite the flat tire.
HS9003BA
Page 363 of 491

9-12
In case of emergency
surface of the wheel and hub with a cloth.
12.Put on the spare tire. Replace the wheel nuts.
Tighten them by hand.
Do not use oil or grease on the wheel studs or
nuts when the spare tire is installed. This could
cause the nuts to become loose and lead to an
accident.
13.Turn the jack handle counterclockwise to lower the
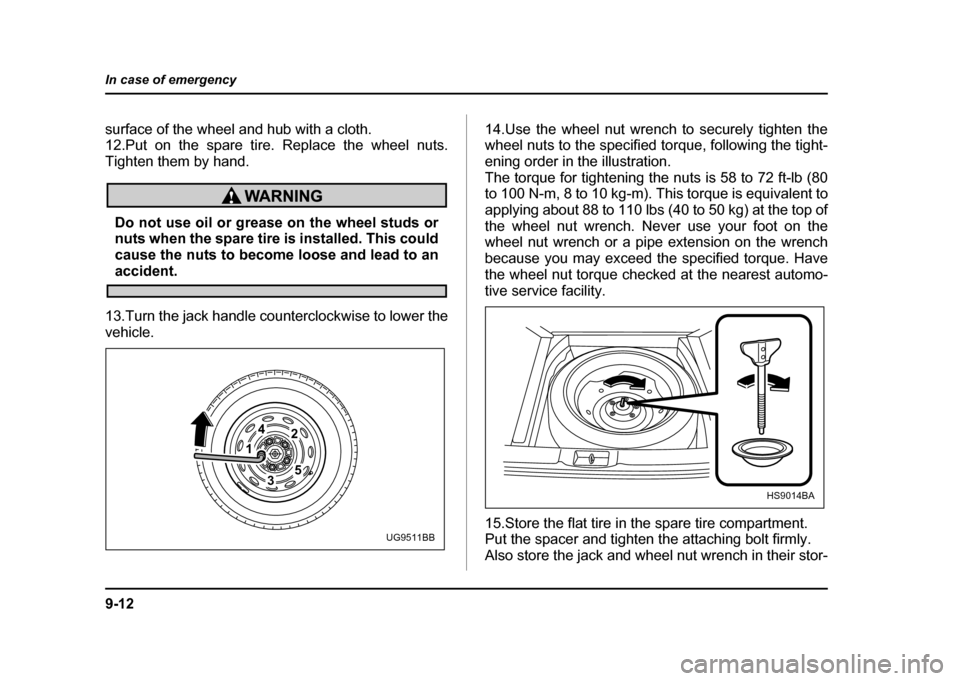
vehicle. 14.Use the wheel nut wrench to securely tighten the
wheel nuts to the specified torque, following the tight-
ening order in the illustration.
The torque for tightening the nuts is 58 to 72 ft-lb (80
to 100 N-m, 8 to 10 kg-m). This torque is equivalent to
applying about 88 to 110 lbs (40 to 50 kg) at the top of
the wheel nut wrench. Never use your foot on the
wheel nut wrench or a pipe extension on the wrench
because you may exceed the specified torque. Have
the wheel nut torque checked at the nearest automo-
tive service facility.
15.Store the flat tire in the spare tire compartment.
Put the spacer and tighten the attaching bolt firmly.
Also store the jack and wheel nut wrench in their stor-
1
42
53
UG9511BB
HS9014BA
Page 364 of 491
9-13
In case of emergency
– CONTINUED –
age locations.
After placing the jack in its storage location, turn the
jackscrew clockwise by hand until it becomes too hard
to turn. Then, tighten it by an additional 1/4 – 1/3 of a
turn using a screwdriver or the jack handle. Unless the
jack is properly secured, it may rattle while the vehicle is moving.
Never place a tire or tire changing tools in the
passenger compartment after changing
wheels. In a sudden stop or collisions, loose
equipment could strike occupants and cause injury. Store the tire and all tools in the proper
place.
HG9019BA
Page 369 of 491
9-18
In case of emergency
terioration of the center differential.
! Towing and tie-down hooks
The towing hooks should be used only in an emergen-
cy (e.g., to free a stuck vehicle from mud, sand or
snow).
Front towing hook:
1. Take out the towing hook, screwdriver and wheel
nut wrench from the on board tool bag.
2. Insert a flat-head screwdriver into the slot at point A
on the front passenger side fog light cover, then use it
to pry the cover upward. The tabs at point A on the fog light cover will come free of the bumper.
3. Pull the entire fog light cover toward you.
4. Screw the towing hook into the threaded hole until
its thread becomes invisible.
5. Tighten the towing hook securely using the wheel
nut wrench.
After towing, remove the towing hook from the vehicle
and stow it in the tool bag.
Fit the fog light cover on the bumper.
"
Do not use the towing hook except when tow-
ing your vehicle.
A
UG9030BB
UG9526BA
Page 371 of 491

9-20
In case of emergency
"
Use only the specified towing hook and tie-
down hook. Never use suspension parts or oth-
er body parts for towing or tie-down purposes." Never use the tie-down hook on the under-
side of the vehicle closest to the muffler for
towing purposes.
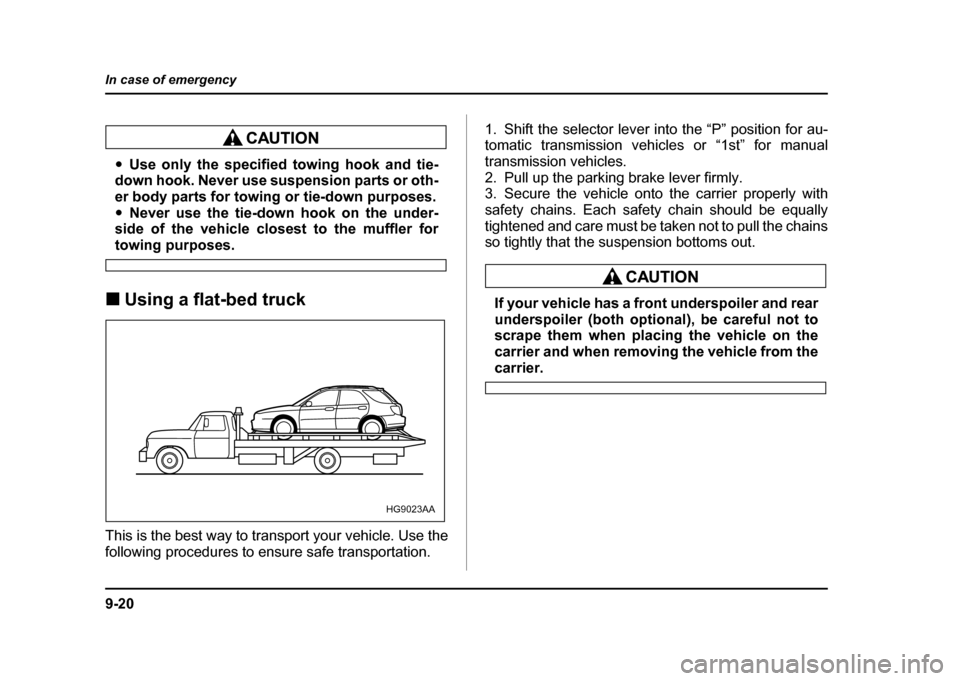
! Using a flat-bed truck
This is the best way to transport your vehicle. Use the
following procedures to ensure safe transportation. 1. Shift the selector lever into the “P” position for au-
tomatic transmission vehicles or “1st” for manual
transmission vehicles.
2. Pull up the parking brake lever firmly.
3. Secure the vehicle onto the carrier properly with
safety chains. Each safety chain should be equally
tightened and care must be taken not to pull the chains
so tightly that the suspension bottoms out.
If your vehicle has a front underspoiler and rear
underspoiler (both optional), be careful not to
scrape them when placing the vehicle on the
carrier and when removing the vehicle from the
carrier.
HG9023AA
Page 392 of 491
11 - 7
Maintenance and service
– CONTINUED –
from the slot in the hood and return the prop to its re-
tainer.
2. Lower the hood until it approaches about 12 in. (30
cm) from the closed position and let it drop.
After closing the hood, be sure the hood is securely
locked.
If this does not close the hood, release it from a slightly
higher position. Do not push the hood forcibly to close
it. It could deform the metal.
Always check that the hood is properly locked
before you start driving. If it is not, it might fly
open while the vehicle is moving and block
your view, which may cause an accident and
serious bodily injury.
Page 399 of 491
11 - 1 4
Maintenance and service
Non-turbo models
4. Drain out the engine oil by removing the drain plug
while the engine is still warm. The used oil should be
drained into an appropriate container and disposed of
properly.
Be careful not to burn yourself with hot engineoil.
5. Wipe the seating surface of the drain plug with a
clean cloth and tighten it securely with a new sealing washer after the oil has completely drained out.
6. Remove under cover (For turbo).
Turbo models
UGB057DA
UGB083BA
Page 405 of 491
11 - 2 0
Maintenance and service
1) Rubber gaskets
3. After refilling the reserve tank and the radiator, re-
install the caps and check that the rubber gaskets in-
side the radiator cap are in the proper position.
" Be careful not to spill engine coolant when
adding it. If coolant touches the exhaust pipe, it
may cause a bad smell, smoke, and/or a fire." Do not splash the engine coolant over paint-
ed parts. The alcohol contained in the engine
coolant may damage the paint surface.
! Changing the coolant
1) Drain plug
Change the engine coolant using the following proce-
dures according to the maintenance schedule.
1. Remove the under cover.
2. Place a proper container under the drain plug and
loosen the drain plug.
3. Loosen the radiator cap to drain the coolant from
the radiator. Then drain the coolant from the reserve
tank. Tighten the drain plug securely.
1
HSB026BB
1HSB027BB