Page 222 of 491
5-9
Audio
– CONTINUED –
seconds to store the frequency. The frequency of the
station will flash once on the display at this time. If the
button is pressed for less than 2 seconds, the preced-
ing selection will remain in memory.
NOTE
If the connection between the radio and battery is
broken for any reason such as vehicle mainte-
nance or radio removal, all stations stored in the
preset buttons are cleared. If this occurs, it is nec-
essary to reset the preset buttons.
Page 229 of 491
5-16
Audio
Type B audio set (if equipped)
The radio will operate only when the ignition switch is in the “ACC” or “ON”
position. !
Radio operation
(1) (2) (3)
(8) (7) (6) (5) (4)
UG5031BB
(1) FM button
(2) AM button
(3) SCAN button
(4) Tuning knob
(5) Preset buttons
(6) Fader/Balance selection button
(7) Power switch, Volume control, Bass/Treble control and Fader/
Balance control dial
(8) Bass/Treble selection button
Page 233 of 491

5-20
Audio
!
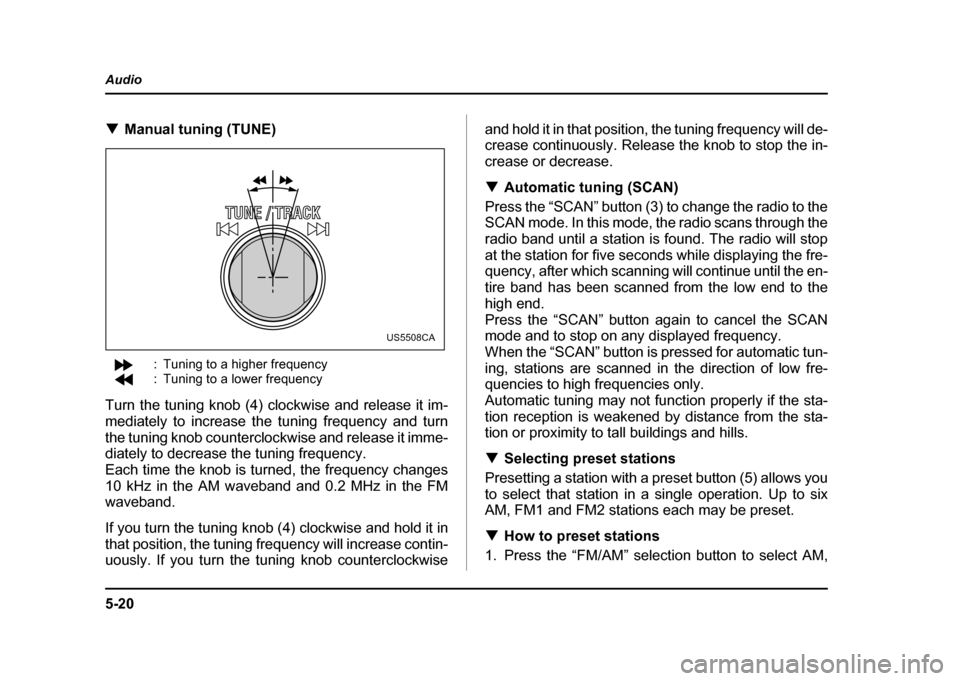
Manual tuning (TUNE)
: Tuning to a higher frequency
: Tuning to a lower frequency
Turn the tuning knob (4) clockwise and release it im-
mediately to increase the tuning frequency and turn
the tuning knob counterclockwise and release it imme-
diately to decrease the tuning frequency.
Each time the knob is turned, the frequency changes
10 kHz in the AM waveband and 0.2 MHz in the FM
waveband.
If you turn the tuning knob (4) clockwise and hold it in
that position, the tuning frequency will increase contin-
uously. If you turn the tuning knob counterclockwise and hold it in that position, the tuning frequency will de-
crease continuously. Release the knob to stop the in-
crease or decrease. !
Automatic tuning (SCAN)
Press the “SCAN” button (3) to change the radio to the
SCAN mode. In this mode, the radio scans through the
radio band until a station is found. The radio will stop
at the station for five seconds while displaying the fre-
quency, after which scanning will continue until the en-
tire band has been scanned from the low end to the
high end.
Press the “SCAN” button again to cancel the SCAN
mode and to stop on any displayed frequency.
When the “SCAN” button is pressed for automatic tun-
ing, stations are scanned in the direction of low fre-
quencies to high frequencies only.
Automatic tuning may not function properly if the sta-
tion reception is weakened by distance from the sta-
tion or proximity to tall buildings and hills. ! Selecting preset stations
Presetting a station with a preset button (5) allows you
to select that station in a single operation. Up to six
AM, FM1 and FM2 stations each may be preset. ! How to preset stations
1. Press the “FM/AM” selection button to select AM,
US5508CA
Page 234 of 491
5-21
Audio
– CONTINUED –
FM1 or FM2 reception.
2. Press the “SCAN” button (3) or tune the radio man-
ually until the desired station frequency is displayed.
3. Press one of the preset buttons (5) for at least 1.5
seconds to store the frequency. The frequency of the
station will flash once on the display at this time. If the
button is pressed for less than 1.5 seconds, the pre-
ceding selection will remain in memory.
NOTE
If the connection between the radio and battery is
broken for any reason such as vehicle mainte-
nance or radio removal, all stations stored in the
preset buttons are cleared. If this occurs, it is nec-
essary to reset the preset buttons.