2004 SUBARU IMPREZA WRX oil change
[x] Cancel search: oil changePage 54 of 491

1-27
Seat, seatbelt and SRS airbags
– CONTINUED –
!Seatbelt maintenance
To clean the seatbelts, use a mild soap and lukewarm
water. Never bleach or dye the belts because this
could seriously affect their strength.
Inspect the seatbelts and attachments including the
webbing and all hardware periodically for cracks, cuts,
gashes, tears, damage, loose bolts or worn areas. Re-
place the seatbelts even if only minor damage is
found.
" Keep the belts free of polishes, oils, chemi-
cals and particularly battery acid. " Never attempt to make modifications or
changes that will prevent the seatbelt from op-
erating properly.
Front seatbelt pretensioners
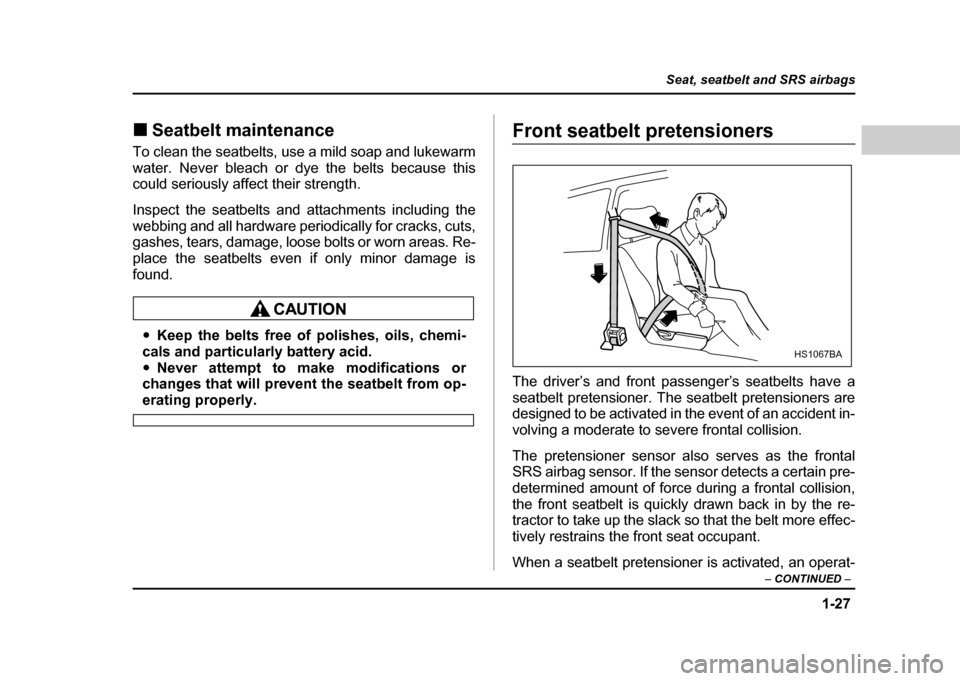
The driver’s and front passenger’s seatbelts have a
seatbelt pretensioner. The seatbelt pretensioners are
designed to be activated in the event of an accident in-
volving a moderate to severe frontal collision.
The pretensioner sensor also serves as the frontal
SRS airbag sensor. If the sensor detects a certain pre-
determined amount of force during a frontal collision,
the front seatbelt is quickly drawn back in by the re-
tractor to take up the slack so that the belt more effec-
tively restrains the front seat occupant.
When a seatbelt pretensioner is activated, an operat-
HS1067BA
Page 138 of 491

3-1
3
Instruments and controls
Ignition switch .............................................. 3-3 LOCK .................................................................. 3-3
ACC .................................................................... 3-4
ON ....................................................................... 3-4
START ................................................................ 3-4
Key reminder chime .......................................... 3-4
Ignition switch light (if equipped) .................... 3-5
Key interlock release (AT vehicles only) ........ 3-5
Hazard warning flasher ................................ 3-6
Meters and gauges (WRX-STi) .................... 3-7 Combination meter illumination ...................... 3-7
Cancelling sequential illumination of the combination meter ......................................... 3-7
Speedometer ..................................................... 3-7
Odometer/Trip meter ........................................ 3-8
Tachometer ........................................................ 3-9
Fuel gauge ......................................................... 3-9
Temperature gauge ........................................... 3-10
Ambient temperature gauge ............................ 3-11
REV indicator light and buzzer (WRX-STi) . 3-12 Setting the alarm-level engine speed .............. 3-13
Deactivating the REV alarm system ................ 3-14
Meters and gauges (Except WRX-STi) ........ 3-15 Speedometer ..................................................... 3-15
Odometer/Trip meter ........................................ 3-15
Tachometer ........................................................ 3-16
Fuel gauge ......................................................... 3-16
Temperature gauge ........................................... 3-17
Ambient temperature gauge (if equipped) ...... 3-18
Warning and indicator lights ....................... 3-19 Seatbelt warning light and chime .................... 3-19 SRS airbag system warning light .................... 3-20
CHECK ENGINE warning light/Malfunction
indicator lamp ................................................. 3-20
Charge warning light ........................................ 3-21
Oil pressure warning light ............................... 3-21
AT OIL TEMPerature warning light (for AT vehicles) ............................................. 3-22
Rear differential oil temperature warning light
(WRX-STi) ........................................................ 3-22
ABS warning light ............................................. 3-23
Brake system warning light ............................. 3-24
Door open warning lights ................................ 3-25
Front-wheel drive warning light (for AT vehicles – if equipped) ...................... 3-25
Intercooler water spray warning light
(WRX-STi) ........................................................ 3-25
Selector lever position indicator (AT vehicles) 3-26
Turn signal indicator lights .............................. 3-26
High beam indicator light ................................. 3-26
Cruise control indicator light ........................... 3-26
Cruise control set indicator light .................... 3-26
Driver’s control center differential auto indicator light (WRX-STi) ............................... 3-26
Driver’s control center differential indicator
lights (WRX-STi) ............................................. 3-27
Headlight indicator light (WRX-STi) ................ 3-27
REV indicator light (WRX-STi) ......................... 3-27
Clock .............................................................. 3-28
Light control switch ...................................... 3-29 Headlights ......................................................... 3-29
High/low beam change (dimmer) .................... 3-30
Headlight flasher ............................................... 3-30
Page 397 of 491

11 - 1 2
Maintenance and service
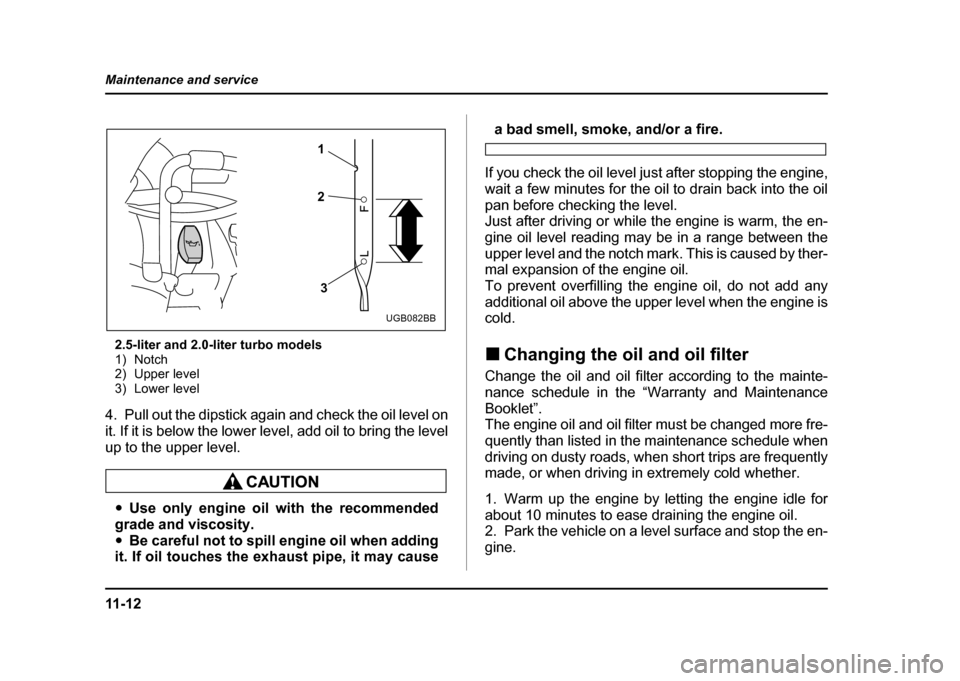
2.5-liter and 2.0-liter turbo models
1) Notch
2) Upper level
3) Lower level
4. Pull out the dipstick again and check the oil level on
it. If it is below the lower level, add oil to bring the level
up to the upper level.
" Use only engine oil with the recommended
grade and viscosity. " Be careful not to spill engine oil when adding
it. If oil touches the exhaust pipe, it may cause
a bad smell, smoke, and/or a fire.
If you check the oil level just after stopping the engine,
wait a few minutes for the oil to drain back into the oil
pan before checking the level.
Just after driving or while the engine is warm, the en-
gine oil level reading may be in a range between the
upper level and the notch mark. This is caused by ther-
mal expansion of the engine oil.
To prevent overfilling the engine oil, do not add any
additional oil above the upper level when the engine iscold. ! Changing the oil and oil filter
Change the oil and oil filter according to the mainte-
nance schedule in the “Warranty and Maintenance Booklet”.
The engine oil and oil filter must be changed more fre-
quently than listed in the maintenance schedule when
driving on dusty roads, when short trips are frequently
made, or when driving in extremely cold whether.
1. Warm up the engine by letting the engine idle for
about 10 minutes to ease draining the engine oil.
2. Park the vehicle on a level surface and stop the en-
gine.
1 2
3
UGB082BB
Page 438 of 491

11 -5 3
Maintenance and service
– CONTINUED –
Aluminum wheels (If equipped)
Aluminum wheels can be scratched and damaged
easily. Handle them carefully to maintain their appear-
ance, performance, and safety. "When any of the wheels is removed and replaced
for tire rotation or to change a flat, always check the
tightness of the wheel nuts after driving approximately
600 miles (1,000 km). If any nut is loose, tighten it to
the specified torque. " Never apply oil to the threaded parts, wheel nuts, or
tapered surface of the wheel. " Never let the wheel rub against sharp protrusions or
curbs." Be sure to fit tire chains on uniformly and completely
around the tire, otherwise the chains may scratch the
wheel. " When wheel nuts, balance weights, or the center
cap is replaced, be sure to replace them with genuine
SUBARU parts designed for aluminum wheels.Intercooler water spray
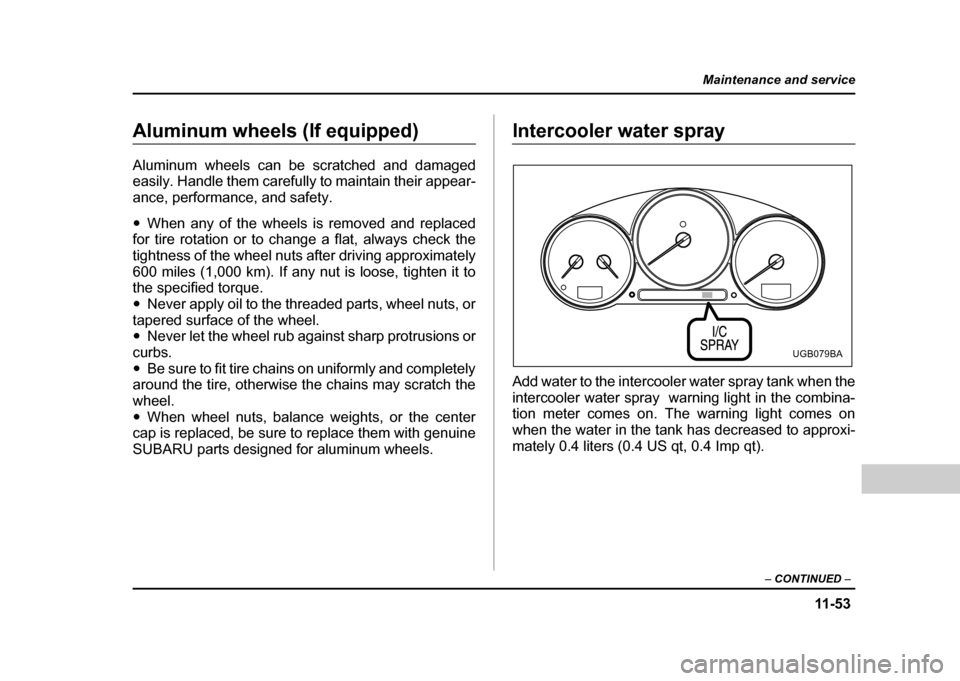
Add water to the intercooler water spray tank when the
intercooler water spray warning light in the combina-
tion meter comes on. The warning light comes on
when the water in the tank has decreased to approxi-
mately 0.4 liters (0.4 US qt, 0.4 Imp qt).
UGB079BA