2004 SUBARU IMPREZA WRX change time
[x] Cancel search: change timePage 227 of 491
5-14
Audio
!
To start playback
When the “CD” button (13) is pressed, the CD changer
will start playback. The display shows the current disc
number, track number and the elapsed time during
playback.
NOTE " If a disc is in the player, the “DISC” button is
used to change from CD player operation to DISC
changer operation. Each time the “DISC” button is
pressed, the operating mode will change alter-
nately. " At the end of the disc, the player automatically
continues with the next disc. " After playback on the last disc finishes, play-
back will automatically return to the first disc. " If you have loaded fewer than 6 discs, any miss-
ing disc is automatically skipped. ! Selection of a desired disc
You can select a desired disc from among the discs
contained in the CD changer only by pressing the cor-
responding number on one of the disc select buttons.
If you are to listen to the 5th disc in the CD changer,
press the “5” button of the disc select buttons. All other
discs in the CD changer can also be selected in a sim-
ilar way.
NOTE " No disc change takes place if the button corre-
sponding to the storage tray in which no disc is
loaded is pressed." If the disc select button corresponding to the
disc now in playback is pressed again, the disc
will be replayed from its beginning. ! To select a song from its beginning
" Forward direction
Briefly press the “ ” button (12) to skip to the begin-
ning of the next track. Each time the button is pressed,
the indicated track number will increase. " Backward direction
Briefly press the “ ” button (12) to skip to the begin-
ning of the current track. Each time the button is
pressed, the indicated track number will decrease. ! Fast forwarding and fast reverse
" Fast forwarding
Press the “ ” button (12) continuously for more than
1 second to fast forward the disc.
Release the button to stop fast forwarding.
If you continue fast forwarding to the end of the disc,
the CD changer will automatically stop fast forwarding
and start playback beginning with the first track on the
Page 233 of 491
5-20
Audio
!
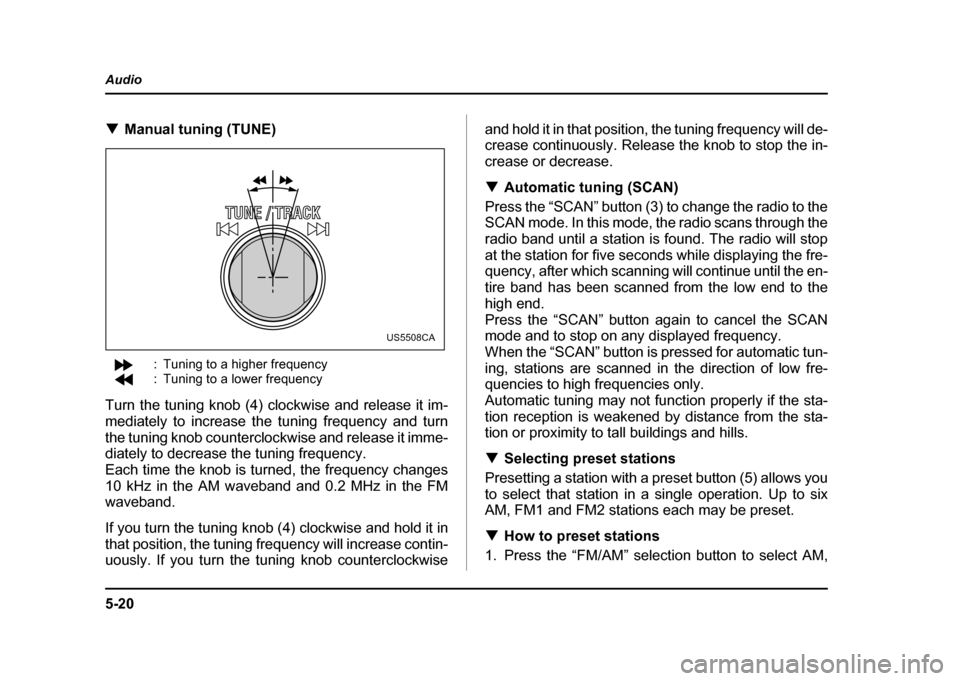
Manual tuning (TUNE)
: Tuning to a higher frequency
: Tuning to a lower frequency
Turn the tuning knob (4) clockwise and release it im-
mediately to increase the tuning frequency and turn
the tuning knob counterclockwise and release it imme-
diately to decrease the tuning frequency.
Each time the knob is turned, the frequency changes
10 kHz in the AM waveband and 0.2 MHz in the FM
waveband.
If you turn the tuning knob (4) clockwise and hold it in
that position, the tuning frequency will increase contin-
uously. If you turn the tuning knob counterclockwise and hold it in that position, the tuning frequency will de-
crease continuously. Release the knob to stop the in-
crease or decrease. !
Automatic tuning (SCAN)
Press the “SCAN” button (3) to change the radio to the
SCAN mode. In this mode, the radio scans through the
radio band until a station is found. The radio will stop
at the station for five seconds while displaying the fre-
quency, after which scanning will continue until the en-
tire band has been scanned from the low end to the
high end.
Press the “SCAN” button again to cancel the SCAN
mode and to stop on any displayed frequency.
When the “SCAN” button is pressed for automatic tun-
ing, stations are scanned in the direction of low fre-
quencies to high frequencies only.
Automatic tuning may not function properly if the sta-
tion reception is weakened by distance from the sta-
tion or proximity to tall buildings and hills. ! Selecting preset stations
Presetting a station with a preset button (5) allows you
to select that station in a single operation. Up to six
AM, FM1 and FM2 stations each may be preset. ! How to preset stations
1. Press the “FM/AM” selection button to select AM,
US5508CA
Page 245 of 491
5-32
Audio
"
Do not attempt to insert two or more discs
into the slot at a time. Doing so can cause me-
chanical damage to the CD changer." Use only music CDs identified by
am ark .
" Do not use CDs listed below which could
cause damage to the CD player. "3-inch (8 cm) compact disc.
" Any disc with a peel-off or seal on it.
" Any disc with scratches and/or dust.
" Bent disc.
" Cleaning disc.
" CD accessory. (E.g., 3-inch (8 cm) disc
adapter)
" Do not insert or remove any disc when the
automatic transmission selector lever is in the
park position; the selector lever in that position
can interfere with disc insertion or removal,
causing scratches on the disc surface (for AT
vehicles).
! To insert a disc
1. Press one of the “Disc select” buttons (3) (num-
bered from 1 to 6) for which the disc indicator light (2) is “OFF”.
The Disc indicator lights are located directly above the
corresponding “Disc select” buttons.
2. The indicator will begin blinking. The blinking will last for 15 seconds.
During this period, insert a desired disc, and the disc
will begin to play. (If any disc is not inserted during this
period, the “Disc slot” (1) door will close. Repeat step
1.)
Be sure to hold a disc with the label side (the side
where titles are printed) up.
3. To insert another disc, repeat step 1 and 2 choos-
ing a different disc select button. !
To insert six discs at a time
1. Press and hold the “Disc select” button number 1
until all disc indicators begin blinking (about 1.5 sec-
onds).
2. The indicators will blink for 15 seconds. During this
period, insert desired six discs.
3. When all discs are loaded, the first disc will begin to
play. (If no disc is inserted within this 15 seconds, the
entire disc load sequence will be canceled.) ! To remove a disc
1. Press the desired one of the “Disc select” buttons
(3) (numbered from 1 to 6) for which the disc indicator
light is on.
Page 246 of 491

5-33
Audio
– CONTINUED –
2. Press the “Eject button” (4). The selected disc will
be ejected and the indicator light will begin blinking.
3. To remove another disc, repeat step 1 and 2
choosing a different “Disc select” button.
(To remove discs when the ignition switch is in the
“Lock” position, press the “Eject” button, and the first
disc will be ejected. Press the “Eject” button again,
and the next disc will be ejected and so on. At this
time, the “Disc select” buttons are disabled.) !To remove all discs at one time
1. Press and hold the “Eject” button (4) until all “Disc”
indicators begin blinking (about 1.5 seconds), and the
first disc will be ejected.
2. When the disc is removed, the next one will be
ejected, and so on. ! To replace a playing disc with another
Simply press the desired one of “Disc select” buttons
(3) (numbered from 1 to 6) or press the “DISC select”
button on the radio unit to select the desired disc, and
the disc will begin to play. ! Disc indicators
Lit: when the corresponding storage tray is occupied
by a disc.
Blinking: Disc player is either in loading, eject or
changing mode. OFF: No disc is loaded or the ignition switch is in the
“LOCK” position. "
Open/Closed disc slot indicator
When the disc slot is open, the disc indicators on both
sides of the slot illuminate. ! Function control
Refer to CD changer control operating instructions de-
scribed in the “Type B audio set (if equipped)” section.
Page 309 of 491
7-40
Starting and operating
"
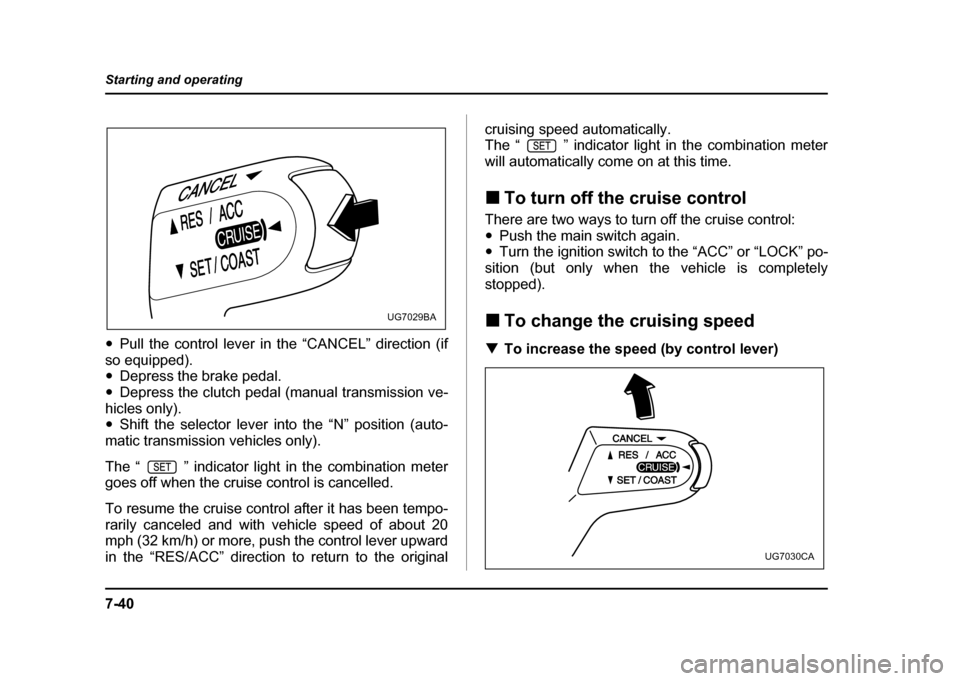
Pull the control lever in the “CANCEL” direction (if
so equipped). " Depress the brake pedal.
" Depress the clutch pedal (manual transmission ve-
hicles only)." Shift the selector lever into the “N” position (auto-
matic transmission vehicles only).
The “ ” indicator light in the combination meter
goes off when the cruise control is cancelled.
To resume the cruise control after it has been tempo-
rarily canceled and with vehicle speed of about 20
mph (32 km/h) or more, push the control lever upward
in the “RES/ACC” direction to return to the original cruising speed automatically.
The “ ” indicator light in the combination meter
will automatically come on at this time. !
To turn off the cruise control
There are two ways to turn off the cruise control: " Push the main switch again.
" Turn the ignition switch to the “ACC” or “LOCK” po-
sition (but only when the vehicle is completely
stopped). ! To change the cruising speed
! To increase the speed (by control lever)
UG7029BA
UG7030CA
Page 342 of 491
8-31
Driving tips
– CONTINUED –
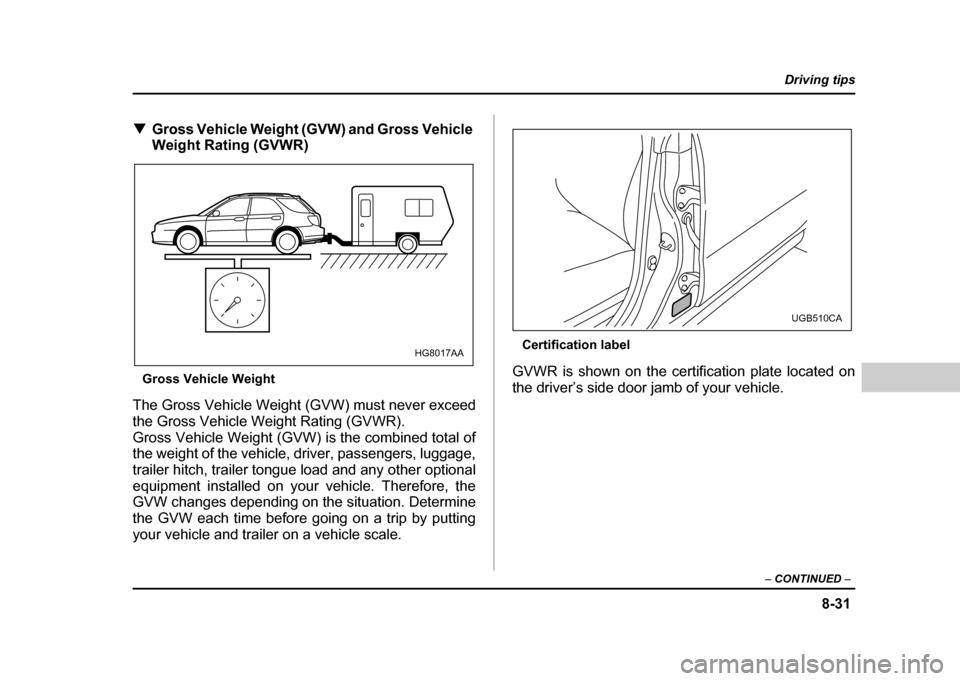
!Gross Vehicle Weight (GVW) and Gross Vehicle
Weight Rating (GVWR)
Gross Vehicle Weight
The Gross Vehicle Weight (GVW) must never exceed
the Gross Vehicle Weight Rating (GVWR).
Gross Vehicle Weight (GVW) is the combined total of
the weight of the vehicle, driver, passengers, luggage,
trailer hitch, trailer tongue load and any other optional
equipment installed on your vehicle. Therefore, the
GVW changes depending on the situation. Determine
the GVW each time before going on a trip by putting
your vehicle and trailer on a vehicle scale. Certification label
GVWR is shown on the certification plate located on
the driver’s side door jamb of your vehicle.
HG8017AA
UGB510CA
Page 348 of 491
8-37
Driving tips
– CONTINUED –
use towing mirrors that conform with Federal, state/
province and/or other applicable regulations. !Trailer lights
Connection of trailer lights to your vehicle’s electrical
system requires modifications to the vehicle’s lighting
circuit to increase its capacity and accommodate wir-
ing changes. To ensure the trailer lights are connected
properly, please consult your SUBARU dealer. Check
for proper operation of the turn signals, the brake
lights and parking lights each time you hitch up.
Direct splicing or other improper connection of
trailer lights may damage your vehicle’s electri-
cal system and cause a malfunction of your ve-
hicle’s lighting system.
! Tires
Make sure that all the tires on your vehicle are properly
inflated to the pressure specified on the tire placard lo-
cated on the left center pillar of your vehicle.
Trailer tire condition, size, load rating and proper infla-
tion pressure should be in accordance with the trailer
manufacturer’s specifications. In the event your vehicle gets a flat tire when towing a
trailer, ask a commercial road service to repair the flat
tire.
If you carry a regular size spare tire in your vehicle or
trailer as a precaution against getting a flat tire, be
sure that the spare tire is firmly secured.
Never tow a trailer when the temporary spare
tire is used. The temporary spare tire is not de-
signed to sustain the towing load. Use of the
temporary spare tire when towing can result in
failure of the spare tire and/or less stability of
the vehicle.
! Trailer towing tips
"Never exceed 45 mph (72 km/h) when towing
a trailer in hilly country on hot days. " When towing a trailer, steering, stability,
stopping distance and braking performance
will be different from normal operation. For
safety’s sake, you should employ extra caution
Page 349 of 491
8-38
Driving tips
when towing a trailer and you should never
speed. You should also keep the following tips
in mind:
! Before starting out on a trip
" Check that the vehicle and vehicle-to-hitch mount-
ing are in good condition. If any problems are appar-
ent, do not tow the trailer. " Check that the vehicle sits horizontally with the trail-
er attached. If the vehicle is tipped sharply up at the
front and down at the rear, check the total trailer
weight, GVW, GAWs and tongue load again, then con-
firm that the load and its distribution are acceptable. " Check that the tire pressures are correct.
" Check that the vehicle and trailer are connected
properly. Confirm that – the trailer tongue is connected properly to the
hitch ball.
– the trailer lights connector is connected properly
and trailer’s brake lights illuminate when the vehi-
cle’s brake pedal is pressed, and that the trailer’s
turn signal lights flash when the vehicle’s turn signal
lever is operated.
– the safety chains are connected properly.
– all cargo in the trailer is secured safety in position.
– the side mirrors provide a good rearward field of view without a significant blind spot.
" Sufficient time should be taken to learn the “feel” of
the vehicle/trailer combination before starting out on a
trip. In an area free of traffic, practice turning, stopping
and backing up. ! Driving with a trailer
" You should allow for considerably more stopping
distance when towing a trailer. Avoid sudden braking
because it may result in skidding or jackknifing and
loss of control." Avoid abrupt starts and sudden accelerations. If
your vehicle has a manual transmission, always start
out in first gear and release the clutch at moderate en-
gine revolution." Avoid uneven steering, sharp turns and rapid lane
changes." Slow down before turning. Make a longer than nor-
mal turning radius because the trailer wheels will be
closer than the vehicle wheels to the inside of the turn.
In a tight turn, the trailer could hit your vehicle." Crosswinds will adversely affect the handling of
your vehicle and trailer, causing sway. Crosswinds
can be due to weather conditions or the passing of
large trucks or buses. If swaying occurs, firmly grip the
steering wheel and slow down immediately but gradu-
ally." When passing other vehicles, considerable dis-