2004 SUBARU IMPREZA WRX change time
[x] Cancel search: change timePage 1 of 491

Foreword
Congratulations on choosing a SUBARU vehicle. This Owner’s Man-
ual has all the information necessary to keep your SUBARU in excel-
lent condition and to properly maintain the emission control system
for minimizing emission pollutants. We urge you to read this manual
carefully so that you may understand your vehicle and its operation.
For information not found in this Owner’s Manual, such as details
concerning repairs or adjustments, please contact the dealer from
whom you purchased your SUBARU or the nearest SUBARU dealer. The information, specifications and illustrations found in this manual
are those in effect at the time of printing. FUJI HEAVY INDUSTRIES
LTD. reserves the right to change specifications and designs at any
time without prior notice and without incurring any obligation to
make the same or similar changes on vehicles previously sold. This
Owner’s Manual applies to all models and covers all equipment, in-
cluding factory installed options. Some explanations, therefore may
be for equipment not installed in your vehicle.
Please leave this manual in the vehicle at the time of resale. The next
owner will need the information found herein.FUJI HEAVY INDUSTRIES LTD., TOKYO, JAPAN
and are registered trademarks of FUJI HEAVY INDUSTRIES, LTD.
© copyright 2002 FUJI HEAVY INDUSTRIES LTD.
Page 42 of 491
1-15
Seat, seatbelt and SRS airbags
– CONTINUED –
!Automatic/Emergency Locking Retrac- tor (A/ELR)
Each passenger’s seatbelt has an Automatic/Emer-
gency Locking Retractor (A/ELR). The Automatic/
Emergency Locking Retractor normally functions as
an Emergency Locking Retractor (ELR). The A/ELR
has an additional locking mode “Automatic Locking
Retractor (ALR) mode” intended to secure a child re-
straint system. When the seatbelt is once drawn out
completely and is then retracted even slightly, the re-
tractor locks the seatbelt in that position and the seat-
belt cannot be extended. As the belt is rewinding,
clicks will be heard which indicate the retractor func-
tions as an ALR. When the seatbelt is retracted fully,
the ALR mode is released.
When securing a child restraint system on the rear
seats by the use of the seatbelt, the seatbelt must be
changed over to the Automatic Locking Retractor (ALR) mode.
When the child restraint system is removed, make
sure that the seatbelt retracts fully and the retractor re-
turned to the Emergency Locking Retractor (ELR)
mode.
For instructions on how to convert the retractor to the
ALR mode and restore it to the ELR mode, see the
“Child restraint systems” section in this chapter. !
Seatbelt warning light and chime
Your vehicle is equipped with a seatbelt warning de-
vice at the driver’s seat, as required by current safety
standards.
This device causes the seatbelt warning light on the
instrument panel to light up for about six seconds
when the ignition switch is turned to “ON” to remind the
driver to wear the seatbelt. If the driver’s seatbelt is not
fastened, a warning chime sounds at the same time. ! Fastening the seatbelt
"Never use a belt that is twisted or reversed. In
an accident, this can increase the risk or sever-
ity of injury. " Keep the lap belt as low as possible on your
hips. In a collision, this spreads the force of the
lap belt over stronger hip bones instead of
across the weaker abdomen. " Seatbelts provide maximum restraint when
the occupant sits well back and upright in the
seat. To reduce the risk of sliding under the
seatbelt in a collision, the front seatbacks
should be always used in the upright position
while the vehicle is running. If the front seat-
Page 63 of 491
1-36
Seat, seatbelt and SRS airbags
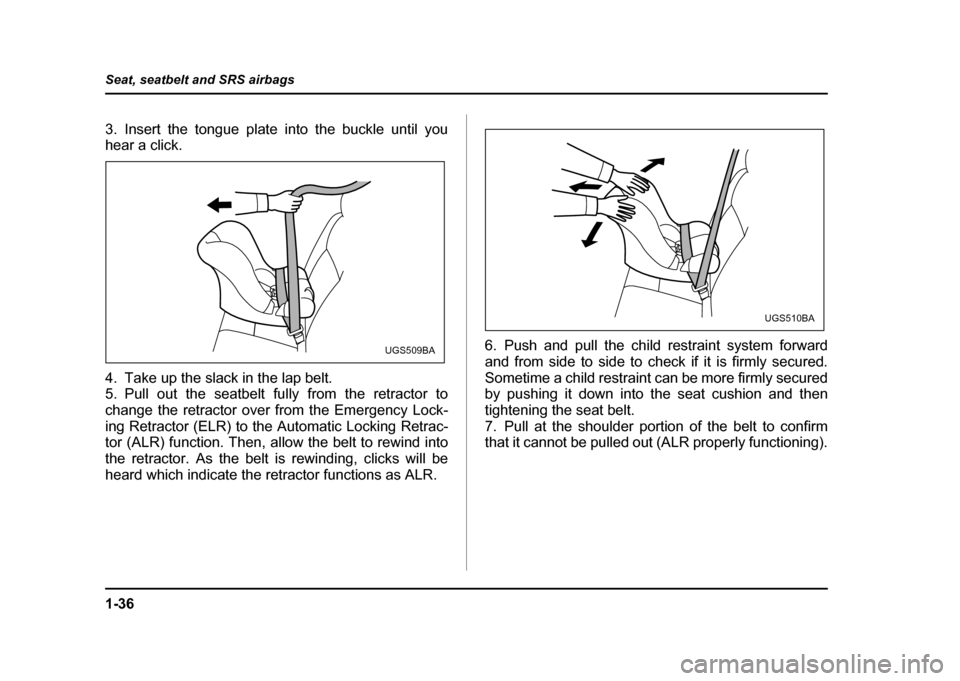
3. Insert the tongue plate into the buckle until you
hear a click.
4. Take up the slack in the lap belt.
5. Pull out the seatbelt fully from the retractor to
change the retractor over from the Emergency Lock-
ing Retractor (ELR) to the Automatic Locking Retrac-
tor (ALR) function. Then, allow the belt to rewind into
the retractor. As the belt is rewinding, clicks will be
heard which indicate the retractor functions as ALR.
6. Push and pull the child restraint system forward
and from side to side to check if it is firmly secured.
Sometime a child restraint can be more firmly secured
by pushing it down into the seat cushion and then
tightening the seat belt.
7. Pull at the shoulder portion of the belt to confirm
that it cannot be pulled out (ALR properly functioning).
UGS509BA
UGS510BA
Page 65 of 491
1-38
Seat, seatbelt and SRS airbags
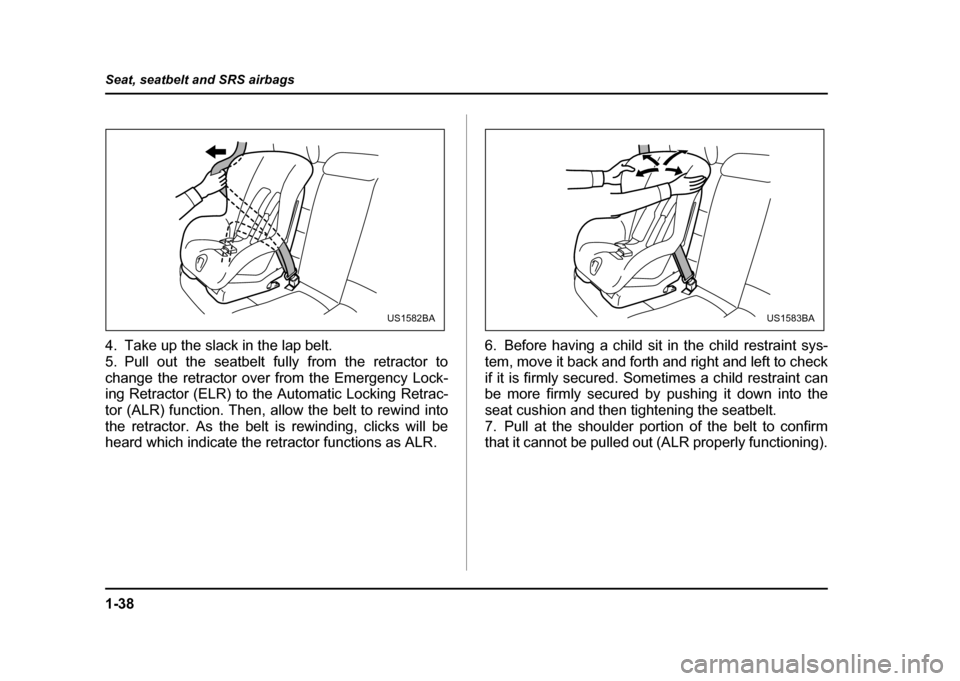
4. Take up the slack in the lap belt.
5. Pull out the seatbelt fully from the retractor to
change the retractor over from the Emergency Lock-
ing Retractor (ELR) to the Automatic Locking Retrac-
tor (ALR) function. Then, allow the belt to rewind into
the retractor. As the belt is rewinding, clicks will be
heard which indicate the retractor functions as ALR.
6. Before having a child sit in the child restraint sys-
tem, move it back and forth and right and left to check
if it is firmly secured. Sometimes a child restraint can
be more firmly secured by pushing it down into the
seat cushion and then tightening the seatbelt.
7. Pull at the shoulder portion of the belt to confirm
that it cannot be pulled out (ALR properly functioning).
US1582BAUS1583BA
Page 150 of 491
3-13
Instruments and controls
– CONTINUED –
speed enters the tachometer’s red zone. !Setting the alarm-level engine speed
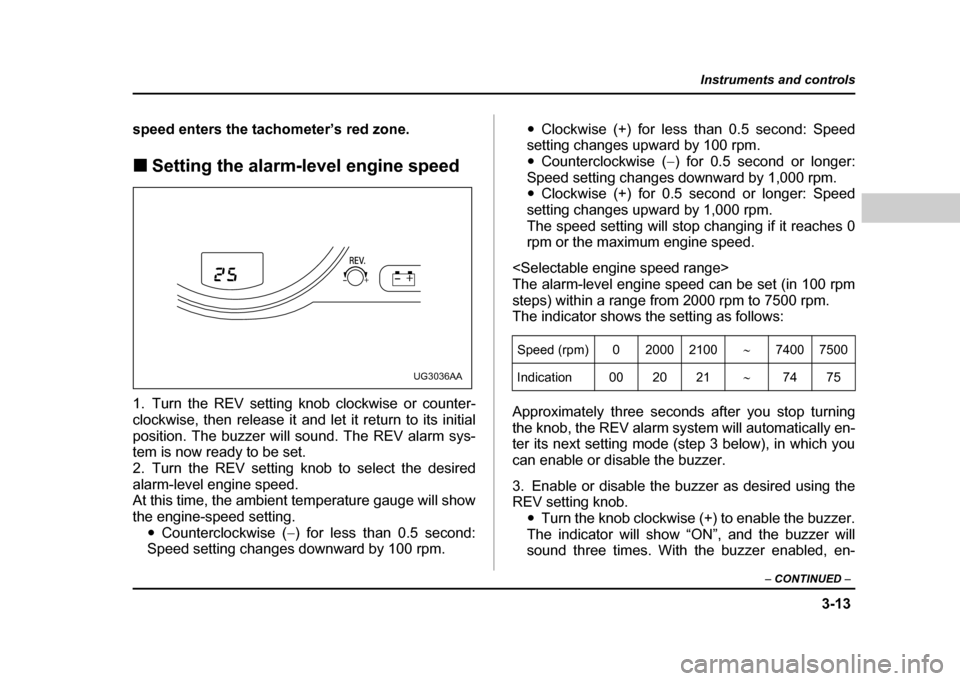
1. Turn the REV setting knob clockwise or counter-
clockwise, then release it and let it return to its initial
position. The buzzer will sound. The REV alarm sys-
tem is now ready to be set.
2. Turn the REV setting knob to select the desired
alarm-level engine speed.
At this time, the ambient temperature gauge will show
the engine-speed setting. "Counterclockwise ( −) for less than 0.5 second:
Speed setting changes downward by 100 rpm. "
Clockwise (+) for less than 0.5 second: Speed
setting changes upward by 100 rpm." Counterclockwise ( −) for 0.5 second or longer:
Speed setting changes downward by 1,000 rpm. " Clockwise (+) for 0.5 second or longer: Speed
setting changes upward by 1,000 rpm.
The speed setting will stop changing if it reaches 0
rpm or the maximum engine speed.
The alarm-level engine speed can be set (in 100 rpm
steps) within a range from 2000 rpm to 7500 rpm.
The indicator shows the setting as follows:
Approximately three seconds after you stop turning
the knob, the REV alarm system will automatically en-
ter its next setting mode (step 3 below), in which you
can enable or disable the buzzer.
3. Enable or disable the buzzer as desired using the REV setting knob. "Turn the knob clockwise (+) to enable the buzzer.
The indicator will show “ON”, and the buzzer will
sound three times. With the buzzer enabled, en-
UG3036AA
Speed (rpm) 0 2000 2100 ∼7400 7500
Indication 00 20 21 ∼74 75
Page 168 of 491
3-31
Instruments and controls
– CONTINUED –
more than just a few seconds.
! Daytime running light system (except
U.S. spec. WRX-STi)
The low beam headlights will automatically come on at
reduced brightness when the engine has started, un-
der the following conditions: " The parking brake is fully released.
" The light switch is in the “OFF” or “ ” position.
" The automatic transmission selector lever is set at
other than the “P” position.
The tail lights, parking lights, and side marker
lights are not turned on by the daytime running
light system. The light switch must always be
turned to the “ ” position when it is dark
outside.
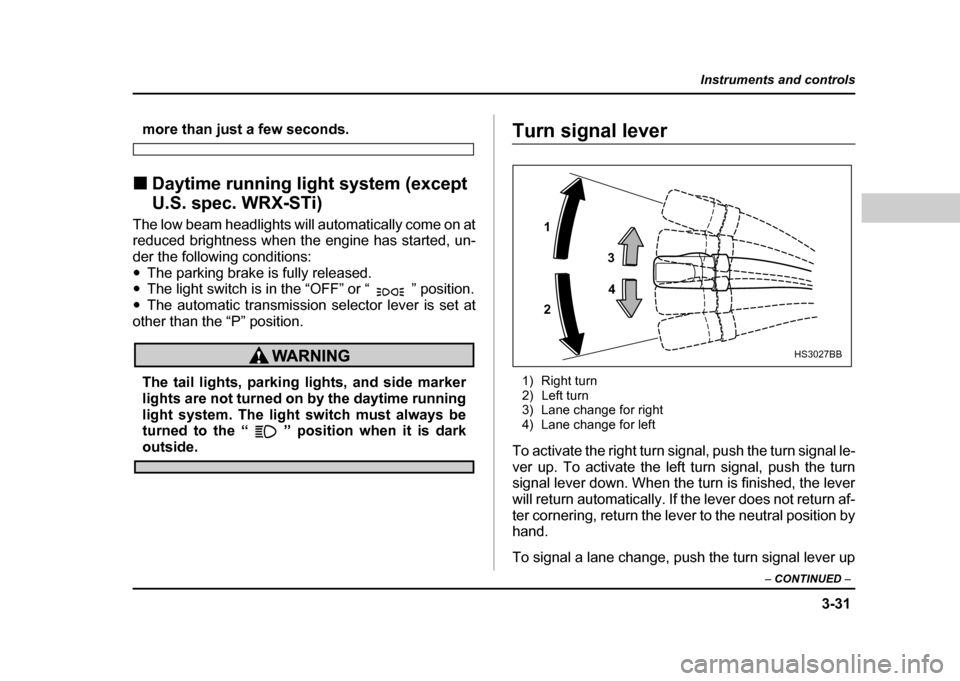
Turn signal lever
1) Right turn
2) Left turn
3) Lane change for right
4) Lane change for left
To activate the right turn signal, push the turn signal le-
ver up. To activate the left turn signal, push the turn
signal lever down. When the turn is finished, the lever
will return automatically. If the lever does not return af-
ter cornering, return the lever to the neutral position by
hand.
To signal a lane change, push the turn signal lever up
1 2 3
4
HS3027BB
Page 212 of 491
4-23
Climate control
– CONTINUED –
5. Reinstall the air filter cover. 6. Connect the connector, and reinstall the glove box.
7. Close the glove box.
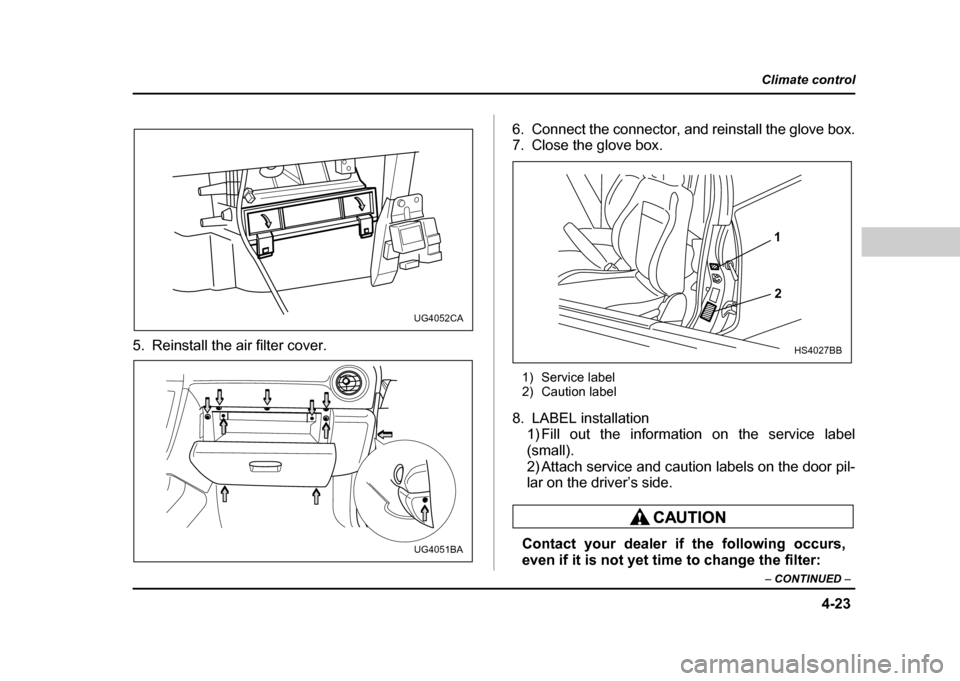
1) Service label
2) Caution label
8. LABEL installation 1) Fill out the information on the service label
(small).
2) Attach service and caution labels on the door pil-
lar on the driver’s side.
Contact your dealer if the following occurs,
even if it is not yet time to change the filter:
UG4052CA
UG4051BA
1
2
HS4027BB
Page 221 of 491
5-8
Audio
!
FM/AM selection button (FM/AM)
Push the “FM/AM” button (4) when the radio is off to
turn on the radio.
Push the “FM/AM” button when the radio is on to se-
lect FM1, FM2 or AM reception. Each time this button
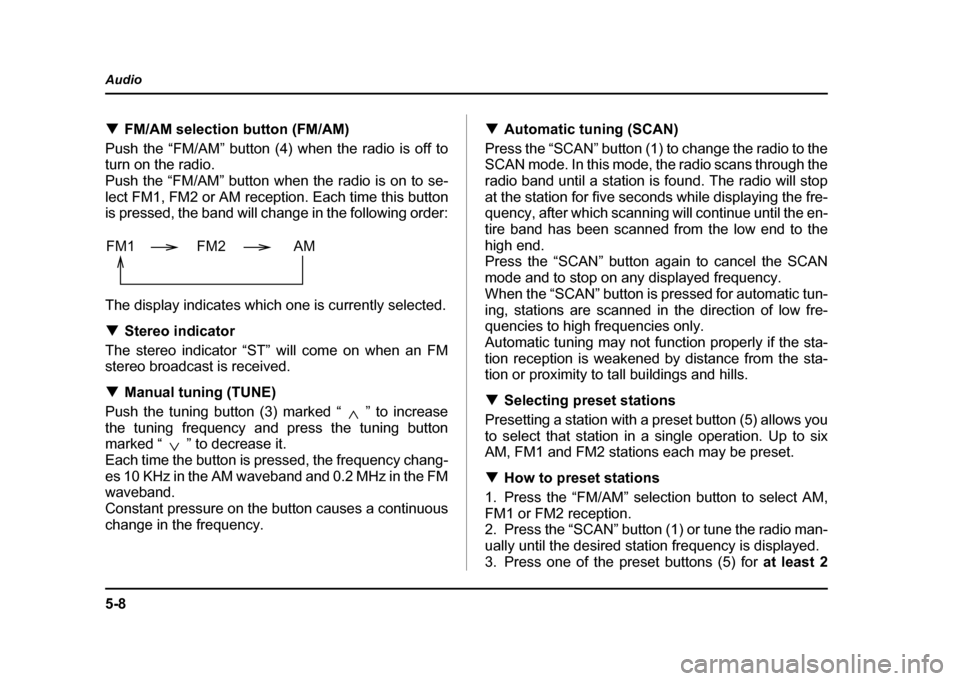
is pressed, the band will change in the following order:
The display indicates which one is currently selected. ! Stereo indicator
The stereo indicator “ST” will come on when an FM
stereo broadcast is received. ! Manual tuning (TUNE)
Push the tuning button (3) marked “ ” to increase
the tuning frequency and press the tuning button
marked “ ” to decrease it.
Each time the button is pressed, the frequency chang-
es 10 KHz in the AM waveband and 0.2 MHz in the FM
waveband.
Constant pressure on the button causes a continuous
change in the frequency. !
Automatic tuning (SCAN)
Press the “SCAN” button (1) to change the radio to the
SCAN mode. In this mode, the radio scans through the
radio band until a station is found. The radio will stop
at the station for five seconds while displaying the fre-
quency, after which scanning will continue until the en-
tire band has been scanned from the low end to the
high end.
Press the “SCAN” button again to cancel the SCAN
mode and to stop on any displayed frequency.
When the “SCAN” button is pressed for automatic tun-
ing, stations are scanned in the direction of low fre-
quencies to high frequencies only.
Automatic tuning may not function properly if the sta-
tion reception is weakened by distance from the sta-
tion or proximity to tall buildings and hills. ! Selecting preset stations
Presetting a station with a preset button (5) allows you
to select that station in a single operation. Up to six
AM, FM1 and FM2 stations each may be preset. ! How to preset stations
1. Press the “FM/AM” selection button to select AM,
FM1 or FM2 reception.
2. Press the “SCAN” button (1) or tune the radio man-
ually until the desired station frequency is displayed.
3. Press one of the preset buttons (5) for at least 2
FM1 FM2 AM