2004 SUBARU IMPREZA WRX automatic transmission
[x] Cancel search: automatic transmissionPage 290 of 491
7-21
Starting and operating
– CONTINUED –
mode.
NOTE "If the differential-limiting factor is large during
cornering maneuvers, a small speed difference
between the front and rear wheels may cause tight
corner braking (a phenomenon accompanied by
vibration and noise). This phenomenon does not
indicate a problem. It will disappear if the differen-
tial-action limiting factor is reduced. " Use the center-differential indicator light only as
a rough indication of the differential-action limit-
ing factor. ! Temporary release
When the driver stop the vehicle and pulls the parking-
brake lever after manually setting the differential-ac-
tion limiting factor, the factor is temporarily minimized.
The indicator in the combination meter continues to
show the driver’s selected differential-action limiting
factor. When the driver releases the parking-brake le-
ver, the factor set by the driver is restored.
Automatic transmission
The automatic transmission is electronically controlled
with 4-forward speeds and 1-reverse speed.
NOTE
Immediately after a disconnected battery is recon-
nected or ATF (automatic transmission fluid) is re-
placed, you may feel that the automatic transmis-
sion operation is somewhat unusual.
This results from erasure or invalidation of data
the on-board computer has collected and stored in
memory to allow the transmission to shift at the
most appropriate times for the current condition
of your vehicle. Optimized shifting will be restored
as the vehicle continues to be driven for a while.
Do not shift from the “P” or “N” position into
the “D”, “3”, “2”, “1” or “R” position while de-
pressing the accelerator pedal. This may cause
the vehicle to jump forward or backward.
" Shift into the “P” or “R” position only after
Page 291 of 491
7-22
Starting and operating
the vehicle is completely stopped. Shifting
while the vehicle is moving may cause damage
to the transmission."
Do not race the engine for more than five sec-
onds in any position except the “N” or “P” po-
sition when the brake is set or the tires are on
blocks. This may cause the automatic transmis-
sion fluid to overheat. " Avoid shifting from one of the forward driving
positions into the “R” position or vice versa un-
til the vehicle has completely stopped. Such
shifting may cause damage to the transmis-
sion. !
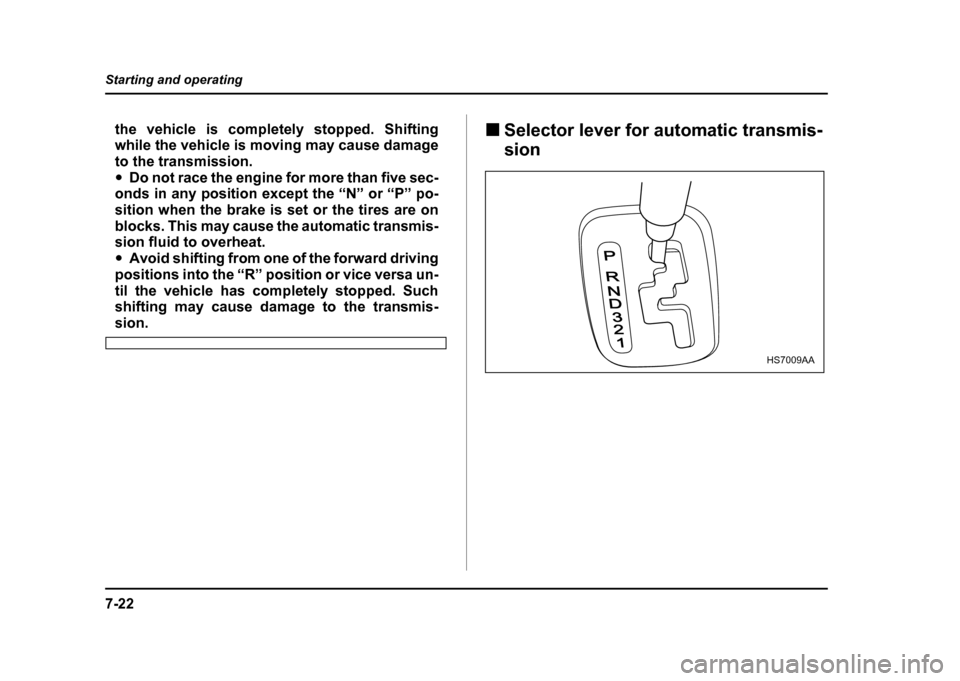
Selector lever for automatic transmis- sion
P
RND321
HS7009AA
Page 292 of 491
7-23
Starting and operating
– CONTINUED –
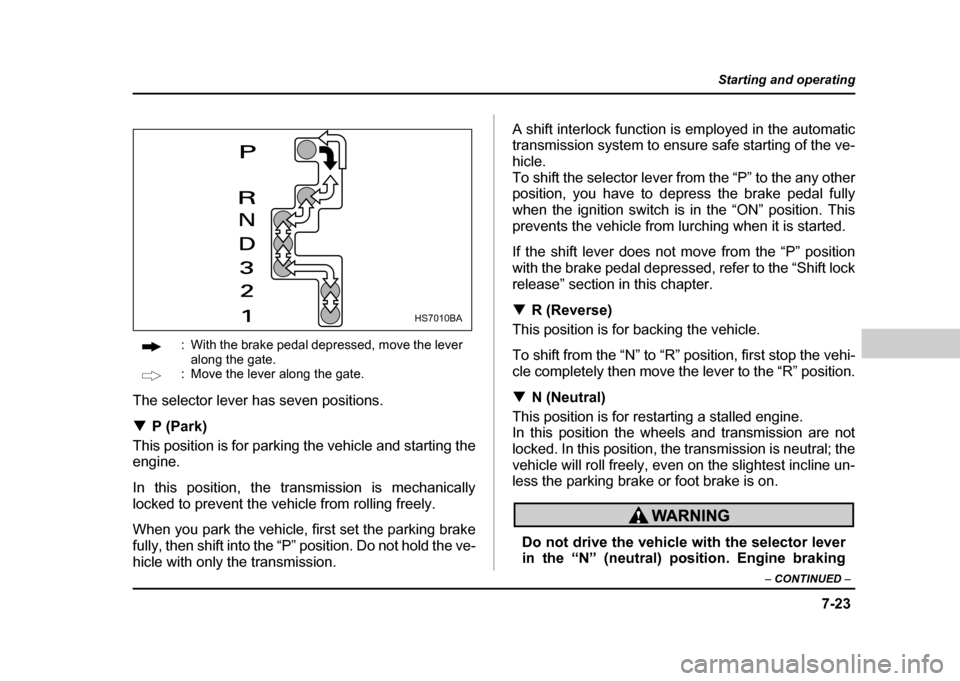
: With the brake pedal depressed, move the lever
along the gate.
: Move the lever along the gate.
The selector lever has seven positions. ! P (Park)
This position is for parking the vehicle and starting the
engine.
In this position, the transmission is mechanically
locked to prevent the vehicle from rolling freely.
When you park the vehicle, first set the parking brake
fully, then shift into the “P” position. Do not hold the ve-
hicle with only the transmission. A shift interlock function is employed in the automatic
transmission system to ensure safe starting of the ve-
hicle.
To shift the selector lever from the “P” to the any other
position, you have to depress the brake pedal fully
when the ignition switch is in the “ON” position. This
prevents the vehicle from lurching when it is started.
If the shift lever does not move from the “P” position
with the brake pedal depressed, refer to the “Shift lock
release” section in this chapter. !
R (Reverse)
This position is for backing the vehicle.
To shift from the “N” to “R” position, first stop the vehi-
cle completely then move the lever to the “R” position. ! N (Neutral)
This position is for restarting a stalled engine.
In this position the wheels and transmission are not
locked. In this position, the transmission is neutral; the
vehicle will roll freely, even on the slightest incline un-
less the parking brake or foot brake is on.
Do not drive the vehicle with the selector lever
in the “N” (neutral) position. Engine braking
HS7010BA
Page 293 of 491
7-24
Starting and operating
has no effect in this condition and the risk of anaccident is consequently increased.
! D (Drive)
This position is for normal driving.
The transmission automatically shifts into a suitable
gear from 1st to 4th according to the vehicle speed
and the acceleration you require.
When more acceleration is required in this position,
press the accelerator pedal fully to the floor and hold
that position. The transmission will automatically
downshift to 3rd, 2nd or 1st gear. When you release
the pedal, the transmission will return to the original
gear position. " While climbing a grade
When driving up hill, undesired upshift to 4th gear is
prevented from taking place when the accelerator
pedal is released. This minimizes the chances of sub-
sequent downshifting to a lower gear when accelerat-
ing again. This prevents repeated upshifting and
downshifting resulting in a smoother operation of the
vehicle.
NOTE
The transmission may downshift to 2nd or 1st gear, depending on the way the accelerator pedal
is pressed to accelerate the vehicle again. "
While going down a hill
When descending a steep hill, depressing the brake
pedal will cause the transmission to downshift to 3rd
gear, thus applying engine braking. Reacceleration for
a short time will cause the transmission to upshift nor-mally.
NOTE
In some cases, depressing the brake pedal on a
downhill grade does not result in an automatic
downshift to 3rd gear. This can happen when the
automatic transmission fluid temperature is very
low, for example, during driving shortly after the
vehicle has been parked for an extended period of
time. When the ATF temperature has risen to a cer-
tain level, automatic downshift normally takes
place. In the meantime, downshift manually for en-
gine braking as required.
Also, downshifting when braking downhill will not
occur at speeds above approximately 48 mph (78
km/h). ! 3 (Third)
This position is for using engine braking when going
down a hill or for climbing a grade.
Page 294 of 491

7-25
Starting and operating
– CONTINUED –
The transmission automatically shifts into a suitable
gear from 1st to 3rd according to the vehicle speed
and the acceleration you require.
When more acceleration is required in this position,
press the accelerator pedal fully to the floor and hold
that position. The transmission will automatically
downshift to 2nd or 1st gear. When you release the
pedal, the transmission will return to the original gear position. !2 (Second)
This position is for using engine braking when going
down a hill or for climbing a steep grade.
In this position, the transmission holds in the 2nd gear.
Use this position when starting off from a standstill on
slippery road surfaces such as mud or snow. It will en-
sure greater traction. ! 1 (First)
This position is for driving up or down very steep
grades, or driving through mud or sand, or on slippery
surfaces. In this position, the transmission holds in the
1st gear. ! Maximum speeds
The following tables show the maximum speeds that
are possible with each different gear. The tachome- ter’s needle will enter the red area if these speeds are
exceeded.
When shifting down a gear, it is important to confirm
that the current vehicle speed is not in excess of the
Maximum Allowable Speed of the gear which is about
to be selected.
Exceeding the Maximum Allowable Speeds will result
in over-revving of the engine. In addition a powerful
engine brake will engage and control of the vehicle
may be lost.
mph (km/h)
NOTE
In order to prevent over-revving during decelera-
tion of the vehicle, the transmission will remain in
the current gear if the speed of the vehicle is in ex-
cess of the Maximum Allowable Speed for the gear2.5 liter models 2.0 liter turbo
models WRX
RS TS, OUTBACK
SPORT
1 29 (47) 35 (56) 38 (60)
2 58 (93) 64 (103) 71 (115)
3 95 (153) 101 (162) 112 (180)
Page 304 of 491
7-35
Starting and operating
– CONTINUED –
“Warning and indicator lights” section (chapter 3).
Never drive while the parking brake is set be-
cause this will cause unnecessary wear on the
brake linings. Before starting to drive, always
make sure that the parking brake has been fully
released.
! Parking tips
When parking your vehicle, always set the parking
brake firmly and put the shift lever in the “1” (1st) for an
upgrade or “R” (Reverse) for a downgrade for manual
transmission vehicles, or in the “P” (Park) position for
automatic transmission vehicles. Always set the park-
ing brake firmly when parking your vehicle. Never rely
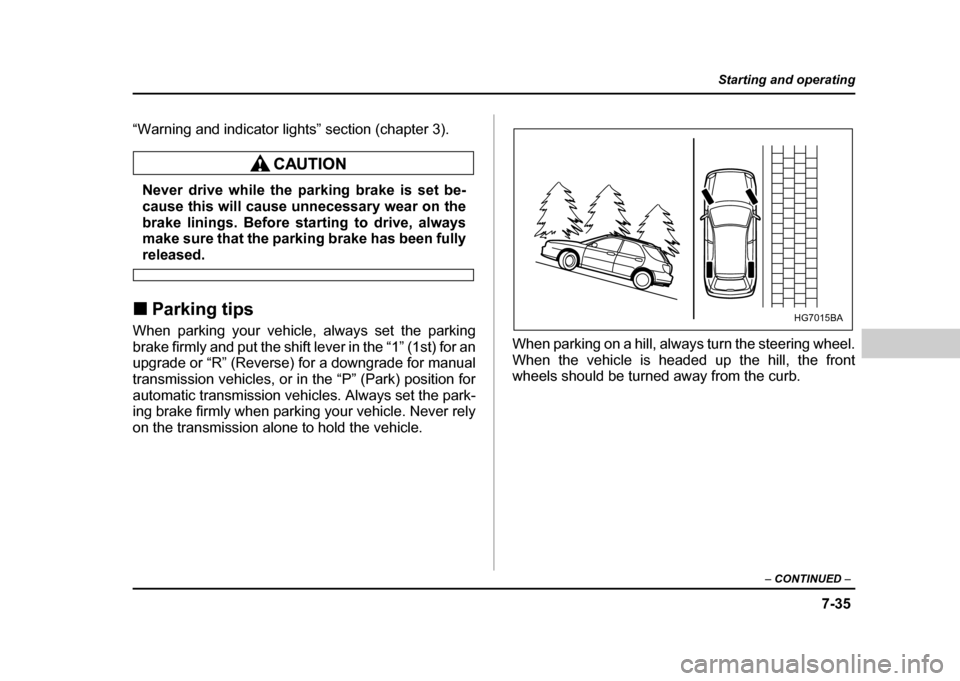
on the transmission alone to hold the vehicle. When parking on a hill, always turn the steering wheel.
When the vehicle is headed up the hill, the front
wheels should be turned away from the curb.
HG7015BA
Page 309 of 491
7-40
Starting and operating
"
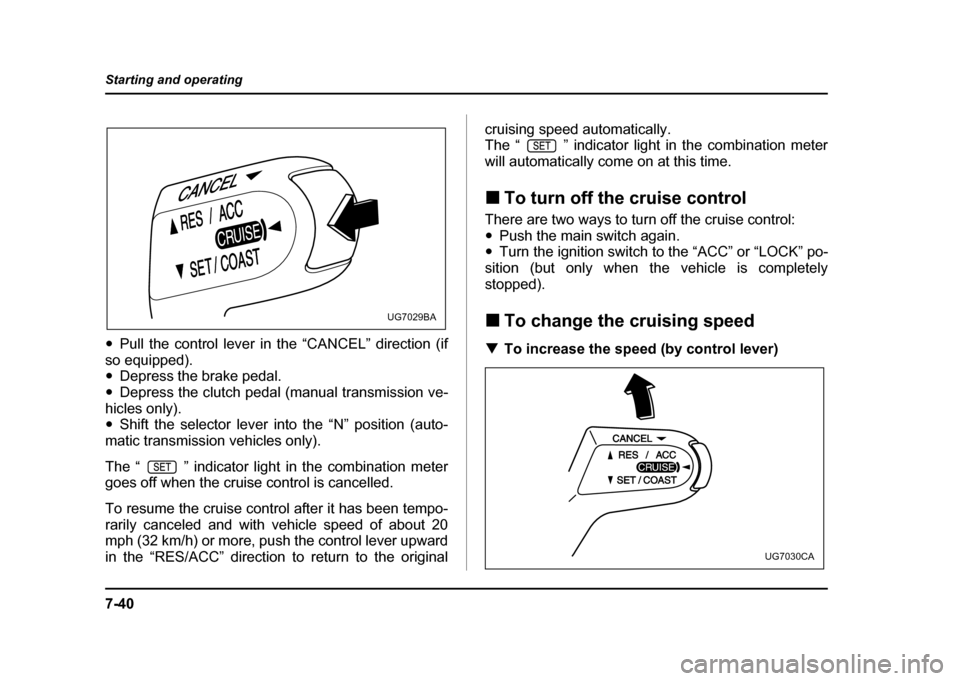
Pull the control lever in the “CANCEL” direction (if
so equipped). " Depress the brake pedal.
" Depress the clutch pedal (manual transmission ve-
hicles only)." Shift the selector lever into the “N” position (auto-
matic transmission vehicles only).
The “ ” indicator light in the combination meter
goes off when the cruise control is cancelled.
To resume the cruise control after it has been tempo-
rarily canceled and with vehicle speed of about 20
mph (32 km/h) or more, push the control lever upward
in the “RES/ACC” direction to return to the original cruising speed automatically.
The “ ” indicator light in the combination meter
will automatically come on at this time. !
To turn off the cruise control
There are two ways to turn off the cruise control: " Push the main switch again.
" Turn the ignition switch to the “ACC” or “LOCK” po-
sition (but only when the vehicle is completely
stopped). ! To change the cruising speed
! To increase the speed (by control lever)
UG7029BA
UG7030CA
Page 323 of 491

8-12
Driving tips
starting.
Keep the door locks from freezing by squirting them
with deicer or glycerin.
Forcing a frozen door open may damage or separate
the rubber weather strips around the door. If the door
is frozen, use hot water to melt the ice, and afterwards
thoroughly wipe the water away.
Use a windshield washer fluid that contains an anti-
freeze solution. Do not use engine antifreeze or other
substitutes because they may damage the paint of the
vehicle. !
Before driving your vehicle
Before entering the vehicle, remove any snow or ice
from your shoes because that could make the pedals
slippery and dangerous.
While warming up the vehicle before driving, check
that the accelerator pedal, brake pedal, and all other
controls operate smoothly.
Clear away ice and snow that has accumulated under
the fenders to avoid making steering difficult. During
severe winter driving, stop when and where it is safe
to do so and check under the fenders periodically. !
Parking in cold weather
Do not use the parking brake when parking for long
periods in cold weather since it could freeze in that po-
sition. Instead, observe the following:
1. Place the shift lever in “1” or “R” for manual trans-
mission vehicles, and in “P” for automatic transmission
vehicles.
2. Use tire stops under the tires to prevent the vehicle
from moving.
When the vehicle is parked in snow or when it snows,
raise the wiper blades off the glass to prevent damageto them.
When the vehicle has been left parked after use on
roads heavily covered with snow, or has been left
parked during a snowstorm, icing may develop on the
brake system, which could cause poor braking action.
Check for snow or ice buildup on the suspension, disc
brakes and brake hoses underneath the vehicle.
If there is caked snow or ice, remove it, being careful
not to damage the disc brakes and brake hoses andABS harness.
Snow can trap dangerous exhaust gases under
your vehicle. Keep snow clear of the exhaust