2004 SUBARU IMPREZA WRX tires
[x] Cancel search: tiresPage 14 of 491
11
–
CONTINUED –
!Driving with pets
Unrestrained pets can interfere with your driving and
distract your attention from driving. In a collision or
sudden stop, unrestrained pets or cages can be
thrown around inside the vehicle and hurt you or your
passengers. Besides, the pets can be hurt under
these situations. It is also for their own safety that pets
should be properly restrained in your vehicle. Restrain
a pet with a special traveling harness which can be se-
cured to the rear seat with a seatbelt or use a pet car-
rier which can be secured to the rear seat by routing a
seatbelt through the carrier’s handle. Never restrain
pets or pet carriers in the front passenger’s seat. For
further information, consult your veterinarian, local an-
imal protection society or pet shop. ! Tire pressures
Check and, if necessary, adjust the pressure of each
tire (including the spare) at least once a month and be-
fore any long journey.
Check the tire pressure when the tires are cold. Use a
pressure gauge to adjust the tire pressures to the val-
ues shown on the tire placard.
Refer to the “Tires and wheels” section in chapter 11
for detailed information.
Driving at high speeds with excessively low tire
pressures can cause the tires to deform severe-
ly and to rapidly become hot. A sharp increase
in temperature could cause tread separation,
and destruction of the tires. The resulting loss
of vehicle control could lead to an accident.
! California proposition 65 warning
Engine exhaust, some of its constituents, and
certain vehicle components contain or emit
chemicals known to the State of California to
cause cancer and birth defects or other repro-
ductive harm. In addition, certain fluids in vehi-
cles and certain components of product wear
contain or emit chemicals known to the State of
California to cause cancer and birth defects or
other reproductive harm.
Page 17 of 491

14
Illustrated index !Exterior
10
12 11 8 7 965
4
3
12UGF054BB
1) Engine hood (page 11-5)
2) Headlight switch (page 3-29)
3) Replacing bulbs (page 11-64)
4) Wiper switch (page 3-37)
5) Moonroof (page 2-31)
6) Door locks (page 2-3)
7) Tire pressure (page 11-45)
8) Flat tires (page 9-5)
9) Tire chains (page 8-16)
10) Front fog light switch (page 3-
35)
11) Tie-down hooks (page 9-17)
12) Towing hooks (page 9-17)
Page 57 of 491
1-30
Seat, seatbelt and SRS airbags
bly or scrapping the entire car damaged by a
collision, consult your SUBARU dealer. "
Tampering with or disconnecting the sys-
tem’s wiring could result in accidental activa-
tion of the seatbelt pretensioner and/or SRS air-
bag or could make the system inoperative,
which may result in serious injury. The wiring
harnesses of the seatbelt pretensioner and SRS
airbag systems are covered with yellow insula-
tion and the connectors of the system are yel-
low for easy identification. Do not use electrical
test equipment on any circuit related to the
seatbelt pretensioner and SRS airbag systems.
For required servicing of the seatbelt preten-
sioner, see your nearest SUBARU dealer.
The front sub sensors are located in both front
fenders and the SRS airbag control module in-
cluding the impact sensors is located under the
center console. If you need service or repair in
those areas or near the front seatbelt retrac-
tors, we recommend that you have an autho-
rized SUBARU dealer perform the work.
NOTE
If the front part of the vehicle is damaged in an ac-
cident to the extent that the seatbelt pretensioner
does not operate, contact your SUBARU dealer as
soon as possible. ! Precautions against vehicle modifica- tion
Always consult your SUBARU dealer if you want to in-
stall any accessory parts to your vehicle.
Do not perform any of the following modifica-
tions. Such modifications can interfere with
proper operation of the seatbelt pretensioners. " Attachment of any equipment (bush bar,
winches, snow plow, skid plate, etc.) other than
SUBARU genuine accessory parts to the front
end." Modification of the suspension system or
front end structure." Installation of a tire of different size and con-
struction from the tires specified on the tire
placard attached to the driver’s door jamb.
Page 102 of 491
1-75
Seat, seatbelt and SRS airbags
– CONTINUED –
with SRS side airbags only) "Replacement of seat fabric or leather (for
vehicles with SRS side airbags only) " Installation of additional fabric or leather
on the front seat (for vehicles with SRS side
airbags only)
" Installation of additional electrical/electronic
equipment such as a mobile two-way radio on
or near the SRS airbag system components
and/or wiring is not advisable. This could inter-
fere with proper operation of the SRS airbag
system.
Do not perform any of the following modifica-
tions. Such modifications can interfere with
proper operation of the SRS airbag system." Attachment of any equipment (brush bar,
winches, snow plow, skid plate, etc.) other than
SUBARU genuine accessory parts to the front
end. " Modification of the suspension system or
front end structure. " Installation of a tire of different size and con-
struction from the tires specified on the tire placard attached to the driver’s door jamb. "
Attachment of any equipment (side steps or
side sill protectors, etc.) other than SUBARU
genuine accessory parts to the side body (for
vehicles with side airbags only).
Always consult your SUBARU dealer if you want to in-
stall any accessory parts to your vehicle.
Page 160 of 491
3-23
Instruments and controls
– CONTINUED –
tires are not all the same size and brand, the rear
differential will be heavily loaded when the vehicle
is driven, resulting in an abnormally high oil tem-
perature. "The rear differential oil will deteriorate if its tem-
perature increases enough for the rear differential
oil temperature warning light to come on. It is ad-
visable to have the rear differential oil replaced as
soon as possible. ! ABS warning light
The ABS warning light comes on when the ignition
switch is turned to the “ON” position and goes out after
about two seconds.
This is an indication that the ABS system is working
properly.
If the warning light behaves as follows, the ABS
system may not work properly.
When the warning light is on, the ABS function
shuts down; however, the conventional brake
system continues to operate normally." The warning light does not come on when the
ignition switch is turned to the “ON” position." The warning light comes on when the ignition switch is turned to the “ON” position, but it
does not go out even when the vehicle speed
exceeds approximately 8 mph (12 km/h)."
The warning light comes on during driving.
If these occur, have the ABS system repaired at
the first available opportunity by your SUBARU
dealer.
With a vehicle equipped with an EBD system, the ABS
warning light comes on together with the brake system
warning light if the EBD system becomes faulty. For
further details of the EBD system fault warning, refer to “Brake system warning light”.
NOTE
If the warning light behavior is as described be-
low, the ABS system may be considered normal." The warning light comes on right after the en-
gine is started but goes out immediately, remain-
ing off." The warning light remains on after the engine
has been started, but it goes out when the vehicle
speed reaches about 8 mph (12 km/h)." The warning light comes on during driving, but
it goes out immediately and remains off.
When driving with an insufficient battery voltage such
(U.S.) (Canada)
Page 278 of 491
7-9
Starting and operating
– CONTINUED –
Preparing to drive
You should perform the following checks and adjust-
ments every day before you start driving.
1. Check that all windows, mirrors, and lights are
clean and unobstructed.
2. Check the appearance and condition of the tires.
Also check tires for proper inflation.
3. Look under the vehicle for any sign of leaks.
4. Check that the hood, trunk and rear gate are fully
closed.
5. Check the adjustment of the seat.
6. Check the adjustment of the inside and outside mir-
rors.
7. Fasten your seatbelt. Check that your passengers
have fastened their seatbelts.
8. Check the operation of the warning and indicator
lights when the ignition switch is turned to the “ON” po-sition.
9. Check the gauges, indicator and warning lights af-
ter starting the engine.
NOTE
Engine oil, engine coolant, brake fluid, washer flu-
id and other fluid levels should be checked daily,
weekly or at fuel stops.
Starting the engine
Do not operate the starter motor continuously
for more than ten seconds. If the engine fails to
start after operating the starter for five to ten
seconds, wait for ten seconds or more before
trying again.
! Manual transmission vehicle
1. Apply the parking brake.
2. Turn off unnecessary lights and accessories.
3. Press the clutch pedal to the floor and shift the shift
lever into neutral. Hold the clutch pedal to the floor
while starting the engine.
The starter motor will only operate when the clutch
pedal is pressed fully to the floor.
4. Turn the ignition switch to the “ON” position and
check the operation of the warning and indicator lights.
Refer to the “Warning and indicator lights” section (chapter 3).
5. Turn the ignition switch to the “START” position
without depressing the accelerator pedal. Release
the key immediately after the engine has started.
Page 291 of 491
7-22
Starting and operating
the vehicle is completely stopped. Shifting
while the vehicle is moving may cause damage
to the transmission."
Do not race the engine for more than five sec-
onds in any position except the “N” or “P” po-
sition when the brake is set or the tires are on
blocks. This may cause the automatic transmis-
sion fluid to overheat. " Avoid shifting from one of the forward driving
positions into the “R” position or vice versa un-
til the vehicle has completely stopped. Such
shifting may cause damage to the transmis-
sion. !
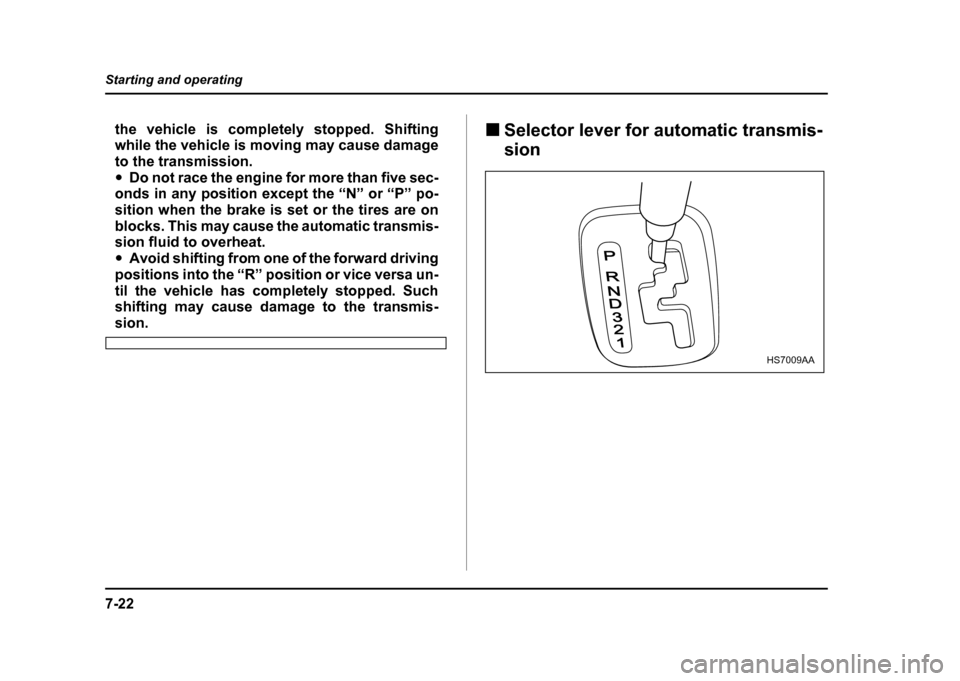
Selector lever for automatic transmis- sion
P
RND321
HS7009AA
Page 312 of 491

8-1
8
Driving tips
New vehicle break-in driving – the first 1,000 miles (1,600 km) ................ 8-2
Fuel economy hints ...................................... 8-2
Engine exhaust gas (Carbon monoxide) .... 8-3
Catalytic converter ....................................... 8-4
Periodic inspections .................................... 8-6
Driving in foreign countries ......................... 8-6
Driving tips for AWD vehicles ..................... 8-7
Off road driving ............................................ 8-8 All AWD models except OUTBACK SPORT and vehicles with 17 inch tires ..................... 8-9
OUTBACK SPORT ............................................. 8-9
Winter driving ............................................... 8-11 Operation during cold weather ........................ 8-11
Driving on snowy and icy roads ...................... 8-13
Corrosion protection ........................................ 8-14
Snow tires .......................................................... 8-14
Tire chains ......................................................... 8-16
Rocking the vehicle .......................................... 8-16
Loading your vehicle ................................... 8-17 Vehicle capacity weight .................................... 8-19
GVWR and GAWR (Gross Vehicle Weight Rating and Gross Axle Weight Rating) ........ 8-20
Roof rail and crossbar (if equipped) ............... 8-21
Trailer hitch (if equipped) ............................ 8-25 Connecting a trailer .......................................... 8-25
When you do not tow a trailer .......................... 8-28
Trailer towing ................................................ 8-29 Warranties and maintenance ........................... 8-29 Maximum load limits ........................................ 8-29
Trailer hitches ................................................... 8-34
Connecting a trailer .......................................... 8-35
Trailer towing tips ............................................. 8-37