Page 300 of 491

7-31
Starting and operating
– CONTINUED –
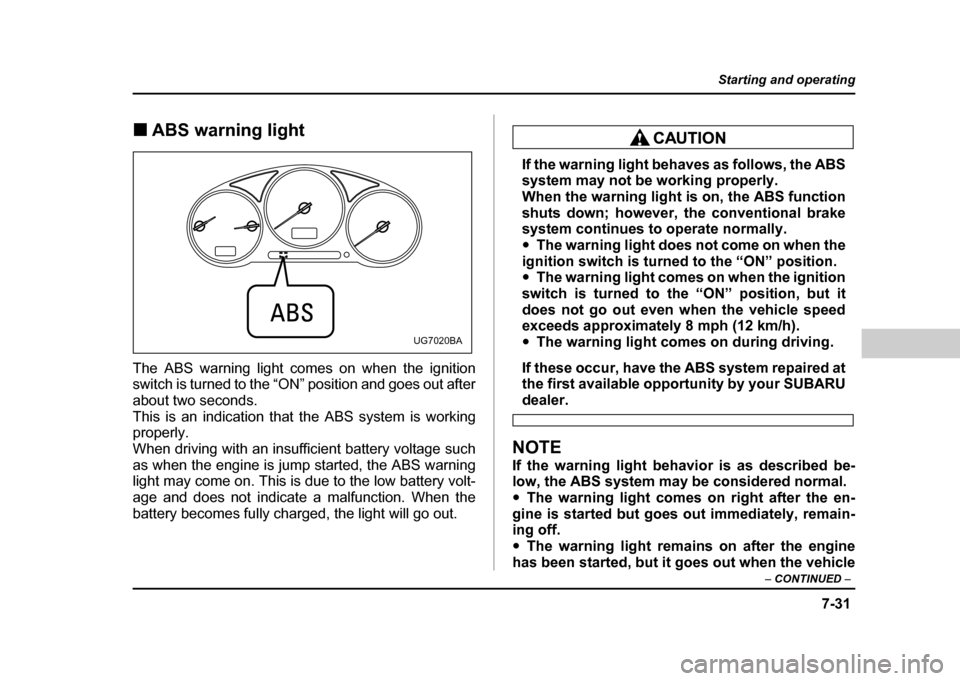
!ABS warning light
The ABS warning light comes on when the ignition
switch is turned to the “ON” position and goes out after
about two seconds.
This is an indication that the ABS system is working
properly.
When driving with an insufficient battery voltage such
as when the engine is jump started, the ABS warning
light may come on. This is due to the low battery volt-
age and does not indicate a malfunction. When the
battery becomes fully charged, the light will go out.
If the warning light behaves as follows, the ABS
system may not be working properly.
When the warning light is on, the ABS function
shuts down; however, the conventional brake
system continues to operate normally. " The warning light does not come on when the
ignition switch is turned to the “ON” position. " The warning light comes on when the ignition
switch is turned to the “ON” position, but it
does not go out even when the vehicle speed
exceeds approximately 8 mph (12 km/h). " The warning light comes on during driving.
If these occur, have the ABS system repaired at
the first available opportunity by your SUBARU
dealer.
NOTE
If the warning light behavior is as described be-
low, the ABS system may be considered normal." The warning light comes on right after the en-
gine is started but goes out immediately, remain-
ing off." The warning light remains on after the engine
has been started, but it goes out when the vehicle
UG7020BA
Page 301 of 491
7-32
Starting and operating
speed reaches about 8 mph (12 km/h). "
The warning light comes on during driving, but
it goes out immediately and remains off. Electronic Brake Force Distribution
(EBD) system
The EBD system maximizes the effectiveness of the
brakes by allowing the rear brakes to supply a greater
proportion of the braking force. It functions by adjust-
ing the distribution of braking force to the rear wheels
in accordance with the vehicle’s loading condition and
speed.
The EBD system is an integral part of the ABS system
and uses some of the ABS system’s components to
perform its function of optimizing the distribution of
braking force. If any of the ABS components used by
the EBD function fails, the EBD system also stops
working.
When the EBD system is operating, you may hear a
chattering noise or feel a slight vibration in the brake
pedal. This is normal and does not indicate a malfunc-tion.
Page 302 of 491

7-33
Starting and operating
– CONTINUED –
!Steps to take if EBD system fails
If a malfunction occurs in the EBD system, the system
stops working and the brake system warning light and
ABS warning light come on simultaneously.
The EBD system may be faulty if the brake system
warning light and ABS warning light illuminate simulta-
neously during driving.
Even if the EBD system fails, the conventional braking
system will still function. However, the rear wheels will
be more prone to locking when the brakes are applied
harder than usual and the vehicle’s motion may there-
fore become somewhat harder to control. If the brake system warning light and ABS warning light illuminate simultaneously, take the following steps:
1. Stop the vehicle in the nearest safe, flat place.
2. Shut down the engine, then restart it.
3. Release the parking brake. If both warning lights go
out, the EBD system may be faulty. Drive carefully to
the nearest SUBARU dealer and have the system in- spected.
4. If both warning lights come on again and stay illu-
minated after the engine has been restarted, shut
down the engine again, apply the parking brake, and
check the brake fluid level.
5. If the brake fluid level is not below the “MIN” mark,
the EBD system may be faulty. Drive carefully to the
nearest SUBARU dealer and have the system inspect- ed.
6. If the brake fluid level is below the “MIN” mark, DO
NOT drive the vehicle. Instead, have the vehicle towed
to the nearest SUBARU dealer for repair.
"
Driving with the brake system warning light
on is dangerous. This indicates your brake sys-
tem may not be working properly. If the light re-
mains on, have the brakes inspected by a SUB-
ARU dealer immediately." If at all in doubt about whether the brakes are
UG7020CA
Page 303 of 491
7-34
Starting and operating
operating properly, do not drive the vehicle.
Have your vehicle towed to the nearest SUBA-
RU dealer for repair.
Parking your vehicle !
Parking brake
To set the parking brake, press the brake pedal firmly
and hold it down while fully pulling up the parking
brake lever.
To release the parking brake, pull the lever up slightly,
press the release button, then lower the lever while
keeping the button pressed.
When the parking brake is set while the engine is run-
ning, the parking brake warning light comes on. After
starting the vehicle, be sure that the warning light has
gone out before the vehicle is driven. Refer to the
UG7509BA
Page 304 of 491
7-35
Starting and operating
– CONTINUED –
“Warning and indicator lights” section (chapter 3).
Never drive while the parking brake is set be-
cause this will cause unnecessary wear on the
brake linings. Before starting to drive, always
make sure that the parking brake has been fully
released.
! Parking tips
When parking your vehicle, always set the parking
brake firmly and put the shift lever in the “1” (1st) for an
upgrade or “R” (Reverse) for a downgrade for manual
transmission vehicles, or in the “P” (Park) position for
automatic transmission vehicles. Always set the park-
ing brake firmly when parking your vehicle. Never rely
on the transmission alone to hold the vehicle. When parking on a hill, always turn the steering wheel.
When the vehicle is headed up the hill, the front
wheels should be turned away from the curb.
HG7015BA
Page 309 of 491

7-40
Starting and operating
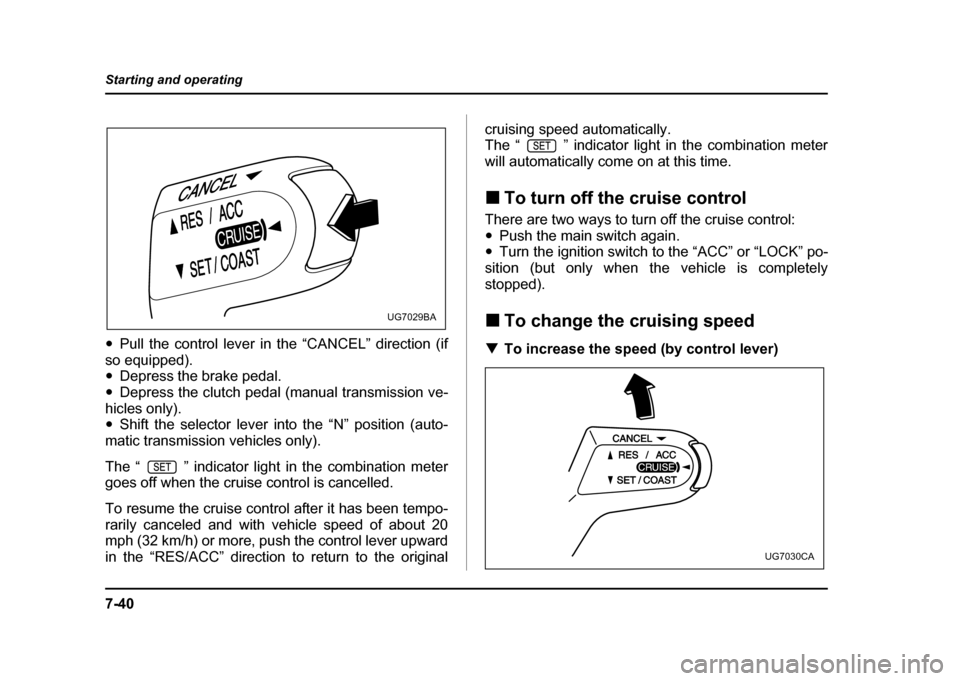
"
Pull the control lever in the “CANCEL” direction (if
so equipped). " Depress the brake pedal.
" Depress the clutch pedal (manual transmission ve-
hicles only)." Shift the selector lever into the “N” position (auto-
matic transmission vehicles only).
The “ ” indicator light in the combination meter
goes off when the cruise control is cancelled.
To resume the cruise control after it has been tempo-
rarily canceled and with vehicle speed of about 20
mph (32 km/h) or more, push the control lever upward
in the “RES/ACC” direction to return to the original cruising speed automatically.
The “ ” indicator light in the combination meter
will automatically come on at this time. !
To turn off the cruise control
There are two ways to turn off the cruise control: " Push the main switch again.
" Turn the ignition switch to the “ACC” or “LOCK” po-
sition (but only when the vehicle is completely
stopped). ! To change the cruising speed
! To increase the speed (by control lever)
UG7029BA
UG7030CA
Page 321 of 491

8-10
Driving tips
shallow streams, first check the depth of the water and
the bottom of the stream bed for firmness and ensure
that the bed of the stream is flat. Drive slowly and com-
pletely through the stream. The water should be shal-
low enough that it does not reach the vehicle’s under-
carriage. Water entering the engine air intake or the
exhaust pipe or water splashing onto electrical parts
may damage your vehicle and may cause it to stall.
Never attempt to drive through rushing water; regard-
less of its depth, it can wash away the ground from un-
der your tires, resulting in possible loss of traction and
even vehicle rollover. "
Always check your brakes for effectiveness immedi-
ately after driving in sand, mud or water. Do this by
driving slowly and stepping on the brake pedal. Re-
peat that process several times to dry out the brake
discs and brake pads. " Do not drive or park over or near flammable materi-
als such as dry grass or fallen leaves, as they may
burn easily. The exhaust system is very hot while the
engine is running and right after the engine stops. This
could create a fire hazard." After driving through tall grass, mud, rocks, sand,
rivers, etc., check that there is no grass, bush, paper,
rags, stones, sand, etc. adhering to or trapped on the
underbody. Clear off any such matter from the under-
body. If the vehicle is used with these materials trapped or adhering to the underbody, a mechanical
breakdown or fire could occur. "
Secure all cargo carried inside the vehicle and make
certain that it is not piled higher than the seatbacks.
During sudden stops or jolts, unsecured cargo could
be thrown around in the vehicle and cause injury. Do
not pile heavy loads on the roof. Those loads raise the
vehicle’s center of gravity and make it more prone to
tip over." If you must rock the vehicle to free it from sand or
mud, depress the accelerator pedal slightly and move
the selector lever back and forth between “D” and “R”
repeatedly. Do not race the engine. For the best pos-
sible traction, avoid spinning the wheels when trying to
free the vehicle.
When the road surface is extremely slippery, you can
obtain better traction by starting the vehicle with the
transmission in 2nd than 1st (both for MT and AT). " Never equip your vehicle with tires larger than those
specified in this manual. " Frequent driving of an AWD vehicle under hard-driv-
ing conditions such as rough roads or off roads will ne-
cessitate more frequent replacement of engine oil,
brake fluid and transmission oil than that specified in
the maintenance schedule described in the “Warranty
and Maintenance Booklet”.
Remember that damage done to your Subaru while
Page 339 of 491
8-28
Driving tips
Hitch harness connector – Wagon
8. Connect the hitch wire harness’s black four-pin
wire connector to the towing trailer’s wire harness
9. Confirm proper function of the hitch wire harness
by individually activating the brake, right turn signal,
left turn signal, stop, and parking lights on the trailer.
NOTE
Always disconnect the trailer wire harness before
launching or retrieving a watercraft. ! When you do not tow a trailer
" Remove the ball mount from the hitch receiver tube and insert the receiver cover onto the hitch receiver tube. "
Place the dust cap over the four-pin connector of the
hitch wire harness to protect against possible damage. " Occasionally lubricate terminals of the four-pin con-
nector using terminal grease.
HS8015BA