Page 259 of 432
City Driving
One of the biggest problems with city streets is the
amount of traffic on them. You'll want to watch out for
what the other drivers are doing and pay attention
to traffic signals.Here are ways to increase your safety in city driving:
·Know the best way to get to where you are
going. Get a city map and plan your trip into
an unknown part of the city just as you would for
a cross-country trip.
·Try to use the freeways that rim and crisscross
most large cities. You'll save time and energy.
See the next part, ªFreeway Driving.º
·Treat a green light as a warning signal. A traffic
light is there because the corner is busy enough
to need it. When a light turns green, and just before
you start to move, check both ways for vehicles
that have not cleared the intersection or may
be running the red light.
4-23
Page 273 of 432

Towing a Trailer
{CAUTION:
If you don't use the correct equipment and
drive properly, you can lose control when you
pull a trailer. For example, if the trailer is too
heavy, the brakes may not work well Ð or
even at all. You and your passengers could be
seriously injured. You may also damage your
vehicle; the resulting repairs would not be
covered by your warranty. Pull a trailer only if
you have followed all the steps in this section.
Ask your dealer for advice and information
about towing a trailer with your vehicle.Your vehicle can tow a trailer if it is equipped with the
proper trailer towing equipment. To identify what
the vehicle trailering capacity is for your vehicle, you
should read the information in ªWeight of the Trailerº that
appears later in this section. But trailering is different
than just driving your vehicle by itself. Trailering means
changes in handling, durability and fuel economy.
Successful, safe trailering takes correct equipment,
and it has to be used properly.
That's the reason for this part. In it are many time-tested,
important trailering tips and safety rules. Many of
these are important for your safety and that of your
passengers. So please read this section carefully before
you pull a trailer.
Load-pulling components such as the engine, transaxle,
wheel assemblies and tires are forced to work harder
against the drag of the added weight. The engine
is required to operate at relatively higher speeds and
under greater loads, generating extra heat. What's more,
the trailer adds considerably to wind resistance,
increasing the pulling requirements.
4-37
Page 281 of 432

Service............................................................5-3
Doing Your Own Service Work.........................5-3
Adding Equipment to the Outside
of Your Vehicle...........................................5-4
Fuel................................................................5-4
Gasoline Octane............................................5-4
Gasoline Speci®cations....................................5-5
California Fuel...............................................5-5
Additives.......................................................5-6
Fuels in Foreign Countries...............................5-7
Filling Your Tank............................................5-7
Filling a Portable Fuel Container.....................5-10
Checking Things Under the Hood....................5-10
Hood Release..............................................5-11
Engine Compartment Overview.......................5-12
Engine Oil...................................................5-16
Supercharger Oil..........................................5-21
Engine Air Cleaner/Filter................................5-22
Automatic Transaxle Fluid..............................5-24
Engine Coolant.............................................5-26
Radiator Pressure Cap..................................5-29
Engine Overheating.......................................5-29
Cooling System............................................5-32
Power Steering Fluid.....................................5-42
Windshield Washer Fluid................................5-43Brakes........................................................5-45
Battery........................................................5-48
Jump Starting...............................................5-49
Headlamp Aiming...........................................5-56
Bulb Replacement..........................................5-59
Halogen Bulbs..............................................5-59
Headlamps and Sidemarker Lamps.................5-60
Front Turn Signal, Parking and
Fog Lamps...............................................5-62
Center High-Mounted Stoplamp (CHMSL).........5-64
Taillamps, Turn Signal, and Stoplamps............5-64
Back-Up Lamps............................................5-65
Replacement Bulbs.......................................5-66
Windshield Wiper Blade Replacement..............5-67
Tires..............................................................5-68
In¯ation -- Tire Pressure................................5-69
Tire Pressure Monitor System.........................5-70
Tire Inspection and Rotation...........................5-71
When It Is Time for New Tires.......................5-72
Buying New Tires.........................................5-73
Uniform Tire Quality Grading..........................5-74
Wheel Alignment and Tire Balance..................5-75
Wheel Replacement......................................5-75
Tire Chains..................................................5-77
Section 5 Service and Appearance Care
5-1
Page 282 of 432

If a Tire Goes Flat........................................5-78
Changing a Flat Tire.....................................5-78
Compact Spare Tire......................................5-89
Appearance Care............................................5-90
Cleaning the Inside of Your Vehicle.................5-90
Care of Safety Belts......................................5-93
Weatherstrips...............................................5-93
Cleaning the Outside of Your Vehicle..............5-93
Sheet Metal Damage.....................................5-95
Finish Damage.............................................5-95
Underbody Maintenance................................5-96
Chemical Paint Spotting.................................5-96
GM Vehicle Care/Appearance Materials...........5-96Vehicle Identi®cation......................................5-98
Vehicle Identi®cation Number (VIN).................5-98
Service Parts Identi®cation Label.....................5-98
Electrical System............................................5-99
Add-On Electrical Equipment..........................5-99
Headlamp Wiring..........................................5-99
Windshield Wiper Fuses................................5-99
Power Windows and Other Power Options.......5-99
Fuses and Circuit Breakers............................5-99
Capacities and Speci®cations........................5-104
Capacities and Speci®cations........................5-104
Normal Maintenance Replacement Parts.........5-105
Normal Maintenance Replacement Parts.........5-105
Section 5 Service and Appearance Care
5-2
Page 297 of 432
When to Add Engine Oil
If the oil is at or below the cross-hatched area at the tip
of the dipstick, then you'll need to add at least one
quart of oil. But you must use the right kind. This section
explains what kind of oil to use. For engine oil
crankcase capacity, see
Capacities and Speci®cations
on page 5-104.
Notice:Don't add too much oil. If your engine has
so much oil that the oil level gets above the
cross-hatched area that shows the proper operating
range, your engine could be damaged.See
Engine Compartment
Overview on page 5-12for
the location of the
engine oil ®ll cap.
Be sure to add enough oil to put the level somewhere in
the proper operating range in the cross-hatched area.
Push the dipstick all the way back in when you're through.
5-17
Page 306 of 432

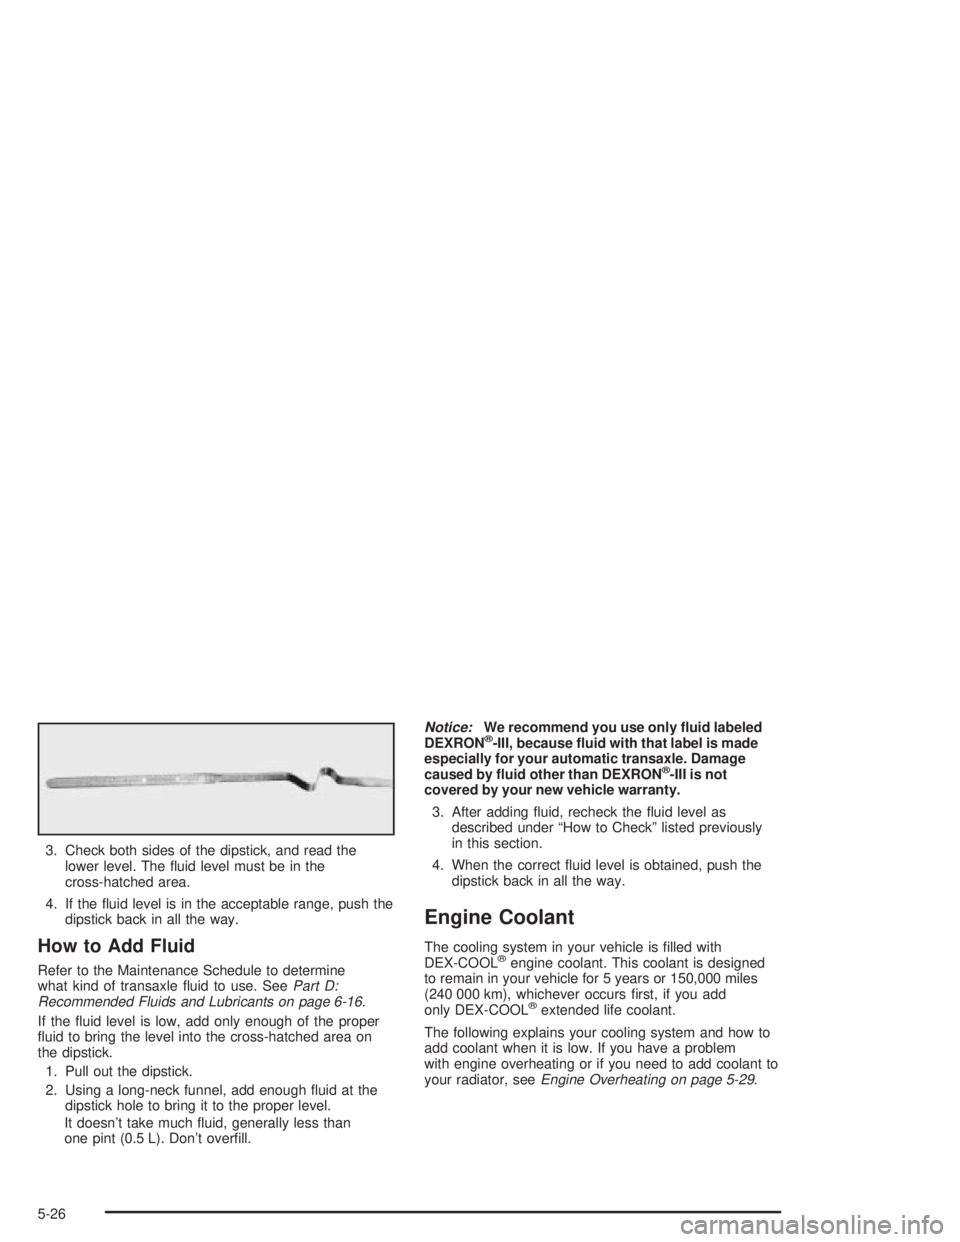
3. Check both sides of the dipstick, and read the
lower level. The ¯uid level must be in the
cross-hatched area.
4. If the ¯uid level is in the acceptable range, push the
dipstick back in all the way.
How to Add Fluid
Refer to the Maintenance Schedule to determine
what kind of transaxle ¯uid to use. SeePart D:
Recommended Fluids and Lubricants on page 6-16.
If the ¯uid level is low, add only enough of the proper
¯uid to bring the level into the cross-hatched area on
the dipstick.
1. Pull out the dipstick.
2. Using a long-neck funnel, add enough ¯uid at the
dipstick hole to bring it to the proper level.
It doesn't take much ¯uid, generally less than
one pint (0.5 L). Don't over®ll.
Notice:We recommend you use only ¯uid labeled
DEXRONž-III, because ¯uid with that label is made
especially for your automatic transaxle. Damage
caused by ¯uid other than DEXRON
ž-III is not
covered by your new vehicle warranty.
3. After adding ¯uid, recheck the ¯uid level as
described under ªHow to Checkº listed previously
in this section.
4. When the correct ¯uid level is obtained, push the
dipstick back in all the way.
Engine Coolant
The cooling system in your vehicle is ®lled with
DEX-COOLžengine coolant. This coolant is designed
to remain in your vehicle for 5 years or 150,000 miles
(240 000 km), whichever occurs ®rst, if you add
only DEX-COOL
žextended life coolant.
The following explains your cooling system and how to
add coolant when it is low. If you have a problem
with engine overheating or if you need to add coolant to
your radiator, see
Engine Overheating on page 5-29.
5-26
Page 312 of 432
If you no longer have the overheat warning, you can
drive. Just to be safe, drive slower for about 10 minutes.
If the warning doesn't come back on, you can drive
normally.
If the warning continues, and you have not stopped,
pull over, stop, and park your vehicle right away.
If there's still no sign of steam, you can idle the engine
for three minutes while you're parked. If you still
have the warning, turn off the engine and get everyone
out of the vehicle until it cools down. Also, see
ªOverheated Engine Protection Operating Modeº listed
previously in this section.
You may decide not to lift the hood but to get service
help right away.Cooling System
When you decide it's safe to lift the hood, here's what
you'll see:
3800 V6 Engine
5-32
Page 339 of 432
5. Turn the vertical aiming screw until the headlamp
beam is aimed to the horizontal tape line. The top
edge of the cut-off should be positioned at the
bottom edge of the horizontal tape line.
6. Repeat steps 4 and 5 for the opposite headlamp.
Bulb Replacement
For the proper type of replacement bulb, seeReplacement Bulbs on page 5-66.
For any bulb changing procedure not listed in this
section, contact your dealer.
Halogen Bulbs
{CAUTION:
Halogen bulbs have pressurized gas inside
and can burst if you drop or scratch the bulb.
You or others could be injured. Be sure to
read and follow the instructions on the bulb
package.
5-59