2004 PONTIAC GRAND PRIX maintenance
[x] Cancel search: maintenancePage 282 of 432

If a Tire Goes Flat........................................5-78
Changing a Flat Tire.....................................5-78
Compact Spare Tire......................................5-89
Appearance Care............................................5-90
Cleaning the Inside of Your Vehicle.................5-90
Care of Safety Belts......................................5-93
Weatherstrips...............................................5-93
Cleaning the Outside of Your Vehicle..............5-93
Sheet Metal Damage.....................................5-95
Finish Damage.............................................5-95
Underbody Maintenance................................5-96
Chemical Paint Spotting.................................5-96
GM Vehicle Care/Appearance Materials...........5-96Vehicle Identi®cation......................................5-98
Vehicle Identi®cation Number (VIN).................5-98
Service Parts Identi®cation Label.....................5-98
Electrical System............................................5-99
Add-On Electrical Equipment..........................5-99
Headlamp Wiring..........................................5-99
Windshield Wiper Fuses................................5-99
Power Windows and Other Power Options.......5-99
Fuses and Circuit Breakers............................5-99
Capacities and Speci®cations........................5-104
Capacities and Speci®cations........................5-104
Normal Maintenance Replacement Parts.........5-105
Normal Maintenance Replacement Parts.........5-105
Section 5 Service and Appearance Care
5-2
Page 283 of 432
Service
Your dealer knows your vehicle best and wants you to
be happy with it. We hope you'll go to your dealer
for all your service needs. You'll get genuine GM parts
and GM-trained and supported service people.
We hope you'll want to keep your GM vehicle all GM.
Genuine GM parts have one of these marks:
Doing Your Own Service Work
If you want to do some of your own service work, you'll
want to use the proper service manual. It tells you
much more about how to service your vehicle than this
manual can. To order the proper service manual,
see
Service Publications Ordering Information on
page 7-10.
Your vehicle has an air bag system. Before attempting
to do your own service work, see
Servicing Your Air
Bag-Equipped Vehicle on page 1-56.
You should keep a record with all parts receipts and list
the mileage and the date of any service work you
perform. See
Part E: Maintenance Record on page 6-17.
{CAUTION:
You can be injured and your vehicle could be
damaged if you try to do service work on a
vehicle without knowing enough about it.
·Be sure you have sufficient knowledge,
experience, the proper replacement parts
and tools before you attempt any vehicle
maintenance task.
CAUTION: (Continued)
5-3
Page 301 of 432
What to Do with Used Oil
Used engine oil contains certain elements that may be
unhealthy for your skin and could even cause cancer.
Don't let used oil stay on your skin for very long. Clean
your skin and nails with soap and water, or a good
hand cleaner. Wash or properly dispose of clothing or
rags containing used engine oil. See the manufacturer's
warnings about the use and disposal of oil products.
Used oil can be a threat to the environment. If you
change your own oil, be sure to drain all the oil from
the ®lter before disposal. Never dispose of oil by putting
it in the trash, pouring it on the ground, into sewers,
or into streams or bodies of water. Instead, recycle it by
taking it to a place that collects used oil. If you have
a problem properly disposing of your used oil, ask your
dealer, a service station or a local recycling center
for help.
Supercharger Oil
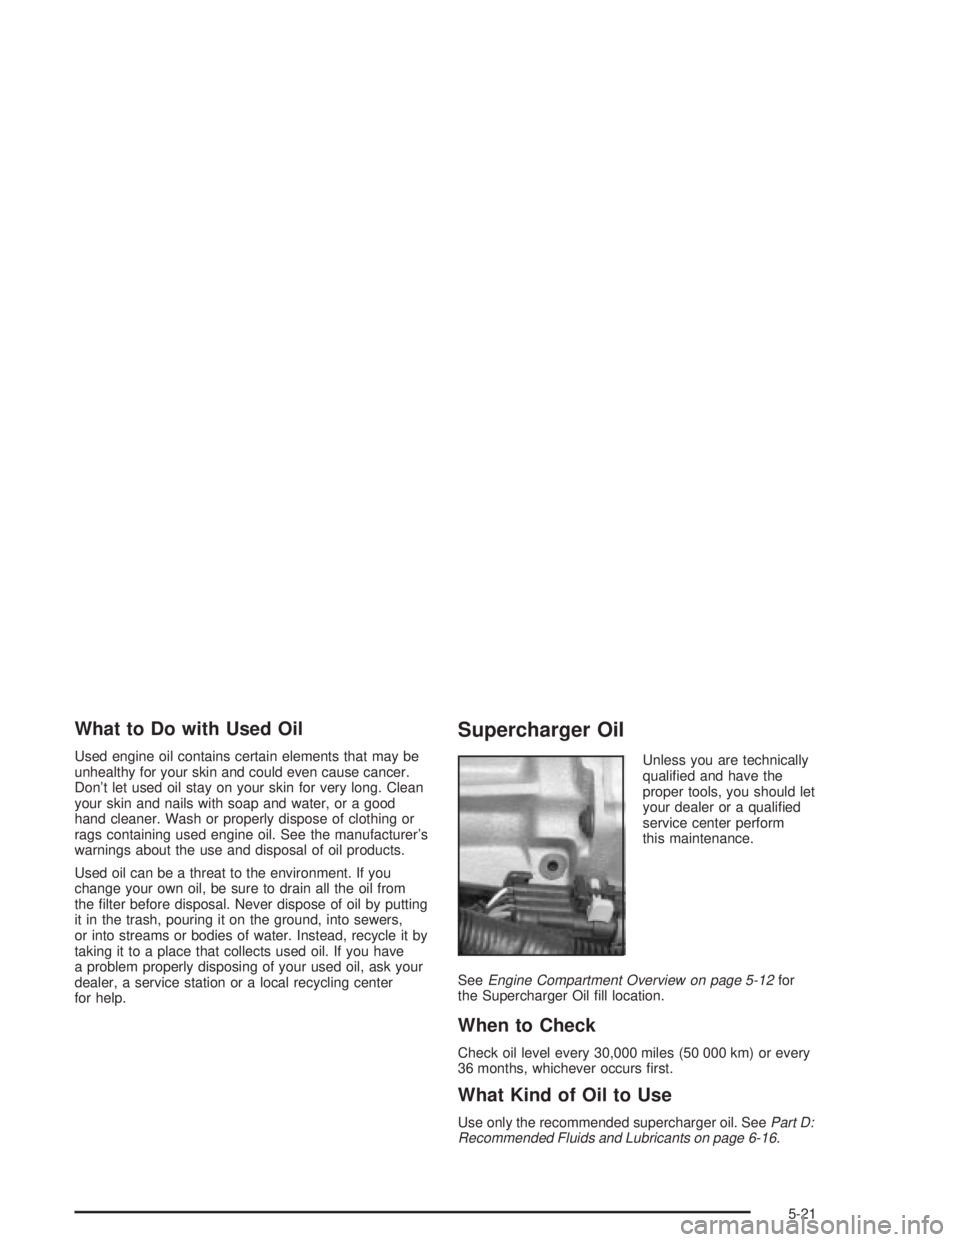
Unless you are technically
quali®ed and have the
proper tools, you should let
your dealer or a quali®ed
service center perform
this maintenance.
See
Engine Compartment Overview on page 5-12for
the Supercharger Oil ®ll location.
When to Check
Check oil level every 30,000 miles (50 000 km) or every
36 months, whichever occurs ®rst.
What Kind of Oil to Use
Use only the recommended supercharger oil. SeePart D:
Recommended Fluids and Lubricants on page 6-16.
5-21
Page 303 of 432
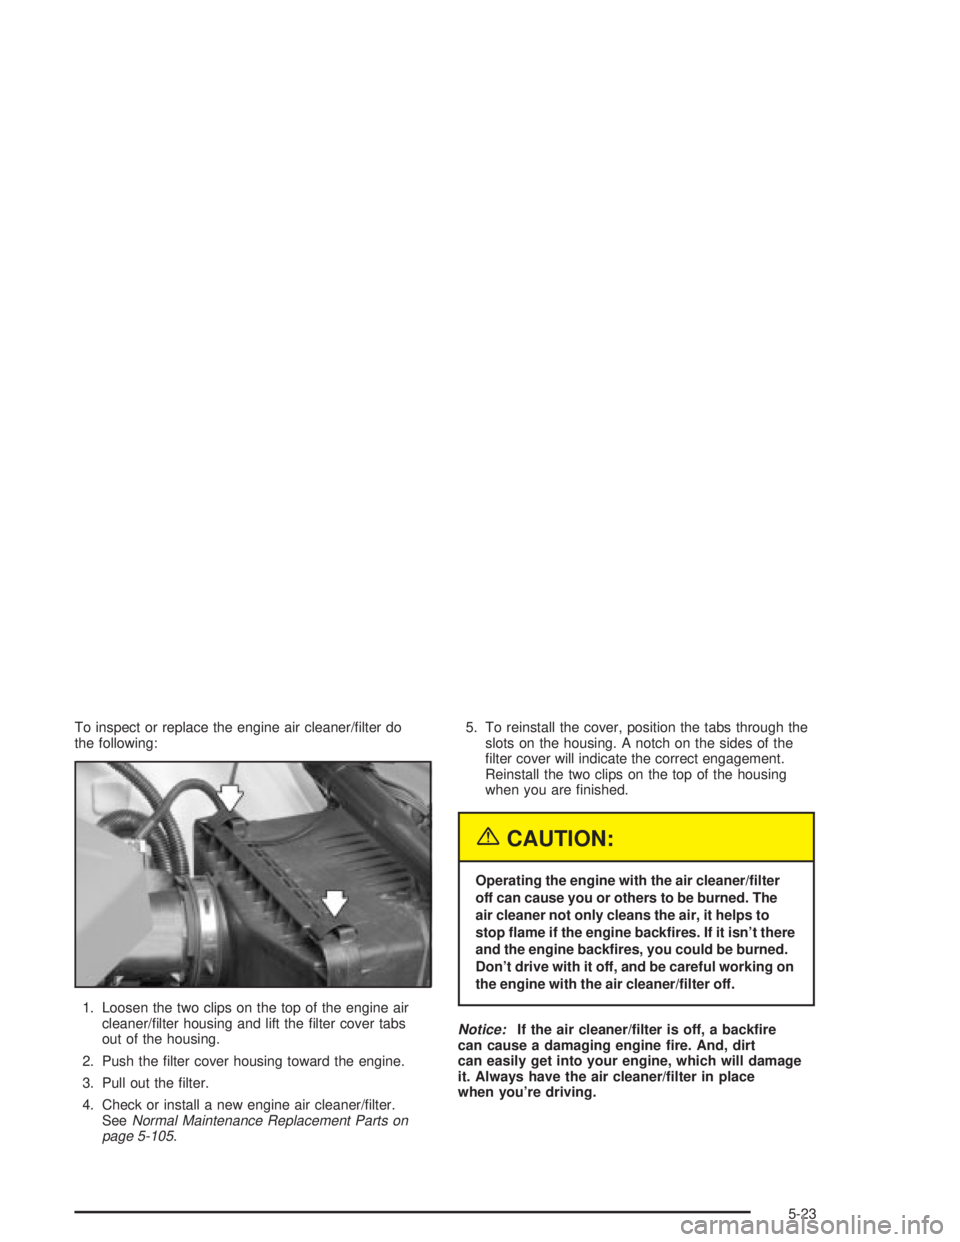
To inspect or replace the engine air cleaner/®lter do
the following:
1. Loosen the two clips on the top of the engine air
cleaner/®lter housing and lift the ®lter cover tabs
out of the housing.
2. Push the ®lter cover housing toward the engine.
3. Pull out the ®lter.
4. Check or install a new engine air cleaner/®lter.
See
Normal Maintenance Replacement Parts on
page 5-105.5. To reinstall the cover, position the tabs through the
slots on the housing. A notch on the sides of the
®lter cover will indicate the correct engagement.
Reinstall the two clips on the top of the housing
when you are ®nished.
{CAUTION:
Operating the engine with the air cleaner/®lter
off can cause you or others to be burned. The
air cleaner not only cleans the air, it helps to
stop ¯ame if the engine back®res. If it isn't there
and the engine back®res, you could be burned.
Don't drive with it off, and be careful working on
the engine with the air cleaner/®lter off.
Notice:If the air cleaner/®lter is off, a back®re
can cause a damaging engine ®re. And, dirt
can easily get into your engine, which will damage
it. Always have the air cleaner/®lter in place
when you're driving.
5-23
Page 304 of 432
Automatic Transaxle Fluid
When to Check and Change
A good time to check your automatic transaxle ¯uid
level is when the engine oil is changed.
Change both the ¯uid and ®lter every 50,000 miles
(83 000 km) if the vehicle is mainly driven under one or
more of these conditions:
·In heavy city traffic where the outside temperature
regularly reaches 90ÉF (32ÉC) or higher.
·In hilly or mountainous terrain.
·When doing frequent trailer towing.
·Uses such as found in taxi, police or delivery
service.
If you do not use your vehicle under any of these
conditions, change the ¯uid and ®lter at
100,000 miles (166 000 km).
See
Part A: Scheduled Maintenance Services on
page 6-4.
How to Check
Because this operation can be a little difficult, you may
choose to have this done at the dealership service
department.
If you do it yourself, be sure to follow all the instructions
here, or you could get a false reading on the dipstick.
Notice:Too much or too little ¯uid can damage
your transaxle. Too much can mean that some of the
¯uid could come out and fall on hot engine or
exhaust system parts, starting a ®re. Too little ¯uid
could cause the transaxle to overheat. Be sure
to get an accurate reading if you check your
transaxle ¯uid.
Wait at least 30 minutes before checking the transaxle
¯uid level if you have been driving:
·When outside temperatures are above 90ÉF (32ÉC).
·At high speed for quite a while.
·In heavy traffic ± especially in hot weather.
·While pulling a trailer.
5-24
Page 306 of 432
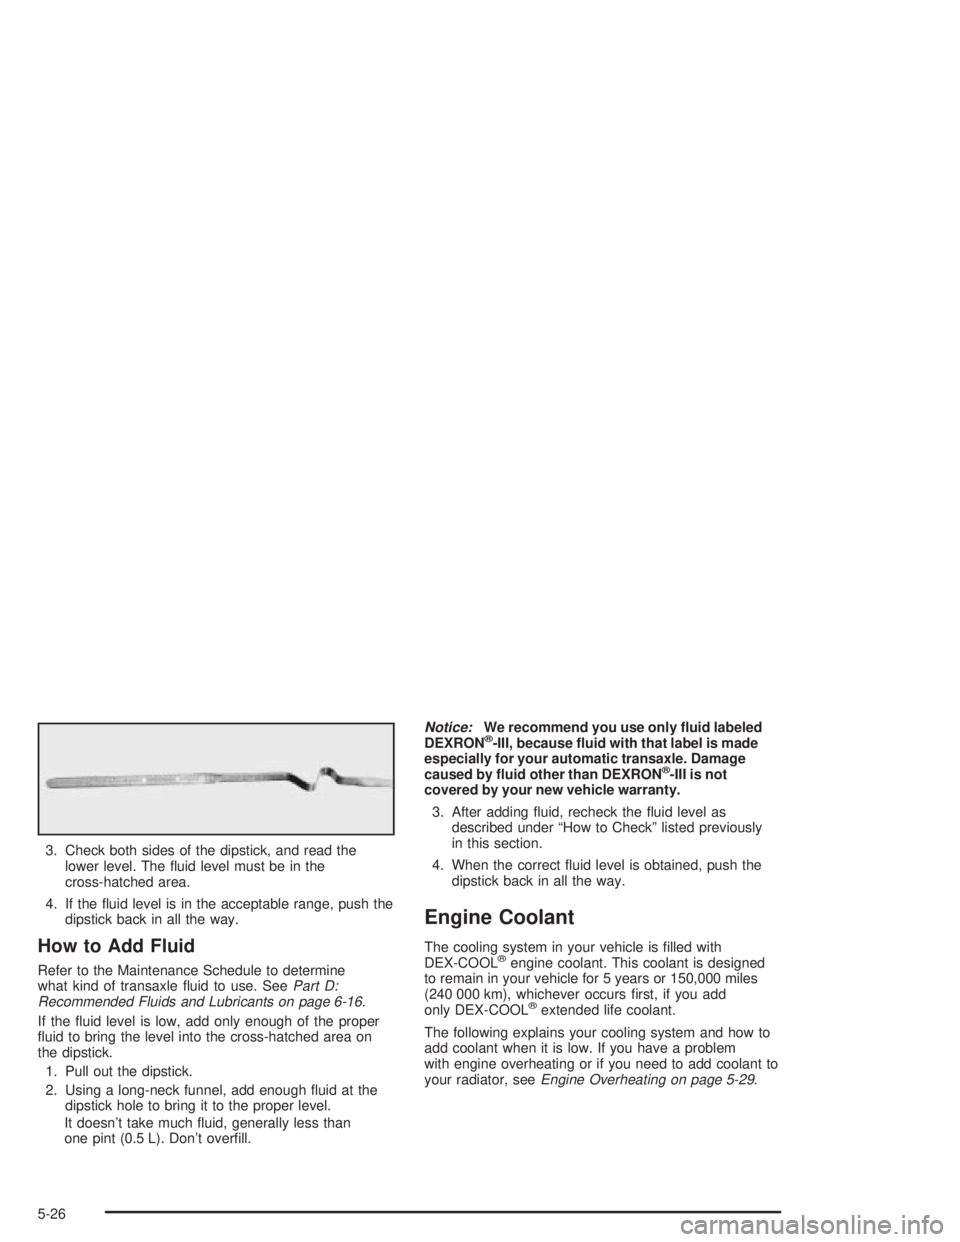
3. Check both sides of the dipstick, and read the
lower level. The ¯uid level must be in the
cross-hatched area.
4. If the ¯uid level is in the acceptable range, push the
dipstick back in all the way.
How to Add Fluid
Refer to the Maintenance Schedule to determine
what kind of transaxle ¯uid to use. SeePart D:
Recommended Fluids and Lubricants on page 6-16.
If the ¯uid level is low, add only enough of the proper
¯uid to bring the level into the cross-hatched area on
the dipstick.
1. Pull out the dipstick.
2. Using a long-neck funnel, add enough ¯uid at the
dipstick hole to bring it to the proper level.
It doesn't take much ¯uid, generally less than
one pint (0.5 L). Don't over®ll.
Notice:We recommend you use only ¯uid labeled
DEXRONž-III, because ¯uid with that label is made
especially for your automatic transaxle. Damage
caused by ¯uid other than DEXRON
ž-III is not
covered by your new vehicle warranty.
3. After adding ¯uid, recheck the ¯uid level as
described under ªHow to Checkº listed previously
in this section.
4. When the correct ¯uid level is obtained, push the
dipstick back in all the way.
Engine Coolant
The cooling system in your vehicle is ®lled with
DEX-COOLžengine coolant. This coolant is designed
to remain in your vehicle for 5 years or 150,000 miles
(240 000 km), whichever occurs ®rst, if you add
only DEX-COOL
žextended life coolant.
The following explains your cooling system and how to
add coolant when it is low. If you have a problem
with engine overheating or if you need to add coolant to
your radiator, see
Engine Overheating on page 5-29.
5-26
Page 328 of 432
Replacing Brake System Parts
The braking system on a vehicle is complex. Its many
parts have to be of top quality and work well together if
the vehicle is to have really good braking. Your vehicle
was designed and tested with top-quality GM brake parts.
When you replace parts of your braking system Ð for
example, when your brake linings wear down and you
need new ones put in Ð be sure you get new approved
GM replacement parts. If you don't, your brakes may no
longer work properly. For example, if someone puts in
brake linings that are wrong for your vehicle, the balance
between your front and rear brakes can change Ð for the
worse. The braking performance you've come to expect
can change in many other ways if someone puts in the
wrong replacement brake parts.
Battery
Your new vehicle comes with a maintenance free
ACDelcožbattery. When it's time for a new battery, get
one that has the replacement number shown on the
original battery's label. We recommend an ACDelco
ž
battery. SeeEngine Compartment Overview on
page 5-12for battery location.
Warning:Battery posts, terminals and related
accessories contain lead and lead compounds,
chemicals known to the State of California to cause
cancer and reproductive harm. Wash hands after
handling.If your battery has a very low charge or is dead, you
may not be able to remove the ignition key from
the ignition switch or shift out of PARK (P). Refer to
Shifting Out of Park (P) on page 2-30.
Vehicle Storage
If you're not going to drive your vehicle for 25 days or
more, remove the black, negative (-) cable from the
battery. This will help keep your battery from
running down.
{CAUTION:
Batteries have acid that can burn you and gas
that can explode. You can be badly hurt if you
aren't careful. See ªJump Startingº next for
tips on working around a battery without
getting hurt.
Contact your dealer to learn how to prepare your
vehicle for longer storage periods.
Also, for your audio system, see
Theft-Deterrent
Feature on page 3-128.
5-48
Page 347 of 432
Windshield Wiper Blade
Replacement
Remove and replace a windshield wiper by following
these steps:
1. Put the ignition in ACCESSORY and turn the
windshield wipers on.
2. Stop the windshield wipers when they are in the
upright position by turning the key to the off position.
3. Pull the windshield arm away from the windshield.
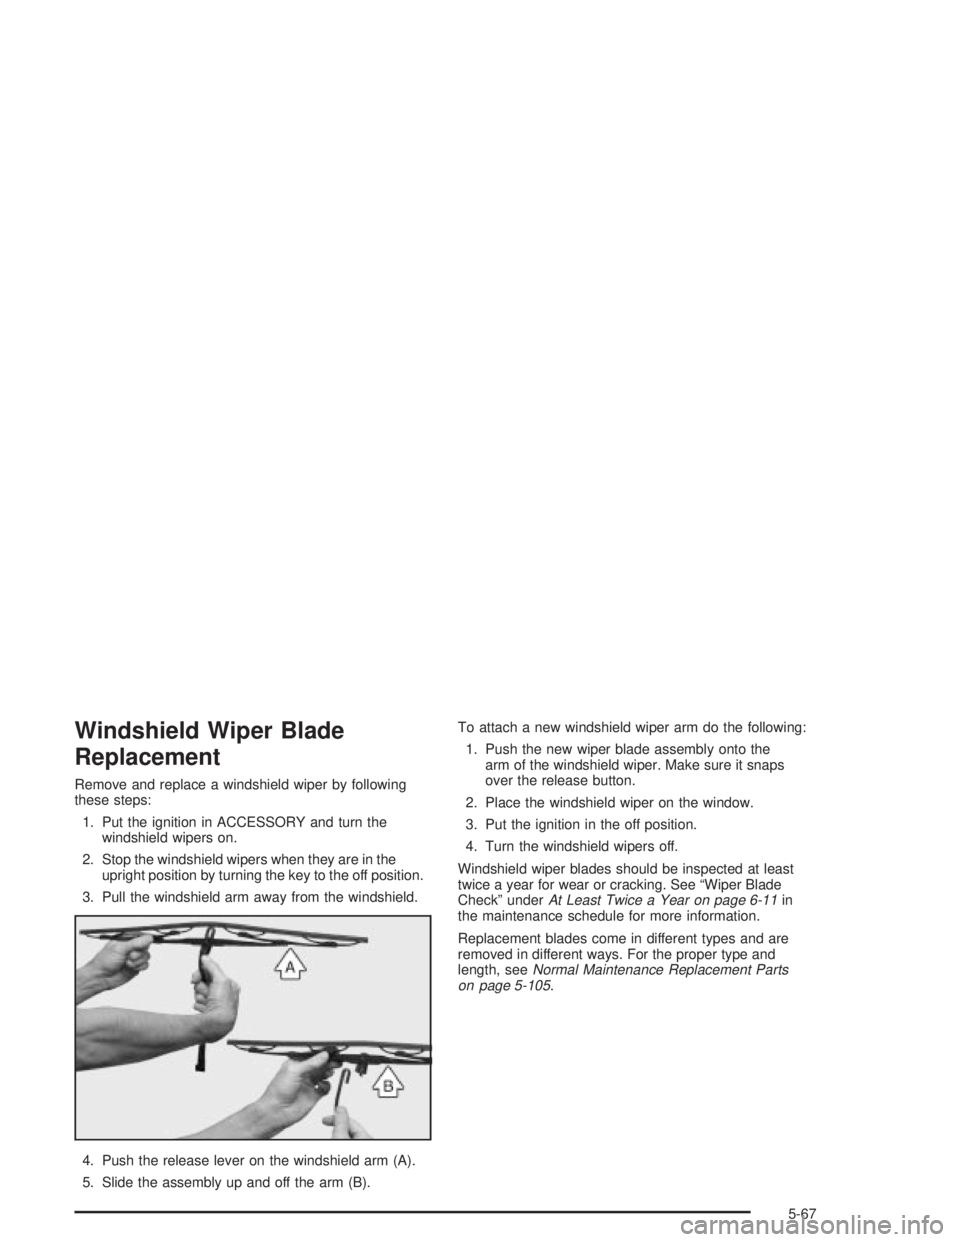
4. Push the release lever on the windshield arm (A).
5. Slide the assembly up and off the arm (B).To attach a new windshield wiper arm do the following:
1. Push the new wiper blade assembly onto the
arm of the windshield wiper. Make sure it snaps
over the release button.
2. Place the windshield wiper on the window.
3. Put the ignition in the off position.
4. Turn the windshield wipers off.
Windshield wiper blades should be inspected at least
twice a year for wear or cracking. See ªWiper Blade
Checkº under
At Least Twice a Year on page 6-11in
the maintenance schedule for more information.
Replacement blades come in different types and are
removed in different ways. For the proper type and
length, see
Normal Maintenance Replacement Parts
on page 5-105.
5-67