2004 PONTIAC BONNEVILLE engine oil
[x] Cancel search: engine oilPage 96 of 446
Engine Coolant Heater
If your vehicle has this feature, in very cold weather,
0°F (−18°C) or colder, the engine coolant heater
can help. You will get easier starting and better fuel
economy during engine warm-up. Usually, the coolant
heater should be plugged in a minimum of four
hours prior to starting your vehicle. At temperatures
above 32°F (0°C), use of the coolant heater is not
required.
To Use the Engine Coolant Heater
1. Turn off the engine.
2. Open the hood and unwrap the electrical cord.
The engine coolant heater cord is located on the
passenger’s side of the vehicle, above the headlamp
assembly.
3. Plug it into a normal, grounded 110-volt AC outlet.
{CAUTION:
Plugging the cord into an ungrounded outlet
could cause an electrical shock. Also, the
wrong kind of extension cord could overheat
and cause a �re. You could be seriously
injured. Plug the cord into a properly grounded
three-prong 110-volt AC outlet. If the cord will
not reach, use a heavy-duty three-prong
extension cord rated for at least 15 amps.
4. Before starting the engine, be sure to unplug and
store the cord as it was before to keep it away
from moving engine parts. If you do not, it could be
damaged.
How long should you keep the coolant heater plugged
in? The answer depends on the outside temperature, the
kind of oil you have, and some other things. Instead
of trying to list everything here, we ask that you contact
your dealer in the area where you will be parking
your vehicle. The dealer can give you the best advice
for that particular area.
2-28
Page 121 of 446
Instrument Panel Overview...............................3-4
Hazard Warning Flashers................................3-6
Other Warning Devices...................................3-6
Horn.............................................................3-7
Tilt Wheel.....................................................3-7
Turn Signal/Multifunction Lever.........................3-7
Windshield Wiper Lever.................................3-13
Exterior Lamps.............................................3-14
Interior Lamps..............................................3-18
Head-Up Display (HUD).................................3-22
Accessory Power Outlets...............................3-25
Ashtrays and Cigarette Lighter........................3-26
Climate Controls............................................3-27
Climate Control System.................................3-27
Automatic Climate Control System...................3-29
Outlet Adjustment.........................................3-34
Climate Controls Personalization.....................3-35
Warning Lights, Gages, and Indicators............3-36
Instrument Panel Cluster................................3-37
Speedometer and Odometer...........................3-39
Tachometer.................................................3-40
Safety Belt Reminder Light.............................3-40
Air Bag Readiness Light................................3-41
Voltmeter Gage............................................3-42Brake System Warning Light..........................3-42
Anti-Lock Brake System Warning Light.............3-44
Traction Control System (TCS) Warning Light......3-45
Low Traction Active Light...............................3-46
Engine Coolant Temperature Gage..................3-47
Tire Pressure Light.......................................3-48
Malfunction Indicator Lamp.............................3-48
Oil Pressure Gage........................................3-52
Check Oil Level Light....................................3-53
Security Light...............................................3-53
Low Washer Fluid Warning Light.....................3-53
Check Gages Warning Light...........................3-54
Door Ajar Light.............................................3-54
Trunk Ajar Light............................................3-55
Service Vehicle Soon Light............................3-55
Fuel Gage...................................................3-56
Systems Monitor............................................3-57
Driver Information Center (DIC).......................3-58
DIC Controls and Displays.............................3-58
DIC Warnings and Messages.........................3-61
Driver Identi�er DIC Display...........................3-63
DIC Vehicle Personalization............................3-64
Secondary Information Center (SIC).................3-70
Electronic Compass......................................3-70
Section 3 Instrument Panel
3-1
Page 142 of 446
Battery Load Management
The battery load management feature is designed to
monitor the vehicle’s electrical load and determine when
the battery is in a heavy discharge condition. During
times of high electrical loading, the engine may idle at
higher revolutions per minute (RPM) than normal to make
sure the battery charges. High electrical loads may occur
when several of the following are on: headlamps, high
beams, fog lamps, rear window defogger, fan on high
speed, heated seats and engine cooling fans.
If your vehicle’s battery remains in a heavy discharge
condition for a long period of time, the fan, rear
defogger, heated seats and heated mirrors will be
disabled and the DIC will display BATTERY SAVER
ACTIVE. This can happen either under long periods of
idling or low speed driving with high electrical loading,
or in the event of a charging system fault.
Monitor the battery voltage when in the BATTERY
SAVER ACTIVE mode.
If the voltmeter remains in the shaded area (below
11 volts) when driving then have the charging
system serviced immediately.
If the voltage increases above 12 volts then the
battery needs to be recharged. Try driving on
the highway with as few electrical accessories on
as possible.
Head-Up Display (HUD)
{CAUTION:
If the HUD image is too bright, or too high in
your �eld of view, it may take you more time to
see things you need to see when it is dark
outside. Be sure to keep the HUD image dim
and placed low in your �eld of view.
If you have the optional Head-Up Display (HUD), you
can see some of the driver information also available on
your instrument panel cluster. The information may
be displayed in English or metric units and appears as a
re�ection on the windshield. The HUD shows the
following:
Speedometer Reading
Turn Signal Indicators
High-beam Indicator Symbol
CHECK GAGES Message (for low oil pressure,
high coolant temperature, low oil level, high/low
battery, brake, ABS and air bag)
Low Fuel Warning Symbol
Radio Frequency and Playback Mode (with the
exception of the XM™ radio)
3-22
Page 172 of 446
Oil Pressure Gage
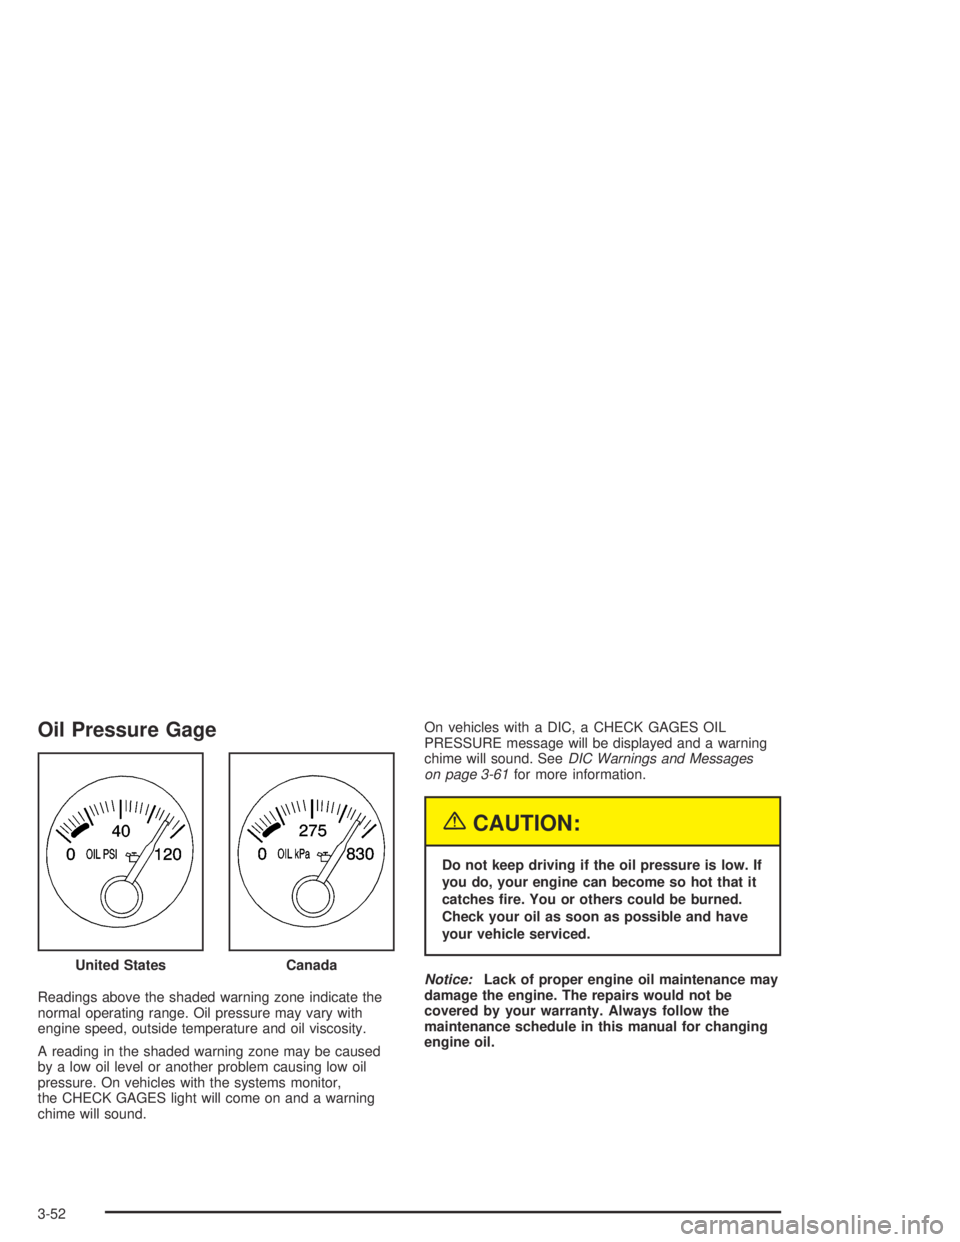
Readings above the shaded warning zone indicate the
normal operating range. Oil pressure may vary with
engine speed, outside temperature and oil viscosity.
A reading in the shaded warning zone may be caused
by a low oil level or another problem causing low oil
pressure. On vehicles with the systems monitor,
the CHECK GAGES light will come on and a warning
chime will sound.On vehicles with a DIC, a CHECK GAGES OIL
PRESSURE message will be displayed and a warning
chime will sound. SeeDIC Warnings and Messages
on page 3-61for more information.
{CAUTION:
Do not keep driving if the oil pressure is low. If
you do, your engine can become so hot that it
catches �re. You or others could be burned.
Check your oil as soon as possible and have
your vehicle serviced.
Notice:Lack of proper engine oil maintenance may
damage the engine. The repairs would not be
covered by your warranty. Always follow the
maintenance schedule in this manual for changing
engine oil. United States
Canada
3-52
Page 173 of 446
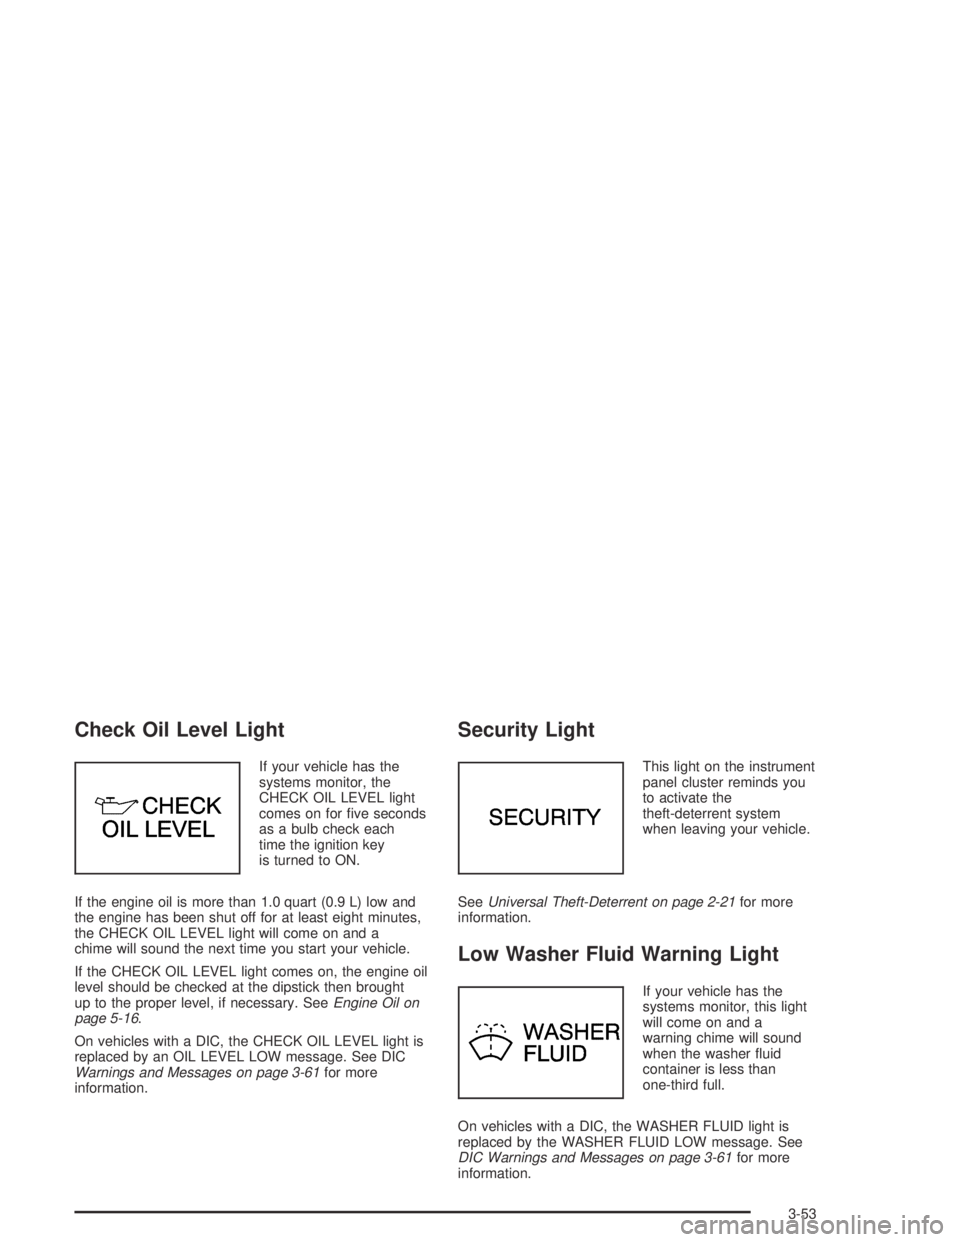
Check Oil Level Light
If your vehicle has the
systems monitor, the
CHECK OIL LEVEL light
comes on for �ve seconds
as a bulb check each
time the ignition key
is turned to ON.
If the engine oil is more than 1.0 quart (0.9 L) low and
the engine has been shut off for at least eight minutes,
the CHECK OIL LEVEL light will come on and a
chime will sound the next time you start your vehicle.
If the CHECK OIL LEVEL light comes on, the engine oil
level should be checked at the dipstick then brought
up to the proper level, if necessary. SeeEngine Oil on
page 5-16.
On vehicles with a DIC, the CHECK OIL LEVEL light is
replaced by an OIL LEVEL LOW message. See DIC
Warnings and Messages on page 3-61for more
information.
Security Light
This light on the instrument
panel cluster reminds you
to activate the
theft-deterrent system
when leaving your vehicle.
SeeUniversal Theft-Deterrent on page 2-21for more
information.
Low Washer Fluid Warning Light
If your vehicle has the
systems monitor, this light
will come on and a
warning chime will sound
when the washer �uid
container is less than
one-third full.
On vehicles with a DIC, the WASHER FLUID light is
replaced by the WASHER FLUID LOW message. See
DIC Warnings and Messages on page 3-61for more
information.
3-53
Page 180 of 446
Vehicle Data
Average Fuel Economy:Press the SELECT button
until the display shows AVG FUEL ECONOMY. Average
fuel economy is viewed as a long term approximation
of your overall driving conditions. To learn the average
fuel economy from a new starting point, press the
RESET button for �ve seconds while the average fuel
economy is displayed on the DIC.
Instantaneous Fuel Economy:Press the SELECT
button until the display shows INST FUEL ECONOMY.
Instantaneous fuel economy varies with your driving
conditions, such as acceleration, braking and the grade
of the road being traveled. The RESET button does
not function in this mode.
Fuel Range:Press the SELECT button until the display
shows FUEL RANGE. The fuel range will calculate
the remaining distance you can drive without refueling.
This calculation is based on the average fuel economy
for the last 25 miles (40.25 km) driven, and the fuel
remaining in the fuel tank. If the fuel range drops below
40 miles (64.4 km), the display will show FUEL
RANGE LOW. The RESET button does not function in
this mode.Fuel Used:Press the SELECT button until the display
shows FUEL USED. The value indicates how much
fuel has been used since the last reset. Do not confuse
fuel used with the amount of fuel in your tank. To
learn how much fuel will be used from a speci�c starting
point, press the RESET button for �ve seconds while
the fuel used is displayed on the DIC.
GM Oil Life System:Press the SELECT button until
OIL LIFE appears in the display. The OIL LIFE NORMAL
display will show an estimate of the oil’s remaining
useful life. When the oil life index is less than 10%, an
ENGINE OIL CHANGE SOON message will be
displayed and the oil life display will show OIL LIFE
CHANGE. When the ENGINE OIL CHANGE SOON
message is displayed, it means that service is required
for your vehicle. SeePart A: Scheduled Maintenance
Services on page 6-4andEngine Oil on page 5-16
for more information.
When you have the oil changed according to the
maintenance schedule, you will have to reset the Oil
Life System. To reset the Oil Life System, see “When to
Change Engine Oil” underEngine Oil on page 5-16.
3-60
Page 182 of 446
EXP
(Export ID) Warning Message
33 STARTING DISABLED — THEFT*
34 SERVICE THEFT SYSTEM
35 CHECK GAGES OIL PRESSURE*
36 OIL LEVEL LOW
37 BRAKE FLUID LOW*
40 ALARM OCCURRED
44 CHECK GAGES TEMPERATURE*
54 SERVICE STABILITY SYSTEM
55 STABILITY SYSTEM ACTIVE
61 CHECK GAS CAP
81 ENGINE OIL CHANGE SOONEXP
(Export ID) Warning Message
83 SERVICE AIR BAG
102 CHECK CHARGE SYSTEM
140 DRIVER DOOR AJAR
141 FRONT PASSENGER DOOR AJAR
142 LEFT REAR DOOR AJAR
143 RIGHT REAR DOOR AJAR
144 CHECK TIRE PRESSURE
147 PARK BRAKE SET*
The EXP codes are used to make translation from
English to other languages easier.
Pressing any of the DIC control buttons will remove
the above messages or warnings from the DIC
display, unless noted by an asterisk (*).
3-62
Page 253 of 446
Once you are moving on the freeway, make certain you
allow a reasonable following distance.
Expect to move slightly slower at night.
When you want to leave the freeway, move to the
proper lane well in advance. If you miss your exit, do
not, under any circumstances, stop and back up. Drive
on to the next exit.
The exit ramp can be curved, sometimes quite sharply.
The exit speed is usually posted. Reduce your speed
according to your speedometer, not to your sense
of motion. After driving for any distance at higher
speeds, you may tend to think you are going slower
than you actually are.
Before Leaving on a Long Trip
Make sure you are ready. Try to be well rested. If you
must start when you are not fresh — such as after
a day’s work — do not plan to make too many miles that
�rst part of the journey. Wear comfortable clothing
and shoes you can easily drive in.Is your vehicle ready for a long trip? If you keep it
serviced and maintained, it is ready to go. If it needs
service, have it done before starting out. Of course, you
will �nd experienced and able service experts in GM
dealerships all across North America. They will be ready
and willing to help if you need it.
Here are some things you can check before a trip:
Windshield Washer Fluid:Is the reservoir full? Are
all windows clean inside and outside?
Wiper Blades:Are they in good shape?
Fuel, Engine Oil, Other Fluids:Have you checked
all levels?
Lamps:Are they all working? Are the lenses clean?
Tires:They are vitally important to a safe,
trouble-free trip. Is the tread good enough for
long-distance driving? Are the tires all in�ated to the
recommended pressure?
Weather Forecasts:What is the weather outlook
along your route? Should you delay your trip a
short time to avoid a major storm system?
Maps:Do you have up-to-date maps?
4-23