Page 112 of 173

02-02-2004
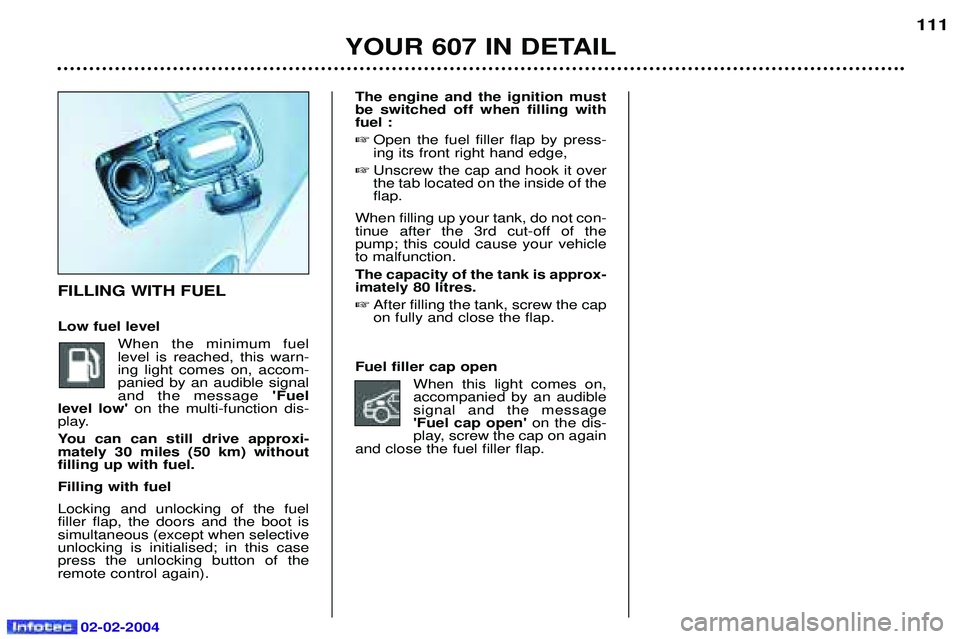
The engine and the ignition must be switched off when filling withfuel :� Open the fuel filler flap by press-ing its front right hand edge,
� Unscrew the cap and hook it overthe tab located on the inside of theflap.
When filling up your tank, do not con-
tinue after the 3rd cut-off of thepump; this could cause your vehicleto malfunction. The capacity of the tank is approx- imately 80 litres. � After filling the tank, screw the capon fully and close the flap.
Fuel filler cap open When this light comes on,accompanied by an audiblesignal and the message'Fuel cap open' on the dis-
play, screw the cap on again
and close the fuel filler flap.
FILLING WITH FUEL Low fuel level
When the minimum fuel level is reached, this warn-ing light comes on, accom-panied by an audible signaland the message 'Fuel
level low' on the multi-function dis-
play.
You can can still drive approxi- mately 30 miles (50 km) withoutfilling up with fuel. Filling with fuelLocking and unlocking of the fuel filler flap, the doors and the boot issimultaneous (except when selectiveunlocking is initialised; in this casepress the unlocking button of theremote control again).
YOUR 607 IN DETAIL 111
Page 128 of 173

02-02-2004
YOUR 607 IN DETAIL123
SUN VISOR WITH
ILLUMINATED COURTESYMIRROR With the ignition on, the mirror is automatically lit up when the flap isopened.
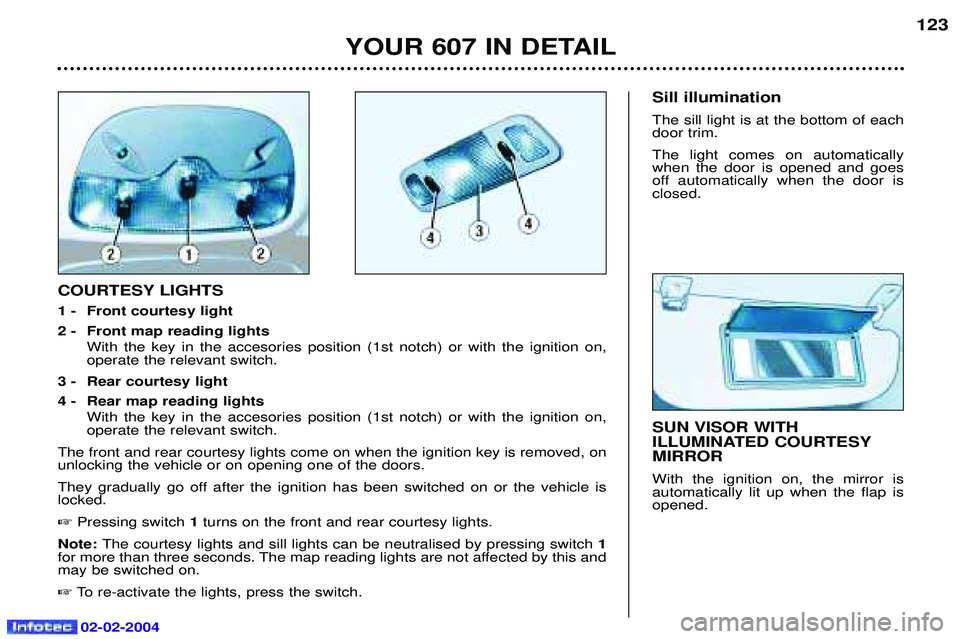
COURTESY LIGHTS
1 - Front courtesy light
2 - Front map reading lights
With the key in the accesories position (1st notch) or with the ignition on, operate the relevant switch.
3 - Rear courtesy light
4 - Rear map reading lights With the key in the accesories position (1st notch) or with the ignition on, operate the relevant switch.
The front and rear courtesy lights come on when the ignition key is removed, onunlocking the vehicle or on opening one of the doors.
They gradually go off after the ignition has been switched on or the vehicle is locked. � Pressing switch 1turns on the front and rear courtesy lights.
Note: The courtesy lights and sill lights can be neutralised by pressing switch 1
for more than three seconds. The map reading lights are not affected by this and may be switched on. � To re-activate the lights, press the switch. Sill illuminationThe sill light is at the bottom of each door trim. The light comes on automatically when the door is opened and goes
off automatically when the door isclosed.
Page 158 of 173
PRACTICAL INFORMATION
150
Correct Incorrect
Pliers A
CHANGING A FUSE The fuse boxes are located under the fascia panel and in the enginecompartment. �
The replacement fuses and pliers A are fixed to the inside of the
fascia panel fuse box cover.
Removing and fitting a fuse Before changing a fuse, you must establish the cause of the fault and
have it put right. The fuse numbersare indicated on the fuse box. � Use pliers A.
Always change a faulty fuse forone of the same rating. Fascia panel fuse box
� Loosen the screw a quarter turnwith a coin and tilt the cover toaccess the fuses.
Fuse no. Rating Functions R- Replacement fuses.
1 30 A
Locking / deadlocking.
2 20 A Radio amplifier.
3 30 A Windscreen wash.
4 30 A Rear window switches on rear doors.
5 15 A Electronic immobiliser, monochrome screen or colour screen control unit, instrument panel, air conditioning control unit, audiosystem / telephone.
6 10 A Rear right brake light.
02-02-2004
Page 161 of 173
PRACTICAL INFORMATION
150
Correct Incorrect
Pliers A
CHANGING A FUSE The fuse boxes are located under the fascia panel and in the enginecompartment. �
The replacement fuses and pliers A are fixed to the inside of the
fascia panel fuse box cover.
Removing and fitting a fuse Before changing a fuse, you must establish the cause of the fault and
have it put right. The fuse numbersare indicated on the fuse box. � Use pliers A.
Always change a faulty fuse forone of the same rating. Fascia panel fuse box
� Loosen the screw a quarter turnwith a coin and tilt the cover toaccess the fuses.
Fuse no. Rating Functions R- Replacement fuses.
1 30 A
Locking / deadlocking.
2 20 A Radio amplifier.
3 30 A Windscreen wash.
4 30 A Rear window switches on rear doors.
5 15 A Electronic immobiliser, monochrome screen or colour screen control unit, instrument panel, air conditioning control unit, audiosystem / telephone.
6 10 A Rear right brake light.
02-02-2004
Page 162 of 173

02-02-2004
PRACTICAL INFORMATION151
Fuse no. Rating Functions 7 10 A Switches, rear ashtray illumination, front courtesy light, rear courtesy light, rear lighter, number plate lighting, headlamp height adjustment.
8 10 A Diagnostic connector, headlamp height adjustment control unit, HF locking receiver,
passenger compartment air temperature sensor, HF tyre under-inflation receiver.
9 20 A Headlamp wash.
10 20 A Glove box lighting, front lighter, front and rear courtesy light, electrochrome interior mirror,electric exterior mirrors.
11 5 A Control unit for automatic lighting of headlamps, air bags control unit, safety relay for automatic lighting of headlamps.
12 30 A Rear window switches on driver's pad, rear windows.
13 30 A Windscreen wiper.
14 15 A Not used.
15 15 A Driver's door pad, passenger's door pad.
16 15 A Rear lighter.
17 5 A Heated exterior mirrors.
18 15 A Rear left brake light, additional brake light.
19 10 A Parking assistance control unit, navigation control unit.
20 15 A Alarm siren, monochrome screen or colour screen control unit, HF receiver, audio system /telephone, monochrome or colour navigation control unit, diesel additive control unit.
21 15 A Diagnostic connector, caravan socket, trailer sidelights relay.
22 15 A Diesel additive control unit, driver's seat memory control unit, driver's door pad, passenger'sdoor pad.
23 30 A Driver's window, passenger's window, sunroof safety auto-reverse, passenger window switch on driver's door pad and passenger's door pad.
24 10 A Rear fog lamp.
25 40 A PARC shunt.
26 40 A Heated rear screen, radio aerial amplifier.
Page:
< prev 1-8 9-16 17-24