2004 NISSAN TITAN ECO mode
[x] Cancel search: ECO modePage 86 of 328
the fuel filler cap is installed and closed tightly,
and that the vehicle has at least 3 gallons of fuel
in the fuel tank.
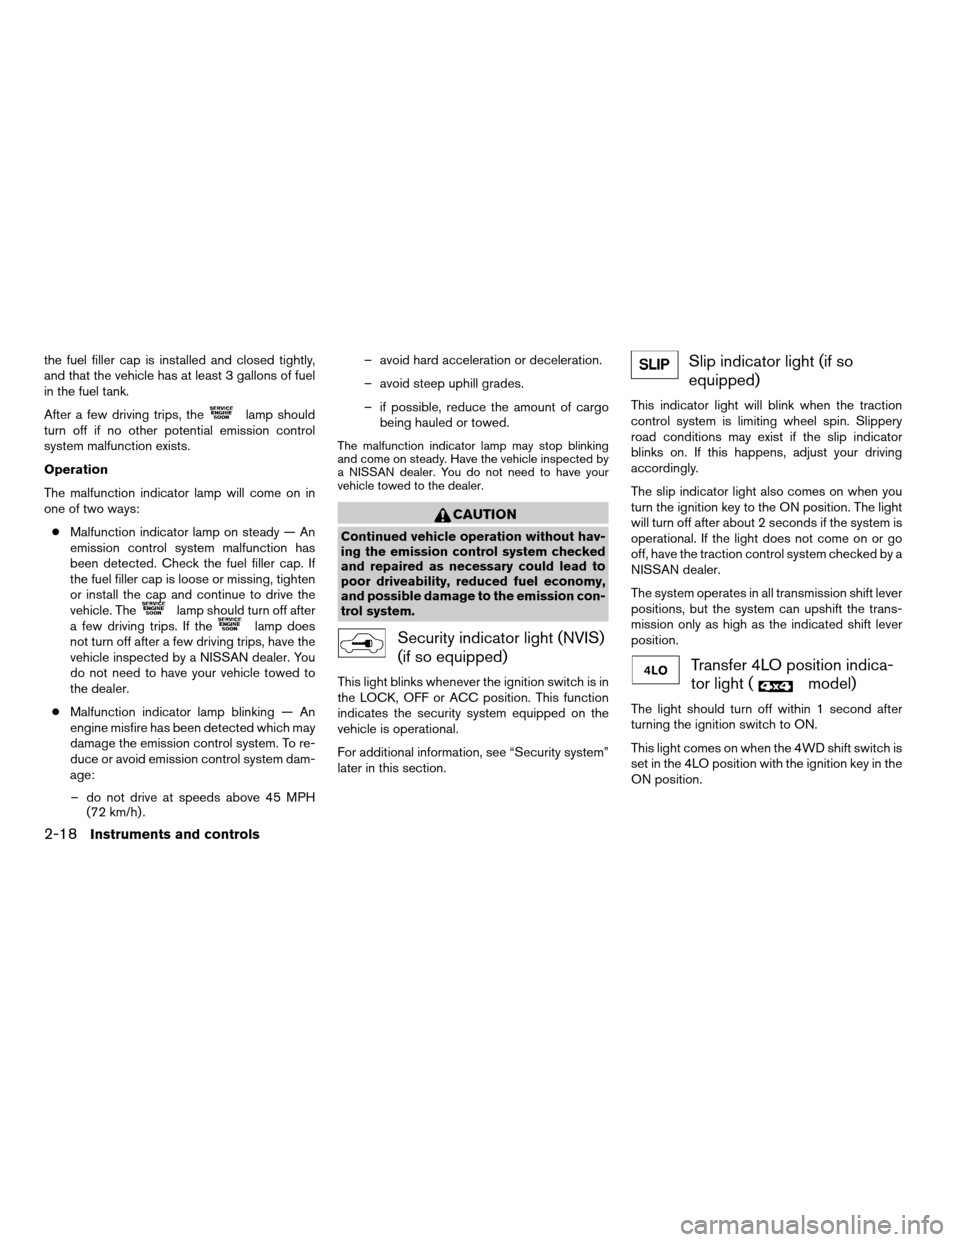
After a few driving trips, the
lamp should
turn off if no other potential emission control
system malfunction exists.
Operation
The malfunction indicator lamp will come on in
one of two ways:
cMalfunction indicator lamp on steady — An
emission control system malfunction has
been detected. Check the fuel filler cap. If
the fuel filler cap is loose or missing, tighten
or install the cap and continue to drive the
vehicle. The
lamp should turn off after
a few driving trips. If thelamp does
not turn off after a few driving trips, have the
vehicle inspected by a NISSAN dealer. You
do not need to have your vehicle towed to
the dealer.
cMalfunction indicator lamp blinking — An
engine misfire has been detected which may
damage the emission control system. To re-
duce or avoid emission control system dam-
age:
– do not drive at speeds above 45 MPH
(72 km/h) .– avoid hard acceleration or deceleration.
– avoid steep uphill grades.
– if possible, reduce the amount of cargo
being hauled or towed.
The malfunction indicator lamp may stop blinking
and come on steady. Have the vehicle inspected by
a NISSAN dealer. You do not need to have your
vehicle towed to the dealer.
CAUTION
Continued vehicle operation without hav-
ing the emission control system checked
and repaired as necessary could lead to
poor driveability, reduced fuel economy,
and possible damage to the emission con-
trol system.
Security indicator light (NVIS)
(if so equipped)
This light blinks whenever the ignition switch is in
the LOCK, OFF or ACC position. This function
indicates the security system equipped on the
vehicle is operational.
For additional information, see “Security system”
later in this section.
Slip indicator light (if so
equipped)
This indicator light will blink when the traction
control system is limiting wheel spin. Slippery
road conditions may exist if the slip indicator
blinks on. If this happens, adjust your driving
accordingly.
The slip indicator light also comes on when you
turn the ignition key to the ON position. The light
will turn off after about 2 seconds if the system is
operational. If the light does not come on or go
off, have the traction control system checked by a
NISSAN dealer.
The system operates in all transmission shift lever
positions, but the system can upshift the trans-
mission only as high as the indicated shift lever
position.
Transfer 4LO position indica-
tor light (
model)
The light should turn off within 1 second after
turning the ignition switch to ON.
This light comes on when the 4WD shift switch is
set in the 4LO position with the ignition key in the
ON position.
2-18Instruments and controls
ZREVIEW COPY:Ð2004 Titan(tzw)
Owners Manual(owners)ÐUSA English(nna)
02/20/04Ðtbrooks
X
Page 87 of 328

If the 4WD shift switch is set in the 4LO position
and the light blinks, stop the vehicle, drive slowly
forward and the light will turn on.
When you shift between 4H and 4LO, stop the
vehicle, move the automatic transmission selec-
tor lever to the N (Neutral) position with the brake
pedal depressed, then push the 4WD shift
switch and move it to 4LO or 4H.
The transfer case may be damaged if you shift the
switch while driving.
You cannot move the transfer 4WD shift switch
between 4H and 4LO unless you have first
stopped the vehicle and moved the automatic
transmission shift selector lever to N (Neutral)
with the brake pedal depressed. Make sure the
transfer 4LO position indicator light turns on
when you shift the 4WD shift switch to 4LO.
The indicator light may blink while shifting
from one drive mode to the other.
Turn signal/hazard indicator
lights
The appropriate light flashes when the turn signal
switch is activated.
Both lights flash when the hazard switch is turned
on.
Vehicle dynamic control off
indicator light (if so equipped)
This indicator light comes on when the vehicle
dynamic control off switch is pushed to OFF. This
indicates the vehicle dynamic control system is
not operating.
Push the vehicle dynamic control off switch again
or restart the engine and the system will operate
normally. See “Vehicle dynamic control (VDC)
system” in the “Starting and driving” section of
this manual.
The vehicle dynamic control light also comes on
when you turn the ignition key to the ON position.
The light will turn off after about 2 seconds if the
system is operational. If the light stays on or
comes on along with the SLIP indicator light
while you are driving, have the vehicle dynamic
control system checked by a NISSAN dealer.
While the vehicle dynamic control system is op-
erating, you might feel slight vibration or hear the
system working when starting the vehicle or ac-
celerating, but this is normal.
AUDIBLE REMINDERS
Brake pad wear warning
The front disc brake pads have audible wear
warnings. When a front brake pad requires re-
placement, it makes a high pitched scraping
sound when the vehicle is in motion, whether or
not the brake pedal is depressed. Have the
brakes checked as soon as possible if the warn-
ing sound is heard.
Key reminder chime
A chime sounds if the driver’s door is opened
while the key is left in the ignition switch. Remove
the key and take it with you when leaving the
vehicle.
Light reminder chime
With the ignition switch in the OFF position, a
chime sounds when the driver’s door is opened if
the headlights or parking lights are on.
Turn the headlight control switch off before leav-
ing the vehicle.
Instruments and controls2-19
ZREVIEW COPY:Ð2004 Titan(tzw)
Owners Manual(owners)ÐUSA English(nna)
02/20/04Ðtbrooks
X
Page 99 of 328
WARNING
The rear sonar system is a convenience
but it is not a substitute for proper back-
ing. Always turn and check that it is safe to
do so before backing up. Always back up
slowly.
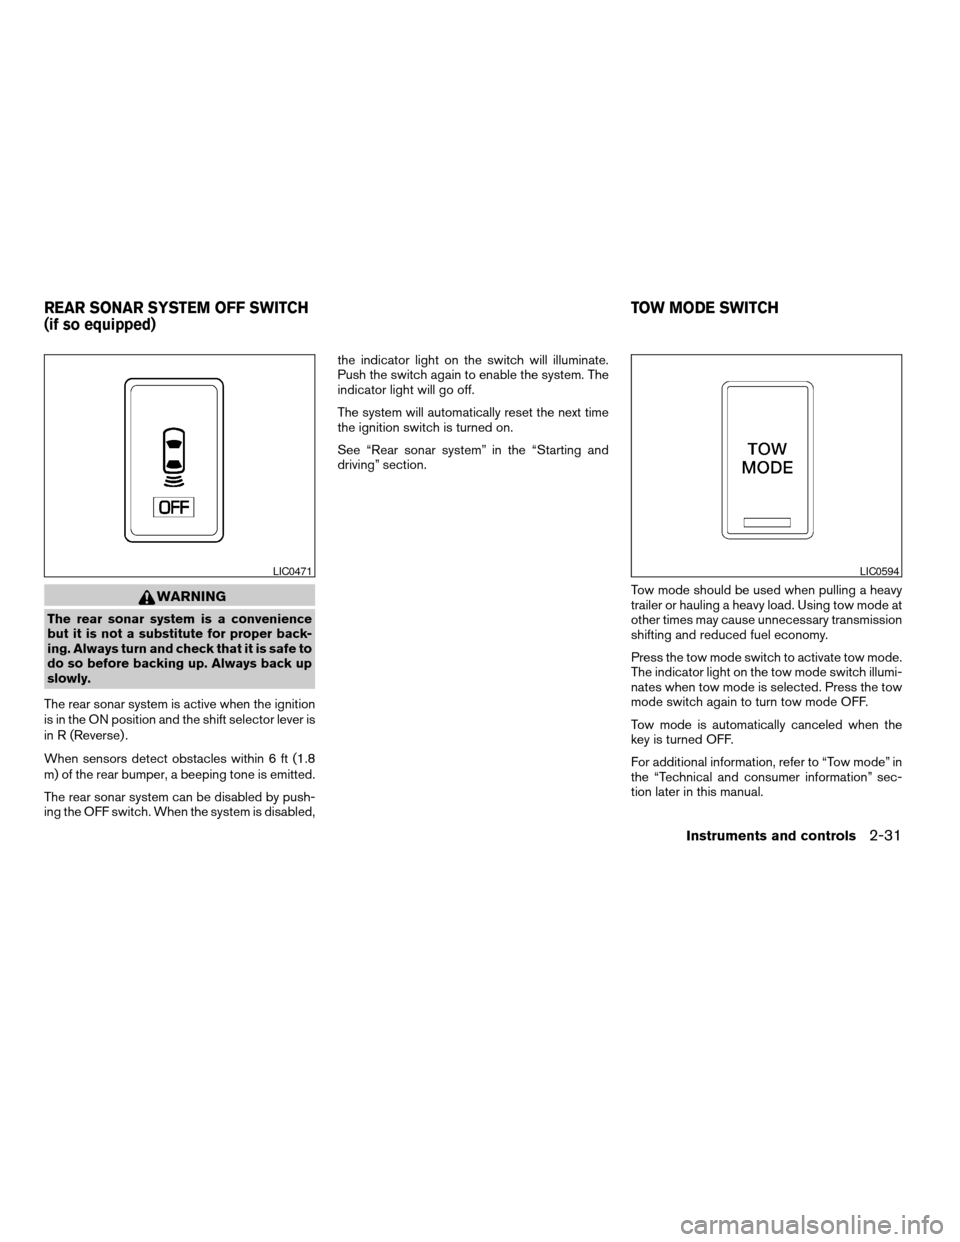
The rear sonar system is active when the ignition
is in the ON position and the shift selector lever is
in R (Reverse) .
When sensors detect obstacles within 6 ft (1.8
m) of the rear bumper, a beeping tone is emitted.
The rear sonar system can be disabled by push-
ing the OFF switch. When the system is disabled,the indicator light on the switch will illuminate.
Push the switch again to enable the system. The
indicator light will go off.
The system will automatically reset the next time
the ignition switch is turned on.
See “Rear sonar system” in the “Starting and
driving” section.
Tow mode should be used when pulling a heavy
trailer or hauling a heavy load. Using tow mode at
other times may cause unnecessary transmission
shifting and reduced fuel economy.
Press the tow mode switch to activate tow mode.
The indicator light on the tow mode switch illumi-
nates when tow mode is selected. Press the tow
mode switch again to turn tow mode OFF.
Tow mode is automatically canceled when the
key is turned OFF.
For additional information, refer to “Tow mode” in
the “Technical and consumer information” sec-
tion later in this manual.
LIC0471LIC0594
REAR SONAR SYSTEM OFF SWITCH
(if so equipped)TOW MODE SWITCH
Instruments and controls2-31
ZREVIEW COPY:Ð2004 Titan(tzw)
Owners Manual(owners)ÐUSA English(nna)
02/20/04Ðtbrooks
X
Page 118 of 328
WARNING
cDo not use the HomeLinkTUniversal
Transceiver with any garage door
opener that lacks safety stop and re-
verse features as required by federal
safety standards. (These standards be-
came effective for opener models
manufactured after April 1, 1982) . A ga-
rage door opener which cannot detect
an object in the path of a closing garage
door and then automatically stop and
reverse, does not meet current federal
safety standards. Using a garage door
opener without these features in-
creases the risk of serious injury or
death.
cDuring the programming procedure
your garage door or security gate will
open and close (if the transmitter is
within range) . Make sure that people or
objects are clear of the garage door,
gate, etc. that you are programming.
cYour vehicle’s engine should be turned
off while programming the HomeLinkT
Universal Transceiver.
PROGRAMMING HOMELINKT
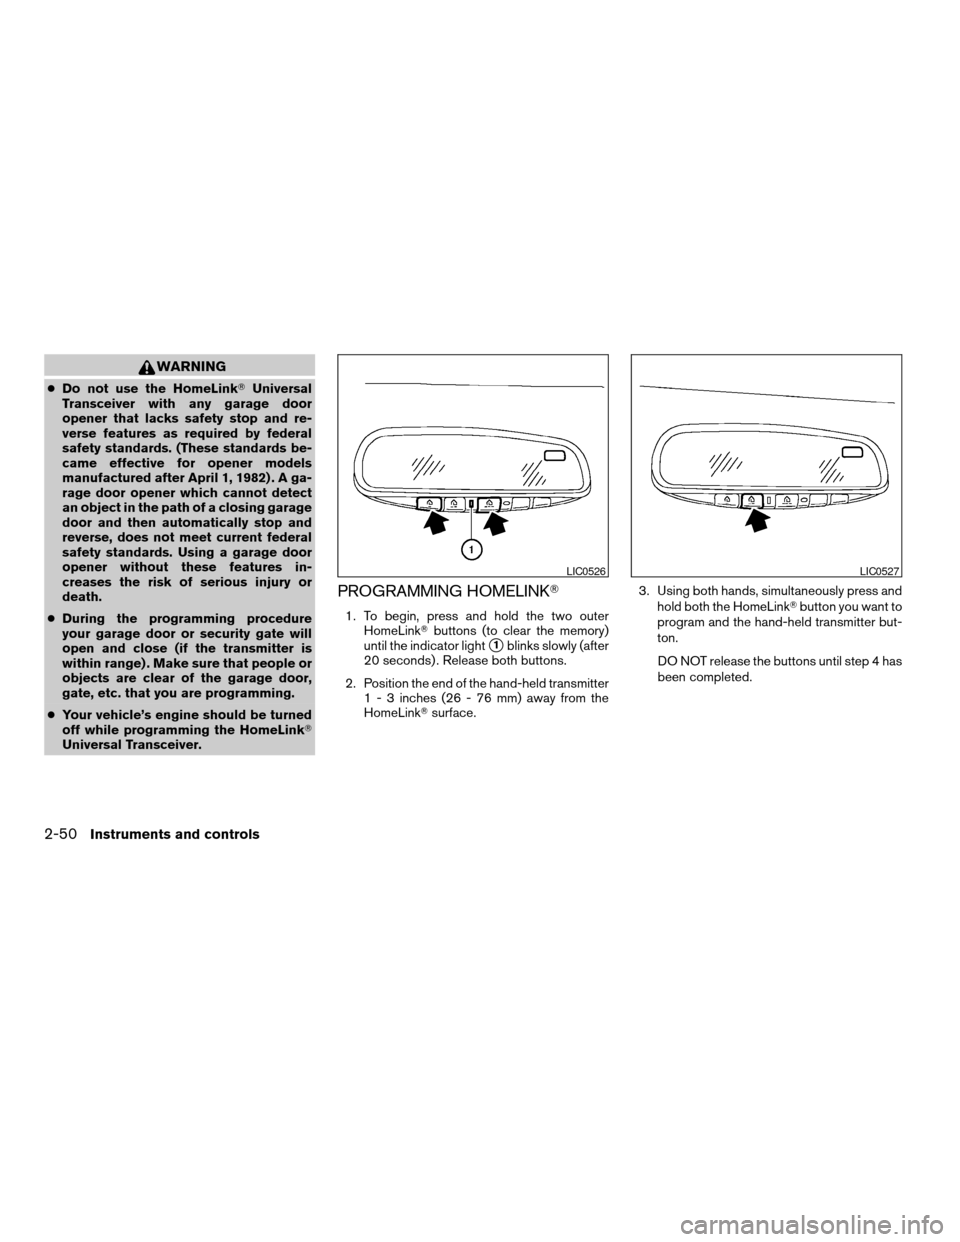
1. To begin, press and hold the two outer
HomeLinkTbuttons (to clear the memory)
until the indicator light
s1blinks slowly (after
20 seconds) . Release both buttons.
2. Position the end of the hand-held transmitter
1 - 3 inches (26 - 76 mm) away from the
HomeLinkTsurface.3. Using both hands, simultaneously press and
hold both the HomeLinkTbutton you want to
program and the hand-held transmitter but-
ton.
DO NOT release the buttons until step 4 has
been completed.
LIC0526LIC0527
2-50Instruments and controls
ZREVIEW COPY:Ð2004 Titan(tzw)
Owners Manual(owners)ÐUSA English(nna)
02/20/04Ðtbrooks
X
Page 119 of 328

4. Hold down both buttons until the indicator
light on the HomeLinkTflashes, changing
from a “slow blink” to a “rapidly flashing
blink”. This could take up to 90 seconds.
When the indicator light flashes rapidly, both
buttons may be released. The rapidly flash-
ing light indicates successful programming.
To activate the garage door or other pro-
grammed device, press and hold the pro-
grammed HomeLinkTbutton — releasing
when the device begins to activate.
5. If the indicator light on the HomeLinkTblinks
rapidly for 2 seconds and then turns solid,
HomeLinkThas picked up a “rolling code”
garage door opener signal. You will need to
proceed with the next steps to train the
HomeLinkTto complete the programming
which may require a ladder and another per-
son for convenience.
6. Press and release the “smart” or “learn” pro-
gram button located on the garage door
opener’s motor to activate the “training
mode”. This button is usually located near
the antenna wire that hangs down from the
motor. If the wire originates from under a
light lens, you will need to remove the lens to
access the program button.NOTE:
Once you have pressed and released the
program button on the garage door open-
er’s motor and the “training light” is lit, you
have 30 seconds in which to perform step 7.
Use the help of a second person for conve-
nience to assist when performing this step.
7. Within 30 seconds of pressing and releas-
ing the garage door opener program button,
quickly and firmly press and release the
HomeLinkTbutton you’ve just programmed.
Press and release the HomeLinkTbutton up
to 3 times to complete the training.
8. Your HomeLinkTbutton should now be pro-
grammed. (To program the remaining
HomeLinkTbuttons for additional door or
gate openers, follow steps 2-8 only.)
NOTE:
Do not repeat step 1 unless you want to
“clear” all previously programmed
HomeLinkTbuttons.
If you have any questions or are having difficulty
programming your HomeLinkTbuttons, please
refer to the HomeLinkTweb site at:
www.homelink.com or call 1-800-NISSAN-1
(1-800-647-7261) .PROGRAMMING HOMELINKTFOR
CANADIAN CUSTOMERS
Prior to 1992, D.O.C. regulations required hand-
held transmitters to stop transmitting after 2 sec-
onds. To program your hand-held transmitter to
HomeLinkT, continue to press and hold the
HomeLinkTbutton (note steps2-4under “Pro-
gramming HomeLinkT”) while you press and re-
press (“cycle”) your hand-held transmitters every
2 seconds until the indicator light flashes rapidly
(indicating successful programming) .
NOTE:
When programming a garage door opener,
etc., it is advised to unplug the device dur-
ing the “cycling” process to prevent pos-
sible damage to the garage door opener
components.
OPERATING THE HOMELINKT
UNIVERSAL TRANSCEIVER
The HomeLinkTUniversal Transceiver (once pro-
grammed) may now be used to activate the ga-
rage door, etc. To operate, simply press the ap-
propriate programmed HomeLinkTUniversal
Transceiver button. The red indicator light will
illuminate while the signal is being transmitted.
Instruments and controls2-51
ZREVIEW COPY:Ð2004 Titan(tzw)
Owners Manual(owners)ÐUSA English(nna)
02/20/04Ðtbrooks
X
Page 148 of 328

HOW TO USE THE “TRIP” BUTTON
When the“TRIP”button is pushed, the following
modes will display on the screen.
Warning message (if there are any)!TRIP 1
(Elapsed Time, Driving Distance, Average
Speed)!TRIP 2!FUEL ECONOMY (Average
Fuel Economy, Distance to Empty)!MAINTE-
NANCE (Engine Oil, Tire Rotation)!OFF.
Trip 1, trip 2 and fuel economy items
To reset the TRIP 1, TRIP 2 and FUEL
ECONOMY, select the“RESET”key using the
joystick and push the“ENTER”button or push
the“TRIP”button for more than approximately
1.5 seconds.
Maintenance items
You can set the engine oil and the tire rotation
interval.
To display the setting of the maintenance interval,
select the“Engine Oil”or“Tire Rotation”key
using the joystick and push the“ENTER”button.
LHA0398LHA0399LHA0402
4-4Display screen, heater, air conditioner and audio systems
ZREVIEW COPY:Ð2004 Titan(tzw)
Owners Manual(owners)ÐUSA English(nna)
02/23/04Ðdebbie
X
Page 150 of 328
In case of low tire pressure, a message is dis-
played on the screen:
FLAT TIRE — low tire air pressure.
WARNING
When a spare tire is mounted or a wheel is
replaced, tire pressure will not be indi-
cated and the low tire pressure warning
system will not function. Contact your
NISSAN dealer as soon as possible for tire
replacement and/or system resetting.
HOW TO USE THE “SETTING”
BUTTON
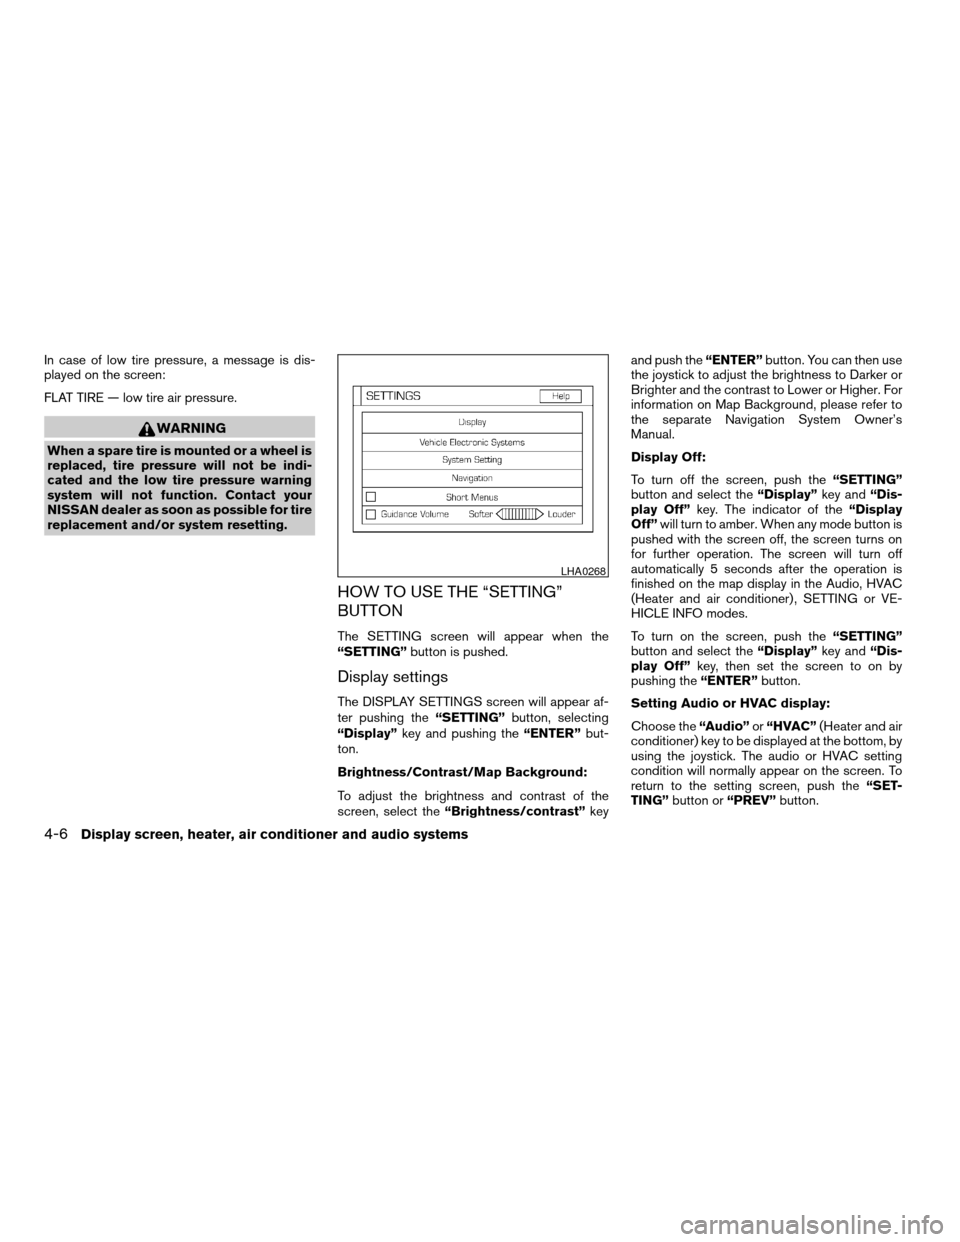
The SETTING screen will appear when the
“SETTING”button is pushed.
Display settings
The DISPLAY SETTINGS screen will appear af-
ter pushing the“SETTING”button, selecting
“Display”key and pushing the“ENTER”but-
ton.
Brightness/Contrast/Map Background:
To adjust the brightness and contrast of the
screen, select the“Brightness/contrast”keyand push the“ENTER”button. You can then use
the joystick to adjust the brightness to Darker or
Brighter and the contrast to Lower or Higher. For
information on Map Background, please refer to
the separate Navigation System Owner’s
Manual.
Display Off:
To turn off the screen, push the“SETTING”
button and select the“Display”key and“Dis-
play Off”key. The indicator of the“Display
Off”will turn to amber. When any mode button is
pushed with the screen off, the screen turns on
for further operation. The screen will turn off
automatically 5 seconds after the operation is
finished on the map display in the Audio, HVAC
(Heater and air conditioner) , SETTING or VE-
HICLE INFO modes.
To turn on the screen, push the“SETTING”
button and select the“Display”key and“Dis-
play Off”key, then set the screen to on by
pushing the“ENTER”button.
Setting Audio or HVAC display:
Choose the“Audio”or“HVAC”(Heater and air
conditioner) key to be displayed at the bottom, by
using the joystick. The audio or HVAC setting
condition will normally appear on the screen. To
return to the setting screen, push the“SET-
TING”button or“PREV”button.
LHA0268
4-6Display screen, heater, air conditioner and audio systems
ZREVIEW COPY:Ð2004 Titan(tzw)
Owners Manual(owners)ÐUSA English(nna)
02/23/04Ðdebbie
X
Page 156 of 328
WARNING
cThe air conditioner cooling function op-
erates only when the engine is running.
cOn hot, sunny days, temperatures in a
closed vehicle could quickly become
high enough to cause severe or possi-
bly fatal injuries to people or animals.
Do not leave children or adults who
would normally require the support of
others in your vehicle. Unattended pets
should not be left alone either.
cDo not use the recirculation mode for
long periods as it may cause the interior
air to become stale and the windows to
fog up.
cPositioning of the heater and/or air
conditioner controls should not be
done while driving so full attention may
be given to vehicle operation.
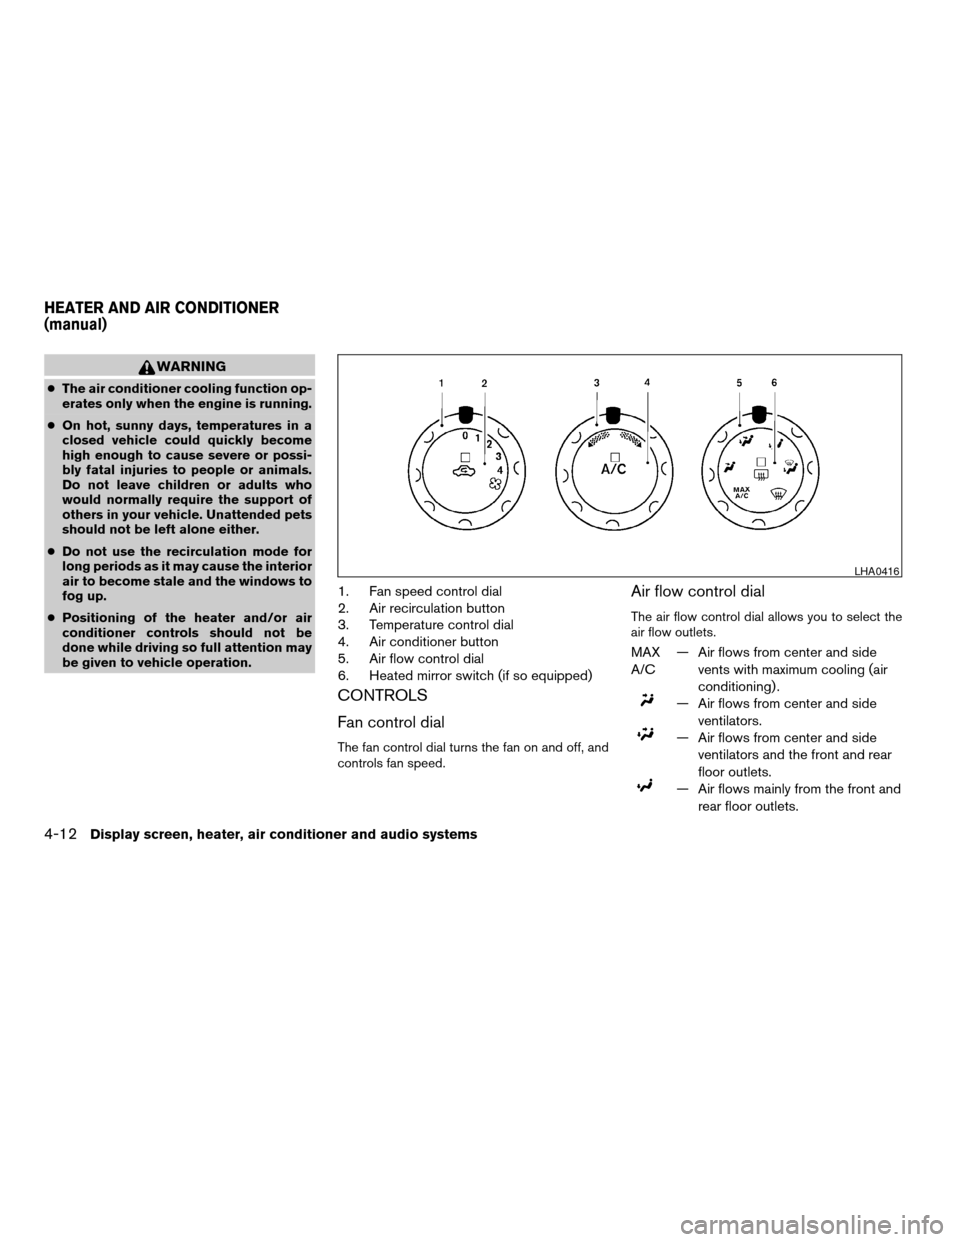
1. Fan speed control dial
2. Air recirculation button
3. Temperature control dial
4. Air conditioner button
5. Air flow control dial
6. Heated mirror switch (if so equipped)
CONTROLS
Fan control dial
The fan control dial turns the fan on and off, and
controls fan speed.
Air flow control dial
The air flow control dial allows you to select the
air flow outlets.
MAX
A/C— Air flows from center and side
vents with maximum cooling (air
conditioning) .
— Air flows from center and side
ventilators.
— Air flows from center and side
ventilators and the front and rear
floor outlets.
— Air flows mainly from the front and
rear floor outlets.
LHA0416
HEATER AND AIR CONDITIONER
(manual)
4-12Display screen, heater, air conditioner and audio systems
ZREVIEW COPY:Ð2004 Titan(tzw)
Owners Manual(owners)ÐUSA English(nna)
02/23/04Ðdebbie
X