2004 NISSAN TITAN ECO mode
[x] Cancel search: ECO modePage 2 of 328
This manual includes information for all options
available on this model. Therefore, you may find
some information that does not apply to your
vehicle.
All information, specifications and illustrations in
this manual are those in effect at the time of
printing. NISSAN reserves the right to change
specifications or design without notice and with-
out obligation.
IMPORTANT INFORMATION ABOUT
THIS MANUAL
You will see various symbols in this manual. They
are used in the following ways:
WARNING
This is used to indicate the presence of a
hazard that could cause death or serious
personal injury. To avoid or reduce the
risk, the procedures must be followed
precisely.
CAUTION
This is used to indicate the presence of a
hazard that could cause minor or moder-
ate personal injury or damage to your ve-
hicle. To avoid or reduce the risk, the pro-
cedures must be followed carefully.If you see this symbol, it means“Do not do this”
or“Do not let this happen.”
If you see a symbol similar to these in an illustra-
tion, it means the arrow points to the front of the
vehicle.
Arrows in an illustration that are similar to these
indicate movement or action.
Arrows in an illustration that are similar to these
call attention to an item in the illustration.
CALIFORNIA PROPOSITION 65
WARNING
WARNING
Engine exhaust, some of its constituents,
and certain vehicle components contain
or emit chemicals known to the State of
California to cause cancer and birth de-
fects or other reproductive harm. In addi-
tion, certain fluids contained in vehicles
and certain products of component wear
contain or emit chemicals known to the
State of California to cause cancer and
birth defects or other reproductive harm.
© 2004 NISSAN NORTH AMERICA, INC.
GARDENA, CALIFORNIA
All rights reserved. No part of this Owner’s
Manual may be reproduced or stored in a retrieval
system, or transmitted in any form, or by any
means, electronic, mechanical, photocopying,
recording or otherwise, without the prior written
permission of Nissan North America, Inc., Gar-
dena, California.
APD1005
WHEN READING THE MANUAL
ZREVIEW COPY:Ð2004 Titan(tzw)
Owners Manual(owners)ÐUSA English(nna)
02/20/04Ðtbrooks
X
Page 10 of 328

1. Rear sliding window (if so equipped)
(P. 2-45)
2. Vehicle loading (P. 9-12)
3. Tailgate/Truckbox (P. 3-19)
4. Trailer hitch/Towing (if so equipped)
(P. 9-22)
5. Replacing bulbs (P. 8-27)
6. Bedside storage compartment (P. 2-42)
7. Fuel filler cap, fuel recommendation
(P. 3-11, P. 9-3)
8. Fuel filler door (P. 3-11)
9. Child safety rear door lock
(Crew Cab models only) (P. 3-6)
See the page number indicated in paren-
theses for operating details.
LII0027
EXTERIOR REAR
0-4Illustrated table of contents
ZREVIEW COPY:Ð2004 Titan(tzw)
Owners Manual(owners)ÐUSA English(nna)
02/20/04Ðtbrooks
X
Page 37 of 328

The right front passenger seat belt sensors are
designed to detect if the seat belt is buckled and
the amount of tension on the seat belt, such as
when it is in the automatic locking mode (child
restraint mode) . Based on the weight on the seat
detected by the weight sensor and the belt ten-
sion detected on the seat belt, the advanced air
bag system determines whether the front pas-
senger air bag should be automatically turned
OFF as required by the regulations.
Right front passenger seat adult occupants who
are properly seated and using the seat belt as
outlined in this manual should not cause the
passenger air bag to be automatically turned
OFF. For small adults it may be turned OFF. Also,
if the occupant takes his/her weight off the seat
cushion (for example, by not sitting upright, by
sitting on an edge of the seat, or by otherwise
being out of position) , this could cause the sen-
sor to turn the air bag OFF. In addition, if the
occupant improperly uses the right front seat belt
in the automatic locking mode (child restraint
mode) , this could cause the air bag to be turned
OFF. Always be sure to be seated and wearing
the seat belt properly for the most effective pro-
tection by the seat belt and supplemental air bag.
NISSAN recommends that pre-teens and chil-
dren be properly restrained in a rear seat.
NISSAN also recommends that appropriate child
restraints and booster seats be properly installedin a rear seat. If this is not possible, the weight
sensor and seat belt sensors are designed to
operate as described above to turn the front
passenger air bag OFF for specified child re-
straints as required by the regulations. Failing to
properly secure child restraints and to use the
automatic locking mode (child restraint mode)
may allow the restraint to tip or move in an acci-
dent or sudden stop. This can also result in the
passenger air bag inflating in a crash instead of
being OFF. See “Child restraints” later in this
section for proper use and installation.
If the right front passenger seat is not occupied
and the seat belt is not buckled, the passenger air
bag is designed not to inflate in a crash. However,
heavy objects placed on the seat could result in
air bag inflation, because of the object’s weight
detected by the weight sensor. Other conditions
could also result in air bag inflation, such as if a
child is standing on the seat, or if two children are
on the seat, contrary to the instructions in this
manual. Always be sure that you and all vehicle
occupants are seated and restrained properly.
Using the passenger air bag status light, you can
monitor when the front passenger air bag is au-
tomatically turned OFF. The light will illuminate
(indicating the air bag is OFF and will not inflate)
when the right front passenger seat is not occu-
pied.If an adult occupant is in the right front seat and
the passenger air bag status light is illuminated
(indicating that the air bag is OFF) , it could be
that the person is a small adult, or is not sitting on
the seat or using the right front seat belt properly.
If a child restraint must be used in the right front
seat, but the status light is not lit (indicating that
the air bag might inflate in a crash) , it could be
that the child restraint or seat belt is not being
used properly. If such situations happen, properly
position and restrain the occupant or child re-
straint. Otherwise reposition the occupant or
child restraint in a rear seat.
If a malfunction occurs in the front passenger air
bag system, the passenger air bag status
light
or, located under the climate
controls, will illuminate and the supplemental air
bag warning light
, located in the meter and
gauges area in the center of the instrument panel,
will blink. Have the system checked by a NISSAN
dealer.
Safety—Seats, seat belts and supplemental air bags1-21
ZREVIEW COPY:Ð2004 Titan(tzw)
Owners Manual(owners)ÐUSA English(nna)
02/20/04Ðtbrooks
X
Page 54 of 328
cFollow all of the child restraint manu-
facturer’s instructions for installation
and use. When purchasing a child re-
straint, be sure to select one which will
fit your child and vehicle. It may not be
possible to properly install some types
of child restraints in your vehicle.
cIf the child restraint is not anchored
properly, the risk of a child being in-
jured in a collision or a sudden stop
greatly increases.
cAdjustable seatbacks should be posi-
tioned to fit the child restraint, but as
upright as possible.
cAfter attaching the child restraint, test it
before you place the child in it. Tilt it
from side to side. Try to tug it forward
and check to see if the belt holds the
restraint in place. The child restraint
should not move more than 1 inch. If the
restraint is not secure, tighten the belt
as necessary, or put the restraint in an-
other seat and test it again.cFor a front-facing child restraint, check
to make sure the shoulder belt does not
go in front of the child’s face or neck. If
it does, put the shoulder belt behind the
child restraint. If you must install a front
facing child restraint in the front seat,
see “Installation on front passenger
seat” later in this section.
cWhen your child restraint is not in use,
keep it secured with a seat belt to pre-
vent it from being thrown around in
case of a sudden stop or accident.
CAUTION
Remember that a child restraint left in a
closed vehicle can become very hot.
Check the seating surface and buckles
before placing your child in the child
restraint.
INSTALLATION ON REAR BENCH
SEAT
WARNING
cThe three-point seat belt in your vehicle
is equipped with an automatic locking
mode retractor which must be used
when installing a child restraint.cFailure to use the retractor’s locking
mode will result in the child restraint
not being properly secured. The re-
straint could tip over or otherwise be
unsecured and cause injury to the child
in a sudden stop or collision.
1-38Safety—Seats, seat belts and supplemental air bags
ZREVIEW COPY:Ð2004 Titan(tzw)
Owners Manual(owners)ÐUSA English(nna)
02/20/04Ðtbrooks
X
Page 63 of 328
cNISSAN recommends that child re-
straints be installed in the rear seat.
However, if you must install a forward-
facing child restraint in the right front
passenger seat, move the passenger
seat to the rearmost position. Also, be
sure the front passenger air bag status
light is illuminated to indicate the pas-
senger air bag is OFF. See “Front pas-
senger air bag and status light” earlier
in this section for details.
cA child restraint with a top tether strap
should not be used in the front passen-
ger seat.cThe three-point seat belt in your vehicle
is equipped with an automatic locking
mode retractor which must be used
when installing a child restraint.
cFailure to use the retractor’s locking
mode will result in the child restraint
not being properly secured. The re-
straint could tip over or otherwise be
unsecured and cause injury to the child
in a sudden stop or collision. Also, it can
change the operation of the front pas-
senger air bag. See “Front passenger
air bag and status light” earlier in this
section.
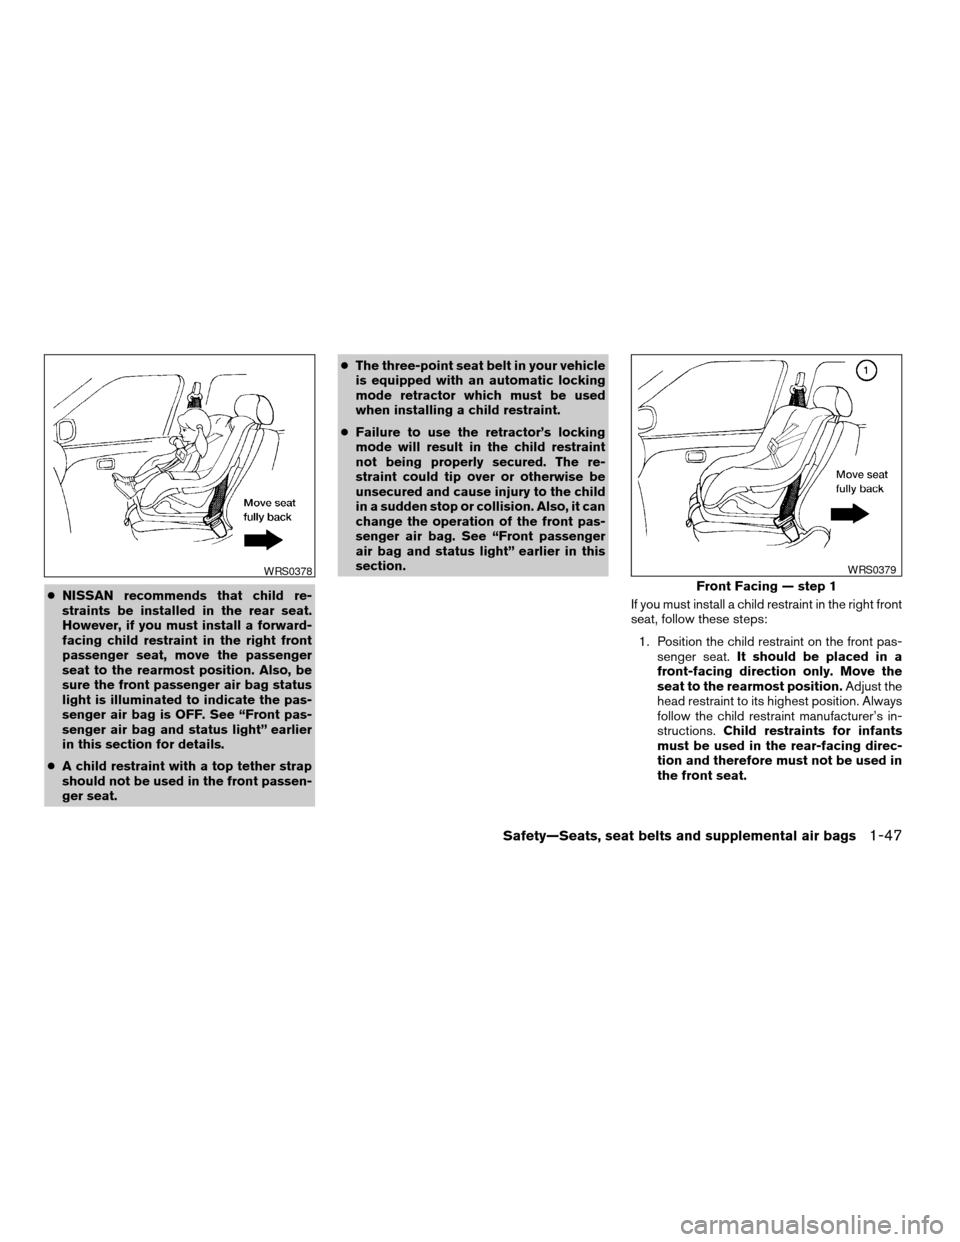
If you must install a child restraint in the right front
seat, follow these steps:
1. Position the child restraint on the front pas-
senger seat.It should be placed in a
front-facing direction only. Move the
seat to the rearmost position.Adjust the
head restraint to its highest position. Always
follow the child restraint manufacturer’s in-
structions.Child restraints for infants
must be used in the rear-facing direc-
tion and therefore must not be used in
the front seat.
WRS0378
Front Facing — step 1
WRS0379
Safety—Seats, seat belts and supplemental air bags1-47
ZREVIEW COPY:Ð2004 Titan(tzw)
Owners Manual(owners)ÐUSA English(nna)
02/20/04Ðtbrooks
X
Page 79 of 328
3. The display will return to the normal com-
pass mode within 5 seconds of no button
activity.
4. If the vehicle changes zone, repeat steps 1
through 3. See map.
cIf the compass deviates from the correct
indication soon after repeated adjustment,
have the compass checked at an authorized
dealer.
cThe compass may not indicate the correct
compass point in tunnels or while driving up
or down a steep hill. (The compass returns
to the correct compass point when the ve-
hicle moves to an area where the geomag-
netism is stabilized.)
CAUTION
cDo not install a ski rack, antenna, etc.,
which are attached to the vehicle by
means of a magnet. They affect the op-
eration of the compass.
cWhen cleaning the mirror, use a paper
towel or similar material dampened
with glass cleaner. Do not spray glass
cleaner directly on the mirror as it may
cause the liquid cleaner to enter the
mirror housing.
Instruments and controls2-11
ZREVIEW COPY:Ð2004 Titan(tzw)
Owners Manual(owners)ÐUSA English(nna)
02/20/04Ðtbrooks
X
Page 81 of 328
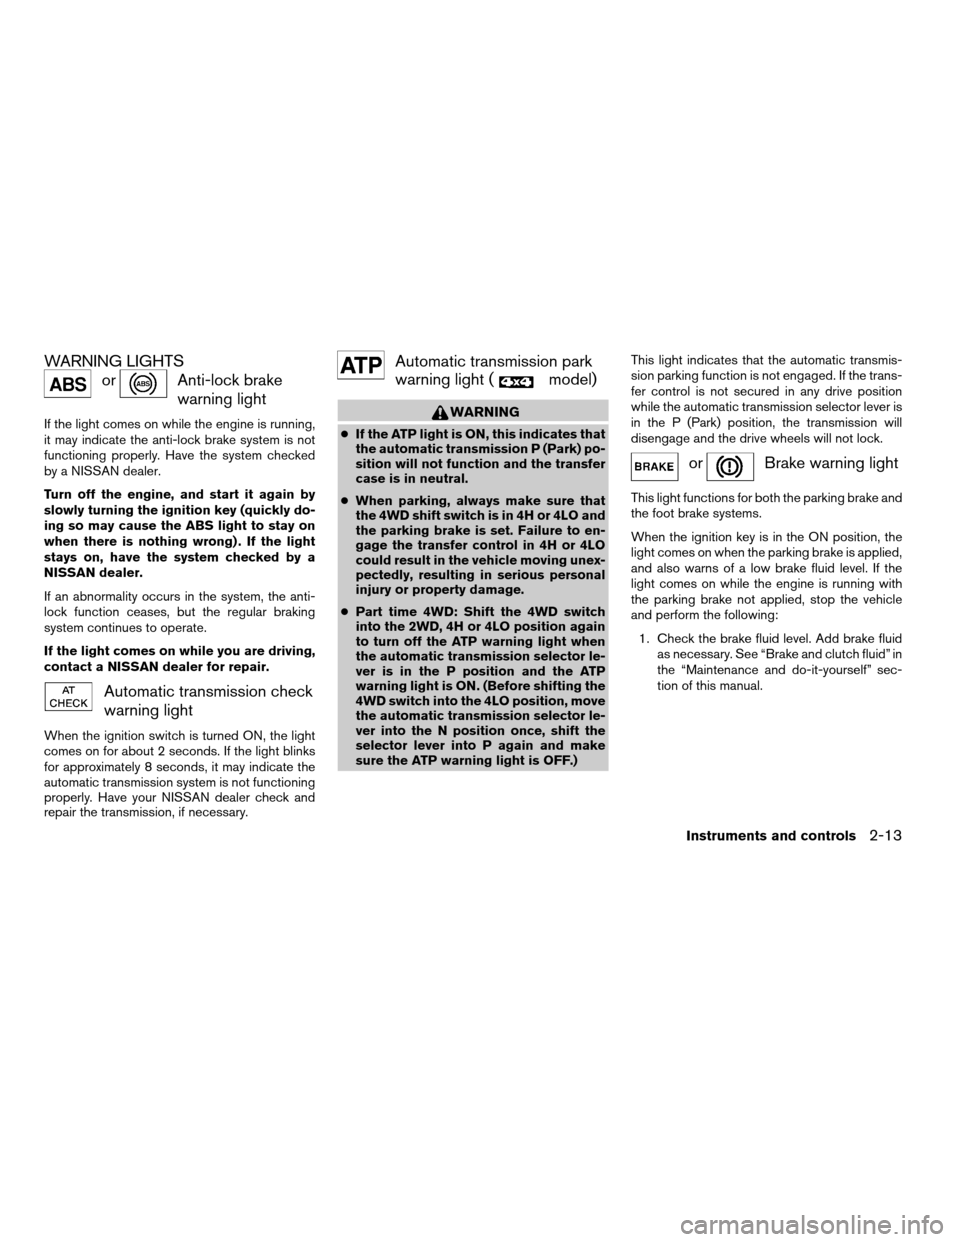
WARNING LIGHTS
orAnti-lock brake
warning light
If the light comes on while the engine is running,
it may indicate the anti-lock brake system is not
functioning properly. Have the system checked
by a NISSAN dealer.
Turn off the engine, and start it again by
slowly turning the ignition key (quickly do-
ing so may cause the ABS light to stay on
when there is nothing wrong) . If the light
stays on, have the system checked by a
NISSAN dealer.
If an abnormality occurs in the system, the anti-
lock function ceases, but the regular braking
system continues to operate.
If the light comes on while you are driving,
contact a NISSAN dealer for repair.
Automatic transmission check
warning light
When the ignition switch is turned ON, the light
comes on for about 2 seconds. If the light blinks
for approximately 8 seconds, it may indicate the
automatic transmission system is not functioning
properly. Have your NISSAN dealer check and
repair the transmission, if necessary.
Automatic transmission park
warning light (
model)
WARNING
cIf the ATP light is ON, this indicates that
the automatic transmission P (Park) po-
sition will not function and the transfer
case is in neutral.
cWhen parking, always make sure that
the 4WD shift switch is in 4H or 4LO and
the parking brake is set. Failure to en-
gage the transfer control in 4H or 4LO
could result in the vehicle moving unex-
pectedly, resulting in serious personal
injury or property damage.
cPart time 4WD: Shift the 4WD switch
into the 2WD, 4H or 4LO position again
to turn off the ATP warning light when
the automatic transmission selector le-
ver is in the P position and the ATP
warning light is ON. (Before shifting the
4WD switch into the 4LO position, move
the automatic transmission selector le-
ver into the N position once, shift the
selector lever into P again and make
sure the ATP warning light is OFF.)This light indicates that the automatic transmis-
sion parking function is not engaged. If the trans-
fer control is not secured in any drive position
while the automatic transmission selector lever is
in the P (Park) position, the transmission will
disengage and the drive wheels will not lock.
orBrake warning light
This light functions for both the parking brake and
the foot brake systems.
When the ignition key is in the ON position, the
light comes on when the parking brake is applied,
and also warns of a low brake fluid level. If the
light comes on while the engine is running with
the parking brake not applied, stop the vehicle
and perform the following:
1. Check the brake fluid level. Add brake fluid
as necessary. See “Brake and clutch fluid” in
the “Maintenance and do-it-yourself” sec-
tion of this manual.
Instruments and controls2-13
ZREVIEW COPY:Ð2004 Titan(tzw)
Owners Manual(owners)ÐUSA English(nna)
02/23/04Ðdebbie
X
Page 85 of 328

orActive brake lim-
ited slip (if so
equipped)
This indicator light comes on if the active brake
limited slip is activated. If activated, the system
will apply brake to the slipping rear wheel, giving
the non-slipping rear wheel more traction.
Cruise main switch indicator
light
The light comes on when the cruise control main
switch is pushed. The light goes out when the
main switch is pushed again. When the cruise
main switch indicator light comes on, the cruise
control system is operational.
Cruise set switch indicator
light
The light comes on while the vehicle speed is
controlled by the cruise control system. If the light
blinks while the engine is running, it may indicate
the cruise control system is not functioning prop-
erly. Have the system checked by a NISSAN
dealer.
Electronic locking rear differ-
ential system on indicator light
(if so equipped)
This light comes on when the electronic locking
rear differential system clutch is fully engaged.
The indicator light flashes when the system is first
turned on. When the system fully engages, the
light remains on. If the switch is on and the
indicator light continues to flash, the system is
not engaged.
For additional information, see “Electronic lock-
ing rear differential system switch” later in this
section and “Electronic locking rear differential
system” in the “Starting and driving” section of
this manual.
4WD shift indicator light
(
model)
The light should turn off within 1 second after
turning the ignition switch to ON.
While the engine is running, the 4WD shift indi-
cator light will illuminate the position selected by
the 4WD shift switch.
The 4WD shift indicator light may blink
while shifting from one drive mode to the
other.
orFront passenger
air bag status light
The front passenger air bag status light (or) will be lit and the passenger front air
bag will be OFF depending on how the right front
passenger seat is being used.
For front passenger air bag status light operation,
see “Front passenger air bag and status light” in
the “Safety — Seats, seat belts and supplemental
air bags” section of this manual.
High beam indicator light
(Blue)
This blue light comes on when the headlight high
beams are on and goes out when the low beams
are selected.
The high beam indicator light also comes on
when the passing signal is activated.
Malfunction indicator lamp
(MIL)
If this indicator lamp comes on steady or blinks
while the engine is running, it may indicate a
potential emission control malfunction.
The malfunction indicator lamp may also come on
steady if the fuel filler cap is loose or missing, or if
the vehicle runs out of fuel. Check to make sure
Instruments and controls2-17
ZREVIEW COPY:Ð2004 Titan(tzw)
Owners Manual(owners)ÐUSA English(nna)
02/20/04Ðtbrooks
X