Page 16 of 320
Indicator
lightName Page
Malfunction
indicator lamp
(MIL)2-10
Overdrive off
indicator light2-10
Security indica-
tor light (NVIS)2-8
Slip indicator
light2-10
Traction control
system off indi-
cator light (if
so equipped)2-10
Turn
signal/hazard
indicator lights2-11
Indicator
lightName Page
Vehicle dy-
namic control
off indicator
light (if so
equipped)2-11
0-10
Illustrated table of contents
ZREVIEW COPY:Ð2004 Quest(van)
Owners Manual(owners)ÐUSA English(nna)
10/08/03Ðtbrooks
X
Page 18 of 320
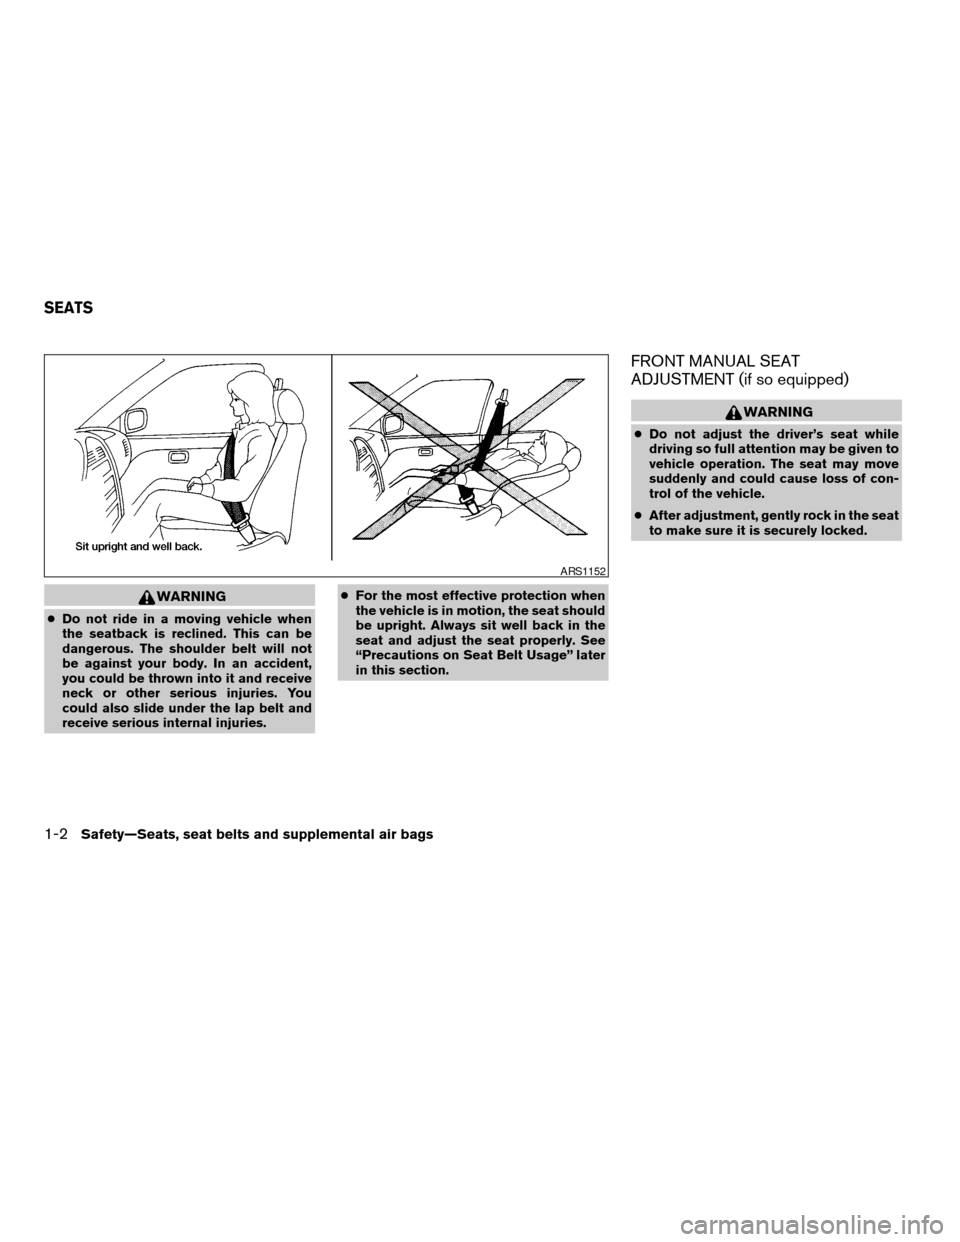
WARNING
cDo not ride in a moving vehicle when
the seatback is reclined. This can be
dangerous. The shoulder belt will not
be against your body. In an accident,
you could be thrown into it and receive
neck or other serious injuries. You
could also slide under the lap belt and
receive serious internal injuries.cFor the most effective protection when
the vehicle is in motion, the seat should
be upright. Always sit well back in the
seat and adjust the seat properly. See
“Precautions on Seat Belt Usage” later
in this section.
FRONT MANUAL SEAT
ADJUSTMENT (if so equipped)
WARNING
cDo not adjust the driver’s seat while
driving so full attention may be given to
vehicle operation. The seat may move
suddenly and could cause loss of con-
trol of the vehicle.
cAfter adjustment, gently rock in the seat
to make sure it is securely locked.
ARS1152
SEATS
1-2Safety—Seats, seat belts and supplemental air bags
ZREVIEW COPY:Ð2004 Quest(van)
Owners Manual(owners)ÐUSA English(nna)
10/08/03Ðtbrooks
X
Page 19 of 320
Forward and backward
Pull the lever up and hold it while you slide the
seat forward or backward to the desired position.
Release the lever to lock the seat in position.
Reclining
To recline the seatback, pull the lever up and lean
back. To bring the seatback forward, pull the lever
up and lean your body forward. Release the lever
to lock the seatback in position.
The reclining feature allows adjustment of the
seatback for occupants of different sizes to help
obtain proper seat belt fit (see “Precautions on
seat belt usage” later in this section) . Also, the
seatback can be reclined to allow occupants to
rest when the vehicle is stopped.
WARNING
After adjustment, gently rock in the seat to
make sure it is securely locked.
WRS0274WRS0275
Safety—Seats, seat belts and supplemental air bags1-3
ZREVIEW COPY:Ð2004 Quest(van)
Owners Manual(owners)ÐUSA English(nna)
10/08/03Ðtbrooks
X
Page 23 of 320
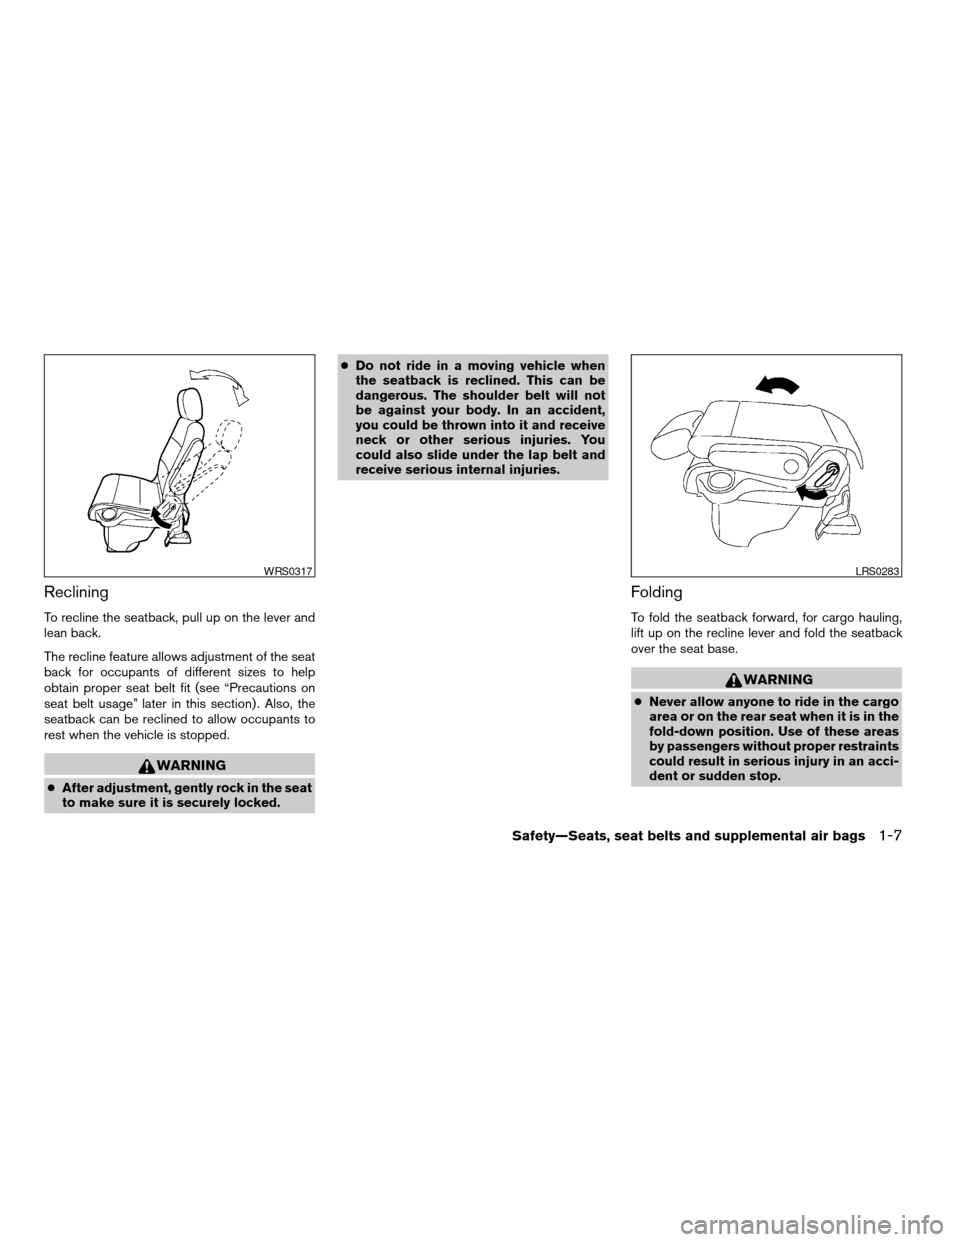
Reclining
To recline the seatback, pull up on the lever and
lean back.
The recline feature allows adjustment of the seat
back for occupants of different sizes to help
obtain proper seat belt fit (see “Precautions on
seat belt usage” later in this section) . Also, the
seatback can be reclined to allow occupants to
rest when the vehicle is stopped.
WARNING
cAfter adjustment, gently rock in the seat
to make sure it is securely locked.cDo not ride in a moving vehicle when
the seatback is reclined. This can be
dangerous. The shoulder belt will not
be against your body. In an accident,
you could be thrown into it and receive
neck or other serious injuries. You
could also slide under the lap belt and
receive serious internal injuries.
Folding
To fold the seatback forward, for cargo hauling,
lift up on the recline lever and fold the seatback
over the seat base.
WARNING
cNever allow anyone to ride in the cargo
area or on the rear seat when it is in the
fold-down position. Use of these areas
by passengers without proper restraints
could result in serious injury in an acci-
dent or sudden stop.
WRS0317LRS0283
Safety—Seats, seat belts and supplemental air bags1-7
ZREVIEW COPY:Ð2004 Quest(van)
Owners Manual(owners)ÐUSA English(nna)
10/08/03Ðtbrooks
X
Page 24 of 320
cIt is extremely dangerous to ride in a
cargo area inside a vehicle. In a colli-
sion, people riding in these areas are
more likely to be seriously injured or
killed.
cDo not allow people to ride in any area
of your vehicle that is not equipped with
seats and seat belts. Be sure everyone
in your vehicle is in a seat and using a
seat belt properly.
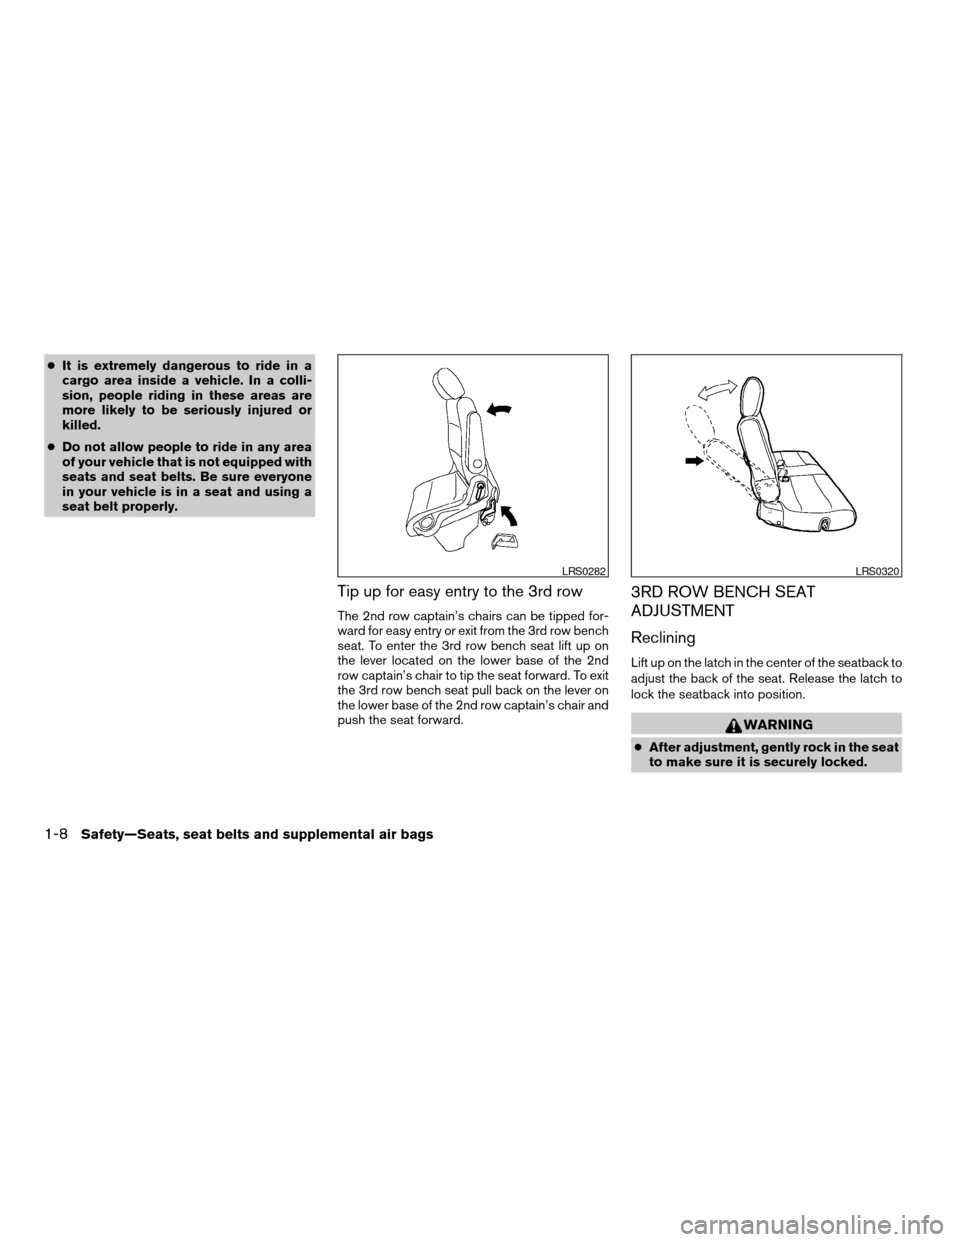
Tip up for easy entry to the 3rd row
The 2nd row captain’s chairs can be tipped for-
ward for easy entry or exit from the 3rd row bench
seat. To enter the 3rd row bench seat lift up on
the lever located on the lower base of the 2nd
row captain’s chair to tip the seat forward. To exit
the 3rd row bench seat pull back on the lever on
the lower base of the 2nd row captain’s chair and
push the seat forward.
3RD ROW BENCH SEAT
ADJUSTMENT
Reclining
Lift up on the latch in the center of the seatback to
adjust the back of the seat. Release the latch to
lock the seatback into position.
WARNING
cAfter adjustment, gently rock in the seat
to make sure it is securely locked.
LRS0282LRS0320
1-8Safety—Seats, seat belts and supplemental air bags
ZREVIEW COPY:Ð2004 Quest(van)
Owners Manual(owners)ÐUSA English(nna)
10/08/03Ðtbrooks
X
Page 27 of 320
ARMRESTS
To use the armrests on any seat, pull them down
to the resting position.
FLEXIBLE SEATING
Folding the 2nd row captain’s chair
s1To fold the 2nd row captain’s chairs to the
floor for maximum cargo hauling, remove the
head restraints. Remove the head restraints
by lifting up, then push and hold the release
knob and place them in the storage bag.
Make sure to secure the storage bag, see
“Head restraint storage” in the “Instrument
and controls” section of this Owner’s
Manual.
s2Lift up on the recline lever to fold the seat-
back forward on the seat base.
s3Push down on the small knob on the back of
the seat to release the base of the seat.
WRS0287WRS0288WRS0289
Safety—Seats, seat belts and supplemental air bags1-11
ZREVIEW COPY:Ð2004 Quest(van)
Owners Manual(owners)ÐUSA English(nna)
10/08/03Ðtbrooks
X
Page 28 of 320
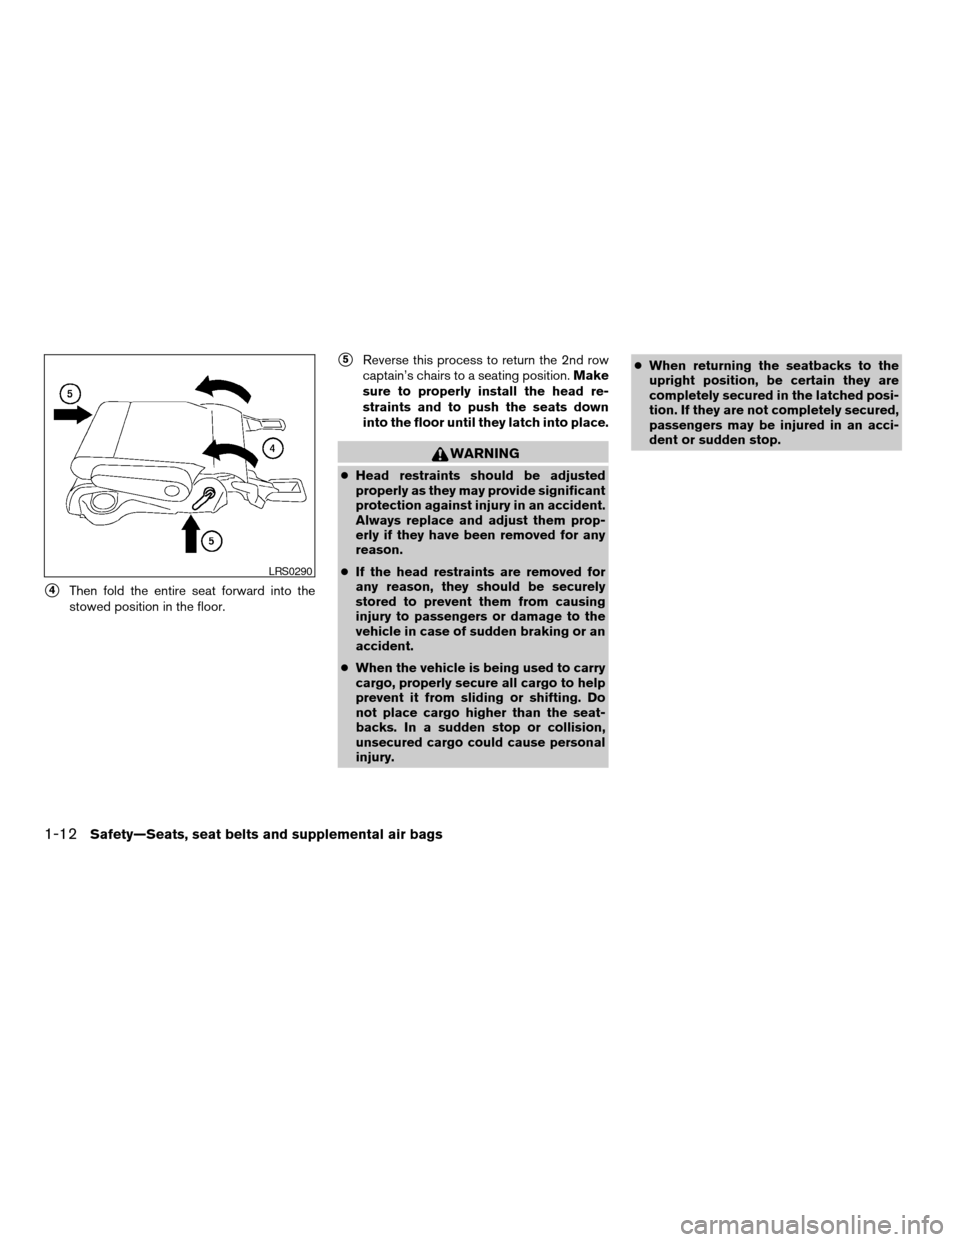
s4Then fold the entire seat forward into the
stowed position in the floor.
s5Reverse this process to return the 2nd row
captain’s chairs to a seating position.Make
sure to properly install the head re-
straints and to push the seats down
into the floor until they latch into place.
WARNING
cHead restraints should be adjusted
properly as they may provide significant
protection against injury in an accident.
Always replace and adjust them prop-
erly if they have been removed for any
reason.
cIf the head restraints are removed for
any reason, they should be securely
stored to prevent them from causing
injury to passengers or damage to the
vehicle in case of sudden braking or an
accident.
cWhen the vehicle is being used to carry
cargo, properly secure all cargo to help
prevent it from sliding or shifting. Do
not place cargo higher than the seat-
backs. In a sudden stop or collision,
unsecured cargo could cause personal
injury.cWhen returning the seatbacks to the
upright position, be certain they are
completely secured in the latched posi-
tion. If they are not completely secured,
passengers may be injured in an acci-
dent or sudden stop.
LRS0290
1-12Safety—Seats, seat belts and supplemental air bags
ZREVIEW COPY:Ð2004 Quest(van)
Owners Manual(owners)ÐUSA English(nna)
10/08/03Ðtbrooks
X
Page 29 of 320
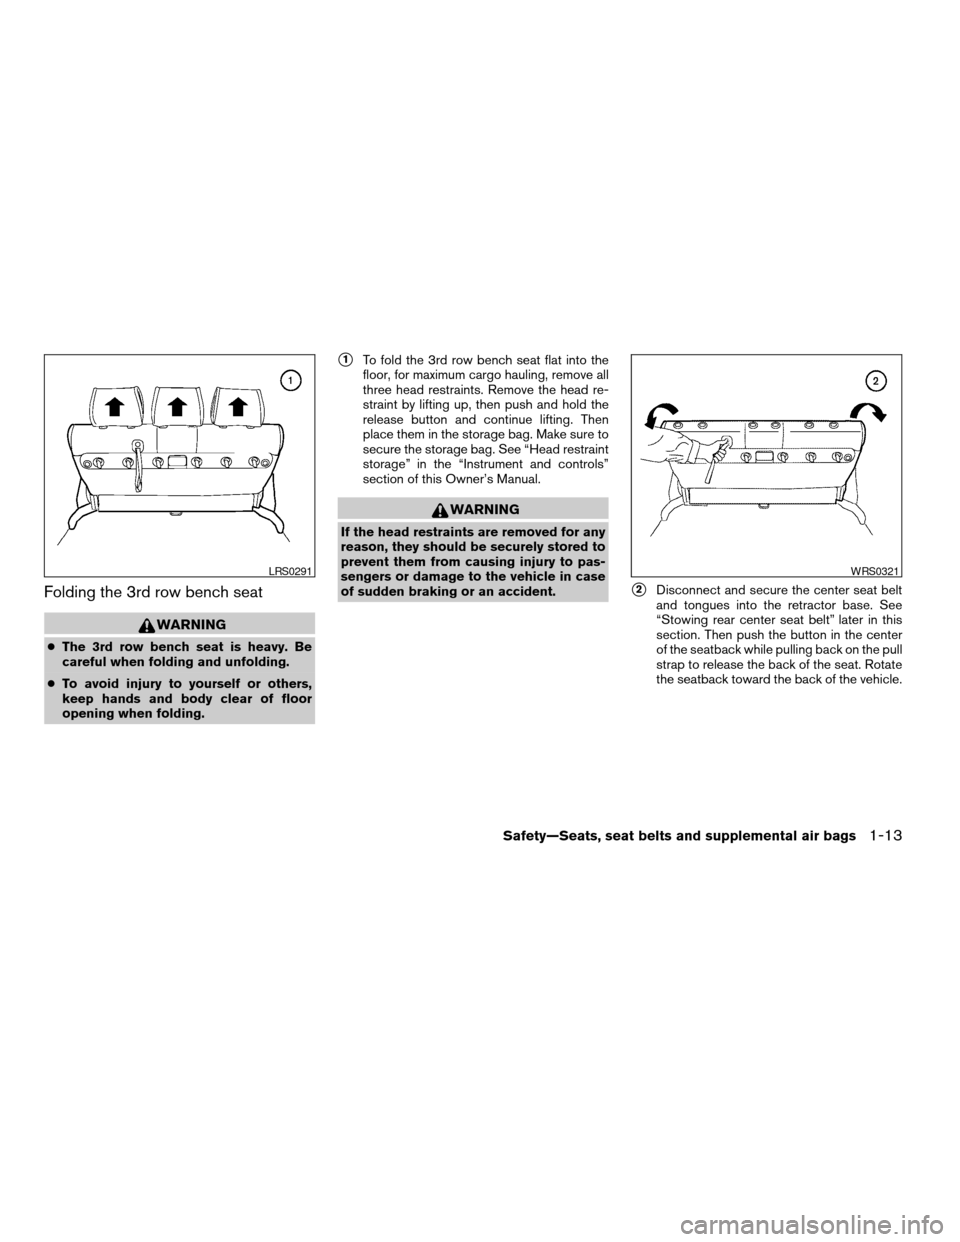
Folding the 3rd row bench seat
WARNING
cThe 3rd row bench seat is heavy. Be
careful when folding and unfolding.
cTo avoid injury to yourself or others,
keep hands and body clear of floor
opening when folding.
s1To fold the 3rd row bench seat flat into the
floor, for maximum cargo hauling, remove all
three head restraints. Remove the head re-
straint by lifting up, then push and hold the
release button and continue lifting. Then
place them in the storage bag. Make sure to
secure the storage bag. See “Head restraint
storage” in the “Instrument and controls”
section of this Owner’s Manual.
WARNING
If the head restraints are removed for any
reason, they should be securely stored to
prevent them from causing injury to pas-
sengers or damage to the vehicle in case
of sudden braking or an accident.
s2Disconnect and secure the center seat belt
and tongues into the retractor base. See
“Stowing rear center seat belt” later in this
section. Then push the button in the center
of the seatback while pulling back on the pull
strap to release the back of the seat. Rotate
the seatback toward the back of the vehicle.
LRS0291WRS0321
Safety—Seats, seat belts and supplemental air bags1-13
ZREVIEW COPY:Ð2004 Quest(van)
Owners Manual(owners)ÐUSA English(nna)
10/08/03Ðtbrooks
X