2004 NISSAN QUEST lock
[x] Cancel search: lockPage 72 of 320

cA child restraint with a top tether strap
should not be used in the front passen-
ger seat unless the vehicle is the 2 pas-
senger cargo van only.
cThe three-point seat belt in your vehicle
is equipped with an automatic locking
mode retractor which must be used
when installing a child restraint.
cFailure to use the retractor’s locking
mode will result in the child restraint
not being properly secured. The re-
straint could tip over or otherwise be
unsecured and cause injury to the child
in a sudden stop or collision.
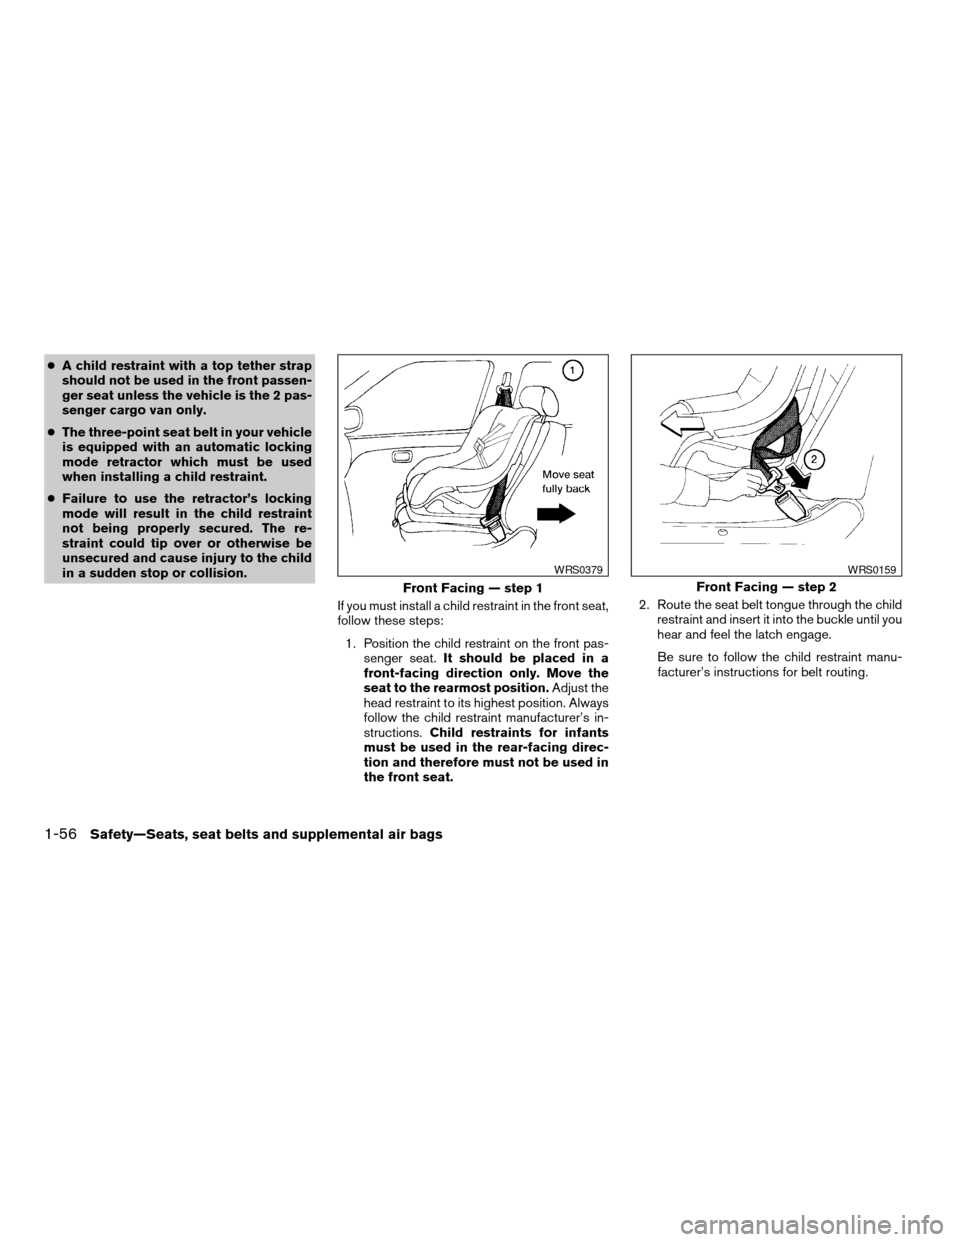
If you must install a child restraint in the front seat,
follow these steps:
1. Position the child restraint on the front pas-
senger seat.It should be placed in a
front-facing direction only. Move the
seat to the rearmost position.Adjust the
head restraint to its highest position. Always
follow the child restraint manufacturer’s in-
structions.Child restraints for infants
must be used in the rear-facing direc-
tion and therefore must not be used in
the front seat.2. Route the seat belt tongue through the child
restraint and insert it into the buckle until you
hear and feel the latch engage.
Be sure to follow the child restraint manu-
facturer’s instructions for belt routing.
Front Facing — step 1
WRS0379
Front Facing — step 2
WRS0159
1-56Safety—Seats, seat belts and supplemental air bags
ZREVIEW COPY:Ð2004 Quest(van)
Owners Manual(owners)ÐUSA English(nna)
10/08/03Ðtbrooks
X
Page 73 of 320

3. Pull on the shoulder belt until all of the belt is
fully extended. At this time, the seat belt
retractor is in the automatic locking mode
(child restraint mode) . It reverts to emer-
gency locking mode when the seat belt is
fully retracted.4. Allow the seat belt to retract slightly. Pull up
on the shoulder belt to remove any slack in
the belt.5. Before placing the child in the child restraint,
use force to tilt the child restraint from side
to side, and tug it forward to make sure that
it is securely held in place. It should not move
more than 1 inch.
6. Check that the retractor is in the automatic
locking mode by trying to pull more seat belt
out of the retractor. If you cannot pull any
more belt webbing out of the retractor, the
retractor is in the automatic locking mode.
Front Facing — step 3
WRS0160
Front Facing — step 4
WRS0161
Front Facing — step 5
WRS0380
Safety—Seats, seat belts and supplemental air bags1-57
ZREVIEW COPY:Ð2004 Quest(van)
Owners Manual(owners)ÐUSA English(nna)
10/08/03Ðtbrooks
X
Page 74 of 320

7. Check to make sure the child restraint is
properly secured prior to each use. If the
seat belt is not locked, repeat steps 3
through 6.
8. Turn the ignition to the ON position. The
passenger air bag status light should say
“PASS AIR BAG OFF”
or.If
this light is not illuminated it may indicate a
malfunction.Move the child restraint to
another seating position.Have the sys-
tem checked by a NISSAN dealer.
After the child restraint is removed and the seat
belt is fully retracted, the automatic locking mode
(child restraint mode) is canceled.
1-58Safety—Seats, seat belts and supplemental air bags
ZREVIEW COPY:Ð2004 Quest(van)
Owners Manual(owners)ÐUSA English(nna)
10/08/03Ðtbrooks
X
Page 82 of 320

orAnti-lock brake warning lightSeat belt warning light and chimeorFront passenger air bag status
light
orBrake warning lightSupplemental air bag warning lightSecurity indicator light (NVIS)
Charge warning lightAutomatic transmission position indicator lightSlip indicator light
Door open warning lightCruise main switch indicator lightTraction control system off indicator light (if so
equipped)
Engine oil pressure warning lightCruise set switch indicator lightTurn signal/hazard indicator lights
Low fuel warning lightHigh beam indicator light (Blue)Vehicle dynamic control off indicator light (if so
equipped)
Low tire pressure warning lightMalfunction indicator lamp (MIL)
Low windshield washer fluid warning lightOverdrive off indicator light
CHECKING BULBS
With all doors closed, apply the parking brake
and turn the ignition key to the ON position
without starting the engine. The following lights
will come on:
,or,,,
The following lights come on briefly and then go
off:
or,,,,,,
If any light fails to come on, it may indicate
a burned-out bulb or an open circuit in the
electrical system. Have the system repaired
promptly.
WARNING LIGHTS
orAnti-lock brake
warning light
If the light comes on while the engine is running,
it may indicate the anti-lock brake system is not
functioning properly. Have the system checked
by a NISSAN dealer.
WARNING/INDICATOR LIGHTS AND
AUDIBLE REMINDERS
2-6Instruments and controls
ZREVIEW COPY:Ð2004 Quest(van)
Owners Manual(owners)ÐUSA English(nna)
10/08/03Ðtbrooks
X
Page 83 of 320

Turn off the engine, and start it again by
slowly turning the ignition key (quickly do-
ing so may cause the ABS light to stay on
when there is nothing wrong) . If the light
stays on, have the system checked by a
NISSAN dealer.
If an abnormality occurs in the system, the anti-
lock function ceases, but the regular braking
system continues to operate.
If the light comes on while you are driving,
contact a NISSAN dealer for repair.
orBrake warning light
This light functions for both the parking brake and
the foot brake systems.
When the ignition key is in the ON position, the
light comes on when the parking brake is applied,
and also warns of a low brake fluid level. If the
light comes on while the engine is running with
the parking brake not applied, stop the vehicle
and perform the following:
1. Check the brake fluid level. Add brake fluid
as necessary. See “Brake fluid” in the “Main-
tenance and do-it-yourself” section of this
manual.2. If the brake fluid level is correct, have the
brake system checked by a NISSAN dealer.
WARNING
cYour vehicle is equipped with an auto-
matic engine cooling fan. It may come
on at any time without warning, even if
the ignition key is in the OFF position
and the engine is not running. To avoid
injury, always disconnect the negative
battery cable before working near the
fan.
cPressing the brake pedal with the en-
gine stopped and/or a low brake fluid
level may increase your stopping dis-
tance and braking will require greater
pedal effort as well as pedal travel.
cIf the brake fluid level is below the
MINIMUM or MIN mark on the brake
fluid reservoir, do not drive until the
brake system has been checked at a
NISSAN dealer.
Charge warning light
If this light comes on while the engine is running,
it may indicate the charging system is not func-
tioning properly. Turn the engine off and checkthe generator belt. If the belt is loose, broken,
missing, or if the light remains on, see a NISSAN
dealer immediately.
CAUTION
Do not continue driving if the generator
belt is loose, broken or missing.
Door open warning light
This light comes on when any of the doors are not
closed securely while the ignition key is in the ON
position.
Engine oil pressure warning
light
This light warns of low engine oil pressure. If the
light flickers or comes on during normal driving,
pull off the road in a safe area, stop the engine
immediatelyand call a NISSAN dealer or other
authorized repair shop.
The engine oil pressure warning light is not
designed to indicate a low oil level.Use the
dipstick to check the oil level. See “Engine oil” in
the “Maintenance and do-it-yourself” section of
this manual.
Instruments and controls2-7
ZREVIEW COPY:Ð2004 Quest(van)
Owners Manual(owners)ÐUSA English(nna)
10/08/03Ðtbrooks
X
Page 87 of 320

For front passenger air bag status light operation,
see “Front passenger air bag and status light” in
the “Safety — Seats, seat belts and supplemental
air bags” section of this manual.
Security indicator light (NVIS)
This light blinks whenever the ignition switch is in
the LOCK, OFF or ACC position. This function
indicates the security system equipped on the
vehicle is operational.
For additional information, see “Security system”
later in this section.
Slip indicator light
This indicator light will blink when the traction
control system is limiting wheel spin. Slippery
road conditions may exist if the slip indicator
blinks on. If this happens, adjust your driving
accordingly.
The slip indicator light also comes on when you
turn the ignition key to the ON position. The light
will turn off after about 2 seconds if the system is
operational. If the light does not come on or go
off, have the traction control system checked by a
NISSAN dealer.The system operates in all transmission shift lever
positions, but the system can upshift the trans-
mission only as high as the indicated shift lever
position.
Traction control system off
indicator light (if so equipped)
This indicator light comes on when the traction
control off switch is pushed to OFF. This indi-
cates the traction control system is not operating.
Push the traction control off switch again or re-
start the engine and the system will operate nor-
mally. See “Traction control system (TCS)” in the
“Starting and driving” section of this manual.
The traction control light also comes on when you
turn the ignition key to the ON position. The light
will turn off after about 2 seconds if the traction
control system (TCS) is operational. If the light
stays on or comes on along with the SLIP indica-
tor light while you are driving, have the traction
control system checked by a NISSAN dealer.
While the traction control system is operating,
you might feel slight vibration or hear the system
working when starting the vehicle or accelerat-
ing, but this is normal.
Turn signal/hazard indicator
lights
The appropriate light flashes when the turn signal
switch is activated.
Both lights flash when the hazard switch is turned
on.
Vehicle dynamic control off
indicator light (if so equipped)
This indicator light comes on when the vehicle
dynamic control off switch is pushed to OFF. This
indicates the vehicle dynamic control system is
not operating.
Push the vehicle dynamic control off switch again
or restart the engine and the system will operate
normally. See “Vehicle dynamic control (VDC)
system” in the “Starting and driving” section of
this manual.
The vehicle dynamic control light also comes on
when you turn the ignition key to the ON position.
The light will turn off after about 2 seconds if the
system is operational. If the light stays on or
comes on along with the SLIP indicator light
while you are driving, have the vehicle dynamic
control system checked by a NISSAN dealer.
Instruments and controls2-11
ZREVIEW COPY:Ð2004 Quest(van)
Owners Manual(owners)ÐUSA English(nna)
10/08/03Ðtbrooks
X
Page 88 of 320

While the vehicle dynamic control system is op-
erating, you might feel slight vibration or hear the
system working when starting the vehicle or ac-
celerating, but this is normal.
AUDIBLE REMINDERS
Brake pad wear warning
The front disc brake pads have audible wear
warnings. When a front brake pad requires re-
placement, it makes a high pitched scraping
sound when the vehicle is in motion, whether or
not the brake pedal is depressed. Have the
brakes checked as soon as possible if the warn-
ing sound is heard.
Key reminder chime
A chime sounds if the driver’s door is opened
while the key is left in the ignition switch. Remove
the key and take it with you when leaving the
vehicle.
Light reminder chime
With the ignition switch in the OFF position, a
chime sounds when the driver’s door is opened if
the headlights or parking lights are on.
Turn the headlight control switch off before leav-
ing the vehicle.
NISSAN VEHICLE IMMOBILIZER
SYSTEM (NVIS)
The NISSAN Vehicle Immobilizer System (NVIS)
will not allow the engine to start without the use of
a registered NVIS key.
If the engine fails to start using a registered NVIS
key (for example, when interference is caused by
another NVIS key, an automated toll road device
or automatic payment device on the key ring) ,
restart the engine using the following proce-
dures:
1. Leave the ignition switch in the ON position
for approximately 5 seconds.
2. Turn the ignition switch to the OFF or LOCK
position, and wait approximately 5 seconds.
3. Repeat steps 1 and 2.
4. Restart the engine while holding the device
(which may have caused the interference)
separate from the registered NVIS key.
If the no start condition re-occurs, NISSAN rec-
ommends placing the registered NVIS key on a
separate key ring to avoid interference from other
devices.Statement related to Section 15 of FCC
Rules for NISSAN Vehicle Immobilizer Sys-
tem (CONT ASSY — IMMOBILIZER, ANT
ASSY — IMMOBILIZER)
This device complies with part 15 of the
FCC Rules and RSS-210 of Industry
Canada. Operation is subject to the follow-
ing two conditions;
(1) This device may not cause harmful in-
terference, and (2) this device must accept
any interference received, including inter-
ference that may cause undesired opera-
tion of the device.
CHANGES OR MODIFICATIONS NOT EX-
PRESSLY APPROVED BY THE MANUFAC-
TURER FOR COMPLIANCE COULD VOID
THE USER’S AUTHORITY TO OPERATE
THE EQUIPMENT.
SECURITY SYSTEM
2-12Instruments and controls
ZREVIEW COPY:Ð2004 Quest(van)
Owners Manual(owners)ÐUSA English(nna)
10/08/03Ðtbrooks
X
Page 89 of 320

Security indicator light
The security indicator light blinks whenever the
ignition switch is in the LOCK, OFF or ACC
position. This function indicates the NISSAN Ve-
hicle Immobilizer System (NVIS) is operational.
If the NVIS is malfunctioning, the light will remain
on while the ignition key is in the ON position.
If the light still remains on and/or the en-
gine will not start, see a NISSAN dealer for
NVIS service as soon as possible. Please
bring all NVIS keys that you have when
visiting your NISSAN dealer for service.
SWITCH OPERATION
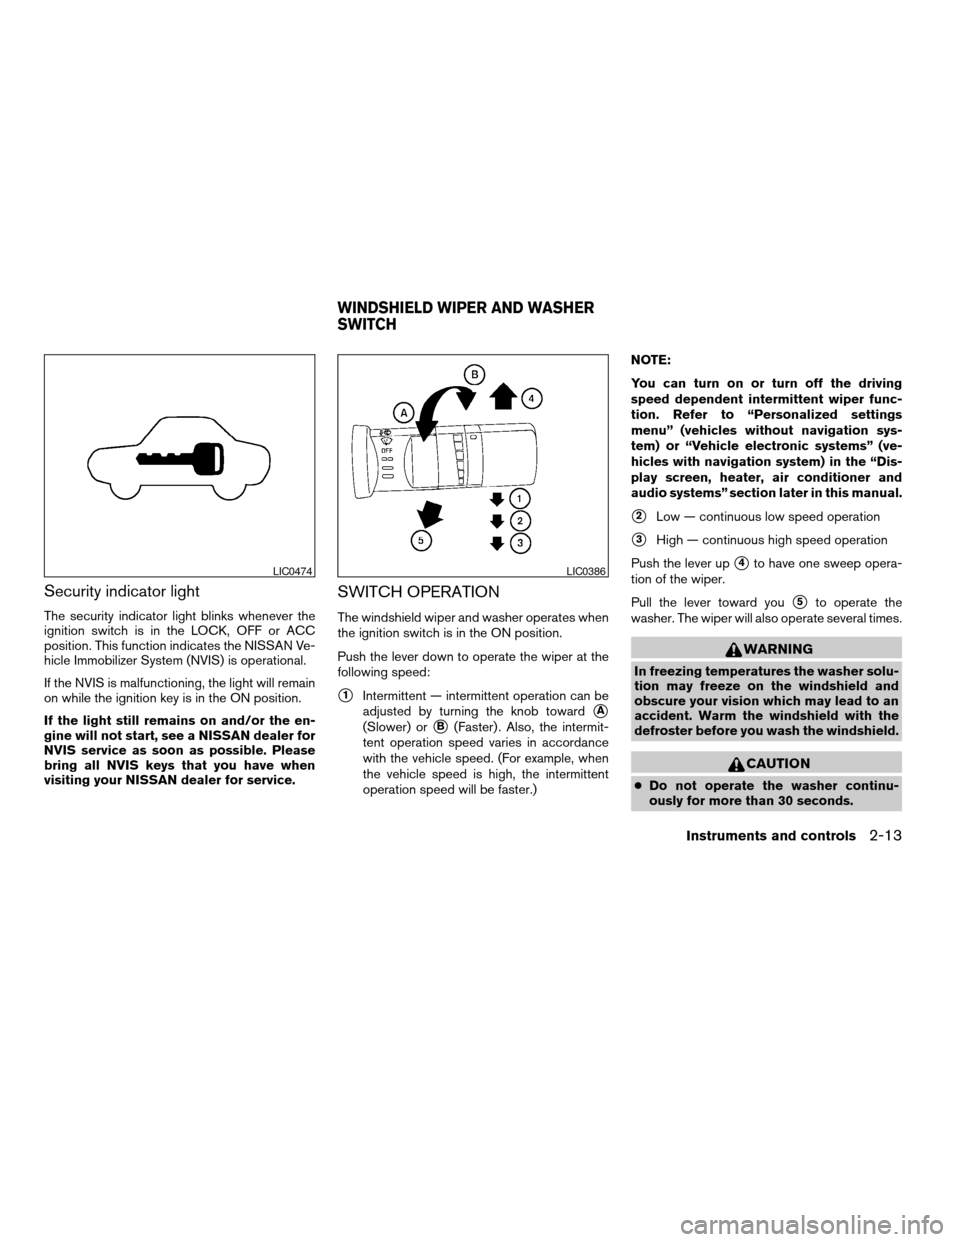
The windshield wiper and washer operates when
the ignition switch is in the ON position.
Push the lever down to operate the wiper at the
following speed:
s1Intermittent — intermittent operation can be
adjusted by turning the knob toward
sA
(Slower) orsB(Faster) . Also, the intermit-
tent operation speed varies in accordance
with the vehicle speed. (For example, when
the vehicle speed is high, the intermittent
operation speed will be faster.)NOTE:
You can turn on or turn off the driving
speed dependent intermittent wiper func-
tion. Refer to “Personalized settings
menu” (vehicles without navigation sys-
tem) or “Vehicle electronic systems” (ve-
hicles with navigation system) in the “Dis-
play screen, heater, air conditioner and
audio systems” section later in this manual.
s2Low — continuous low speed operation
s3High — continuous high speed operation
Push the lever up
s4to have one sweep opera-
tion of the wiper.
Pull the lever toward you
s5to operate the
washer. The wiper will also operate several times.
WARNING
In freezing temperatures the washer solu-
tion may freeze on the windshield and
obscure your vision which may lead to an
accident. Warm the windshield with the
defroster before you wash the windshield.
CAUTION
cDo not operate the washer continu-
ously for more than 30 seconds.
LIC0474LIC0386
WINDSHIELD WIPER AND WASHER
SWITCH
Instruments and controls2-13
ZREVIEW COPY:Ð2004 Quest(van)
Owners Manual(owners)ÐUSA English(nna)
10/08/03Ðtbrooks
X