Page 9 of 296
1. Engine hood (P. 8-6)
2. Windshield wiper and washer switch
(P. 2-18)
3. Windshield (P. 8-26)
4. Roof rack (P.2-30)
5. Power windows (if so equipped)
(P. 2-32)
6. Door locks, keyfob, keys (P. 3-2, 3-4,
3-2)
7. Mirrors (P. 3-13)
8. Tire pressure (P. 8-36)
9. Flat tire (P. 6-2)
10. Tire chains (P. 5-31)
11. Headlight and turn signal switch
(P. 2-20); Replacing bulbs (P. 8-31)
12. Fog light switch (if so equipped)
(P. 2-22)
See the page number indicated in paren-
theses for operating details.
LII0035
EXTERIOR FRONT
Illustrated table of contents0-3
ZREVIEW COPY:Ð2004 Truck/Frontier(d22)
Owners Manual(owners)ÐUSA English(nna)
11/21/03Ðdebbie
X
Page 10 of 296
1. Vehicle loading (P. 9-13)
2. Truck box, tailgate (P.3-15)
3. Roof rack (P.2-30)
4. Rear sliding window (if so equipped)
(P.2-34)
5. Child safety rear door lock (Crew Cab
models only) (P.3-4)
6. Fuel filler cap, fuel recommendation
(P. 3-11, P. 9-3)
7. Replacing bulbs (P. 8-31)
See the page number indicated in paren-
theses for operating details.
LII0036
EXTERIOR REAR
0-4Illustrated table of contents
ZREVIEW COPY:Ð2004 Truck/Frontier(d22)
Owners Manual(owners)ÐUSA English(nna)
11/21/03Ðdebbie
X
Page 60 of 296

anchor point which provides the straightest in-
stallation of the tether strap as shown later in this
section.
Tighten the tether strap according to the manu-
facturer’s instructions to remove any slack.
For best child restraint fit, see the child restraint
installation instructions in this section and the
child restraint manufacturer’s instructions.
1. Top tether strap
2. Hook
3. Anchor bracket
Rear bench seat (Crew cab only)
First, secure the child restraint with the seat belt
or the LATCH system (rear bench seat outboard
positions only) , as applicable.
Position the top tether strap over the head re-
straint and secure it to the tether anchor bracket
that provides the straightest installation.
Tighten the strap according to the manufactur-
er’s instructions to remove any slack.
Anchor point locations
Anchor points are located under the rear window.
King Cab vehicles will only have the outer anchor
point. Crew Cab vehicles will have all 3 anchor
points.
If you have any questions when installing a
top strap child restraint on the rear seat,
consult your NISSAN dealer for details.
WRS0441
Rear bench seat (Crew cab only)King Cab
WRS0223
1-42Safety—Seats, seat belts and supplemental air bags
ZREVIEW COPY:Ð2004 Truck/Frontier(d22)
Owners Manual(owners)ÐUSA English(nna)
12/02/03Ðmarlene
X
Page 69 of 296

2 Instruments and controls
Instrument panel...................................2-2
Meters and gauges................................2-3
Speedometer and odometer.....................2-3
Tachometer....................................2-5
Engine coolant temperature gauge...............2-5
Fuel gauge....................................2-6
Compass and outside temperature display
(if so equipped)...................................2-6
Outside temperature display.....................2-7
Compass display...............................2-7
Warning/indicator lights and audible reminders.......2-9
Checking bulbs................................2-9
Warning lights................................2-10
Indicator lights................................2-13
Audible reminders.............................2-15
Security system (if so equipped)...................2-16
Vehicle security system.........................2-16
Windshield wiper and washer switch...............2-18
Switch operation..............................2-18
Rear window defroster switch (Crew Cab models
only)............................................2-19
Headlight and turn signal switch....................2-20
Headlight control switch........................2-20
Daytime running light system (Canada only)......2-21Instrument brightness control...................2-21
Turn signal switch.............................2-22
Fog light switch (if so equipped)................2-22
Hazard warning flasher switch.....................2-22
Cargo lamp switch...............................2-23
Horn............................................2-23
Vehicle dynamic control (VDC) off switch
(if so equipped)..................................2-24
Power outlet.....................................2-24
Dual 12 volt power outlets (if so equipped)..........2-25
Storage.........................................2-26
Storage compartment..........................2-26
Storage trays (if so equipped)...................2-26
Cup holders..................................2-27
Glove box....................................2-28
Console box..................................2-28
Grocery hooks (King Cab only)..................2-29
Tubular roof rack (if so equipped)................2-30
Windows........................................2-32
Power windows (if so equipped)................2-32
Manual windows..............................2-34
Rear sliding window (if so equipped)............2-34
Interior lights.....................................2-34
Map lights (if so equipped)........................2-35
ZREVIEW COPY:Ð2004 Truck/Frontier(d22)
Owners Manual(owners)ÐUSA English(nna)
11/21/03Ðdebbie
X
Page 84 of 296
VEHICLE SECURITY SYSTEM
The vehicle security system provides visual and
audio alarm signals if parts of the vehicle are
disturbed.
Security indicator light
The security indicator light shows the status of
the vehicle security system.
The light operates whenever the ignition switch is
in the LOCK, OFF, or ACC position.
The vehicle security system has four phases. For
each phase the operation of the security indicator
light is different.
How to arm the vehicle security sys-
tem
1. Close all windows.(The system can be
armed even if the windows are open.)
2. Remove the key from the ignition switch.
LIC0359LIC0093
LIC0053
SECURITY SYSTEM (if so equipped)
2-16Instruments and controls
ZREVIEW COPY:Ð2004 Truck/Frontier(d22)
Owners Manual(owners)ÐUSA English(nna)
11/21/03Ðdebbie
X
Page 87 of 296

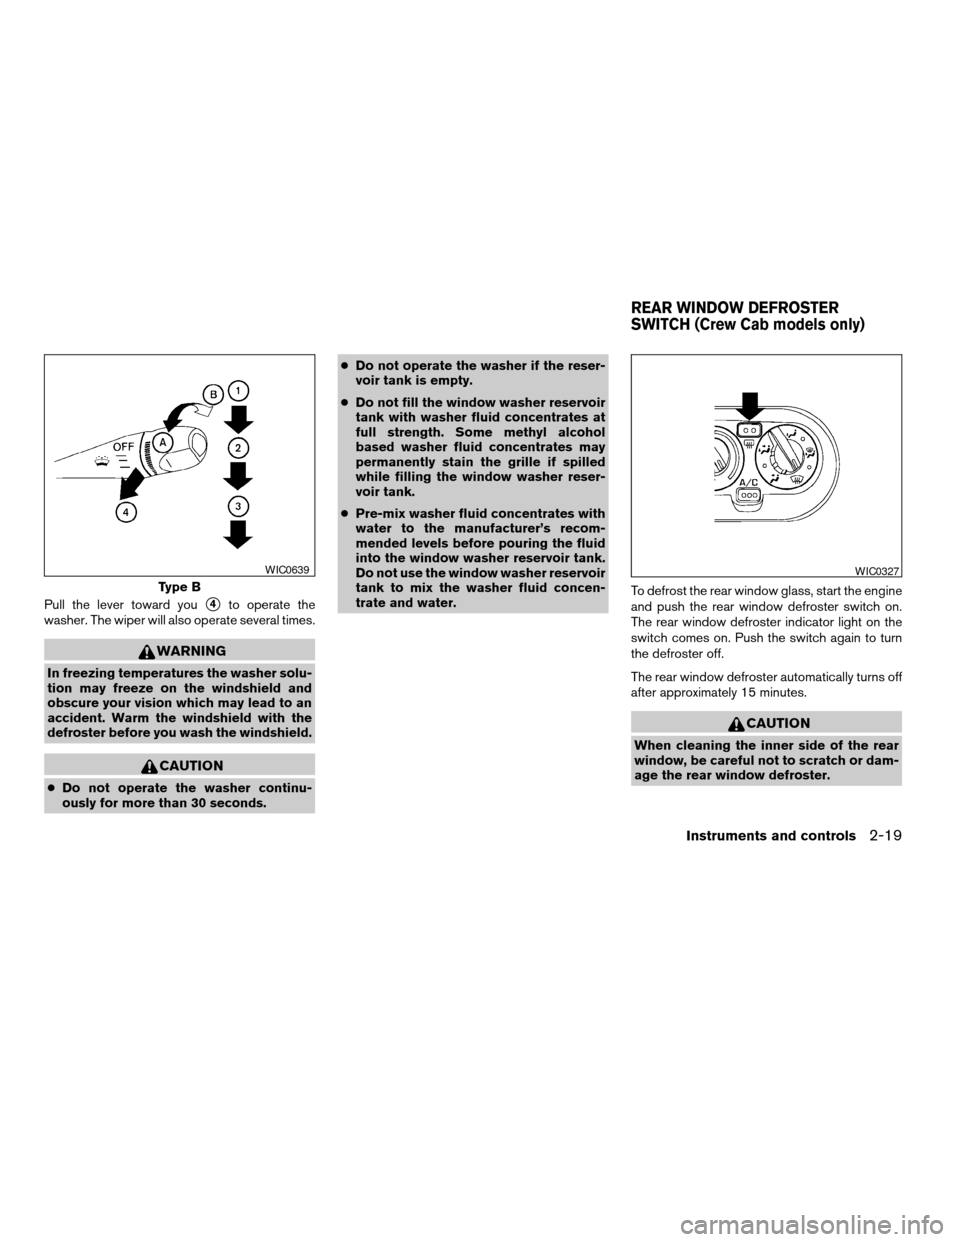
Pull the lever toward yous4to operate the
washer. The wiper will also operate several times.
WARNING
In freezing temperatures the washer solu-
tion may freeze on the windshield and
obscure your vision which may lead to an
accident. Warm the windshield with the
defroster before you wash the windshield.
CAUTION
cDo not operate the washer continu-
ously for more than 30 seconds.cDo not operate the washer if the reser-
voir tank is empty.
cDo not fill the window washer reservoir
tank with washer fluid concentrates at
full strength. Some methyl alcohol
based washer fluid concentrates may
permanently stain the grille if spilled
while filling the window washer reser-
voir tank.
cPre-mix washer fluid concentrates with
water to the manufacturer’s recom-
mended levels before pouring the fluid
into the window washer reservoir tank.
Do not use the window washer reservoir
tank to mix the washer fluid concen-
trate and water.To defrost the rear window glass, start the engine
and push the rear window defroster switch on.
The rear window defroster indicator light on the
switch comes on. Push the switch again to turn
the defroster off.
The rear window defroster automatically turns off
after approximately 15 minutes.
CAUTION
When cleaning the inner side of the rear
window, be careful not to scratch or dam-
age the rear window defroster.
Type B
WIC0639WIC0327
REAR WINDOW DEFROSTER
SWITCH (Crew Cab models only)
Instruments and controls2-19
ZREVIEW COPY:Ð2004 Truck/Frontier(d22)
Owners Manual(owners)ÐUSA English(nna)
11/21/03Ðdebbie
X
Page 88 of 296
NOTE:
The top few rows of wires on the rear win-
dow are not part of the rear window de-
froster system. These wires make up the
antenna for the audio system.
HEADLIGHT CONTROL SWITCH
Lighting
s1When turning the switch to theposi-
tion, the front parking, tail, license plate and
instrument panel lights come on.
s2When turning the switch to theposi-
tion, the headlights come on and all the other
lights remain on.
Type A
WIC0242
Type B
WIC0243
HEADLIGHT AND TURN SIGNAL
SWITCH
2-20Instruments and controls
ZREVIEW COPY:Ð2004 Truck/Frontier(d22)
Owners Manual(owners)ÐUSA English(nna)
11/21/03Ðdebbie
X
Page 93 of 296

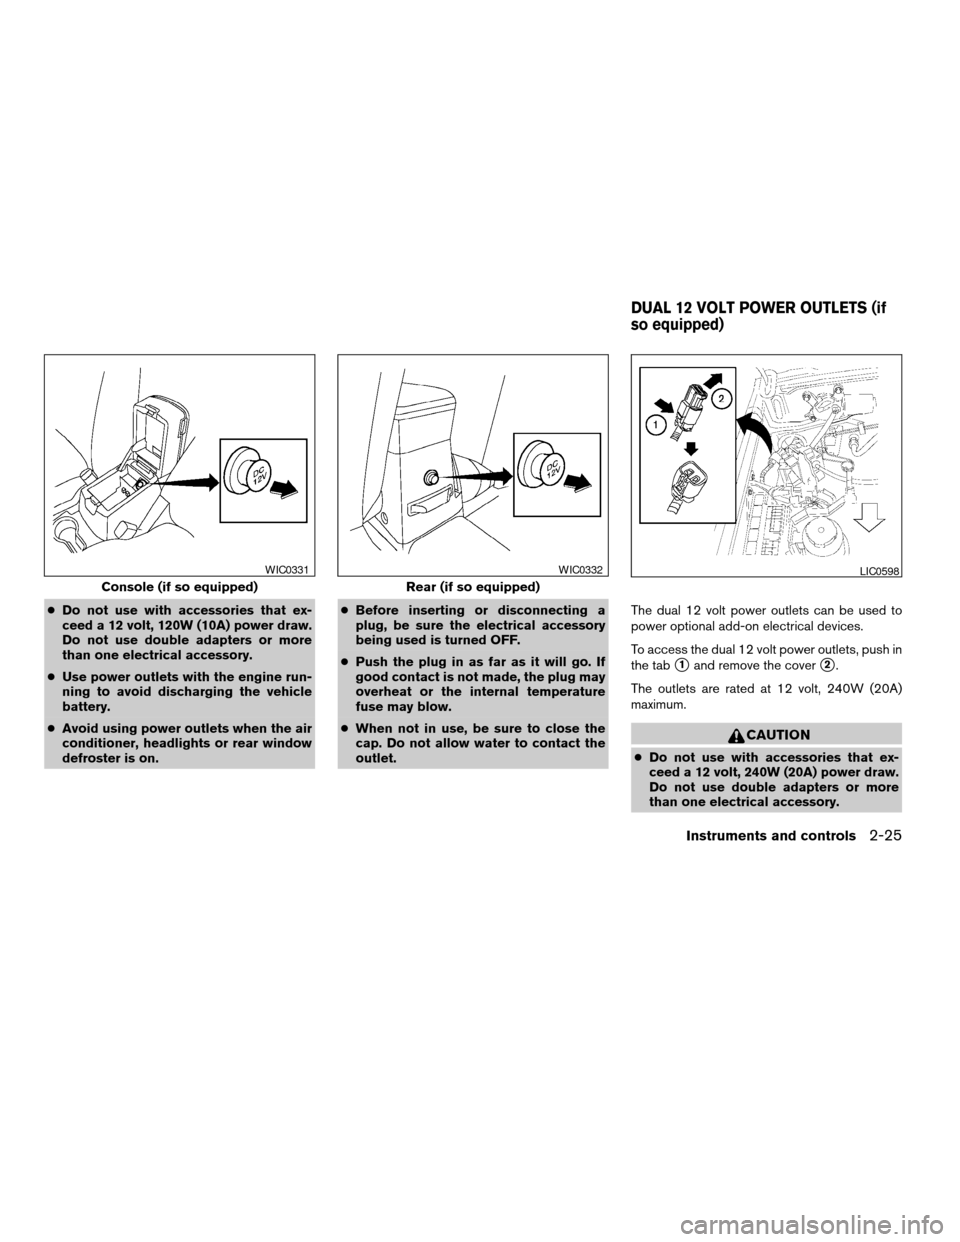
cDo not use with accessories that ex-
ceed a 12 volt, 120W (10A) power draw.
Do not use double adapters or more
than one electrical accessory.
cUse power outlets with the engine run-
ning to avoid discharging the vehicle
battery.
cAvoid using power outlets when the air
conditioner, headlights or rear window
defroster is on.cBefore inserting or disconnecting a
plug, be sure the electrical accessory
being used is turned OFF.
cPush the plug in as far as it will go. If
good contact is not made, the plug may
overheat or the internal temperature
fuse may blow.
cWhen not in use, be sure to close the
cap. Do not allow water to contact the
outlet.The dual 12 volt power outlets can be used to
power optional add-on electrical devices.
To access the dual 12 volt power outlets, push in
the tab
s1and remove the covers2.
The outlets are rated at 12 volt, 240W (20A)
maximum.
CAUTION
cDo not use with accessories that ex-
ceed a 12 volt, 240W (20A) power draw.
Do not use double adapters or more
than one electrical accessory.
Console (if so equipped)
WIC0331
Rear (if so equipped)
WIC0332LIC0598
DUAL 12 VOLT POWER OUTLETS (if
so equipped)
Instruments and controls2-25
ZREVIEW COPY:Ð2004 Truck/Frontier(d22)
Owners Manual(owners)ÐUSA English(nna)
11/21/03Ðdebbie
X