Page 83 of 262
accident or a sudden stop.
STOWING GOLF BAGSFollow the instructions here to stow golf bags in
the rear cargo space of your vehicle. Normally
two bags can be stowed in the luggage area
(Coupe models) or one bag in the trunk (Road-
ster models).
However, in some cases you may not be able to
stow the above number of golf bags in your
vehicle, depending on their sizes or types.
Coupe modelsNormally, two standard golf bags can be stowed
across the strut tower bar in the luggage area as
illustrated (A and B). When stowing a golf bag A
in the rear space, insert the top of the golf baginto left side of the luggage area
�1then put the
bag down
�2.
SIC2196
2-34
Instruments and controls
�
04.5.17/Z33-D/V5.0
�
Page 84 of 262
Roadster modelsNormally, one standard golf bag C can be
stowed in the trunk. Insert the top of the golf bag
into left side of the trunk
�1
then put the bag
down
�2.The hooks are located above the side windows
as shown in the illustration.
CAUTION:
Do not place items which are more than 2
lb (1 kg) on the hook.
POWER WINDOWS
WARNING
�Make sure that all passengers have
their hands, etc. inside the vehicle
while it is in motion and before clos-
ing the windows. Use the window
lock switch to prevent unexpected
use of the power windows.
�Do not leave children unattended in-
side the vehicle. They could unknow-
ingly activate switches or controls
and become trapped in a window.
Unattended children could become
involved in serious accidents.
SIC2237
SIC2378
COAT HOOK WINDOWS
Instruments and controls
2-35
�
04.5.17/Z33-D/V5.0
�
Page 96 of 262

LOCKING WITH KEYThe power door lock system allows you to lock
or unlock all doors including the rear hatch/trunk
lid simultaneously.
�Turning the driver’s door key to the rear of the
vehicle will lock all doors including the rear
hatch/trunk lid.
�Turning the driver’s door key one time to the
front of the vehicle will unlock the driver’s
door and rear hatch/trunk lid. From that po-
sition, returning the key to neutral (where the
key can only be removed and inserted) and
turning it to the front again within 5 secondswill unlock the passenger’s door.
Opening and closing windowsTurn the driver’s door key towards the front of
the vehicle (UNLOCK position) and hold for
about 1 second, all door windows will begin to
lower.
To close all door windows, turn the key to the
LOCK position and hold for about 1 second.
To stop opening or closing, turn the key to the
neutral position.
In the event of a hand in the way, or other
obstruction, the auto reverse function will acti-
vate.
LOCKING WITH INSIDE LOCK
KNOBPushing the door inside lock knobto the LOCK
or UNLOCK position will lock or unlock the
corresponding door. (The rear hatch/trunk lid
lock is linked with the driver side door lock.)
To individually lock the doors from the outside
(without a key), move the inside lock knobto the
LOCK position. Then close the door.
When locking the door without a key, be
sure not to leave the key inside the vehicle.
SPA1503
SPA1504
Pre-driving checks and adjustments
3-3
�
04.5.17/Z33-D/V5.0
�
Page 103 of 262

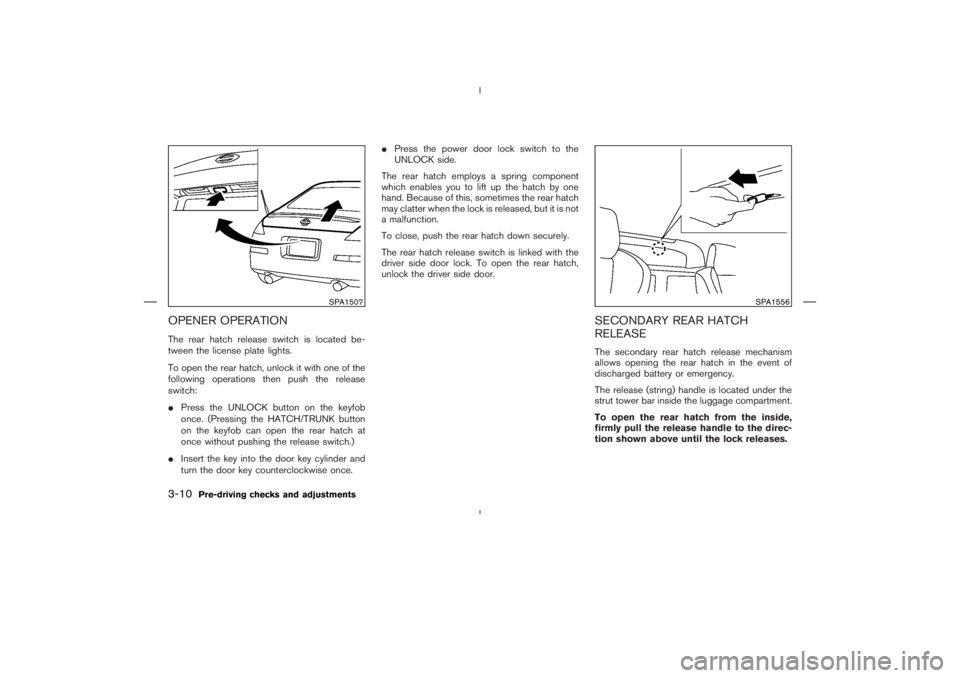
OPENER OPERATIONThe rear hatch release switch is located be-
tween the license plate lights.
To open the rear hatch, unlock it with one of the
following operations then push the release
switch:
�Press the UNLOCK button on the keyfob
once. (Pressing the HATCH/TRUNK button
on the keyfobcan open the rear hatch at
once without pushing the release switch.)
�Insert the key into the door key cylinder and
turn the door key counterclockwise once.�Press the power door lock switch to the
UNLOCK side.
The rear hatch employs a spring component
which enables you to lift up the hatch by one
hand. Because of this, sometimes the rear hatch
may clatter when the lock is released, but it is not
a malfunction.
To close, push the rear hatch down securely.
The rear hatch release switch is linked with the
driver side door lock. To open the rear hatch,
unlock the driver side door.
SECONDARY REAR HATCH
RELEASEThe secondary rear hatch release mechanism
allows opening the rear hatch in the event of
discharged battery or emergency.
The release (string) handle is located under the
strut tower bar inside the luggage compartment.
To open the rear hatch from the inside,
firmly pull the release handle to the direc-
tion shown above until the lock releases.
SPA1507
SPA1556
3-10
Pre-driving checks and adjustments
�
04.5.17/Z33-D/V5.0
�
Page 105 of 262

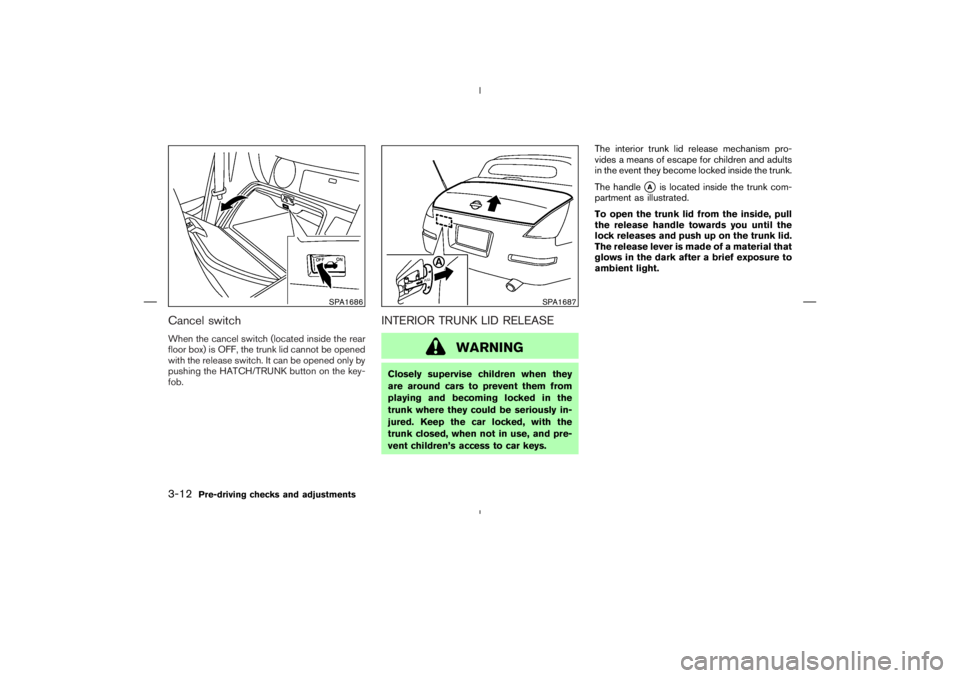
Cancel switchWhen the cancel switch (located inside the rear
floor box) is OFF, the trunk lid cannot be opened
with the release switch. It can be opened only by
pushing the HATCH/TRUNK button on the key-
fob.
INTERIOR TRUNK LID RELEASE
WARNING
Closely supervise children when they
are around cars to prevent them from
playing and becoming locked in the
trunk where they could be seriously in-
jured. Keep the car locked, with the
trunk closed, when not in use, and pre-
vent children’s access to car keys.The interior trunk lid release mechanism pro-
vides a means of escape for children and adults
in the event they become locked inside the trunk.
The handle
�A
is located inside the trunk com-
partment as illustrated.
To open the trunk lid from the inside, pull
the release handle towards you until the
lock releases and push up on the trunk lid.
The release lever is made of a material that
glows in the dark after a brief exposure to
ambient light.
SPA1686
SPA1687
3-12
Pre-driving checks and adjustments
�
04.5.17/Z33-D/V5.0
�
Page 111 of 262
Foldable outside mirrorsFold the outside mirror by pushing it toward the
rear of the vehicle.1. Soft top operating switch
2. Soft top indicator light (on the combination
meter)
3. Top side rail
4. Top latch lever
5. Soft top
6. Top storage lid
7. Trunk lid
8. Rear window
9. Rear section of the top
BEFORE OPERATING THE TOPThe soft top of your 350Z Roadster is electrically
operated. You can fully open or close the top
only by pressing the operating switch (on the
lower side of the instrument panel).
The soft top operating switch must be operated
under all of the following conditions:
�When the foot brake pedal is depressed.
�When the vehicle is stopped.
�When the engine is running.
IC0565
SPA1689
Interior/exterior view
SOFT TOP OPERATION(Roadster
models)
3-18
Pre-driving checks and adjustments
�
04.5.17/Z33-D/V5.0
�
Page 115 of 262

�3Rotate the lever forward until the front edge
of the top is completely joined to the vehicle
body.
�4Rotate the lever toward you and push it up
into the stored position. Make sure the top is
securely engaged to the vehicle body.
When releasing or engaging the top latch,
you may hear the latch operating. This is
normal and not a malfunction.
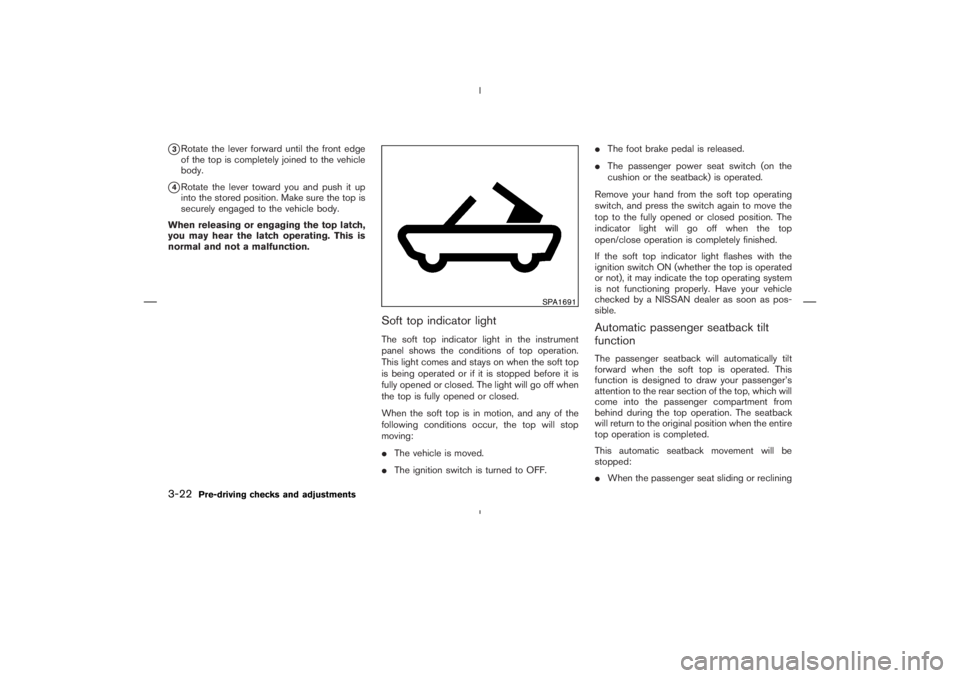
Soft top indicator lightThe soft top indicator light in the instrument
panel shows the conditions of top operation.
This light comes and stays on when the soft top
is being operated or if it is stopped before it is
fully opened or closed. The light will go off when
the top is fully opened or closed.
When the soft top is in motion, and any of the
following conditions occur, the top will stop
moving:
�The vehicle is moved.
�The ignition switch is turned to OFF.�The foot brake pedal is released.
�The passenger power seat switch (on the
cushion or the seatback) is operated.
Remove your hand from the soft top operating
switch, and press the switch again to move the
top to the fully opened or closed position. The
indicator light will go off when the top
open/close operation is completely finished.
If the soft top indicator light flashes with the
ignition switch ON (whether the top is operated
or not), it may indicate the top operating system
is not functioning properly. Have your vehicle
checked by a NISSAN dealer as soon as pos-
sible.
Automatic passenger seatback tilt
functionThe passenger seatback will automatically tilt
forward when the soft top is operated. This
function is designed to draw your passenger’s
attention to the rear section of the top, which will
come into the passenger compartment from
behind during the top operation. The seatback
will return to the original position when the entire
top operation is completed.
This automatic seatback movement will be
stopped:
�When the passenger seat sliding or reclining
SPA1691
3-22
Pre-driving checks and adjustments
�
04.5.17/Z33-D/V5.0
�
Page 120 of 262

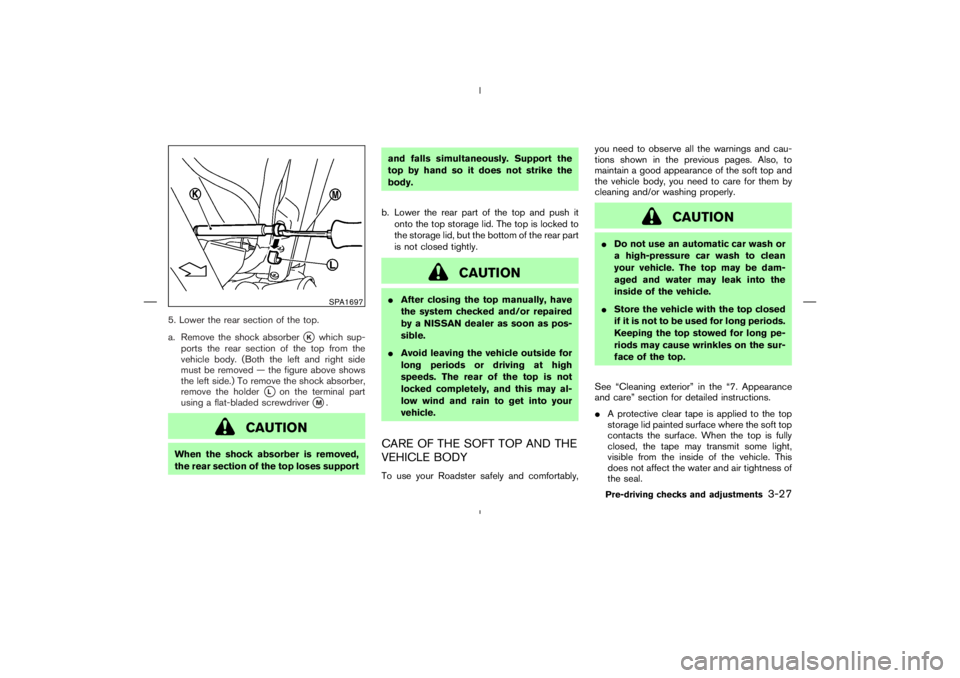
5. Lower the rear section of the top.
a. Remove the shock absorber
�K
which sup-
ports the rear section of the top from the
vehicle body. (Both the left and right side
must be removed — the figure above shows
the left side.) To remove the shock absorber,
remove the holder
�L
on the terminal part
using a flat-bladed screwdriver
�M.
CAUTION
When the shock absorber is removed,
the rear section of the top loses supportand falls simultaneously. Support the
top by hand so it does not strike the
body.
b. Lower the rear part of the top and push it
onto the top storage lid. The top is locked to
the storage lid, but the bottom of the rear part
is not closed tightly.
CAUTION
�After closing the top manually, have
the system checked and/or repaired
by a NISSAN dealer as soon as pos-
sible.
�Avoid leaving the vehicle outside for
long periods or driving at high
speeds. The rear of the top is not
locked completely, and this may al-
low wind and rain to get into your
vehicle.CARE OF THE SOFT TOP AND THE
VEHICLE BODYTo use your Roadster safely and comfortably,you need to observe all the warnings and cau-
tions shown in the previous pages. Also, to
maintain a good appearance of the soft top and
the vehicle body, you need to care for them by
cleaning and/or washing properly.
CAUTION
�Do not use an automatic car wash or
a high-pressure car wash to clean
your vehicle. The top may be dam-
aged and water may leak into the
inside of the vehicle.
�Store the vehicle with the top closed
if it is not to be used for long periods.
Keeping the top stowed for long pe-
riods may cause wrinkles on the sur-
face of the top.
See “Cleaning exterior” in the “7. Appearance
and care” section for detailed instructions.
�A protective clear tape is applied to the top
storage lid painted surface where the soft top
contacts the surface. When the top is fully
closed, the tape may transmit some light,
visible from the inside of the vehicle. This
does not affect the water and air tightness of
the seal.
SPA1697
Pre-driving checks and adjustments
3-27
�
04.5.17/Z33-D/V5.0
�