Page 161 of 434
 SL 55 AMG
You can change the gears manually on the
steering wheel or by using the gear
selector lever (
�pag")
160 Controls in detailAutomatic transmissionSteering wheel gearshift control (Speedshift) SL 55 AMG
You can change the gears manually on the
steering wheel or by using the gear
selector lever (
�page 156).
Allow engine to warm up under low load
use. Do not place full load on the engine
until the operating temperature has been
reached. Shift into reverse gear only when
the vehicle is stopped.The steering wheel gearshift buttons are
located to the left and right of the steering
wheel.
1Left button: downshift
2Right button: upshiftDownshifting
�
Press button1 on the left side of the
steering wheel.
The gear range is limited when you are not
driving in the manual program mode
(
�page 163).
When driving in the manual program mode
(�page 163), the transmission will shift
from the current gear to the next lower
gear (
�page 164).
!Avoid spinning of a drive wheel for an
extended period when driving off on
slippery road surfaces. This may cause
serious damage to the drivetrain which
is not covered by the Mercedes-Benz
Limited Warranty.
Page 162 of 434

161 Controls in detail
Automatic transmission
Upshifting�
Press button2 on the right side of the
steering wheel.
The gear range is extended when you are
not driving in the manual program mode
(
�page 163).
When driving in the manual program mode
(�page 163), the transmission will shift
from the current gear to the next higher
gear (
�page 164).
Program mode selector switch
The program mode selector switch is
located on the lower part of the center
console.
1Program mode selector switch
S Sport For standard driving
C Comfort For comfort driving
Warning!
G
On slippery road surfaces, never downshift
in order to obtain braking action. This could
result in drive wheel slip and reduced
vehicle control. Your vehicle’s ABS will not
prevent this type of loss of control.iYou cannot shift with the steering
wheel gearshift buttons when the gear
selector lever is in positionP,N orR.
iYou cannot shift with the steering
wheel gearshift buttons when the gear
selector lever is in positionP,N orR.
Page 193 of 434
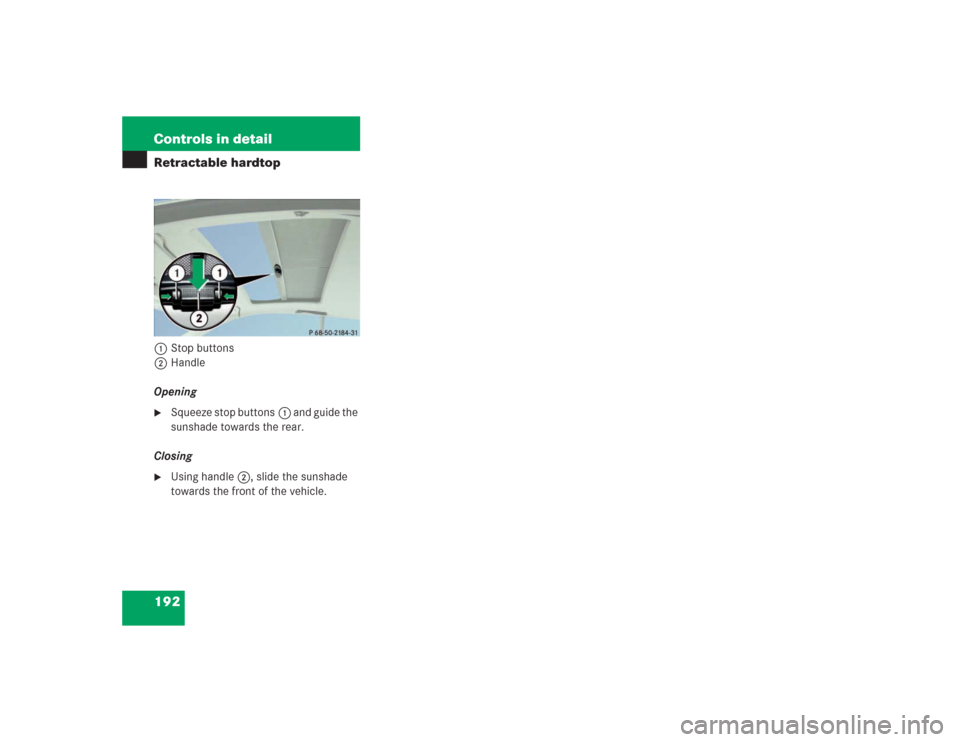
192 Controls in detailRetractable hardtop1Stop buttons
2Handle
Opening�
Squeeze stop buttons1 and guide the
sunshade towards the rear.
Closing
�
Using handle2, slide the sunshade
towards the front of the vehicle.
Page 216 of 434
215 Controls in detail
Useful features
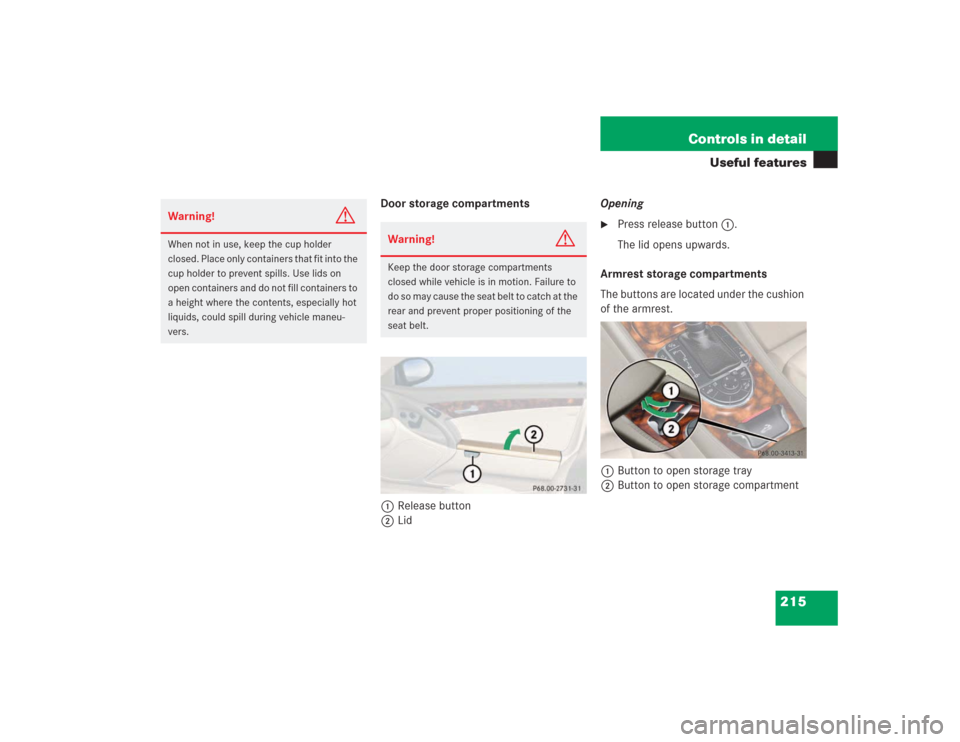
Door storage compartments
1Release button
2LidOpening
�
Press release button 1.
The lid opens upwards.
Armrest storage compartments
The buttons are located under the cushion
of the armrest.
1Button to open storage tray
2Button to open storage compartment
Warning!
G
When not in use, keep the cup holder
closed. Place only containers that fit into the
cup holder to prevent spills. Use lids on
open containers and do not fill containers to
a height where the contents, especially hot
liquids, could spill during vehicle maneu-
vers.
Warning!
G
Keep the door storage compartments
closed while vehicle is in motion. Failure to
do so may cause the seat belt to catch at the
rear and prevent proper positioning of the
seat belt.
Page 224 of 434

223 Controls in detail
Useful features
You can take and place telephone calls us-
ing the í and ì buttons on the
steering wheel. To carry out other tele-
phone functions, use the control system
(�page 152).
See separate instruction manual for in-
structions on how to operate the tele-
phone.
Tele Aid The Tele Aid system
(Tele
matic A
larm I
dentification on D
e-
mand)
The Tele Aid system consists of three
types of response:
�
automatic and manual emergency
�
roadside assistance
�
information.
The Tele Aid system is operational provid-
ing that the vehicle’s battery is charged,
properly connected, not damaged and cel-
lular and GPS coverage is available.
The speaker volume of a Tele Aid call can
be adjusted when using the volume control
on the multifunction steering wheel. To
raise, press buttonæ and to lower,
press buttonç.
�
To activate, press the SOS button, the
Roadside Assistance button• or
the Information button¡, depend-
ing on the type of response required.
Bear in mind that at a speed of just 30 mph
(approximately 50 km / h), your vehicle is
covering a distance of 44 feet
(approximately 14 m) every second.
!The initial activation of the Tele Aid sys-
tem may only be performed by com-
pleting the subscriber agreement and
placing an acquaintance call using the
SOS button. Failure to complete either
of these steps will result in a system
that is not activated. If the system is
not activated, the indicator lamp in the
SOS button stays on after switching on
the ignition and the message
Tele Aid
not activated
will appear in the multi-
function display for approximately
ten seconds.
If you have any questions regarding ac-
tivation, please call the Response
Center at 1-800-756-9018 (in the USA)
or 1-888-923-8367 (in Canada).
Page 230 of 434

229 Controls in detail
Useful features
Upgrade Signals
The Tele Aid system processes calls using
the following priority.�
Automatic emergency – First priority
�
Manual emergency – Second priority
�
Roadside assistance – Third priority
�
Information – Fourth priority
Should a higher priority call be initiated
while you are connected, an upgrade (al-
ternating) tone will be heard, and the ap-
propriate indicator lamp will flash. If
certain information such as vehicle identi-
fication number or customer information is
not available, the operator may need to re-
transmit.
During this time you will hear a beep and
voice contact will be interrupted. Voice
contact will resume once the retransmis-
sion is completed. Once a call is conclud-
ed, a beep will be heard, and the respective
indicator lamp will stop flashing. The
COMAND system operation will resume. Response Center was established, then
the Tele Aid system could not initiate
an Information call (e.g. the relevant
cellular phone network is not avail-
able). The message
Info Call failed
appears in the multifunction display.
Information calls can be terminated us-
ing the ìbutton on the multifunc-
tion steering wheel.!If the indicator lamps do not start flash-
ing after pressing one of the buttons or
remain illuminated (in red) at any time,
the Tele Aid system has detected a
malfunction or the service is currently
not active, and may not initiate a call.
Visit your Mercedes-Benz Center and
have the system checked or contact
the Response Center at
1-800-756-9018 (in the USA) or
1-888-923-8367 (in Canada) as soon
as possible.
!If the indicator lamp continues to flash
or the system does not reset, contact
the Response Center at
1-800-756-9018 (in the USA) or
1-888-923-8367 (in Canada), or
Mercedes-Benz Customer Assistance
at 1-800-FOR-MERCedes
(1-800-367-6372) in the USA or
Customer Service at 1-800-387-0100
in Canada.iThe indicator lamp in the respective
button flashes until the call is conclud-
ed. Calls can only be terminated by a
Response Center or Customer Assis-
tance Center representative except
Roadside Assistance and Information
calls, which can also be terminated by
pressing button ì on the multifunc-
tion steering wheel.
Page 232 of 434

231 Controls in detail
Useful features
Stolen vehicle tracking services
In the event your vehicle was stolen:�
Report the incident to the police
The police will issue a numbered inci-
dent report.
�
Pass this number on to the
Mercedes-Benz Response Center along
with your password issued to you when
you subscribed to the service.
The Response Center will then attempt
to covertly contact the vehicle’s Tele
Aid system. Once the vehicle is locat-
ed, the Response Center will contact
the local law enforcement and you. The
vehicle’s location will only be provided
to law enforcement.
Garage door opener
The built-in remote control is capable of
operating up to three separately controlled
devices, for example garage door openers,
gate openers, or other devices compatible
with HomeLink
® or some other systems.
You can program the signal transmitter
buttons.
Remote control integrated into the interior
rear view mirror1Indicator lamp
2 3 4Signal transmitter button
5Hand-held transmitter button
6Hand-held remote control trans-
mitter (not part of the vehicle
equipment)
Page 234 of 434

233 Controls in detail
Useful features
Programming or reprogramming the in-
tegrated remote control
Step 1:�
Switch on ignition.
Step 2:
�
If you have previously programmed an
integrated signal transmitter button
and wish to retain its programming,
proceed to step 3. Otherwise, press
and hold the two outer signal transmit-
ter buttons2 and4 and release
them only when the indicator light be-
gins to flash after approximately 20
seconds (do not hold the button for
longer than 30 seconds). This proce-
dure erases any previous settings for
all three channels and initializes the
memory. If you later wish to program a
second and/or third hand-held trans-
mitter to the remaining two signal
transmitter buttons, do not repeat this
step and begin directly with step 3.Step 3:
�
Hold the end of the hand-held remote
control transmitter6 of the device
you wish to train approximately 2 to
5 in (5 to12 cm) away from the surface
of the integrated remote control locat-
ed on the interior rear view mirror,
keeping the indicator lamp1 in view.
Step 4:
�
Using both hands, simultaneously
press the hand-held transmitter
button5 and the desired integrated
signal transmitter button (2, 3
or4). Do not release the buttons until
completing step 5.
The indicator lamp1 on the integrat-
ed remote control will flash, first slowly
and then rapidly.Step 5:
�
When the indicator lamp1 flashes
rapidly, release both buttons.
Step 6:
�
Press and hold the just-trained inte-
grated signal transmitter button and
observe the indicator lamp1.
If the indicator lamp1 stays on con-
stantly, programming is complete and
your device should activate when the
integrated signal transmitter button is
pressed and released.iThe indicator lamp1 flashes the first
time the signal transmitter button is
programmed. If this button has already
been programmed, the indicator lamp
will only start flashing after 20 sec-
onds.