Page 105 of 435
104 Controls in detailLocking and unlockingTrunk lid emergency release
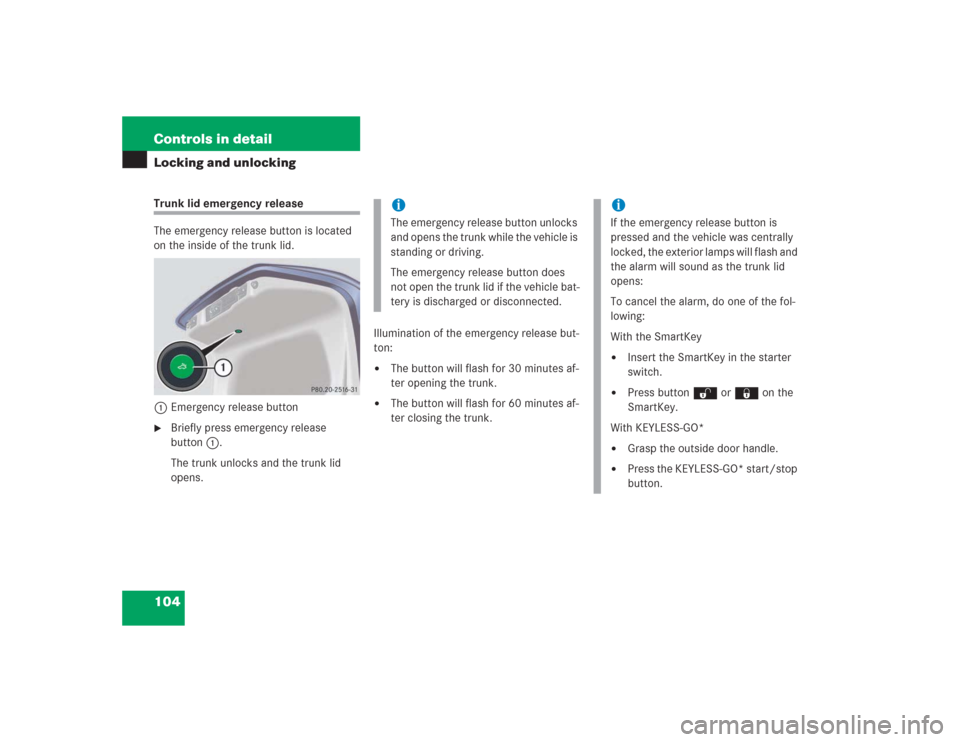
The emergency release button is located
on the inside of the trunk lid.
1Emergency release button�
Briefly press emergency release
button1.
The trunk unlocks and the trunk lid
opens.Illumination of the emergency release but-
ton:
�
The button will flash for 30 minutes af-
ter opening the trunk.
�
The button will flash for 60 minutes af-
ter closing the trunk.iThe emergency release button unlocks
and opens the trunk while the vehicle is
standing or driving.
The emergency release button does
not open the trunk lid if the vehicle bat-
tery is discharged or disconnected.
iIf the emergency release button is
pressed and the vehicle was centrally
locked, the exterior lamps will flash and
the alarm will sound as the trunk lid
opens:
To cancel the alarm, do one of the fol-
lowing:
With the SmartKey�
Insert the SmartKey in the starter
switch.
�
Press button Œ or ‹ on the
SmartKey.
With KEYLESS-GO*
�
Grasp the outside door handle.
�
Press the KEYLESS-GO* start/stop
button.
Page 106 of 435
105 Controls in detail
Locking and unlocking
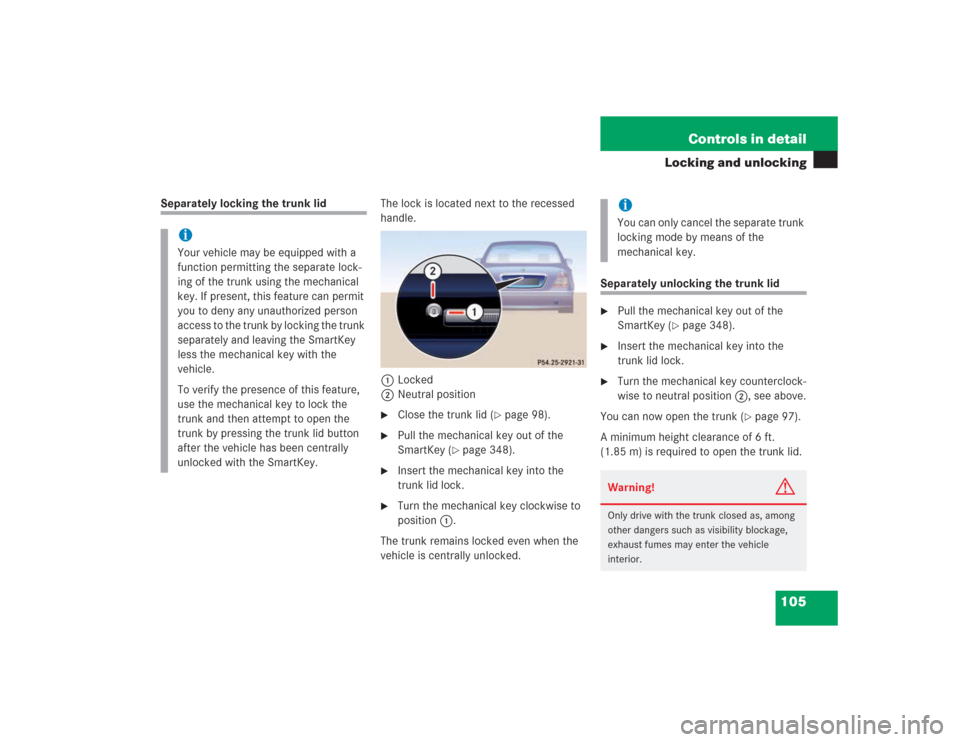
Separately locking the trunk lidThe lock is located next to the recessed
handle.
1Locked
2Neutral position
�
Close the trunk lid (
�page 98).
�
Pull the mechanical key out of the
SmartKey (
�page 348).
�
Insert the mechanical key into the
trunk lid lock.
�
Turn the mechanical key clockwise to
position1.
The trunk remains locked even when the
vehicle is centrally unlocked.
Separately unlocking the trunk lid�
Pull the mechanical key out of the
SmartKey (
�page 348).
�
Insert the mechanical key into the
trunk lid lock.
�
Turn the mechanical key counterclock-
wise to neutral position2, see above.
You can now open the trunk (
�page 97).
A minimum height clearance of 6 ft.
(1.85 m) is required to open the trunk lid.
iYour vehicle may be equipped with a
function permitting the separate lock-
ing of the trunk using the mechanical
key. If present, this feature can permit
you to deny any unauthorized person
access to the trunk by locking the trunk
separately and leaving the SmartKey
less the mechanical key with the
vehicle.
To verify the presence of this feature,
use the mechanical key to lock the
trunk and then attempt to open the
trunk by pressing the trunk lid button
after the vehicle has been centrally
unlocked with the SmartKey.
iYou can only cancel the separate trunk
locking mode by means of the
mechanical key.Warning!
G
Only drive with the trunk closed as, among
other dangers such as visibility blockage,
exhaust fumes may enter the vehicle
interior.
Page 108 of 435
107 Controls in detail
Locking and unlocking
Locking and unlocking from the inside
You can lock or unlock the doors and the
trunk from inside using the central locking
or unlocking switch. This can be useful, for
example, if you want to lock the vehicle be-
fore starting to drive.
The fuel filler flap will not be locked or un-
locked with the central locking or unlock-
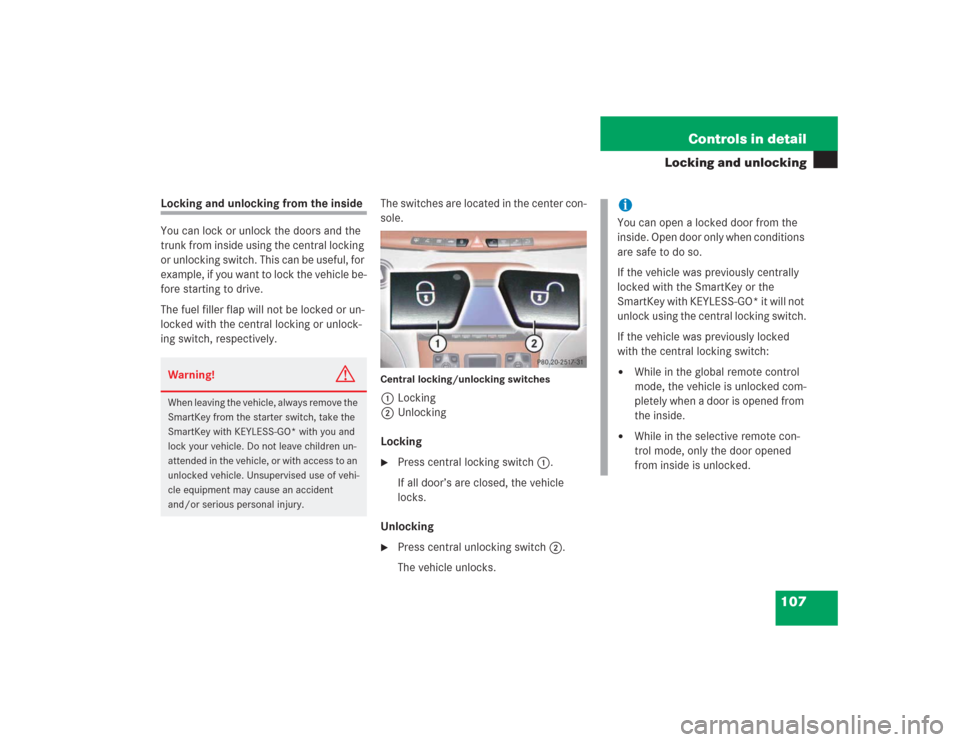
ing switch, respectively.The switches are located in the center con-
sole.
Central locking/unlocking switches1Locking
2Unlocking
Locking�
Press central locking switch1.
If all door’s are closed, the vehicle
locks.
Unlocking
�
Press central unlocking switch2.
The vehicle unlocks.
Warning!
G
When leaving the vehicle, always remove the
SmartKey from the starter switch, take the
SmartKey with KEYLESS-GO* with you and
lock your vehicle. Do not leave children un-
attended in the vehicle, or with access to an
unlocked vehicle. Unsupervised use of vehi-
cle equipment may cause an accident
and/or serious personal injury.
iYou can open a locked door from the
inside. Open door only when conditions
are safe to do so.
If the vehicle was previously centrally
locked with the SmartKey or the
SmartKey with KEYLESS-GO* it will not
unlock using the central locking switch.
If the vehicle was previously locked
with the central locking switch:�
While in the global remote control
mode, the vehicle is unlocked com-
pletely when a door is opened from
the inside.
�
While in the selective remote con-
trol mode, only the door opened
from inside is unlocked.
Page 109 of 435
108 Controls in detailSeats
�SeatsFor more information on seat adjustment,
see “Seat adjustment” (
�page 35).
Easy-entry/exit feature
With the easy-entry/exit feature activated,
the steering wheel tilts upwards and the
driver’s seat moves to the rear.
This allows easier entry into and exit from
the vehicle when the driver’s door is
opened. However, the engine must be
turned off.
When the SmartKey is inserted in the start-
er switch or you have pressed the
KEYLESS-GO* start/stop button once and
the driver’s door is closed, the steering
wheel and the driver’s seat return to their
last set positions.You can activate the following functions:
�
Steering column
Only the steering column is adjusted.
�
Steering column and seat
The steering column and the seat are
adjusted.
The easy-entry/exit feature can be
switched on or off in the convenience sub-
menu of the control system (
�page 160).
Warning!
G
You must ensure that no one can become
trapped or injured by the moving steering
wheel and driver’s seat when the
easy-entry / exit feature is activated, the
driver’s door is being opened, and the en-
gine is turned off or the SmartKey is re-
moved from the starter switch.
Do not leave children unattended in the ve-
hicle, or with access to an unlocked vehicle.
Children could open the driver’s door and
unintentionally activate the easy-entry/exit
feature*, which could result in an accident
and/or serious personal injury.
iTo cancel seat/steering wheel move-
ment, do one of the following:�
Press the seat adjustment switch
(�page 35)
�
Move the steering column stalk
(�page 37)
�
Press the memory button
(�page 121)
Page 113 of 435
112 Controls in detailSeatsLumbar support
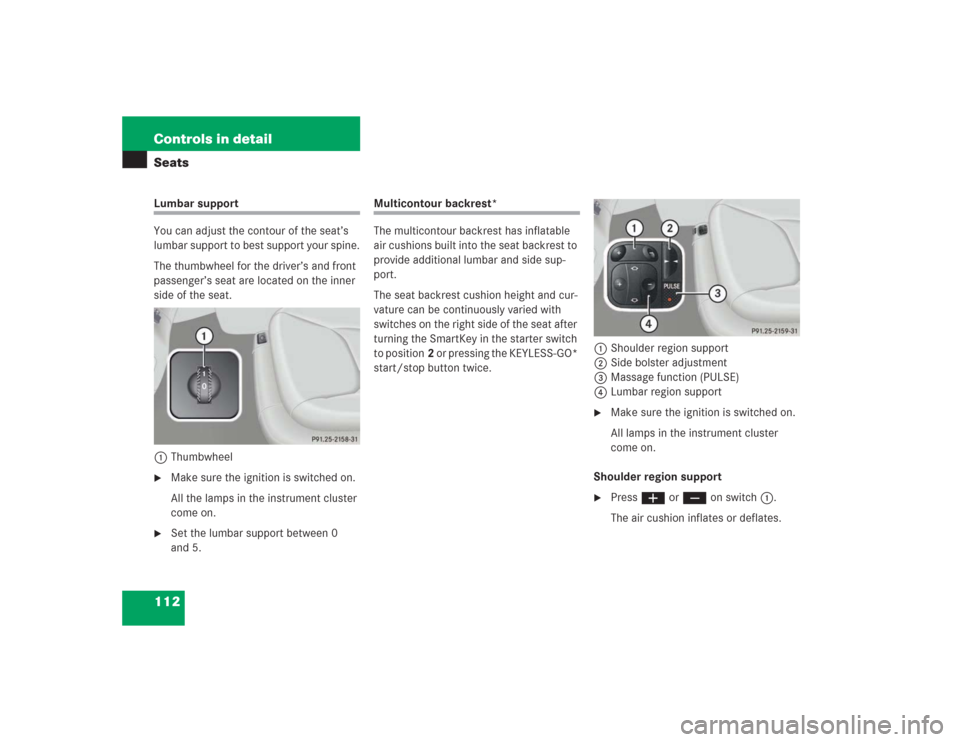
You can adjust the contour of the seat’s
lumbar support to best support your spine.
The thumbwheel for the driver’s and front
passenger’s seat are located on the inner
side of the seat.
1Thumbwheel�
Make sure the ignition is switched on.
All the lamps in the instrument cluster
come on.
�
Set the lumbar support between 0
and 5.
Multicontour backrest*
The multicontour backrest has inflatable
air cushions built into the seat backrest to
provide additional lumbar and side sup-
port.
The seat backrest cushion height and cur-
vature can be continuously varied with
switches on the right side of the seat after
turning the SmartKey in the starter switch
to position2 or pressing the KEYLESS-GO*
start/stop button twice.1Shoulder region support
2Side bolster adjustment
3Massage function (PULSE)
4Lumbar region support
�
Make sure the ignition is switched on.
All lamps in the instrument cluster
come on.
Shoulder region support
�
Press æ or ç on switch1.
The air cushion inflates or deflates.
Page 118 of 435
117 Controls in detailSeats
Seat ventilation*
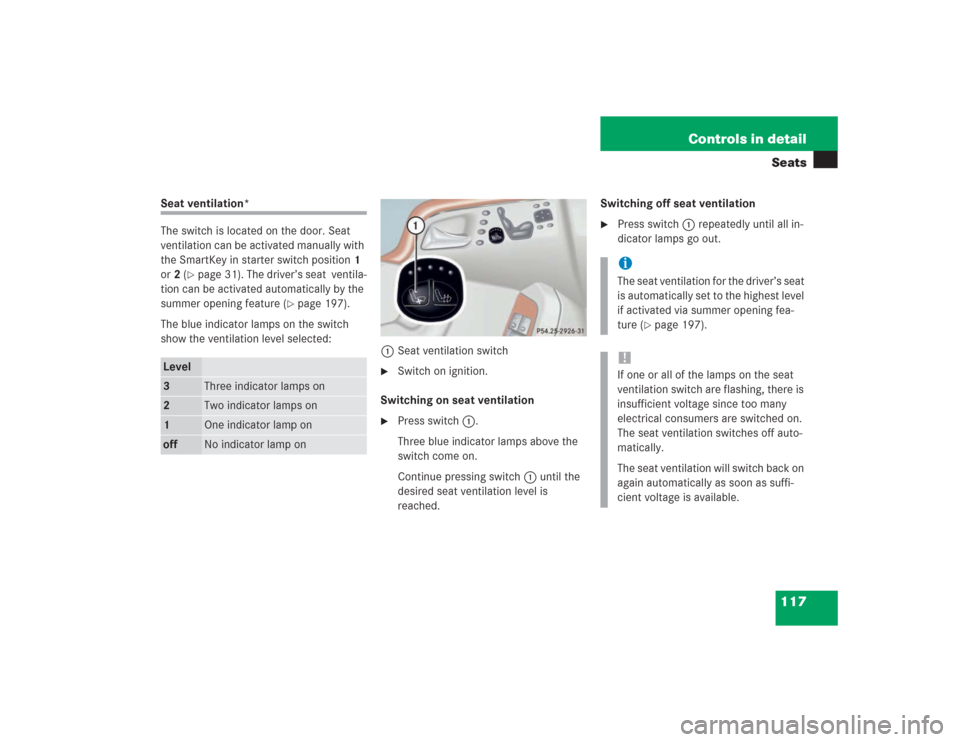
The switch is located on the door. Seat
ventilation can be activated manually with
the SmartKey in starter switch position1
or2 (
�page 31). The driver’s seat ventila-
tion can be activated automatically by the
summer opening feature (
�page 197).
The blue indicator lamps on the switch
show the ventilation level selected:
1Seat ventilation switch
�
Switch on ignition.
Switching on seat ventilation
�
Press switch1.
Three blue indicator lamps above the
switch come on.
Continue pressing switch1 until the
desired seat ventilation level is
reached.Switching off seat ventilation
�
Press switch1 repeatedly until all in-
dicator lamps go out.
Level3
Three indicator lamps on
2
Two indicator lamps on
1
One indicator lamp on
off
No indicator lamp on
iThe seat ventilation for the driver’s seat
is automatically set to the highest level
if activated via summer opening fea-
ture (
�page 197).
!If one or all of the lamps on the seat
ventilation switch are flashing, there is
insufficient voltage since too many
electrical consumers are switched on.
The seat ventilation switches off auto-
matically.
The seat ventilation will switch back on
again automatically as soon as suffi-
cient voltage is available.
Page 122 of 435
121 Controls in detail
Memory function
�Memory function
You can store up to three different settings
per SmartKey or SmartKey with
KEYLESS-GO*.
The following settings are saved for each
stored position:�
Seat and backrest position
�
Settings for the multicontour seat*
�
Steering wheel position
�
Exterior rear view mirror position
�
Automatic climate control
These key-dependent memory settings
can be deactivated if desired
(
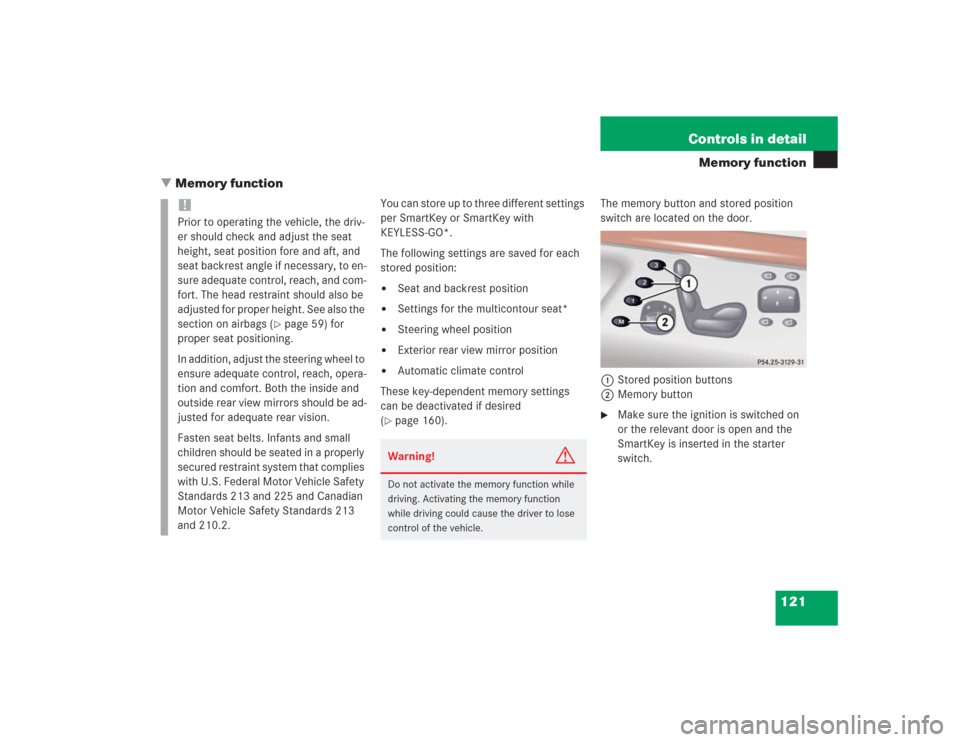
�page 160).The memory button and stored position
switch are located on the door.
1 Stored position buttons
2Memory button
�
Make sure the ignition is switched on
or the relevant door is open and the
SmartKey is inserted in the starter
switch.
!Prior to operating the vehicle, the driv-
er should check and adjust the seat
height, seat position fore and aft, and
seat backrest angle if necessary, to en-
sure adequate control, reach, and com-
fort. The head restraint should also be
adjusted for proper height. See also the
section on airbags (
�page 59) for
proper seat positioning.
In addition, adjust the steering wheel to
ensure adequate control, reach, opera-
tion and comfort. Both the inside and
outside rear view mirrors should be ad-
justed for adequate rear vision.
Fasten seat belts. Infants and small
children should be seated in a properly
secured restraint system that complies
with U.S. Federal Motor Vehicle Safety
Standards 213 and 225 and Canadian
Motor Vehicle Safety Standards 213
and 210.2.
Warning!
G
Do not activate the memory function while
driving. Activating the memory function
while driving could cause the driver to lose
control of the vehicle.
Page 123 of 435
122 Controls in detailMemory functionStoring positions into memory�
Adjust the seats, steering wheel and
exterior rear view mirrors to the de-
sired position (
�page 34).
�
Press memory button2.
�
Release memory button2 and push
one of the position buttons1 within
three seconds.
All the settings are stored with the se-
lected position.
Recalling positions from memory�
Press and hold one of the position
buttons1 until the seat, steering
wheel and exterior rear view mirrors
have fully moved to the stored posi-
tions.Storing exterior rear view mirror park-
ing position
For easier parking, you can adjust the pas-
senger-side exterior rear view mirror so
that you can see the right rear wheel as
soon as you engage reverse gearR.
For information on activating the parking
position, see “Setting parking position for
exterior rear view mirror” (
�page 162).
iReleasing the button immediately
stops movement to the stored posi-
tions.Warning!
G
Do not operate the power seats using the
memory button if the seat backrest is in an
excessively reclined position. Doing so
could cause damage to front or rear seats.
First move seat backrest to an upright posi-
tion.
iYou can store a parking position for the
passenger-side exterior rear view mir-
ror for each SmartKey or SmartKey
with KEYLESS-GO*.