Page 120 of 435
119 Controls in detailSeats
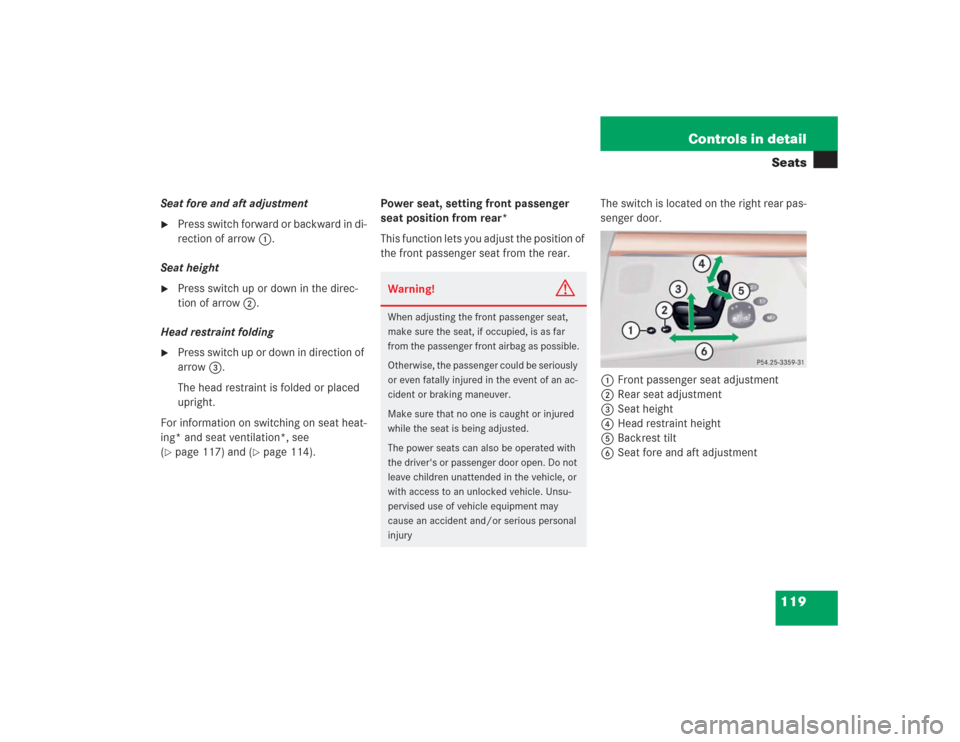
Seat fore and aft adjustment�
Press switch forward or backward in di-
rection of arrow1.
Seat height
�
Press switch up or down in the direc-
tion of arrow2.
Head restraint folding
�
Press switch up or down in direction of
arrow3.
The head restraint is folded or placed
upright.
For information on switching on seat heat-
ing* and seat ventilation*, see
(
�page 117) and (
�page 114).Power seat, setting front passenger
seat position from rear*
This function lets you adjust the position of
the front passenger seat from the rear.The switch is located on the right rear pas-
senger door.
1Front passenger seat adjustment
2Rear seat adjustment
3Seat height
4Head restraint height
5Backrest tilt
6Seat fore and aft adjustment
Warning!
G
When adjusting the front passenger seat,
make sure the seat, if occupied, is as far
from the passenger front airbag as possible.
Otherwise, the passenger could be seriously
or even fatally injured in the event of an ac-
cident or braking maneuver.
Make sure that no one is caught or injured
while the seat is being adjusted.
The power seats can also be operated with
the driver's or passenger door open. Do not
leave children unattended in the vehicle, or
with access to an unlocked vehicle. Unsu-
pervised use of vehicle equipment may
cause an accident and/or serious personal
injury
Page 130 of 435
129 Controls in detail
Lighting
Switching on the hazard warning
flasher�
Press hazard warning flasher switch.
All turn signals will flash.
Switching off the hazard warning
flasher
�
Press hazard warning flasher switch
again.
Interior lighting
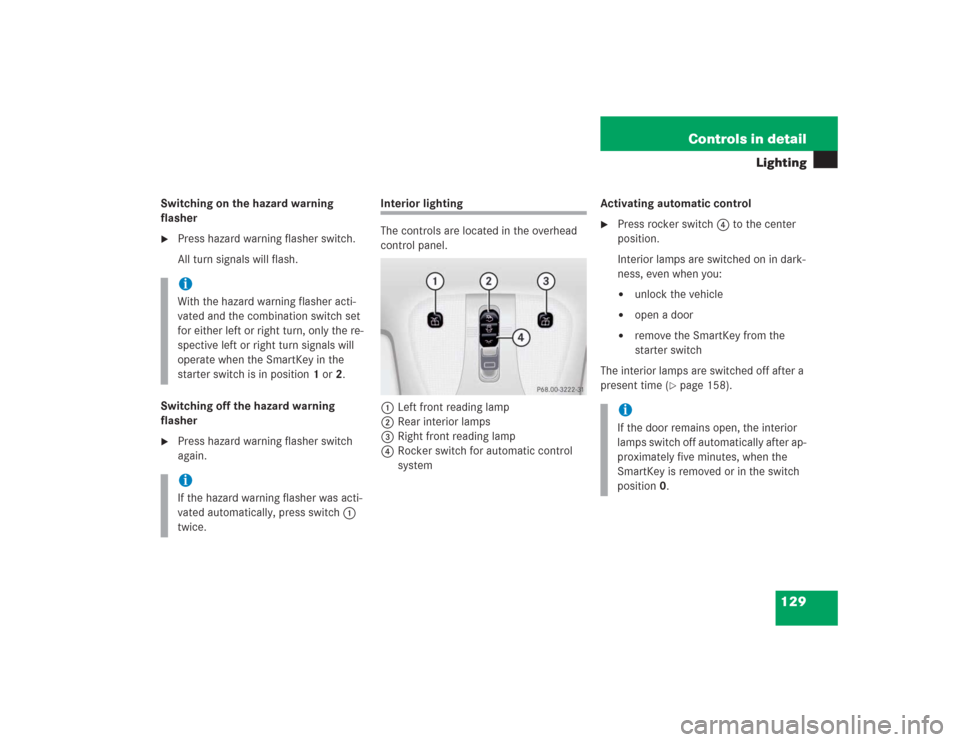
The controls are located in the overhead
control panel.
1Left front reading lamp
2Rear interior lamps
3Right front reading lamp
4Rocker switch for automatic control
systemActivating automatic control
�
Press rocker switch 4 to the center
position.
Interior lamps are switched on in dark-
ness, even when you:�
unlock the vehicle
�
open a door
�
remove the SmartKey from the
starter switch
The interior lamps are switched off after a
present time (
�page 158).
iWith the hazard warning flasher acti-
vated and the combination switch set
for either left or right turn, only the re-
spective left or right turn signals will
operate when the SmartKey in the
starter switch is in position1 or2.iIf the hazard warning flasher was acti-
vated automatically, press switch1
twice.
iIf the door remains open, the interior
lamps switch off automatically after ap-
proximately five minutes, when the
SmartKey is removed or in the switch
position0.
Page 131 of 435
130 Controls in detailLightingDeactivating automatic control�
Press the ñ symbol on rocker
switch 4.
The interior lighting remains switched
off in darkness, even when you:�
unlock the vehicle
�
open a door
�
remove the SmartKey from the
starter switch
Manual control
Switching front interior lamps on and off
�
Press the ð symbol on rocker
switch 4.
The front interior lighting switches on.
�
Press the ñ symbol on rocker
switch 4 again.
The interior lighting switches off. The
automatic control function is activated.Switching rear interior lamps on and off
�
Press switch2 on theò symbol.
The rear compartment lighting is
switched on.
�
Press switch2 on theò symbol
again.
The rear compartment lighting is
switched off.
Switching front reading lamps on and
off
�
Press switch 1 or 3.
The corresponding reading lamp is
switched on.
�
Press switch 1 or 3 again.
The corresponding reading lamp is
switched off.
Courtesy lighting
For better orientation in the dark, courtesy
lamps will illuminate the interior of your ve-
hicle as follows:
With parking lamps switched on:�
the door entry lamps
�
the driver and passenger footwells
With SmartKey in starter switch position1:
�
the door entry lamps
�
the center consoleiIf you turn the SmartKey in the starter
switch to position0 and switch off the
exterior headlamps, the door entry
lamps will remain lit for approximately
five minutes.
Page 132 of 435
131 Controls in detail
Instrument cluster
�Instrument cluster
A full view illustration of the instrument
cluster can be found in the “At a glance”
section of this manual (
�page 22).
The instrument cluster is activated when
you:
�
open a door
�
turn on the ignition
�
press the reset button (
�page 22)
�
switch on the exterior lamps
You can change the instrument cluster set-
tings in the instrument cluster submenu of
the control system (
�page 154).
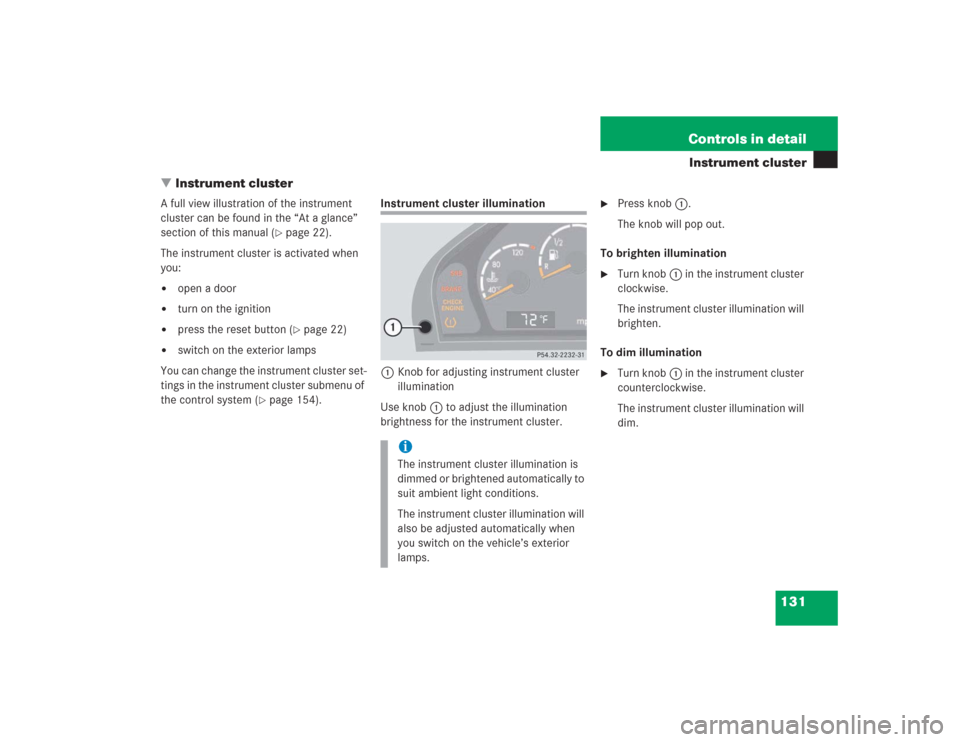
Instrument cluster illumination
1Knob for adjusting instrument cluster
illumination
Use knob1 to adjust the illumination
brightness for the instrument cluster.
�
Press knob1.
The knob will pop out.
To brighten illumination
�
Turn knob1 in the instrument cluster
clockwise.
The instrument cluster illumination will
brighten.
To dim illumination
�
Turn knob1 in the instrument cluster
counterclockwise.
The instrument cluster illumination will
dim.
iThe instrument cluster illumination is
dimmed or brightened automatically to
suit ambient light conditions.
The instrument cluster illumination will
also be adjusted automatically when
you switch on the vehicle’s exterior
lamps.
Page 154 of 435
153 Controls in detail
Control system
The table below shows what settings can
be changed within the various menus. De-
tailed instructions on making individual
settings can be found on the following pag-
es.INSTRUMENT CLUSTER
LIGHTING
VEHICLE
CONVENIENCE
Select temperature display
mode
Set daytime running lamp mode
(USA only)
Set automatic locking
Set key-dependency
Select multifunction display
mode
Set locator lighting
Limiting opening height of trunk
lid*
Activate easy-entry/exit feature
Select language
Exterior lamps delayed shut-off
Set parking position for exterior
rear view mirror
Interior lighting delayed shut-off
Set fold-in function for exterior
rear view mirrorsAdjusting the drive-dynamic
seat (driver’s side)
Page 157 of 435
156 Controls in detailControl systemSetting daytime running lamp mode
(USA only)�
Move the selection marker with
theæ orç button to the
LIGHT-
ING
submenu.
�
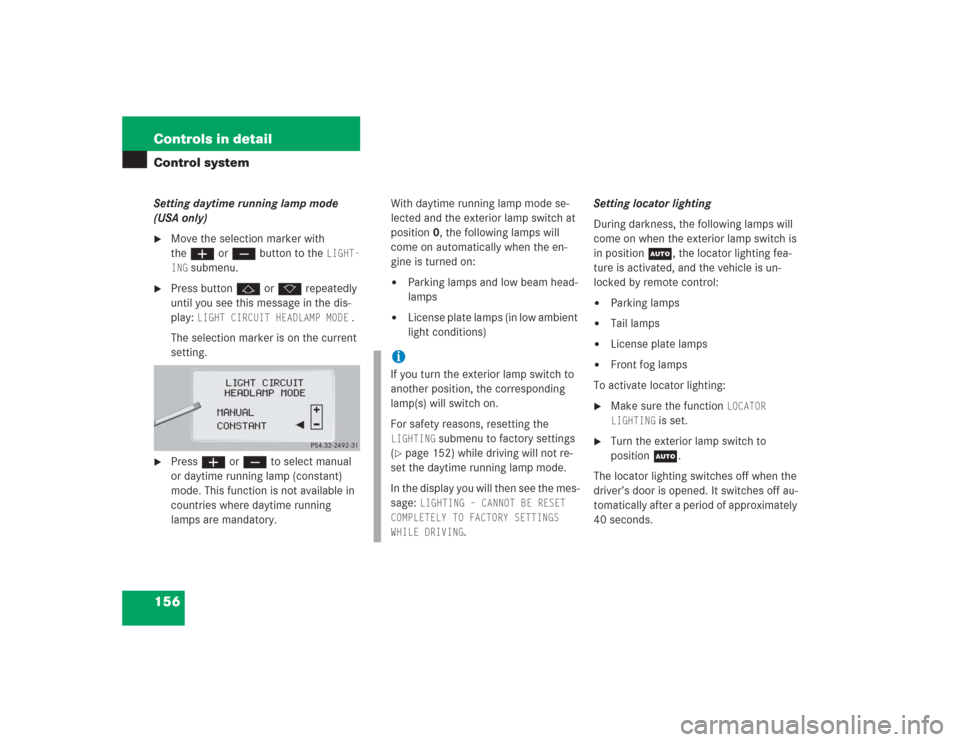
Press buttonj ork repeatedly
until you see this message in the dis-
play:
LIGHT CIRCUIT HEADLAMP MODE
.
The selection marker is on the current
setting.
�
Pressæ orç to select manual
or daytime running lamp (constant)
mode. This function is not available in
countries where daytime running
lamps are mandatory.With daytime running lamp mode se-
lected and the exterior lamp switch at
position0, the following lamps will
come on automatically when the en-
gine is turned on:
�
Parking lamps and low beam head-
lamps
�
License plate lamps (in low ambient
light conditions) Setting locator lighting
During darkness, the following lamps will
come on when the exterior lamp switch is
in position U, the locator lighting fea-
ture is activated, and the vehicle is un-
locked by remote control:
�
Parking lamps
�
Tail lamps
�
License plate lamps
�
Front fog lamps
To activate locator lighting:
�
Make sure the function
LOCATOR
LIGHTING
is set.
�
Turn the exterior lamp switch to
positionU.
The locator lighting switches off when the
driver’s door is opened. It switches off au-
tomatically after a period of approximately
40 seconds.
iIf you turn the exterior lamp switch to
another position, the corresponding
lamp(s) will switch on.
For safety reasons, resetting the LIGHTING
submenu to factory settings
(
�page 152) while driving will not re-
set the daytime running lamp mode.
In the display you will then see the mes-
sage:
LIGHTING – CANNOT BE RESET
COMPLETELY TO FACTORY SETTINGS
WHILE DRIVING
.
Page 160 of 435
159 Controls in detail
Control system
Vehicle submenu
Access the
VEHICLE
submenu via the
SET-
INGS
menu. Use the
VEHICLE
submenu to
make general vehicle settings. The follow-
ing functions are available:Setting automatic locking
Use this function to activate or deactivate
the automatic central locking. With the au-
tomatic central locking system activated,
the vehicle is centrally locked at vehicle
speeds of approximately 9 mph
(15 km/h).
�
Press buttonæ orç to move
the selection marker to the
VEHICLE
submenu.
�
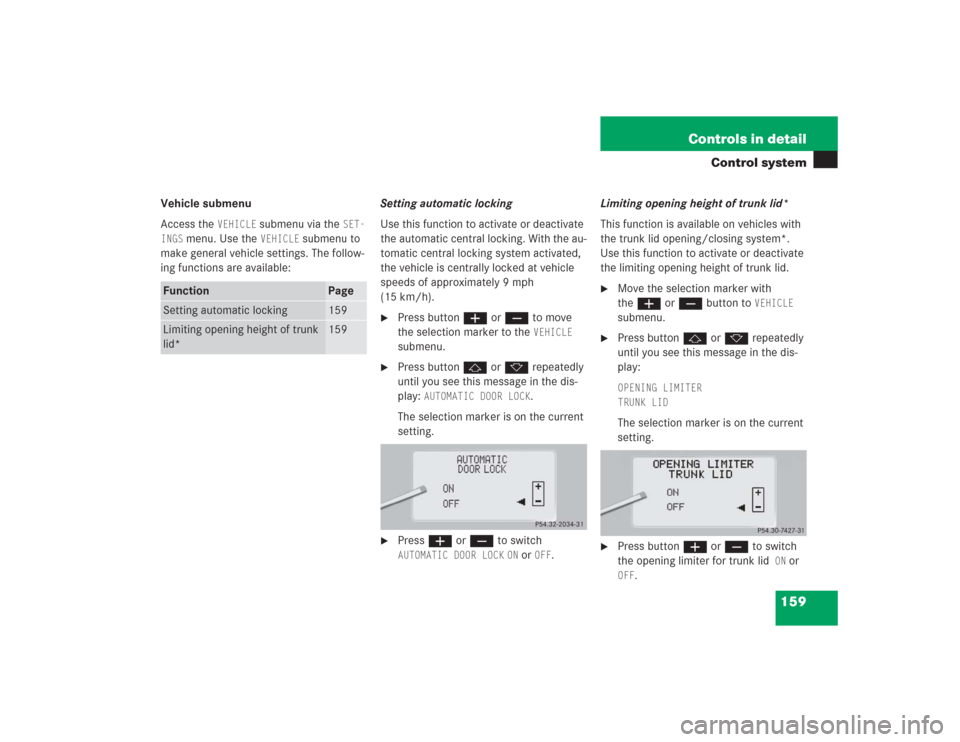
Press buttonj ork repeatedly
until you see this message in the dis-
play:
AUTOMATIC DOOR LOCK
.
The selection marker is on the current
setting.
�
Pressæ orç to switch AUTOMATIC DOOR LOCK
ON or
OFF
.Limiting opening height of trunk lid*
This function is available on vehicles with
the trunk lid opening/closing system*.
Use this function to activate or deactivate
the limiting opening height of trunk lid.
�
Move the selection marker with
theæ orç button to
VEHICLE
submenu.
�
Press buttonj ork repeatedly
until you see this message in the dis-
play:OPENING LIMITER
TRUNK LIDThe selection marker is on the current
setting.
�
Press buttonæ orç to switch
the opening limiter for trunk lid
ON
or
OFF
.
Function
Page
Setting automatic locking
159
Limiting opening height of trunk
lid*
159
Page 162 of 435
161 Controls in detail
Control system
After entering the vehicle, the steering
wheel and seat will move into the position
stored in memory when:�
the driver’s door is closed
�
you put the SmartKey in the starter
switch
�
press and hold the appropriate stored
position button on the memory switch
(�page 121)
�
Move the selection marker with
theæ orç button to
the
CONVENIENCE
submenu.
�
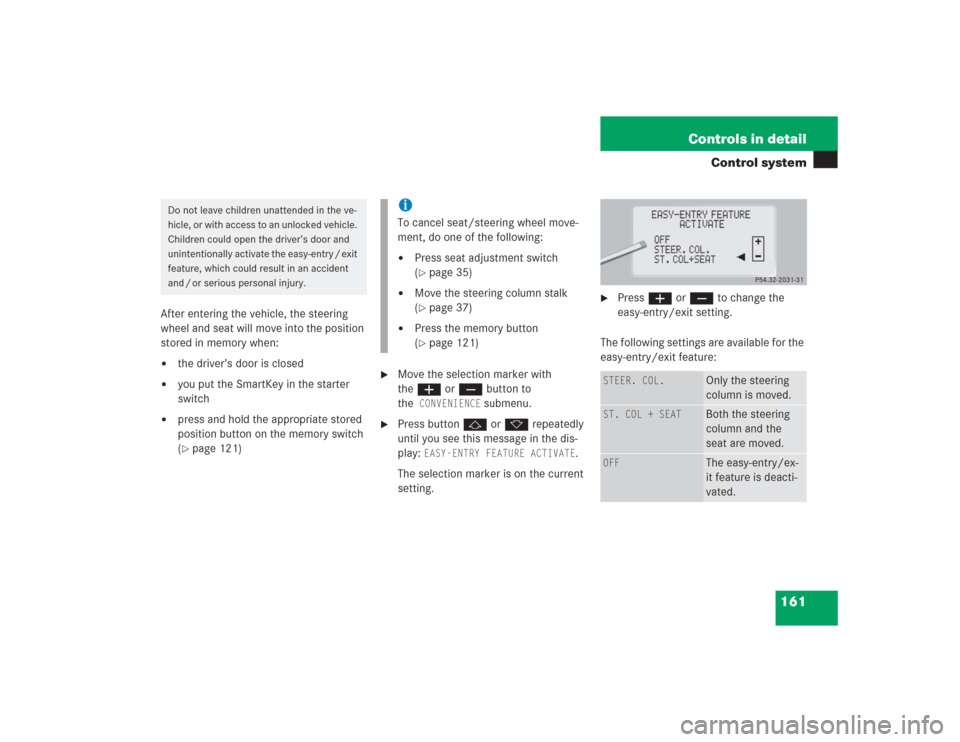
Press buttonj ork repeatedly
until you see this message in the dis-
play:
EASY-ENTRY FEATURE ACTIVATE
.
The selection marker is on the current
setting.
�
Pressæ orç to change the
easy-entry/exit setting.
The following settings are available for the
easy-entry/exit feature:
Do not leave children unattended in the ve-
hicle, or with access to an unlocked vehicle.
Children could open the driver’s door and
unintentionally activate the easy-entry / exit
feature, which could result in an accident
and / or serious personal injury.
iTo cancel seat/steering wheel move-
ment, do one of the following:�
Press seat adjustment switch
(�page 35)
�
Move the steering column stalk
(�page 37)
�
Press the memory button
(�page 121)
STEER. COL.
Only the steering
column is moved.
ST. COL + SEAT
Both the steering
column and the
seat are moved.
OFF
The easy-entry/ex-
it feature is deacti-
vated.