Page 186 of 344
186 Controls in detailUseful featuresTrip computer*
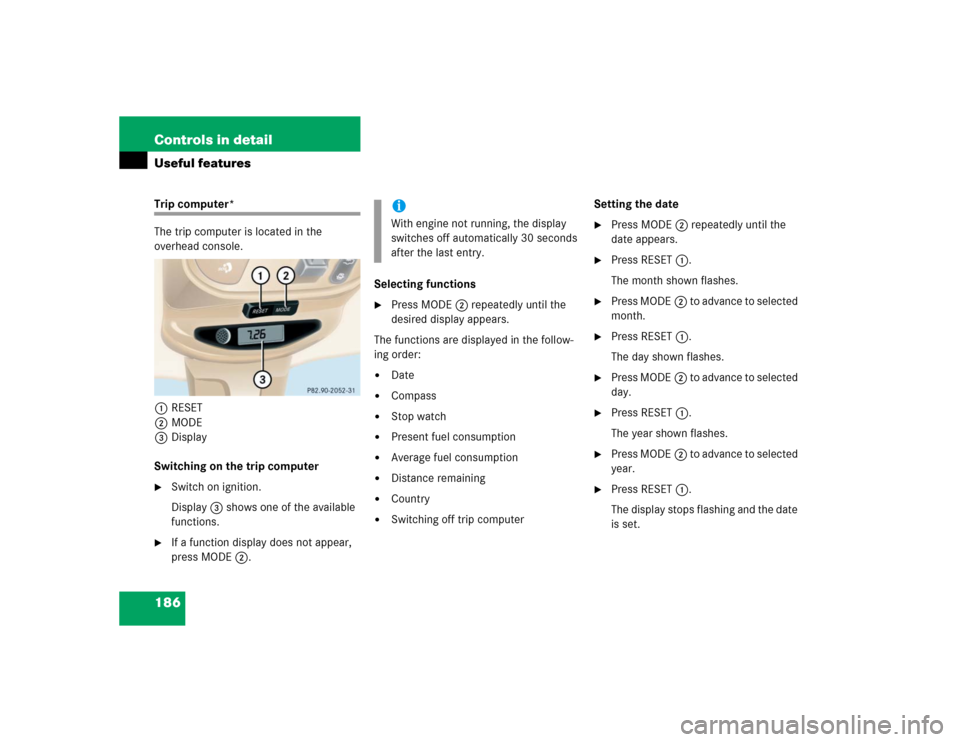
The trip computer is located in the
overhead console.
1RESET
2MODE
3Display
Switching on the trip computer�
Switch on ignition.
Display3 shows one of the available
functions.
�
If a function display does not appear,
press MODE2.Selecting functions
�
Press MODE2 repeatedly until the
desired display appears.
The functions are displayed in the follow-
ing order:
�
Date
�
Compass
�
Stop watch
�
Present fuel consumption
�
Average fuel consumption
�
Distance remaining
�
Country
�
Switching off trip computerSetting the date
�
Press MODE2 repeatedly until the
date appears.
�
Press RESET1.
The month shown flashes.
�
Press MODE2 to advance to selected
month.
�
Press RESET1.
The day shown flashes.
�
Press MODE2 to advance to selected
day.
�
Press RESET1.
The year shown flashes.
�
Press MODE2 to advance to selected
year.
�
Press RESET1.
The display stops flashing and the date
is set.
iWith engine not running, the display
switches off automatically 30 seconds
after the last entry.
Page 187 of 344
187 Controls in detail
Useful features
Compass
The compass displays the direction the ve-
hicle is traveling. The display3 will show
you N, NE, E, SE, S, SW, W or NW.
To ensure the display is correct, the com-
pass must be set to the proper geographic
zone (
�page 188). It may also be neces-
sary to calibrate the compass
(
�page 188).
Zone map North America Zone map South America
iThe presence of buildings, bridges,
power lines and large antenna masts
can influence the displayed values. Me-
tallic or magnetic objects in or on the
vehicle can influence the accuracy of
the compass.
Page 188 of 344
188 Controls in detailUseful featuresSetting the compass zone�
Determine the geographical point of
the vehicle with the aid of the zone
maps.
�
Switch on the ignition.
�
Press MODE2 (
�page 186) repeat-
edly until the compass display appears
in the trip computer display3.
�
Press RESET1 (
�page 186) to select
the compass zone mode.
The zone selected last is shown in the
display.
�
Press RESET1 repeatedly until the
correct compass zone, as determined
from the zone map, is shown in the dis-
play.
�
Press MODE2 twice.
The new compass zone is activated and
the compass display will be shown.Calibrating the compass
If the vehicle was exposed to a significant
magnetic zone, such as high voltage power
lines, the compass may have to be calibrat-
ed.
To calibrate the compass correctly, ob-
serve the following:
�
Calibrate the compass in an area free
of steel superstructures and power
lines.
�
Switch off all electrical consumers (e.g.
exterior lamps, climate control, rear
window defroster etc.).
�
Do not open or close the
sliding / pop-up roof.
�
Close doors and liftgate.
�
Start and run the engine.
�
Press MODE2 (
�page 186) repeat-
edly until the compass display appears
in the trip computer display3.
�
Press RESET1 and afterwards press
MODE2.
In the display appears
CAL–
.
�
Press and hold RESET1 for approxi-
mately two seconds.
The calibration mode is activated and
the display shows
CAL
.
�
Drive without interruption two full cir-
cles at a speed between 3 mph
(5 km / h) and 7 mph (10 km / h).
The message
CAL
goes out after a short
time. The calibration is now complete.
iAn open liftgate triggers the
display
---
.
Page 189 of 344
189 Controls in detail
Useful features
Stop watch�
Press MODE2 (
�page 186) repeat-
edly until the stop watch display ap-
pears in the trip computer display3.
Counting
�
Press RESET1 (
�page 186) to start
counting.Stopping
�
Press RESET1 again to stop counting.
Resetting
�
Press and hold RESET1 until the dis-
play shows “0:00”.
Average fuel consumption
�
Press MODE2 (
�page 186) repeat-
edly until the average fuel consumption
display appears in the trip computer
display3.Distance remaining with fuel presently
in tank
�
Press MODE2 (
�page 186) repeat-
edly until the distance remaining dis-
play appears in the trip computer
display3.
iIf CAL
remains in the display, calibration
was not successfully completed. You
have to recalibrate:
�
Remove the key from the steering
lock.
�
Start the vehicle and start the cali-
bration procedure described previ-
ously.
We recommend that you have the com-
pass calibrated at a Mercedes-Benz
Light Truck Center.
iWhen the fuel supply drops to reserve
level the display flashes distance re-
maining.�
USA only:
The display alternates between FUEL
and distance remaining until
supply is consistently below the re-
serve level. When the fuel supply is
very low [approximately 1.5 gal
(5.5 l)]
FUEL
is displayed
continuously.
Page 190 of 344
190 Controls in detailUseful featuresCountry�
Press MODE2 (
�page 186) repeat-
edly until the country display appears
in the trip computer display3.
�
Press and hold RESET1 a minimum of
five seconds to change the country unit
system.
Canada units system selection
You can choose between CAN-English or
CAN-French.Setting CAN-English
�
Press RESET1 repeatedly until CAN is
displayed.
�
Press MODE2 to select
–ENG
.
�
Press MODE2 again to set CAN-En-
glish.Setting CAN-French
�
Press RESET1 repeatedly until CAN is
displayed.
�
Press MODE2.–ENG
is displayed.
�
Press RESET1 to select
–Fr
.
�
Press MODE2 to set CAN-French.
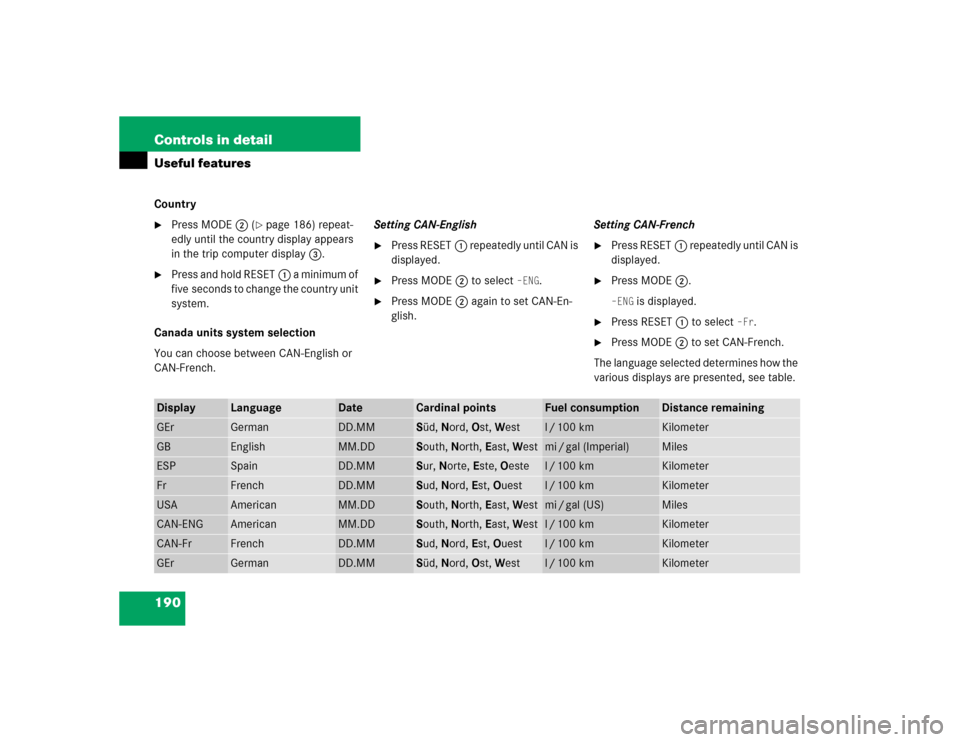
The language selected determines how the
various displays are presented, see table.
Display
Language
Date
Cardinal points
Fuel consumption
Distance remaining
GEr
German
DD.MM
Süd, Nord, Ost, West
l/100 km
Kilometer
GB
English
MM.DD
South, North, East, West
mi / gal (Imperial)
Miles
ESP
Spain
DD.MM
Sur, Norte, Este, Oeste
l/100 km
Kilometer
Fr
French
DD.MM
Sud, Nord, Est, Ouest
l/100 km
Kilometer
USA
American
MM.DD
South, North, East, West
mi / gal (US)
Miles
CAN-ENG
American
MM.DD
South, North, East, West
l/100 km
Kilometer
CAN-Fr
French
DD.MM
Sud, Nord, Est, Ouest
l/100 km
Kilometer
GEr
German
DD.MM
Süd, Nord, Ost, West
l/100 km
Kilometer
Page 219 of 344

219 Operation
Engine compartment
Checking engine oil level via display
When checking the oil level the vehicle
must�
be parked on level ground
�
be at normal operating temperature
�
have been stationary for at least five
minutes with the engine turned off
To check the engine oil level via the display
in the speedometer, do the following:
�
Turn the key in the steering lock to
position2.
1Button
2Display in speedometer
�
Wait until the display
------
appears in
the speedometer display2.
�
Within one second press button1
twice.
One of the following messages will
subsequently appear in the display:�
OIL i.OThe oil level is correct. Engine oil
does not to be added.
�
– 1.0 L�
Add 1.0 liter of engine oil.
�
– 1.5 L�
Add 1.5 liters of engine oil.
�
– 2.0 L�
Add 2.0 liters of engine oil.
For adding engine oil see (
�page 302).
More information on engine oil can be
found in the “Technical data” section
(
�page 300) and (
�page 301).Other display messages
If there is excess engine oil with the engine
at normal operating temperature, the
following message will appear in the
display:
OIL HIThe oil level is too high.�
Have excess oil siphoned.!Excess oil must be siphoned or drained
off. It could cause damage to the
engine and catalytic converter not
covered by the Mercedes-Benz Limited
Warranty.
Page 220 of 344
220 OperationEngine compartmentThe display
------
flashes in the
speedometer display, if a proper oil level
check cannot be performed.
�
If engine is at normal operating
temperature, wait five minutes before
repeating check procedure.
�
If engine is not yet at normal operating
temperature, wait 30 minutes before
repeating check procedure.
See the “Practical hints” section
(
�page 253) if the low engine oil level
warning lamp in the instrument cluster
flashes.Checking engine oil level with the oil
dipstick
When checking the oil level the vehicle
must
�
be parked on level ground
�
be at normal operating temperature
�
have been stationary for at least five
minutes with the engine turned off
To check the engine oil level with the oil
dipstick, do the following:
�
Open the hood (
�page 217).
�
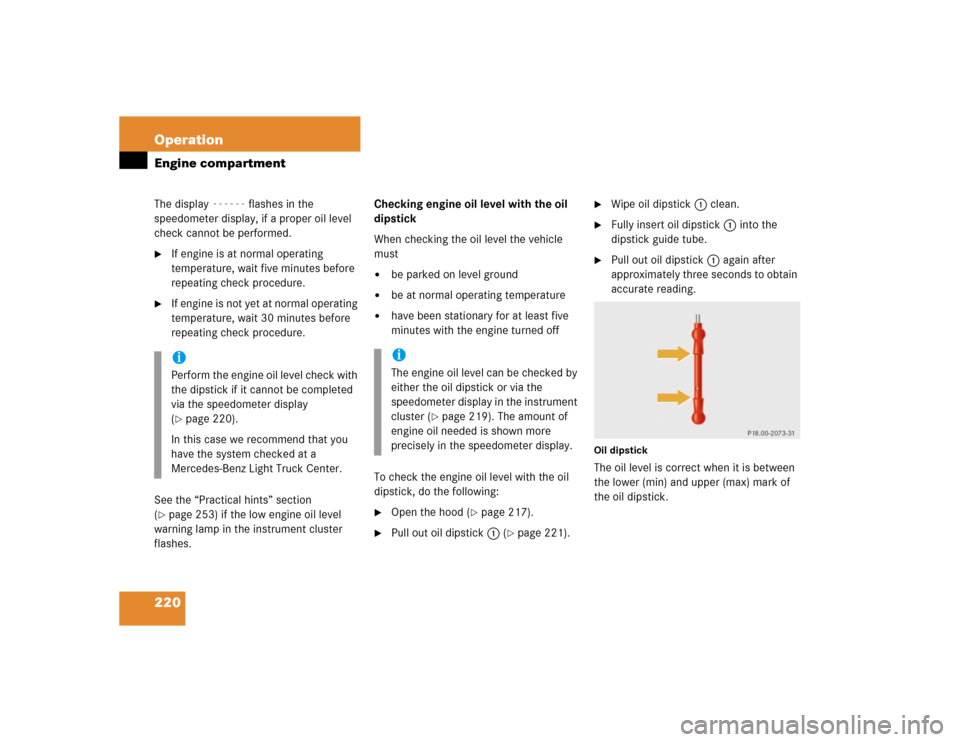
Pull out oil dipstick1 (
�page 221).
�
Wipe oil dipstick1 clean.
�
Fully insert oil dipstick1 into the
dipstick guide tube.
�
Pull out oil dipstick1 again after
approximately three seconds to obtain
accurate reading.
Oil dipstickThe oil level is correct when it is between
the lower (min) and upper (max) mark of
the oil dipstick.
iPerform the engine oil level check with
the dipstick if it cannot be completed
via the speedometer display
(�page 220).
In this case we recommend that you
have the system checked at a
Mercedes-Benz Light Truck Center.
iThe engine oil level can be checked by
either the oil dipstick or via the
speedometer display in the instrument
cluster (
�page 219). The amount of
engine oil needed is shown more
precisely in the speedometer display.
Page 232 of 344
232 OperationMaintenance
�MaintenanceWe strongly recommend that you have
your vehicle serviced by your authorized
Mercedes-Benz Light Truck Center, in
accordance with the Service Booklet at the
times called for by the FSS (Flexible Ser-
vice System).
Failure to have the vehicle maintained in
accordance with the Service Booklet at the
designated times / mileage called for by
the FSS may result in vehicle damage not
covered by the Mercedes-Benz Limited
Warranty.
FSS will notify you when your next service
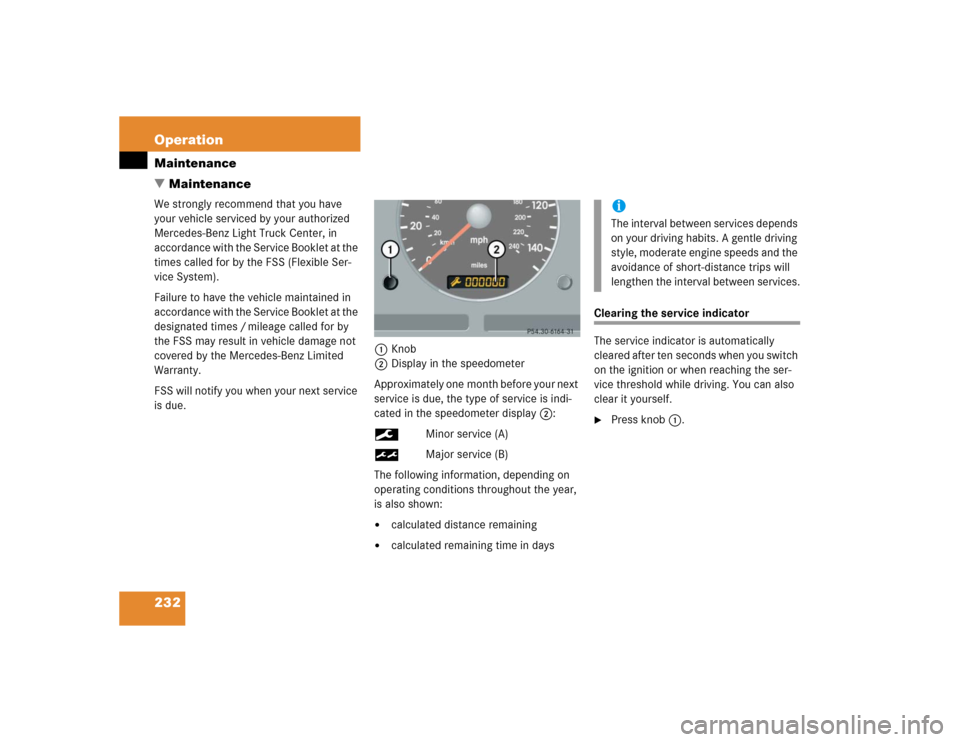
is due.1Knob
2Display in the speedometer
Approximately one month before your next
service is due, the type of service is indi-
cated in the speedometer display2:
9Minor service (A)
½Major service (B)
The following information, depending on
operating conditions throughout the year,
is also shown:
�
calculated distance remaining
�
calculated remaining time in days
Clearing the service indicator
The service indicator is automatically
cleared after ten seconds when you switch
on the ignition or when reaching the ser-
vice threshold while driving. You can also
clear it yourself.�
Press knob1.iThe interval between services depends
on your driving habits. A gentle driving
style, moderate engine speeds and the
avoidance of short-distance trips will
lengthen the interval between services.