Page 84 of 344

84 Safety and SecurityAnti-theft systemsDisarming the alarm system
The alarm system is disarmed when you
unlock your vehicle with the remote con-
trol. The turn signal lamps flash once to in-
dicate that the alarm system is
deactivated.Canceling the alarm
To cancel the alarm:
�
Switch on the ignition by turning the
key in the steering lock to position2.
or
�
Press theŒ or ‹button on the
remote control.
The alarm is canceled.
Tow-away alarm, glass breakage
sensor
The tow-away alarm and the glass break-
age sensor are part of the anti-theft alarm
system.Once the tow-away alarm is armed, a visual
and audible alarm will be triggered when
someone:
�
attempts to raise the vehicle
�
breaks a window and reaches into the
passenger compartment
iIf the turn signal lamps do not flash
three times, the tow-away - glass
breakage sensor is malfunctioning or
one of the following elements may not
be properly closed:�
a door
�
the liftgate
�
the hood
Close the respective element and lock
the vehicle again.
iThe alarm system will rearm automati-
cally again after approximately
40 seconds if one of the doors or the
liftgate is not opened.
iThe tow-away protection alarm is trig-
gered, for example, if the vehicle is
lifted on one side.
If the alarm stays on for more than
20 seconds, an emergency call is initi-
ated automatically by the Tele Aid* sys-
tem (
�page 171) provided Tele Aid
service was subscribed to and properly
activated, and that necessary cellular
service and GPS coverage are avail-
able.
Page 85 of 344
85 Safety and Security
Anti-theft systems
Arming tow-away alarm and glass
breakage sensor
When you lock your vehicle, the tow-away
and glass breakage sensor alarm is auto-
matically armed.
Disarming tow-away alarm and glass
breakage sensor
To prevent triggering the tow-away alarm
feature, switch off the tow-away alarm and
glass breakage sensor before towing the
vehicle, or when parking on a surface sub-
ject to movement, such as a ferry or auto
train.Vehicles with trip computer*
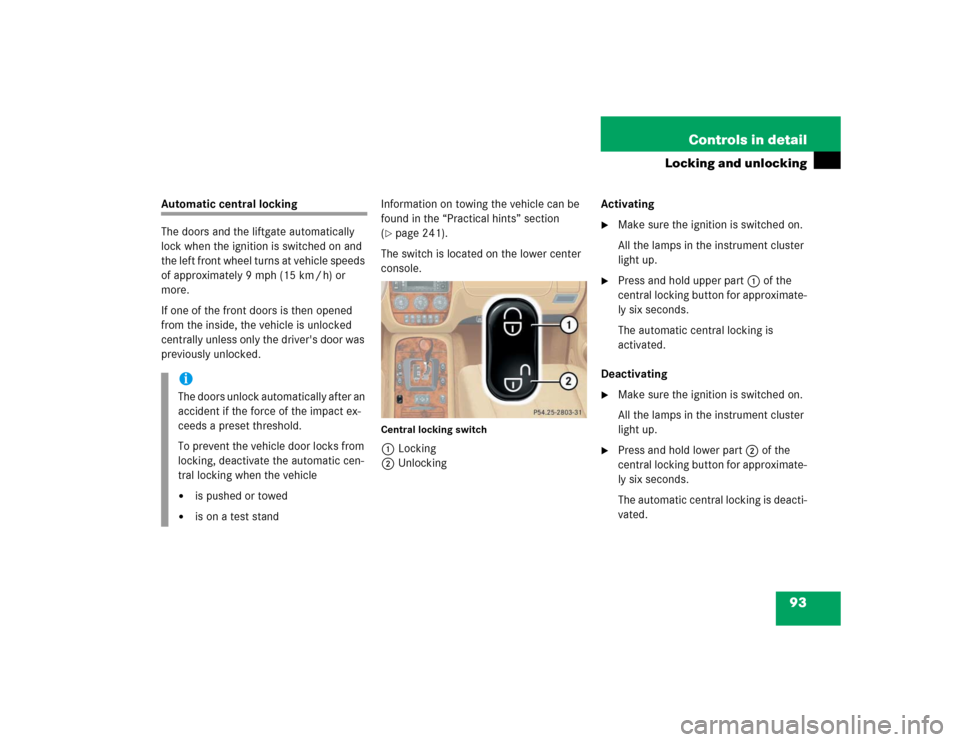
The buttons are located in the overhead
control panel.
1Reset button
2Mode button
3Display
4Glass breakage sensor
�
Turn key in steering lock to position2
(�page 33).
�
Return key to position0 and remove it
from the steering lock.
�
Within 30 seconds press button1
or2.
The display shows
OFF
.
�
Exit vehicle and lock vehicle with
remote control (
�page 32).
The tow-away alarm and glass breakage
sensor remain switched off until the key is
inserted in steering lock and turned to
position1.
Page 86 of 344
86 Safety and SecurityAnti-theft systemsVehicles without trip computer
The buttons are located in the overhead
control panel.
1Switching off tow-away alarm and glass
breakage sensor
�
Turn key in steering lock to position2
(�page 33).
�
Return key to position0 and remove it
from the steering lock.
�
Within 30 seconds press button1 on
the right or left side.
�
Exit vehicle and lock vehicle with
remote control (
�page 32).
The tow-away alarm and glass breakage
sensor remain switched off until the key is
inserted in steering lock and turned to
position1.Canceling the alarm
To cancel the alarm:
�
Switch on the ignition by turning the
key in the steering lock to position2.
or
�
Press theŒ or ‹button on the
remote control.
The alarm is canceled.
Page 93 of 344

93 Controls in detail
Locking and unlocking
Automatic central locking
The doors and the liftgate automatically
lock when the ignition is switched on and
the left front wheel turns at vehicle speeds
of approximately 9mph (15km/h) or
more.
If one of the front doors is then opened
from the inside, the vehicle is unlocked
centrally unless only the driver's door was
previously unlocked.Information on towing the vehicle can be
found in the “Practical hints” section
(
�page 241).
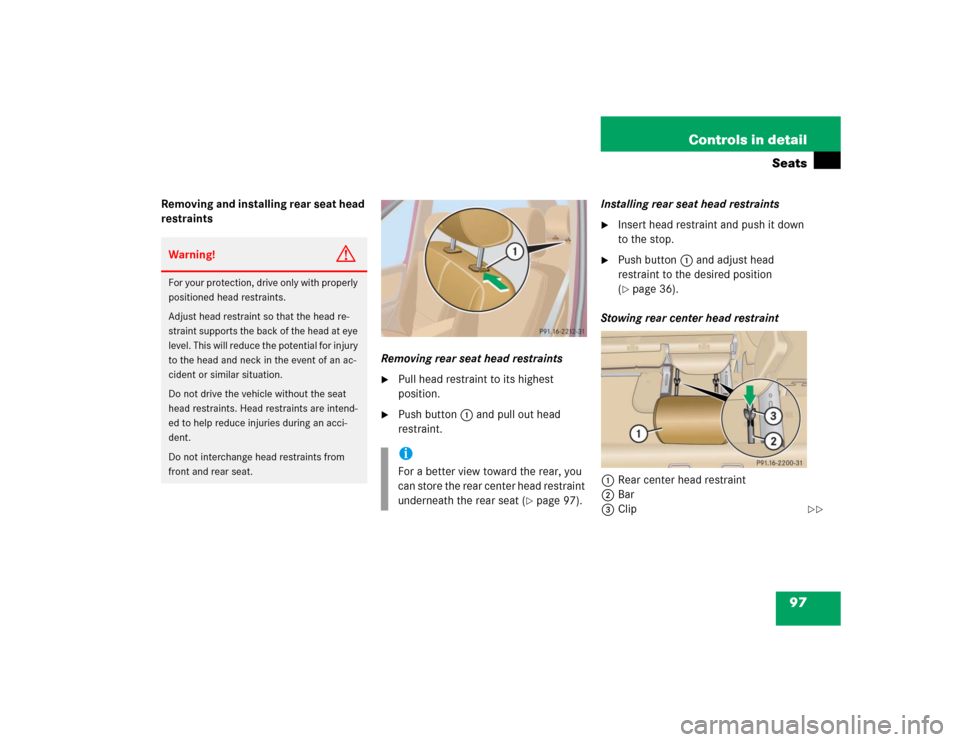
The switch is located on the lower center
console.
Central locking switch1Locking
2UnlockingActivating
�
Make sure the ignition is switched on.
All the lamps in the instrument cluster
light up.
�
Press and hold upper part1 of the
central locking button for approximate-
ly six seconds.
The automatic central locking is
activated.
Deactivating
�
Make sure the ignition is switched on.
All the lamps in the instrument cluster
light up.
�
Press and hold lower part2 of the
central locking button for approximate-
ly six seconds.
The automatic central locking is deacti-
vated.
iThe doors unlock automatically after an
accident if the force of the impact ex-
ceeds a preset threshold.
To prevent the vehicle door locks from
locking, deactivate the automatic cen-
tral locking when the vehicle�
is pushed or towed
�
is on a test stand
Page 97 of 344

97 Controls in detail
Seats
Removing and installing rear seat head
restraints
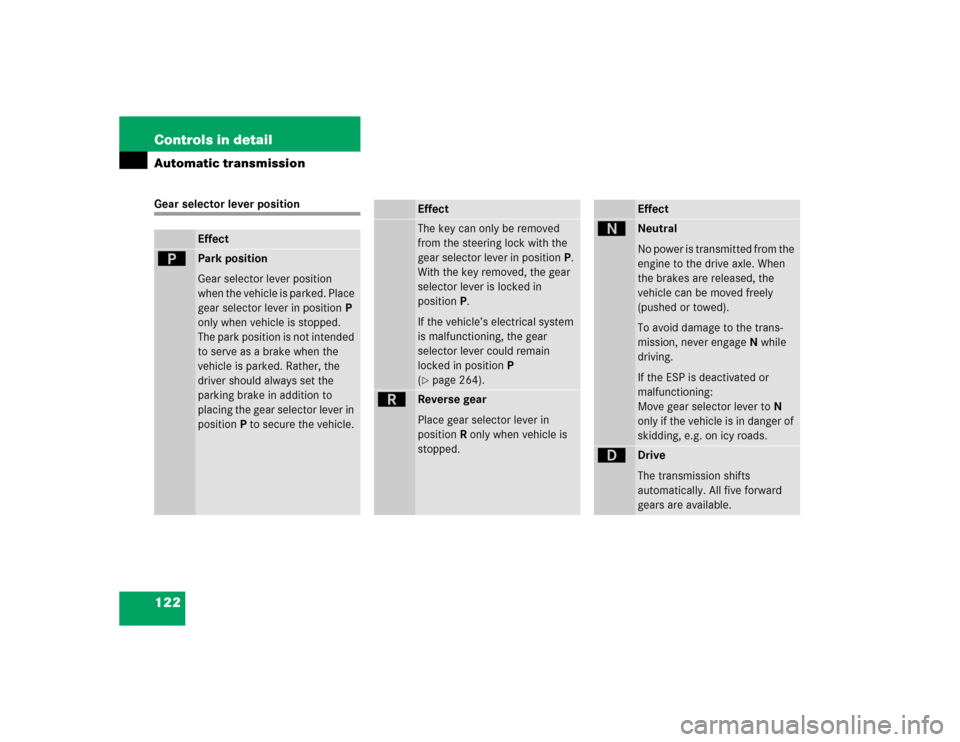
Removing rear seat head restraints
�
Pull head restraint to its highest
position.
�
Push button1 and pull out head
restraint.Installing rear seat head restraints
�
Insert head restraint and push it down
to the stop.
�
Push button1 and adjust head
restraint to the desired position
(�page 36).
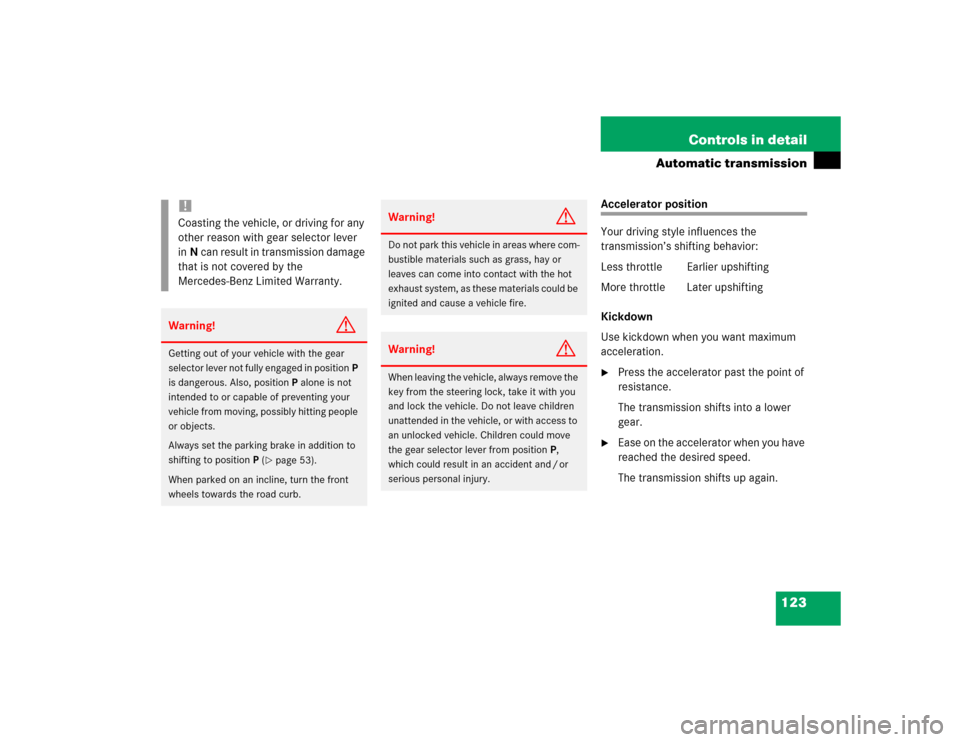
Stowing rear center head restraint
1Rear center head restraint
2Bar
3Clip
Warning!
G
For your protection, drive only with properly
positioned head restraints.
Adjust head restraint so that the head re-
straint supports the back of the head at eye
level. This will reduce the potential for injury
to the head and neck in the event of an ac-
cident or similar situation.
Do not drive the vehicle without the seat
head restraints. Head restraints are intend-
ed to help reduce injuries during an acci-
dent.
Do not interchange head restraints from
front and rear seat.
iFor a better view toward the rear, you
can store the rear center head restraint
underneath the rear seat (
�page 97).
��
Page 122 of 344

122 Controls in detailAutomatic transmissionGear selector lever position
Effect
ì
Park position
Gear selector lever position
when the vehicle is parked. Place
gear selector lever in positionP
only when vehicle is stopped.
The park position is not intended
to serve as a brake when the
vehicle is parked. Rather, the
driver should always set the
parking brake in addition to
placing the gear selector lever in
positionP to secure the vehicle.
EffectThe key can only be removed
from the steering lock with the
gear selector lever in positionP.
With the key removed, the gear
selector lever is locked in
positionP.
If the vehicle’s electrical system
is malfunctioning, the gear
selector lever could remain
locked in positionP
(�page 264).
í
Reverse gear
Place gear selector lever in
positionR only when vehicle is
stopped.
Effect
ë
Neutral
No power is transmitted from the
engine to the drive axle. When
the brakes are released, the
vehicle can be moved freely
(pushed or towed).
To avoid damage to the trans-
mission, never engageN while
driving.
If the ESP is deactivated or
malfunctioning:
Move gear selector lever toN
only if the vehicle is in danger of
skidding, e.g. on icy roads.
ê
Drive
The transmission shifts
automatically. All five forward
gears are available.
Page 123 of 344

123 Controls in detail
Automatic transmission
Accelerator position
Your driving style influences the
transmission’s shifting behavior:
Less throttle Earlier upshifting
More throttle Later upshifting
Kickdown
Use kickdown when you want maximum
acceleration.�
Press the accelerator past the point of
resistance.
The transmission shifts into a lower
gear.
�
Ease on the accelerator when you have
reached the desired speed.
The transmission shifts up again.
!Coasting the vehicle, or driving for any
other reason with gear selector lever
inN can result in transmission damage
that is not covered by the
Mercedes-Benz Limited Warranty.Warning!
G
Getting out of your vehicle with the gear
selector lever not fully engaged in positionP
is dangerous. Also, positionP alone is not
intended to or capable of preventing your
vehicle from moving, possibly hitting people
or objects.
Always set the parking brake in addition to
shifting to positionP (
�page 53).
When parked on an incline, turn the front
wheels towards the road curb.
Warning!
G
Do not park this vehicle in areas where com-
bustible materials such as grass, hay or
leaves can come into contact with the hot
exhaust system, as these materials could be
ignited and cause a vehicle fire.Warning!
G
When leaving the vehicle, always remove the
key from the steering lock, take it with you
and lock the vehicle. Do not leave children
unattended in the vehicle, or with access to
an unlocked vehicle. Children could move
the gear selector lever from positionP,
which could result in an accident and / or
serious personal injury.
Page 124 of 344

124 Controls in detailAutomatic transmissionTowing a trailer
If you tow a trailer, note the following
points:�
Manually shift to a lower gear range
(4,3, 2, 1), if the transmission hunts
between gears on inclines
(�page 121).
A lower gear range and reduction of
speed reduces the change to overload
or overheat the engine.
�
At very steep inclines switch transfer
case to LOW RANGE mode
(�page 125).
For more information on trailer towing, see
the “Operation” section (
�page 206).Emergency operation (Limp Home
Mode)
If vehicle acceleration worsens or the
transmission no longer shifts, the trans-
mission is most likely operating in limp
home (emergency operation) mode. In this
mode only second gear and reverse gear
can be activated.�
Stop the vehicle.
�
Move gear selector lever to positionP.
�
Turn off the engine.
�
Wait at least ten seconds before
restarting.
�
Restart the engine.
�
Move selector lever to positionD
(for second gear) orR.
�
Have the transmission checked at an
authorized Mercedes-Benz Light Truck
Center as soon as possible.