Page 142 of 376
142 Controls in detailAutomatic transmissionGear ranges
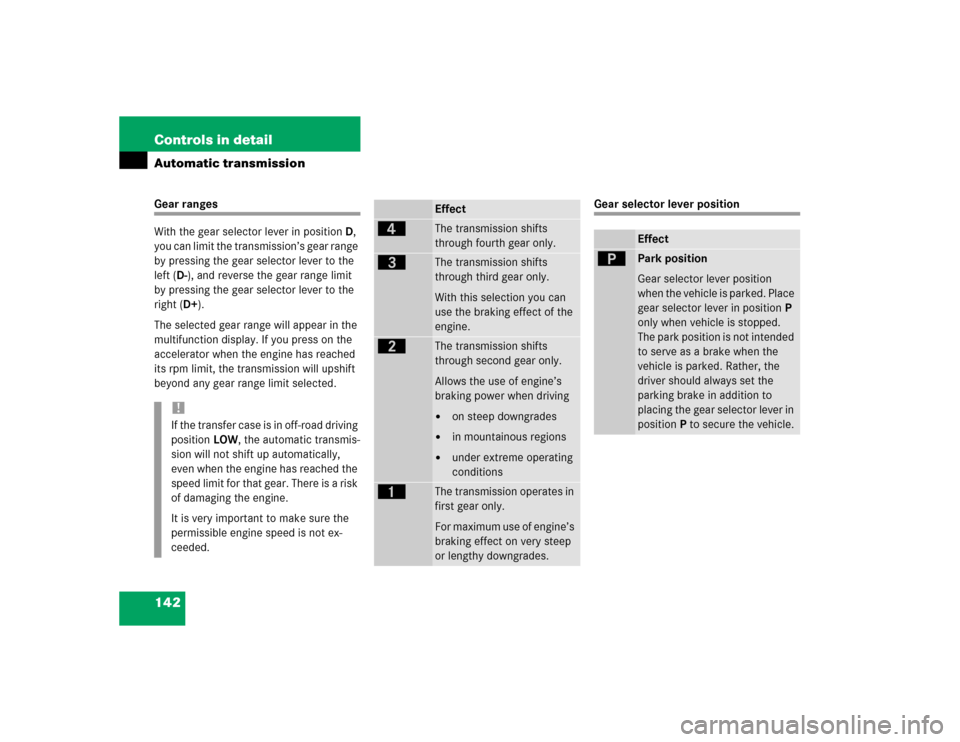
With the gear selector lever in positionD,
you can limit the transmission’s gear range
by pressing the gear selector lever to the
left (D-), and reverse the gear range limit
by pressing the gear selector lever to the
right (D+).
The selected gear range will appear in the
multifunction display. If you press on the
accelerator when the engine has reached
its rpm limit, the transmission will upshift
beyond any gear range limit selected.
Gear selector lever position
!If the transfer case is in off-road driving
position LOW, the automatic transmis-
sion will not shift up automatically,
even when the engine has reached the
speed limit for that gear. There is a risk
of damaging the engine.
It is very important to make sure the
permissible engine speed is not ex-
ceeded.
Effect
é
The transmission shifts
through fourth gear only.
è
The transmission shifts
through third gear only.
With this selection you can
use the braking effect of the
engine.
ç
The transmission shifts
through second gear only.
Allows the use of engine’s
braking power when driving �
on steep downgrades
�
in mountainous regions
�
under extreme operating
conditions
æ
The transmission operates in
first gear only.
For maximum use of engine’s
braking effect on very steep
or lengthy downgrades.
Effect
ì
Park position
Gear selector lever position
when the vehicle is parked. Place
gear selector lever in positionP
only when vehicle is stopped.
The park position is not intended
to serve as a brake when the
vehicle is parked. Rather, the
driver should always set the
parking brake in addition to
placing the gear selector lever in
positionP to secure the vehicle.
Page 169 of 376
169 Controls in detail
Driving systems
�Driving systems
The driving systems of your vehicle are de-
scribed on the following pages:�
Cruise control, with which the vehicle
can maintain a preset speed.
�
Rear Parking Assist*, with which you
can assist your parking maneuvers.
The BAS, ABS, ESP, 4-ETS and EBB driving
systems are described in the “Safety and
Security” section (
�page 74).
Cruise control
Cruise control automatically maintains the
speed you set for your vehicle.
Use of cruise control is recommended for
driving at a constant speed for extended
periods of time. You can set or resume
cruise control at any speed over 20 mph
(30 km/h).
The cruise control function is operated by
means of the cruise control lever.
The cruise control lever is the uppermost
lever found on the left-hand side of the
steering column (
�page 23).
iThe cruise control should not be acti-
vated during-off road driving.
Warning!
G
Cruise control is a convenience system de-
signed to assist the driver during vehicle op-
eration. The driver is and must always
remain responsible for the vehicle speed
and for safe brake operation.
Only use cruise control if the road, traffic
and weather conditions make it advisable to
travel at a steady speed.�
The use of cruise control can be danger-
ous on winding roads or in heavy traffic
because conditions do not allow safe
driving at a steady speed.
�
The use of cruise control can be danger-
ous on slippery roads. Rapid changes in
tire traction can result in wheel spin and
loss of control.
�
Deactivate cruise control when driving
in fog.
The “Resume” function should only be oper-
ated if the driver is fully aware of the previ-
ously set speed and wishes to resume this
particular preset speed.
Page 178 of 376
178 Controls in detailLoadingPartition net* (MB Accessory)
Use of the partition net is a particularly im-
portant safety factor when the vehicle is
loaded higher than the top of the seat
backrests with smaller objects.
While the partition net will help protect you
from smaller objects, it cannot prevent the
movement of large, heavier objects into
the passenger area in an accident. Such
items must be properly secured using the
cargo tie-down rings in the cargo compart-
ment floor.The partition net can be installed behind
the seat backrests of the rear seat bench,
or behind the front seats if the rear seat
bench is folded down.Installation behind rear seat bench
1Partition net
2Mounting
�
Fold the rear seat bench forward
(�page 176).
�
Hook partition net1 in mountings2
on both sides.
iInstallation can be performed by open-
ing the rear doors.
iThis cannot be done by folding the rear
seat backrest forward.
Page 180 of 376
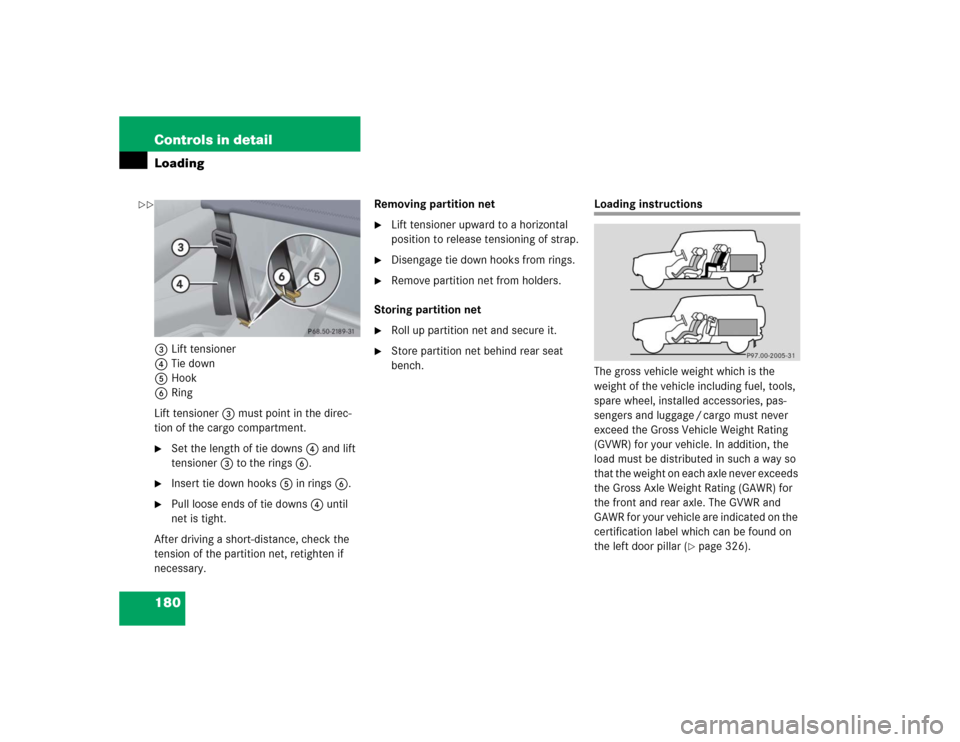
180 Controls in detailLoading3Lift tensioner
4Tie down
5Hook
6Ring
Lift tensioner3 must point in the direc-
tion of the cargo compartment.�
Set the length of tie downs4 and lift
tensioner3 to the rings6.
�
Insert tie down hooks5 in rings6.
�
Pull loose ends of tie downs4 until
net is tight.
After driving a short-distance, check the
tension of the partition net, retighten if
necessary.Removing partition net
�
Lift tensioner upward to a horizontal
position to release tensioning of strap.
�
Disengage tie down hooks from rings.
�
Remove partition net from holders.
Storing partition net
�
Roll up partition net and secure it.
�
Store partition net behind rear seat
bench.
Loading instructions
The gross vehicle weight which is the
weight of the vehicle including fuel, tools,
spare wheel, installed accessories, pas-
sengers and luggage / cargo must never
exceed the Gross Vehicle Weight Rating
(GVWR) for your vehicle. In addition, the
load must be distributed in such a way so
t h a t t h e w e i g h t o n e a c h a x l e n e v e r e x c e e d s
the Gross Axle Weight Rating (GAWR) for
the front and rear axle. The GVWR and
GAWR for your vehicle are indicated on the
certification label which can be found on
the left door pillar (
�page 326).
��
Page 181 of 376
181 Controls in detail
Loading
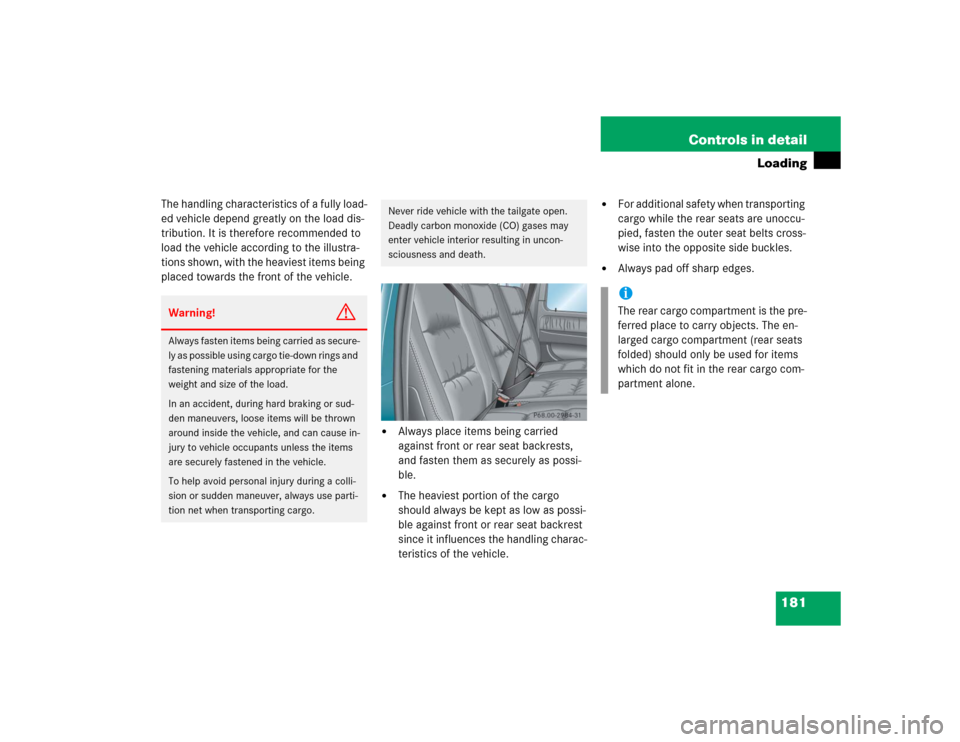
The handling characteristics of a fully load-
ed vehicle depend greatly on the load dis-
tribution. It is therefore recommended to
load the vehicle according to the illustra-
tions shown, with the heaviest items being
placed towards the front of the vehicle.
�
Always place items being carried
against front or rear seat backrests,
and fasten them as securely as possi-
ble.
�
The heaviest portion of the cargo
should always be kept as low as possi-
ble against front or rear seat backrest
since it influences the handling charac-
teristics of the vehicle.
�
For additional safety when transporting
cargo while the rear seats are unoccu-
pied, fasten the outer seat belts cross-
wise into the opposite side buckles.
�
Always pad off sharp edges.
Warning!
G
Always fasten items being carried as secure-
ly as possible using cargo tie-down rings and
fastening materials appropriate for the
weight and size of the load.
In an accident, during hard braking or sud-
den maneuvers, loose items will be thrown
around inside the vehicle, and can cause in-
jury to vehicle occupants unless the items
are securely fastened in the vehicle.
To help avoid personal injury during a colli-
sion or sudden maneuver, always use parti-
tion net when transporting cargo.
Never ride vehicle with the tailgate open.
Deadly carbon monoxide (CO) gases may
enter vehicle interior resulting in uncon-
sciousness and death.
iThe rear cargo compartment is the pre-
ferred place to carry objects. The en-
larged cargo compartment (rear seats
folded) should only be used for items
which do not fit in the rear cargo com-
partment alone.
Page 182 of 376
182 Controls in detailLoadingCargo tie-down rings
The cargo compartment is provided with
four tie-down anchors.
Carefully secure cargo by applying even
load on all rings with rope of sufficient
strength to hold down the cargo.
Warning!
G
While the partition net will help protect you
from smaller objects, it cannot prevent the
movement of large, heavier objects into the
passenger area in an accident.
Such items must be properly secured using
the cargo tie-down rings in the cargo com-
partment floor.
Page 183 of 376
183 Controls in detail
Useful features
�Useful features
Interior storage spaces
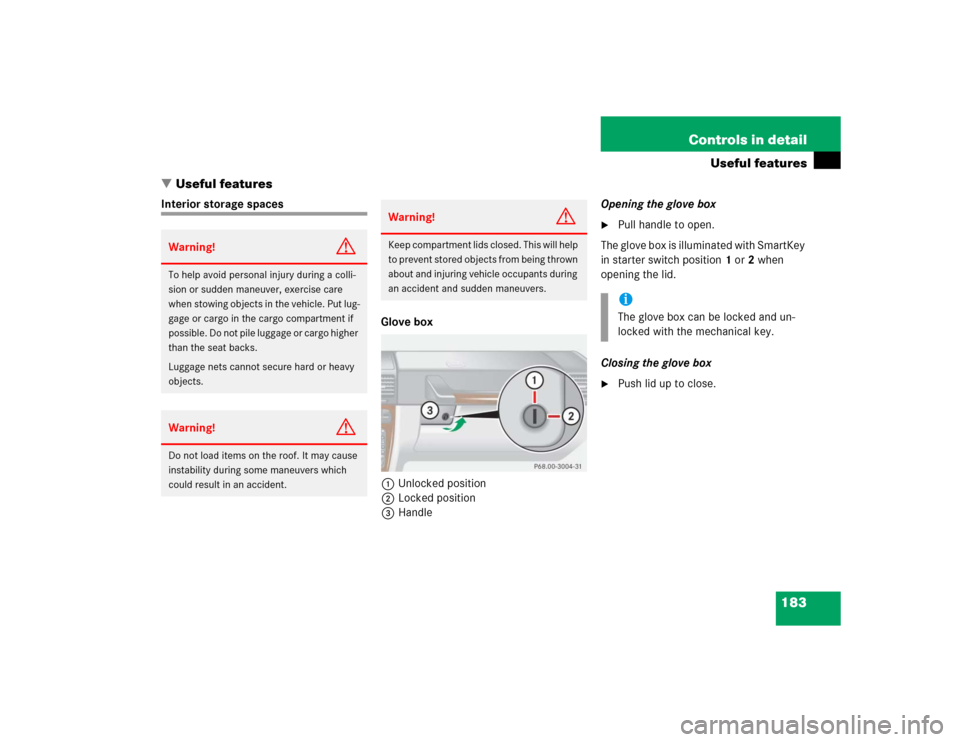
Glove box
1Unlocked position
2Locked position
3HandleOpening the glove box
�
Pull handle to open.
The glove box is illuminated with SmartKey
in starter switch position1 or2 when
opening the lid.
Closing the glove box
�
Push lid up to close.
Warning!
G
To help avoid personal injury during a colli-
sion or sudden maneuver, exercise care
when stowing objects in the vehicle. Put lug-
gage or cargo in the cargo compartment if
possible. Do not pile luggage or cargo higher
than the seat backs.
Luggage nets cannot secure hard or heavy
objects.Warning!
G
Do not load items on the roof. It may cause
instability during some maneuvers which
could result in an accident.
Warning!
G
Keep compartment lids closed. This will help
to prevent stored objects from being thrown
about and injuring vehicle occupants during
an accident and sudden maneuvers.
iThe glove box can be locked and un-
locked with the mechanical key.
Page 213 of 376
213 Operation
Driving instructions
Standing water
Passenger compartment
Off-road driving
!Do not drive through flooded areas or
water of unknown depth. Before driving
through water, determine its depth.
Never accelerate before driving into
water. The bow wave could force water
into the engine and auxiliary equip-
ment, thus damaging them.
If you must drive through standing wa-
ter, drive slowly to prevent water from
entering the passenger compartment
or the engine compartment. Water in
these areas could cause damage to
electrical components or wiring of the
engine or transmission, or could result
in water being ingested by the engine
through the air intake, causing severe
internal engine damage. Any such dam-
age is not covered by the
Mercedes-Benz Limited Warranty.
Warning!
G
Always fasten items being carried as secure-
ly as possible.
In an accident, during hard braking or sud-
den maneuvers, loose items will be thrown
around inside the vehicle, and cause injury
to vehicle occupants unless the items are
securely fastened in the vehicle.
The rear cargo compartment is the preferred
place to carry objects. Always use partition
net when transporting cargo. Partition net
cannot secure hard or heavy objects. Al-
ways fasten items being carried as securely
as possible using the cargo tie-down rings in
the cargo compartment floor and fastening
material.
Do not load items on the roof. It may cause
instability during some maneuvers which
could result in an accident. This vehicle is
not intended to carry items on its roof. Thus
roof rails and roof mounted ski or bike hold-
ers must not be used.Warning!
G
Do not load items on the roof. It may cause
instability during some maneuvers which
could result in an accident.