Page 143 of 376
143 Controls in detail
Automatic transmission
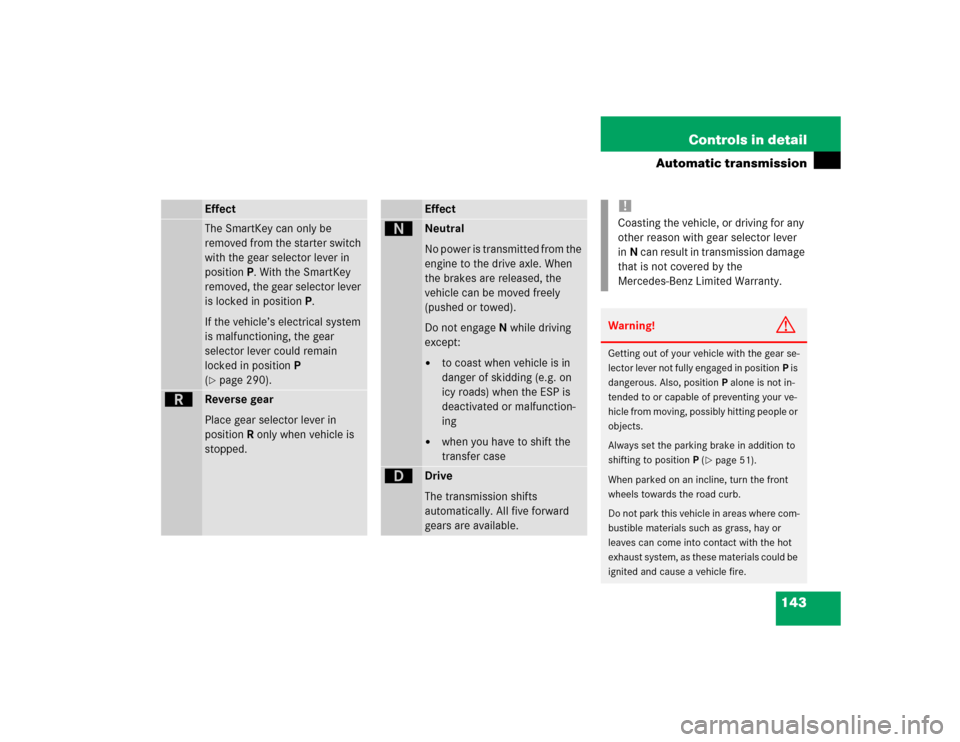
EffectThe SmartKey can only be
removed from the starter switch
with the gear selector lever in
positionP. With the SmartKey
removed, the gear selector lever
is locked in positionP.
If the vehicle’s electrical system
is malfunctioning, the gear
selector lever could remain
locked in positionP
(�page 290).
í
Reverse gear
Place gear selector lever in
positionR only when vehicle is
stopped.
Effect
ë
Neutral
No power is transmitted from the
engine to the drive axle. When
the brakes are released, the
vehicle can be moved freely
(pushed or towed).
Do not engageN while driving
except:�
to coast when vehicle is in
danger of skidding (e.g. on
icy roads) when the ESP is
deactivated or malfunction-
ing
�
when you have to shift the
transfer case
ê
Drive
The transmission shifts
automatically. All five forward
gears are available.
!Coasting the vehicle, or driving for any
other reason with gear selector lever
inN can result in transmission damage
that is not covered by the
Mercedes-Benz Limited Warranty.Warning!
G
Getting out of your vehicle with the gear se-
lector lever not fully engaged in positionP is
dangerous. Also, positionP alone is not in-
tended to or capable of preventing your ve-
hicle from moving, possibly hitting people or
objects.
Always set the parking brake in addition to
shifting to positionP (
�page 51).
When parked on an incline, turn the front
wheels towards the road curb.
Do not park this vehicle in areas where com-
bustible materials such as grass, hay or
leaves can come into contact with the hot
exhaust system, as these materials could be
ignited and cause a vehicle fire.
Page 144 of 376
144 Controls in detailAutomatic transmission
Accelerator position
Your driving style influences the transmis-
sion’s shifting behavior:
Less throttle Earlier upshifting
More throttle Later upshifting
Kickdown
Use kickdown when you want maximum
acceleration.�
Press the accelerator past the point of
resistance.
The transmission shifts into a lower
gear.
�
Ease on the accelerator when you have
reached the desired speed.
The transmission shifts up again.Emergency operation (Limp Home
Mode)
If vehicle acceleration worsens or the
transmission no longer shifts, the trans-
mission is most likely operating in limp
home (emergency operation) mode. In this
mode, only 2nd gear and reverse gear can
be activated.�
Stop the vehicle.
�
Move gear selector lever toP.
�
Turn off the engine.
�
Wait at least ten seconds before re-
starting.
�
Restart the engine.
�
Move gear selector lever to positionD
(for second gear) orR.
�
Have the transmission checked at an
authorized Mercedes-Benz Light Truck
Center as soon as possible.
Warning!
G
When leaving the vehicle, always remove the
SmartKey from the starter switch, and lock
the vehicle. Do not leave children unattend-
ed in the vehicle, or with access to an un-
locked vehicle. Children could move the
gear selector lever from positionP, which
could result in an accident and/or serious
personal injury.
Page 147 of 376
147 Controls in detail
Transfer case
�
TC SHIFT – CANCELLEDThe shift did not take place.
�
Repeat the shift procedure.
�
TRANSFER CASE – VISIT WORKSHOP!There may be a malfunction in the sys-
tem.
�
Repeat the shift procedure.
�
If the shift procedure still does not take
place, have the vehicle checked at your
authorized Mercedes-Benz Light Truck
Center as soon as possible.For more information, see “Practical hints”
section (
�page 281).
iIf the SmartKey is in starter switch
position0 or1, an alarm will sound if
the transfer case is in positionN and
the driver’s door is opened.
Engage transfer case to gear position
HIGH or LOW.
Page 155 of 376
155 Controls in detail
Good visibility
Rear window defroster
Turn the SmartKey in starter switch to
position2.
Activating�
Press button F in the control panel
of the climate control.
The indicator lamp in the button comes
on.
Deactivating
�
Press button F in the control panel
of the climate control.
The indicator lamp in the button goes
out.
!Heavy accumulation of snow and ice
should be removed before activating
the defroster.
The defroster is automatically turned
off after approximately 6-17 minutes of
operation depending on the outside
temperature and vehicle speed.
If several power consumers are turned
on simultaneously, or the battery is
only partially charged, it is possible that
the defroster will automatically turn it-
self off.
When this happens, the indicator lamp
inside the switch starts blinking.
As soon as the battery has sufficient
voltage, the defroster turns itself back
on.
iThe rear window defroster uses a large
amount of power. To keep the battery
drain to a minimum, turn off the de-
froster as soon as the rear window is
clear.
Page 161 of 376
161 Controls in detail
Climate control
Deactivating�
Press button O briefly.
The indicator lamp in the button goes
out.
The air recirculation mode is deactivated
automatically:
�
after 30 minutes if the outside temper-
ature is above about 41°F (5°C)
�
after 5 minutes if the outside tempera-
ture is below about 41°F (5°C)
�
after 5 minutes if economy mode
AC
OFF
is selected
Residual engine heat utilization
With the engine switched off, it is possible
to continue to heat or ventilate the interior
for a short while, depending on the temper-
ature setting of the climate control. Air vol-
ume and distribution are controlled
automatically.
Activating�
Turn the SmartKey in starter switch to
position1 or0 or remove it from the
starter switch.
�
Press button °.
The indicator lamp in the button comes
on.
Set the left and right temperature to
your personal requirements.Deactivating
�
Press button ° again to switch off.
The indicator lamp in the button goes
out.
The residual heat is automatically turned
off:
�
when the SmartKey in starter switch is
turned to position2
�
after about 30 minutes
�
if the battery voltage drops
iThe air recirculation mode is activated
automatically at high outside tempera-
tures.
If you have turned off the air condition-
er or the outside temperature is below
41°F (5°C), the air recirculation mode
will not switch on automatically.
Page 164 of 376
164 Controls in detailPower windows
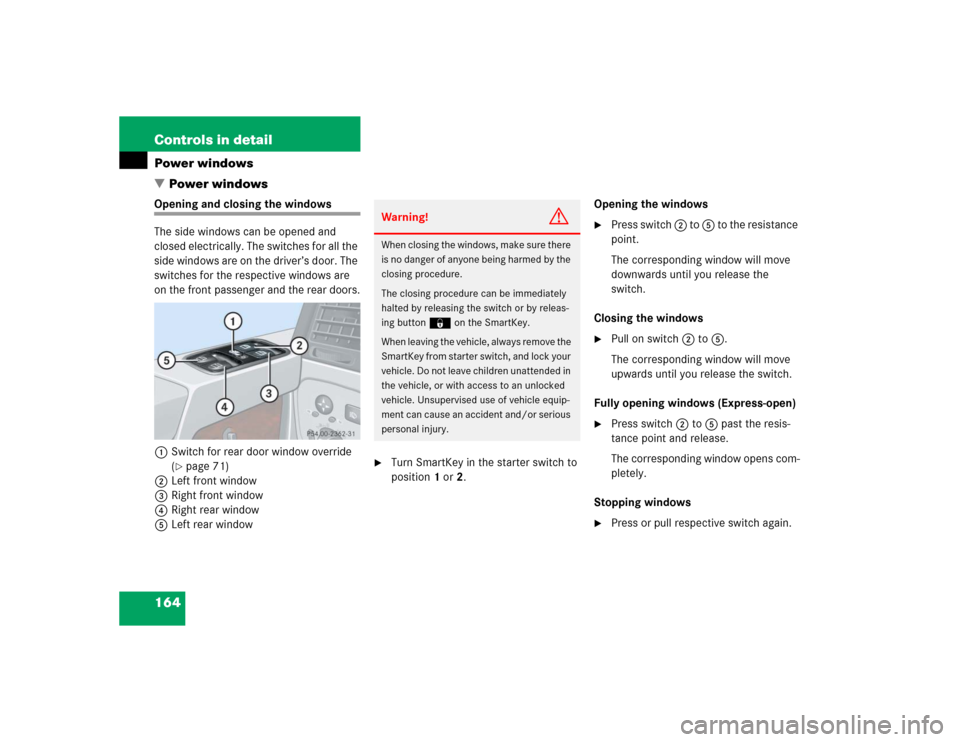
�Power windowsOpening and closing the windows
The side windows can be opened and
closed electrically. The switches for all the
side windows are on the driver’s door. The
switches for the respective windows are
on the front passenger and the rear doors.
1Switch for rear door window override
(
�page 71)
2Left front window
3Right front window
4Right rear window
5Left rear window
�
Turn SmartKey in the starter switch to
position1 or2.Opening the windows
�
Press switch 2 to 5 to the resistance
point.
The corresponding window will move
downwards until you release the
switch.
Closing the windows
�
Pull on switch 2 to 5.
The corresponding window will move
upwards until you release the switch.
Fully opening windows (Express-open)
�
Press switch 2 to 5 past the resis-
tance point and release.
The corresponding window opens com-
pletely.
Stopping windows
�
Press or pull respective switch again.
Warning!
G
When closing the windows, make sure there
is no danger of anyone being harmed by the
closing procedure.
The closing procedure can be immediately
halted by releasing the switch or by releas-
ing button‹ on the SmartKey.
When leaving the vehicle, always remove the
SmartKey from starter switch, and lock your
vehicle. Do not leave children unattended in
the vehicle, or with access to an unlocked
vehicle. Unsupervised use of vehicle equip-
ment can cause an accident and/or serious
personal injury.
Page 165 of 376
165 Controls in detail
Power windows
Opening and closing windows with the
SmartKey
The sliding/pop-up roof (
�page 166) will
also be opened or closed when the power
windows are operated with the SmartKey.
�
Aim transmitter eye at the driver’s door
handle.Opening (Summer opening feature)
�
Press and hold buttonΠafter un-
locking the vehicle.
The windows and sliding/pop-up roof
begin to open after approximately one
second.
�
Release transmit button to interrupt
procedure.Closing (Convenience feature)
�
Press and hold button‹ after lock-
ing the vehicle.
The windows and sliding/pop-up roof
begin to close after approximately one
second.
�
Release transmit button to interrupt
procedure.
Make sure all side windows and the slid-
ing/pop-up roof are properly closed before
leaving the vehicle.
Warning!
G
Never operate the windows or slid-
ing/pop-up roof if there is the possibility of
anyone being harmed by the opening or
closing procedure.
In case the procedure causes potential dan-
ger, the procedure can be immediately halt-
ed by releasing the button on the SmartKey.
To reverse direction of movement,
pressŒ for opening or ‹ for closing.
Page 166 of 376
166 Controls in detailSliding/pop-up roof
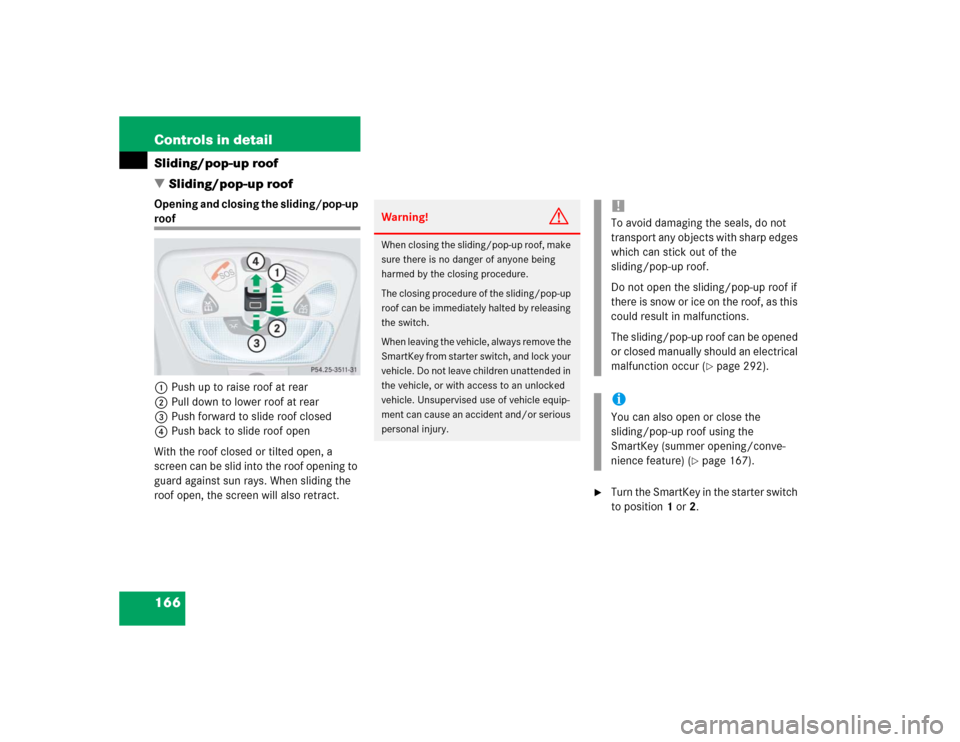
�Sliding/pop-up roofOpening and closing the sliding/pop-up roof
1Push up to raise roof at rear
2Pull down to lower roof at rear
3Push forward to slide roof closed
4Push back to slide roof open
With the roof closed or tilted open, a
screen can be slid into the roof opening to
guard against sun rays. When sliding the
roof open, the screen will also retract.
�
Turn the SmartKey in the starter switch
to position1 or2.
Warning!
G
When closing the sliding/pop-up roof, make
sure there is no danger of anyone being
harmed by the closing procedure.
The closing procedure of the sliding/pop-up
roof can be immediately halted by releasing
the switch.
When leaving the vehicle, always remove the
SmartKey from starter switch, and lock your
vehicle. Do not leave children unattended in
the vehicle, or with access to an unlocked
vehicle. Unsupervised use of vehicle equip-
ment can cause an accident and/or serious
personal injury.
!To avoid damaging the seals, do not
transport any objects with sharp edges
which can stick out of the
sliding/pop-up roof.
Do not open the sliding/pop-up roof if
there is snow or ice on the roof, as this
could result in malfunctions.
The sliding/pop-up roof can be opened
or closed manually should an electrical
malfunction occur (
�page 292).
iYou can also open or close the
sliding/pop-up roof using the
SmartKey (summer opening/conve-
nience feature) (
�page 167).