Page 108 of 376
108 Controls in detailLightingSwitching on high beams�
Turn exterior lamp switch to
positionB or toU
(�page 104).
�
Push the combination switch in
direction1.
The high beam headlamp
indicatorA in the instrument clus-
ter comes on.
High beam flasher
�
Pull the combination switch briefly in
direction2.
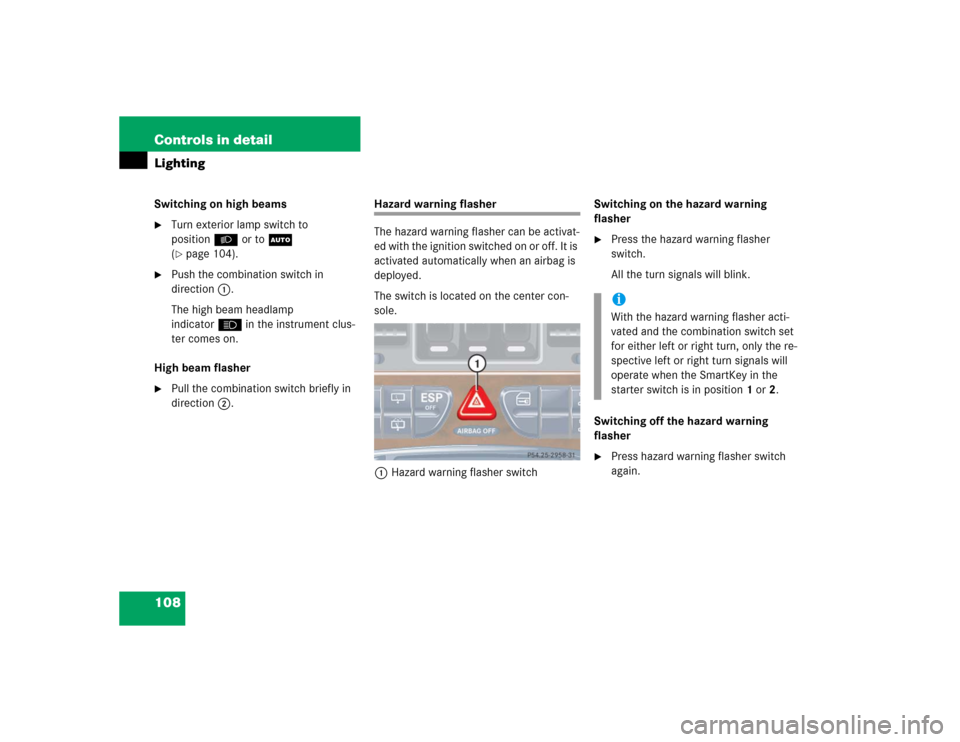
Hazard warning flasher
The hazard warning flasher can be activat-
ed with the ignition switched on or off. It is
activated automatically when an airbag is
deployed.
The switch is located on the center con-
sole.
1Hazard warning flasher switchSwitching on the hazard warning
flasher
�
Press the hazard warning flasher
switch.
All the turn signals will blink.
Switching off the hazard warning
flasher
�
Press hazard warning flasher switch
again.iWith the hazard warning flasher acti-
vated and the combination switch set
for either left or right turn, only the re-
spective left or right turn signals will
operate when the SmartKey in the
starter switch is in position1 or2.
Page 109 of 376

109 Controls in detail
Lighting
Interior lighting
1Cargo compartment lamps
2Right reading lamp
3Rocker switch for automatic control
system
4Left reading lampActivating automatic control
�
Move rocker switch3 to center
position.
Interior lamps are switched on in dark-
ness, when you�
unlock the vehicle
�
open a door
�
remove the SmartKey from the
starter switch
In addition, the entry lamps in the door
trays will come on when you open a
door.
The interior lamps are switched off fol-
lowing an adjustable time delay
(
�page 132).Deactivating automatic control
�
Press the = symbol on rocker
switch3.
The interior lighting and the entry
lamps remain switched off in darkness,
even when you�
unlock the vehicle
�
open a door
�
remove the SmartKey from the
starter switch
Manual control
Switching lamps on
�
Press the W symbol on rocker
switch3.
The interior lighting remains on even
when the doors are closed.
iIf the door remains open, the interior
lamps switch off automatically after ap-
proximately five minutes.
Page 110 of 376
110 Controls in detailLightingSwitching lamps off�
Move rocker switch3 to center posi-
tion to activate the automatic control.
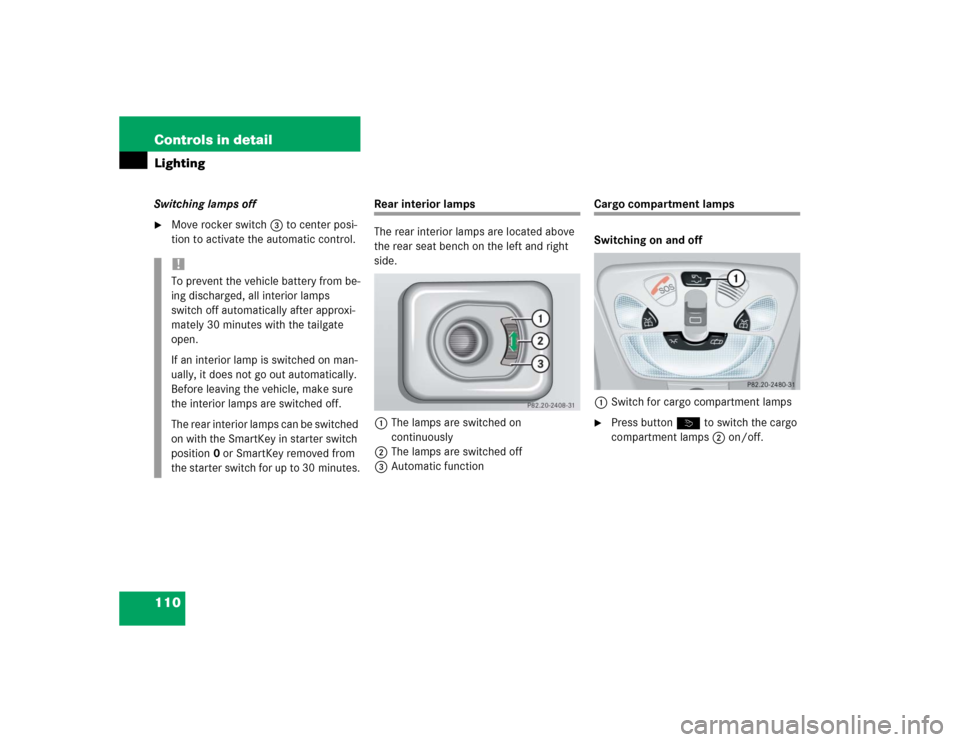
Rear interior lamps
The rear interior lamps are located above
the rear seat bench on the left and right
side.
1The lamps are switched on
continuously
2The lamps are switched off
3Automatic function
Cargo compartment lamps
Switching on and off
1Switch for cargo compartment lamps�
Press button ò to switch the cargo
compartment lamps2 on/off.
!To prevent the vehicle battery from be-
ing discharged, all interior lamps
switch off automatically after approxi-
mately 30 minutes with the tailgate
open.
If an interior lamp is switched on man-
ually, it does not go out automatically.
Before leaving the vehicle, make sure
the interior lamps are switched off.
The rear interior lamps can be switched
on with the SmartKey in starter switch
position0 or SmartKey removed from
the starter switch for up to 30 minutes.
Page 113 of 376

113 Controls in detail
Instrument cluster
�
Turn the SmartKey in the starter switch
to position1 or2.
�
Call up the trip odometer and main
odometer by pressing buttonè
orÿ on the multifunction steering
wheel (
�page 116).
�
Press buttonj ork until the
coolant temperature display appears.During severe operating conditions, e.g.
stop-and-go traffic, the coolant tempera-
ture may rise close to 248°F (120°C).
The engine should not be operated with
the coolant temperature above 248°F
(120°C). Doing so may cause serious en-
gine damage which is not covered by the
Mercedes-Benz Limited Warranty.
Trip odometer�
Make sure you are viewing the trip
odometer display (
�page 115).
�
I f i t i s n o t d i s p l a y e d , p r e s s b u t t o nè
orÿ on the multifunction steering
wheel (
�page 116) until the trip odom-
eter appears.
�
Press and hold the reset button on the
instrument cluster (
�page 112) until
the trip odometer is reset.
Tachometer
The red marking on the tachometer de-
notes excessive engine speed.
To help protect the engine, the fuel supply
is interrupted if the engine is operated
within the red marking.
iExcessive coolant temperature triggers
a warning in the multifunction display
(�page 269).
!Avoid driving at excessive engine
speeds, as it may result in serious en-
gine damage that is not covered by the
Mercedes-Benz Limited Warranty.
Page 115 of 376

115 Controls in detail
Control system
�Control system
The control system is activated as soon as
the SmartKey in the starter switch is
turned to position1. The control system
enables you to�
call up information about your vehicle
�
change vehicle settings
For example, you can use the control sys-
tem to find out when your vehicle is next
due for service, to set the language for
messages in the instrument cluster display
and much more.
The control system relays information to
the multifunction display.
Multifunction display
1Trip odometer
2Main odometer
3Outside temperature
4Clock
1
5Current gear selector lever position
6Transfer case program mode
Warning!
G
A driver’s attention to the road and traffic
conditions must always be his /her primary
focus when driving.
For your safety and the safety of others, se-
lecting features through the multifunction
steering wheel should only be done by the
driver when traffic and road conditions per-
mit it to be done safely.
Bear in mind that at a speed of just 30 mph
(approximately 50 km/h), your vehicle is
covering a distance of 44 feet (approximate-
ly 13.5 m) every second.
1See separate operating instructions for the
COMAND system for clock setting.
Page 121 of 376

121 Controls in detail
Control system
Select radio station�
Turn on the radio. Refer to separate op-
erating instructions.
�
Press buttonè orÿ repeatedly
until you see the currently tuned sta-
tion in the display.
1Station
2Waveband setting
3Setting for station selection using
memory
�
Press buttonk orj repeatedly
until the desired station is found.
The type of search depends on the set-
ting for the station tuning:�
The next stored station is selected
(SP)
�
Station searchOperate the CD player
�
Turn on the radio and select the CD
player. Refer to separate operating in-
structions.
�
Press buttonè orÿ repeatedly
until the settings for the CD currently
being played are shown in the display.
1Current track
2Current CD (for CD changer)
�
Press buttonk orj repeatedly
until the desired track is selected.
iYou can only store new stations by us-
ing the corresponding feature on the
radio. Refer to separate operating in-
structions.
You can also operate the radio in the
usual manner.
iTo select a CD from the magazine,
press a number on the COMAND sys-
tem key pad located in the center dash-
board.
Page 123 of 376

123 Controls in detail
Control system
Should any malfunctions occur while driv-
ing, the number of malfunctions will reap-
pear in the display when the SmartKey in
the starter switch is turned to position0 or
removed from the starter switch.
Settings menu
In the
SETTINGS...
menu there are two
functions:
�
The function
RESET: R BUTTON FOR
3SEC.
, with which you can reset all the
settings to those set at the factory.
�
A collection of submenus with which
you can make individual settings for
your vehicle.
�
Press buttonè orÿ repeatedly
until the
SETTINGS
... menu is seen in
the display.Resetting all settings
You can reset all the functions of all sub-
menus to the factory settings.
�
Press the reset button in the instru-
ment cluster (
�page 112) for approxi-
mately three seconds.
In the display you will see the request
to press the reset button again to con-
firm.
�
Press the reset button again.
The functions of all the submenus will
reset to factory settings.
iThe message memory will be cleared
when you turn the SmartKey in the
starter switch to position1 or2. You
will then only see Priority 1 malfunc-
tions (
�page 260).
Page 124 of 376
124 Controls in detailControl system
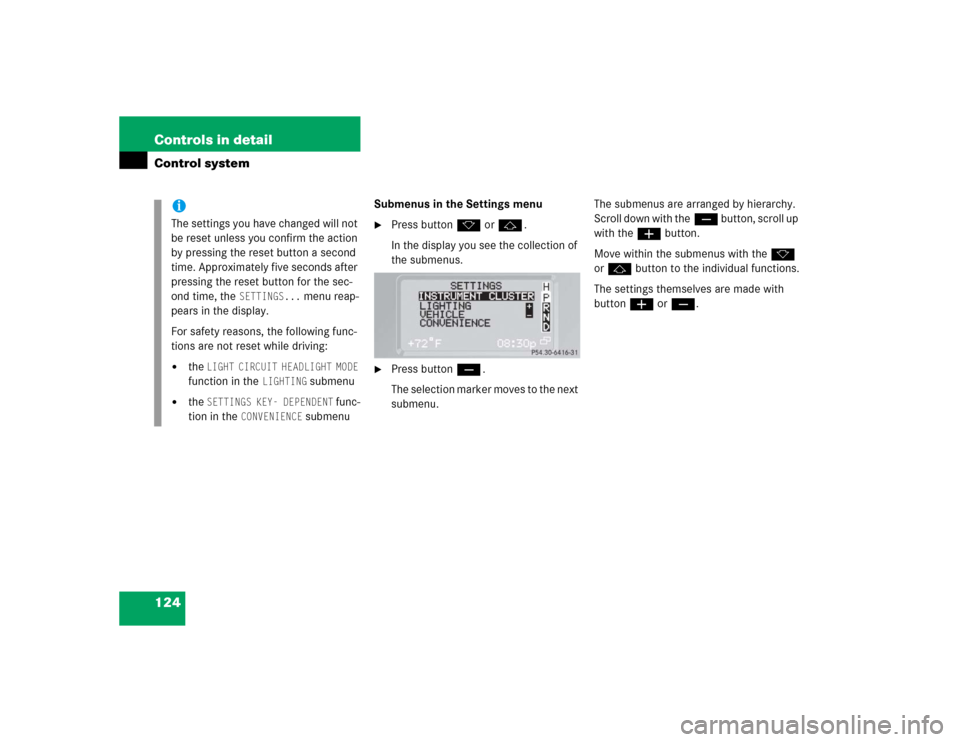
Submenus in the Settings menu�
Press buttonk orj.
In the display you see the collection of
the submenus.
�
Press buttonç.
The selection marker moves to the next
submenu.The submenus are arranged by hierarchy.
Scroll down with theç button, scroll up
with theæ button.
Move within the submenus with thek
orj button to the individual functions.
The settings themselves are made with
buttonæ orç.
iThe settings you have changed will not
be reset unless you confirm the action
by pressing the reset button a second
time. Approximately five seconds after
pressing the reset button for the sec-
ond time, the
SETTINGS...
menu reap-
pears in the display.
For safety reasons, the following func-
tions are not reset while driving:
�
the
LIGHT CIRCUIT HEADLIGHT MODE
function in the
LIGHTING
submenu
�
the
SETTINGS KEY- DEPENDENT
func-
tion in the
CONVENIENCE
submenu