Page 114 of 442
114 Controls in detailSeatsSwitching seat heating off�
Press button1 repeatedly until all in-
dicator lamps go out.
Seat ventilation*
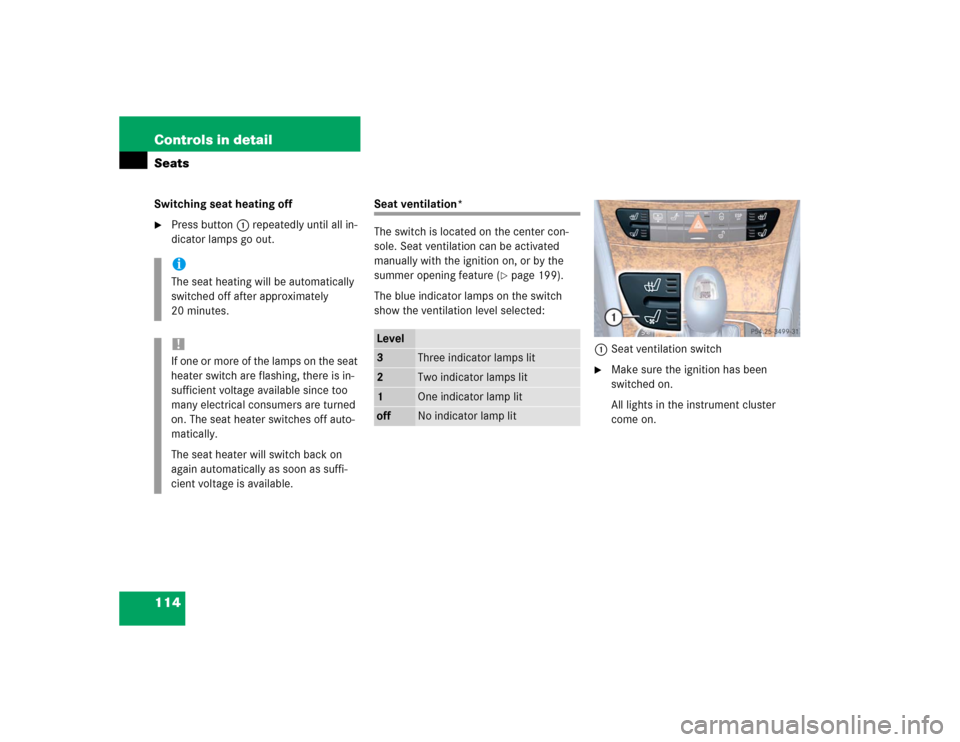
The switch is located on the center con-
sole. Seat ventilation can be activated
manually with the ignition on, or by the
summer opening feature (
�page 199).
The blue indicator lamps on the switch
show the ventilation level selected:
1Seat ventilation switch
�
Make sure the ignition has been
switched on.
All lights in the instrument cluster
come on.
iThe seat heating will be automatically
switched off after approximately
20 minutes.!If one or more of the lamps on the seat
heater switch are flashing, there is in-
sufficient voltage available since too
many electrical consumers are turned
on. The seat heater switches off auto-
matically.
The seat heater will switch back on
again automatically as soon as suffi-
cient voltage is available.
Level3
Three indicator lamps lit
2
Two indicator lamps lit
1
One indicator lamp lit
off
No indicator lamp lit
Page 120 of 442
120 Controls in detailLighting
Manual headlamp mode
The low beam headlamps and parking
lamps can be switched on and off with the
exterior lamp switch (
�page 119).
Automatic headlamp mode
The parking lamps, low beam headlamps
and license plate lamps switch on and off
automatically depending on the brightness
of the ambient light.
�
Turn the exterior lamp switch to U.
iIf you remove the SmartKey and open
the driver’s door while the parking
lamps or low beam headlamps are
switched on, then �
a warning sounds
�
$ appears in the multifunction
display
�
the message
Switch off lights!
appears in the multifunction display
iWith the daytime running lamp mode
activated and the engine running, the
low beam headlamps cannot be
switched off manually.
Warning!
G
If the exterior lamp switch is set toU,�
the headlamps may switch off unexpect-
edly when the system senses bright am-
bient light, for example light from
oncoming traffic.
�
the headlamps will not be automatically
switched on under foggy conditions.
To minimize risk to you and to others, acti-
vate headlamps by turning exterior lamp
switch to B when driving or when traffic
and / or ambient lighting conditions require
you to do so.
In low ambient lighting conditions, only
switch from position U to B with the
vehicle at a standstill. Switching from U
to B will briefly switch off the head-
lamps. Doing so while driving in low ambient
lighting conditions may result in an acci-
dent.
The automatic headlamp feature is only an
aid to the driver. The driver is responsible for
the operation of the vehicle's lights at all
times.
Page 125 of 442
125 Controls in detail
Lighting
Deactivating automatic control�
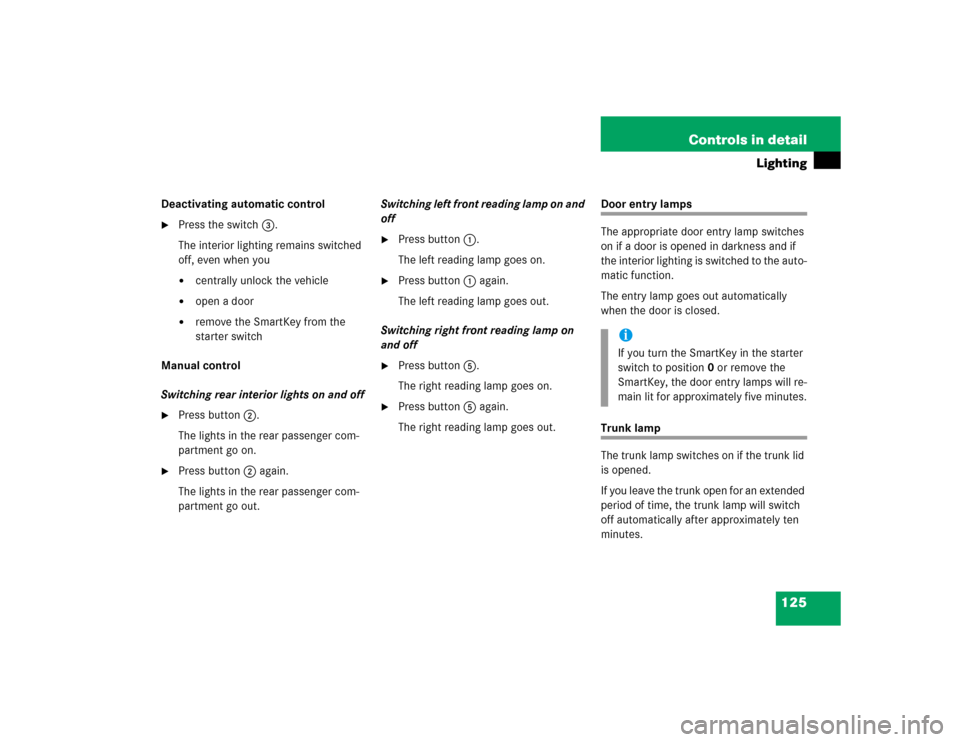
Press the switch3.
The interior lighting remains switched
off, even when you�
centrally unlock the vehicle
�
open a door
�
remove the SmartKey from the
starter switch
Manual control
Switching rear interior lights on and off
�
Press button2.
The lights in the rear passenger com-
partment go on.
�
Press button2 again.
The lights in the rear passenger com-
partment go out.Switching left front reading lamp on and
off
�
Press button1.
The left reading lamp goes on.
�
Press button1 again.
The left reading lamp goes out.
Switching right front reading lamp on
and off
�
Press button5.
The right reading lamp goes on.
�
Press button5 again.
The right reading lamp goes out.
Door entry lamps
The appropriate door entry lamp switches
on if a door is opened in darkness and if
the interior lighting is switched to the auto-
matic function.
The entry lamp goes out automatically
when the door is closed.Trunk lamp
The trunk lamp switches on if the trunk lid
is opened.
If you leave the trunk open for an extended
period of time, the trunk lamp will switch
off automatically after approximately ten
minutes.
iIf you turn the SmartKey in the starter
switch to position0 or remove the
SmartKey, the door entry lamps will re-
main lit for approximately five minutes.
Page 339 of 442
339 Practical hints
What to do if …
Display symbol
Display messages
Possible cause
Possible solution
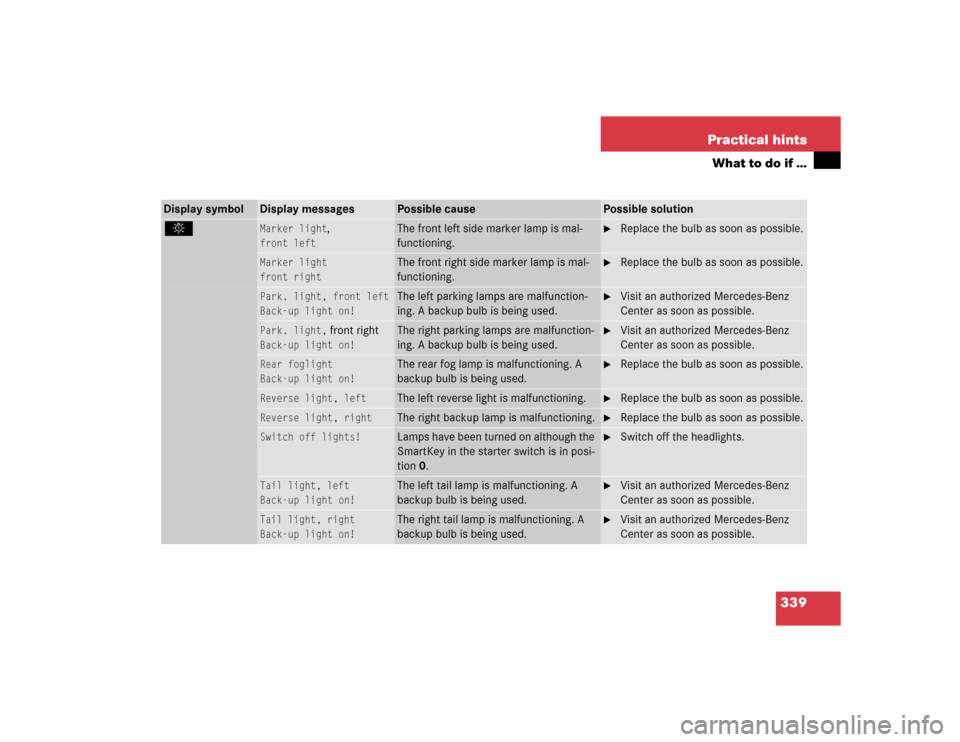
.
Marker light
,
front left
The front left side marker lamp is mal-
functioning.
�
Replace the bulb as soon as possible.
Marker light
front right
The front right side marker lamp is mal-
functioning.
�
Replace the bulb as soon as possible.
Park. light, front left
Back-up light on!
The left parking lamps are malfunction-
ing. A backup bulb is being used.
�
Visit an authorized Mercedes-Benz
Center as soon as possible.
Park. light,
front right
Back-up light on!
The right parking lamps are malfunction-
ing. A backup bulb is being used.
�
Visit an authorized Mercedes-Benz
Center as soon as possible.
Rear foglight
Back-up light on!
The rear fog lamp is malfunctioning. A
backup bulb is being used.
�
Replace the bulb as soon as possible.
Reverse light, left
The left reverse light is malfunctioning.
�
Replace the bulb as soon as possible.
Reverse light, right
The right backup lamp is malfunctioning.
�
Replace the bulb as soon as possible.
Switch off lights!
Lamps have been turned on although the
SmartKey in the starter switch is in posi-
tion 0.
�
Switch off the headlights.
Tail light, left
Back-up light on!
The left tail lamp is malfunctioning. A
backup bulb is being used.
�
Visit an authorized Mercedes-Benz
Center as soon as possible.
Tail light, right
Back-up light on!
The right tail lamp is malfunctioning. A
backup bulb is being used.
�
Visit an authorized Mercedes-Benz
Center as soon as possible.
Page 360 of 442
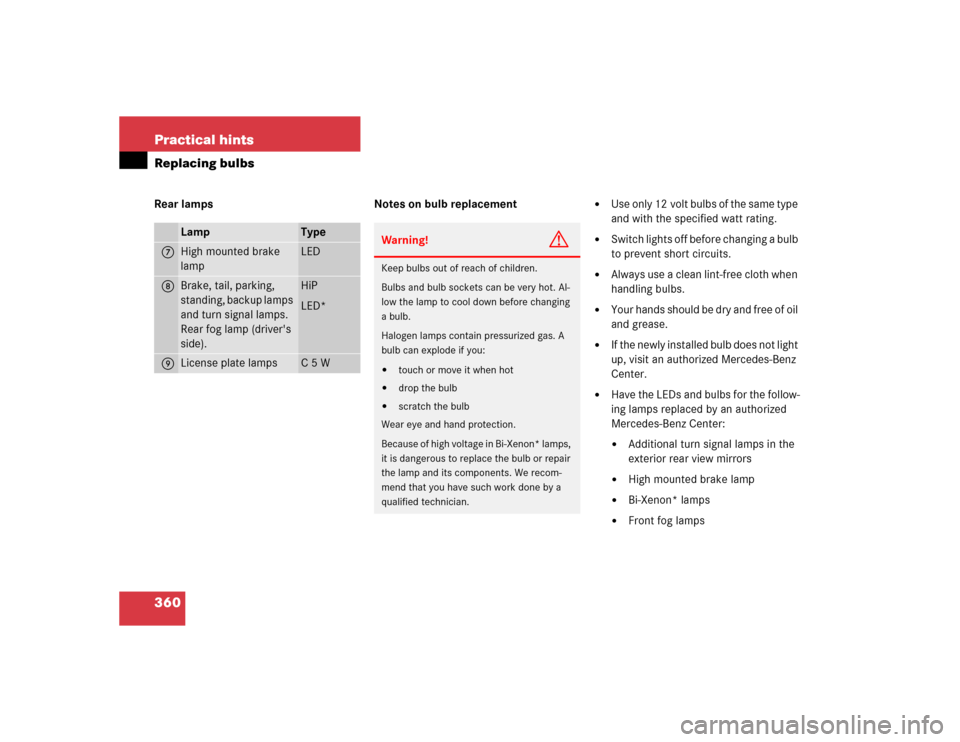
360 Practical hintsReplacing bulbsRear lamps Notes on bulb replacement
�
Use only 12 volt bulbs of the same type
and with the specified watt rating.
�
Switch lights off before changing a bulb
to prevent short circuits.
�
Always use a clean lint-free cloth when
handling bulbs.
�
Your hands should be dry and free of oil
and grease.
�
If the newly installed bulb does not light
up, visit an authorized Mercedes-Benz
Center.
�
Have the LEDs and bulbs for the follow-
ing lamps replaced by an authorized
Mercedes-Benz Center:�
Additional turn signal lamps in the
exterior rear view mirrors
�
High mounted brake lamp
�
Bi-Xenon* lamps
�
Front fog lamps
Lamp
Type
7
High mounted brake
lamp
LED
8
Brake, tail, parking,
standing, backup lamps
and turn signal lamps.
Rear fog lamp (driver's
side).
HiP
LED*
9
License plate lamps
C 5 W
Warning!
G
Keep bulbs out of reach of children.
Bulbs and bulb sockets can be very hot. Al-
low the lamp to cool down before changing
a bulb.
Halogen lamps contain pressurized gas. A
bulb can explode if you:�
touch or move it when hot
�
drop the bulb
�
scratch the bulb
Wear eye and hand protection.
Because of high voltage in Bi-Xenon* lamps,
it is dangerous to replace the bulb or repair
the lamp and its components. We recom-
mend that you have such work done by a
qualified technician.
Page 361 of 442
361 Practical hints
Replacing bulbs
Replacing bulbs for front lamps
1Bulb socket for turn signal lamp
2High beam halogen bulb
3Bulb socket for parking and standing
lamp
4Cover for Bi-Xenon* (low beam and
high beam) or halogen (low beam)
headlampBi-Xenon* headlamps Low beam halogen bulb
�
Switch off the lights.
�
Open the hood (
�page 281).
�
Turn the locking mechanism counter-
clockwise and remove headlamp
cover4.
�
Pull electrical connector off.
�
Release the retaining springs and take
out the bulb.
�
Insert the new bulb in the socket so
that the base is in the recess on the
lower left.
�
Attach the retaining springs.
�
Insert connector into the bulb.
�
Align headlamp cover and click into
place.
Warning!
G
Do not remove the cover4 for the Bi-Xe-
non headlamp. Because of high voltage in
Xenon lamps, it is dangerous to replace the
bulb or repair the lamp and its components.
We recommend that you have such work
done by a qualified technician.
Page 362 of 442

362 Practical hintsReplacing bulbsHigh beam halogen bulb �
Switch off the lights.
�
Open the hood (
�page 281).
�
Press the clamp and remove headlamp
cover.
�
Pull electrical connector off.
�
Turn the locking mechanism counter-
clockwise and take out the high beam
bulb2.
�
Insert the new bulb in the socket so
that the base is in the recess on the
lower left.
�
Attach the retaining springs.
�
Insert connector into the bulb.
�
Align headlamp cover and click into
place.Front turn signal lamp bulb
�
Switch off the lights.
�
Open the hood (
�page 281).
�
Twist bulb socket 1 counterclockwise
and pull out.
�
Push bulb into socket, turn counter-
clockwise and remove.
�
Insert new bulb in socket, push in and
twist clockwise.
�
Reinsert bulb socket in lamp and twist
clockwise.Parking and standing lamp bulb
�
Switch off the lights.
�
Open the hood (
�page 281).
�
Press the clamp and remove headlamp
cover.
�
Pull out the bulb socket3 with the
bulb.
�
Pull the bulb out of the bulb socket.
�
Insert a new bulb in the socket.
�
Reinstall the bulb socket.
�
Align headlamp cover and click into
place.
Page 363 of 442
363 Practical hints
Replacing bulbs
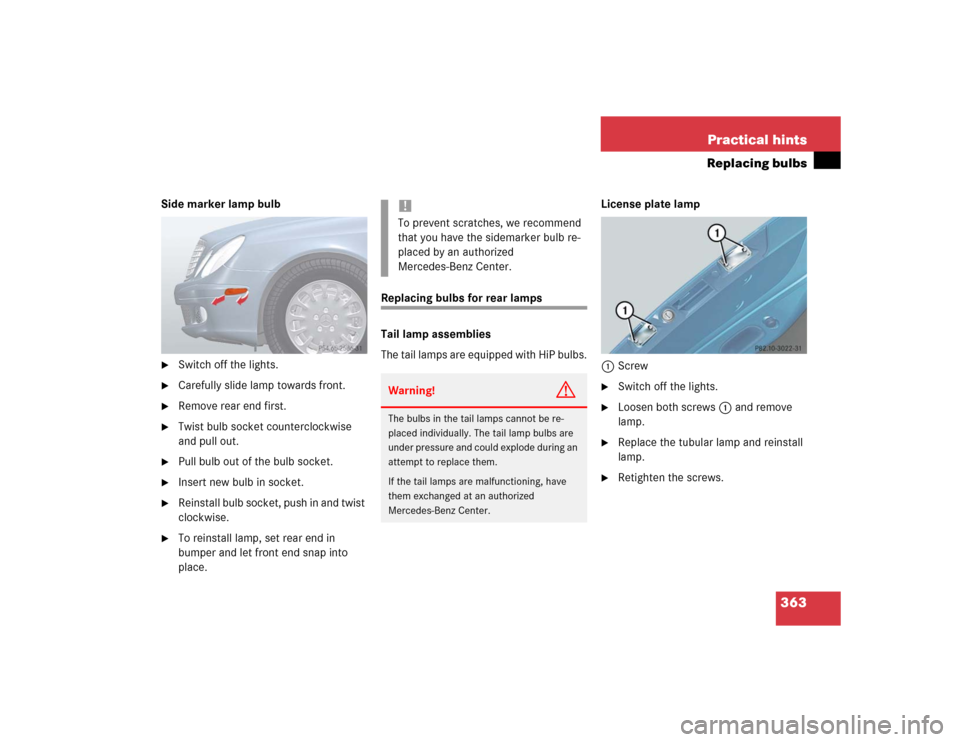
Side marker lamp bulb�
Switch off the lights.
�
Carefully slide lamp towards front.
�
Remove rear end first.
�
Twist bulb socket counterclockwise
and pull out.
�
Pull bulb out of the bulb socket.
�
Insert new bulb in socket.
�
Reinstall bulb socket, push in and twist
clockwise.
�
To reinstall lamp, set rear end in
bumper and let front end snap into
place.
Replacing bulbs for rear lamps
Tail lamp assemblies
The tail lamps are equipped with HiP bulbs.License plate lamp
1Screw
�
Switch off the lights.
�
Loosen both screws1 and remove
lamp.
�
Replace the tubular lamp and reinstall
lamp.
�
Retighten the screws.
!To prevent scratches, we recommend
that you have the sidemarker bulb re-
placed by an authorized
Mercedes-Benz Center.Warning!
G
The bulbs in the tail lamps cannot be re-
placed individually. The tail lamp bulbs are
under pressure and could explode during an
attempt to replace them.
If the tail lamps are malfunctioning, have
them exchanged at an authorized
Mercedes-Benz Center.