Page 298 of 400
298 Practical hintsWhat to do if …Display symbol
Display message
Possible cause
Possible solution
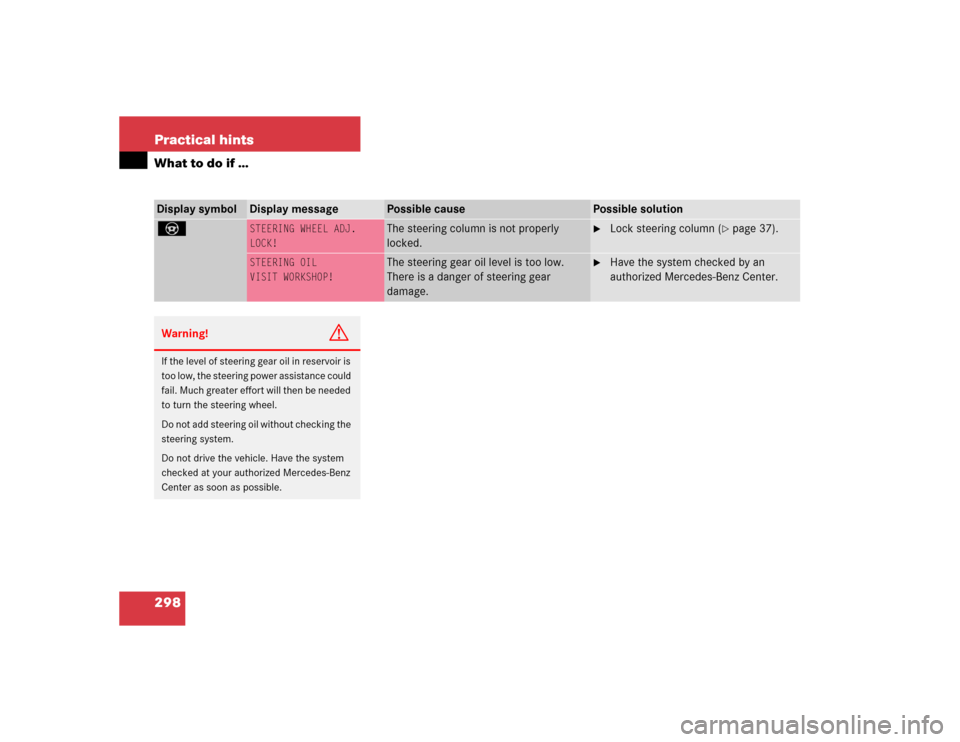
_
STEERING WHEEL ADJ.
LOCK!
The steering column is not properly
locked.
�
Lock steering column (
�page 37).
STEERING OIL
VISIT WORKSHOP!
The steering gear oil level is too low.
There is a danger of steering gear
damage.
�
Have the system checked by an
authorized Mercedes-Benz Center.
Warning!
G
If the level of steering gear oil in reservoir is
too low, the steering power assistance could
fail. Much greater effort will then be needed
to turn the steering wheel.
Do not add steering oil without checking the
steering system.
Do not drive the vehicle. Have the system
checked at your authorized Mercedes-Benz
Center as soon as possible.
Page 299 of 400

299 Practical hints
What to do if …
Display symbol
Display message
Possible cause
Possible solution
K
CLOSE
SUNROOF!
You have opened the driver’s door with
the SmartKey removed from the starter
switch and the sliding/pop-up roof open.
�
Close the sliding/pop-up roof
(�page 199).
J
CLOSE
SUNROOF!
You have opened the driver’s door with
the SmartKey removed from the starter
switch and the sliding/pop-up roof open.
�
Close the sliding/pop-up roof
(�page 199).
L
TELE AID
DRIVE TO WORKSHOP!
One or more main functions of the Tele
Aid system* are malfunctioning.
�
Have the Tele Aid system* checked by
an authorized Mercedes-Benz Center.
ì
FUNCTION
NOT AVAILABLE!
This display appears if buttonì
orí on the multifunction steering
wheel is pressed and the vehicle is not
equipped with a telephone*.
Ê
TRUNK OPEN!
This message will appear whenever the
tailgate is open.
�
Close the tailgate.
W
WASHER FLUID
CHECK LEVEL!
The fluid level has dropped to
about
1/3of total reservoir capacity.
�
Add washer fluid (
�page 259).
Page 318 of 400

318 Practical hintsFlat tire
�Flat tirePreparing the vehicle�
Park the vehicle as far as possible from
moving traffic on a hard surface.
�
Turn on the hazard warning flashers.
�
Engage the steering wheel lock in the
straight ahead position and set the
parking brake.
�
Move the gear selector lever toP.
�
Have any passenger exit the vehicle at
a safe distance from the roadway.
Mounting the Minispare wheel
In the case of a flat tire, you may
temporarily use the Minispare wheel when
observing the following restrictions:�
Do not exceed vehicle speed of 50 mph
(80 km/h).
�
Drive to the nearest tire repair facility
to have the flat tire repaired or
replaced as appropriate.
�
Do not operate vehicle with more than
one spare wheel mounted.Preparing the vehicle
Prepare the vehicle as described on
(
�page 318).
�
Take the wheel wrench, jack and wheel
bolts out of the storage compartment
behind the left trim panel
(�page 300).
�
Take the Minispare wheel out of the
storage compartment underneath the
cargo compartment floor
(�page 302).
Lifting the vehicle
�
Prevent the vehicle from rolling away
by blocking wheels with wheel chocks
(not included) or other sizable objects.
When changing wheel on a level surface:
�
Place one chock in front of and one
behind the wheel that is diagonally
opposite to the wheel being changed.
When changing wheel on a hill:
�
Place chocks on the downhill side
blocking both wheels of the other axle.
Warning!
G
The dimensions of the Minispare wheel are
different from those of the road wheels. As
a result, the vehicle handling characteristics
change when driving with a Minispare wheel
mounted.
The spare wheel should only be used
temporarily, and replaced with a regular
road wheel as quick as possible.
Page 330 of 400

330 Practical hintsTowing the vehicle
!
To be certain to avoid a possibility of
damage to the drive train, however, we
recommend the drive shaft be discon-
nected at the rear axle drive flange
(vehicles with 4MATIC: disconnected at
the front and rear axle drive flanges) for
any towing beyond a short tow to a
nearby garage.
Warning!
G
If circumstances require towing the vehicle
with all wheels on the ground, always tow
with a tow bar if:�
the engine will not run
�
there is a malfunction in the power
supply or in the vehicle’s electrical
system
as that will be necessary to adequately
control the towed vehicle.
Prior to towing the vehicle with all wheels on
the ground, make certain that the SmartKey
is in starter switch position2.
If the SmartKey is left in starter switch
position0 for an extended period of time, it
can no longer be turned in the switch. In this
case, the steering is locked. To unlock,
remove SmartKey from starter switch and
reinsert.
iTo signal turns while being towed with
the hazard warning flasher in use, turn
SmartKey in starter switch to
position2 and activate the combina-
tion switch for the left or right turn
signal in the usual manner – only the
selected turn signal will operate.
Upon canceling the turn signal, the
hazard warning flasher will operate
again.
Page 331 of 400

331 Practical hints
Towing the vehicle
Warning!
G
With the engine not running, there is no
power assistance for the brake and steering
systems. In this case, it is important to keep
in mind that a considerably higher degree of
effort is necessary to brake and steer the ve-
hicle. Adapt your driving accordingly.
!When towing the vehicle with all wheels
on the ground, please note the
following:
With the automatic central locking
activated and the SmartKey in starter
switch position2, the vehicle doors
lock if the left front wheel as well as the
right rear wheel are turning at vehicle
speeds of approx. 9 mph (15 km/h) or
more.
Switch off the tow-away alarm
(�page 81).
To prevent the vehicle doors from
locking, deactivate the automatic
central locking (
�page 131).
Towing of the vehicle should only be
done using the properly installed
towing eye bolt. Never attach tow
cable, tow rope or tow rod to vehicle
chassis, frame or suspension parts.
iIf the battery is disconnected or
discharged�
the SmartKey will not turn in the
starter switch. See notes on the
battery (
�page 324) or on jump
starting (�page 327).
�
the gear selector lever will remain
locked in positionP. See notes on
manually unlocking transmission
gear selector lever (
�page 308).
Page 339 of 400
339 Technical data
Layout of poly-V-belt drive
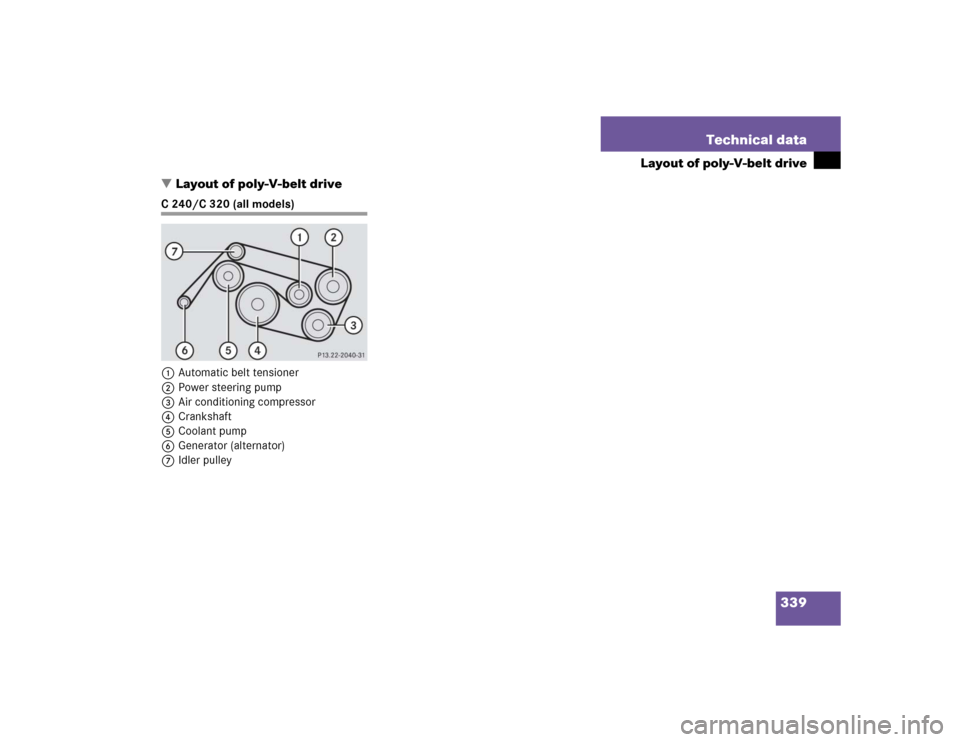
�Layout of poly-V-belt drive
C 240/C 320 (all models)
1Automatic belt tensioner
2Power steering pump
3Air conditioning compressor
4Crankshaft
5Coolant pump
6Generator (alternator)
7Idler pulley
Page 346 of 400

346 Technical dataFuels, coolants, lubricants, etc.
�Fuels, coolants, lubricants, etc.Capacities
Vehicle components and their respectivelubricants must match. Therefore only use
brands tested and approved by
Mercedes-Benz.Please refer to the Factory Approved
Service Products pamphlet, or inquire at
your Mercedes-Benz Center.
Model
Capacity
Fuels, coolants, lubricants, etc.
Engine with oil filter
C240
C320
C2404MATIC
C3204MATIC
7.9 US qt (7.5 l)
7.9 US qt (7.5 l)
7.4 US qt (7.0 l)
7.4 US qt (7.0 l)
Approved engine oils
Automatic transmission
8.5 US qt (8.0 l)
MB Automatic Transmission Oil
Rear axle
1.2 US qt (1.1 l)
Hypoid gear oil SAE 85 W 90
Front axle
C2404MATIC
C3204MATIC
0.5 US qt (0.46 l)
Hypoid gear oil SAE 85 W 90
Transfer case
C2404MATIC
C3204MATIC
approx. 0.62 US qt (0.59 l)
MB Transfer case fluid
Power steering
approx. 1.1 US qt (1.0 l)
MB Power Steering Fluid (Pentosin CHF 11S)
Front wheel hubs
approx. 2.1 oz (60 g) each
High temperature roller bearing grease
Brake system
0.5 US qt (0.5 l)
MB Brake Fluid (DOT 4+)
Cooling system
approx. 6.8 US qt (6.4 l)
MB 325.0 Anticorrosion/Antifreeze Agent
Page 358 of 400

Information and operating center for
vehicle sound and communications
systems, including the radio and the
navigation system, as")
358 Technical termsCOMAND*
(C
ockpit M
anagement and D
ata
System)
Information and operating center for
vehicle sound and communications
systems, including the radio and the
navigation system, as well as other
optional equipment (CD changer*,
telephone*, etc.).
Control system
The control system is used to call up
vehicle information and to change
component settings. Information and
messages appear in the multifunction
display. The driver uses the buttons on
the multifunction steering wheel to
navigate through the system and to
adjust settings.
Cruise control
Driving convenience system for
automatically maintaining the vehicle
speed set by the driver.Engine number
The number set by the manufacturer
and placed on the cylinder block to
uniquely identify each engine
produced.
Engine oil viscosity
Measurement for the inner friction
(viscosity) of the oil at different temper-
atures. The higher the temperature an
oil can tolerate without becoming thin,
or the lower the temperature it can
tolerate without becoming viscous, the
better the viscosity.
ESP
(E
lectronic S
tability P
rogram)
Improves vehicle handling and
directional stability.
ETD
(E
mergency T
ensioning D
evice)
Device which deploys in certain frontal
and rear collisions exceeding the
system's threshold to tighten the
seat belts.
->SRSFSS
(F
lexible S
ervice S
ystem)
Service indicator in the multifunction
display that informs the driver when
the next vehicle maintenance service
is due.
Gear range
Number of gears which are available to
the automatic transmission for shifting.
The automatic gear shifting process
can be adapted to specific operating
conditions using the gear selector
lever.
GPS
(G
lobal P
ositioning S
ystem)
Satellite-based system for relaying
geographic location information to and
from vehicles equipped with special
receivers. Employs CD digital maps for
navigation.