Page 314 of 400
314 Practical hintsReplacing bulbs�
Twist bayonet socket5 counterclock-
wise to the stop (do not remove).
�
Pull the bulb out of the socket.
�
Insert the new bulb so that the base
locates in the recess in bayonet
socket5.
�
Twist bayonet socket clockwise until
you hear it snap into place.
�
Plug the connector onto the bulb.
�
Align lamp cover2 and click into
place.Front turn signal lamp bulb
�
Switch off the lights.
�
Open the hood (
�page 252).
�
Twist bulb socket1 counterclockwise
and pull out.
�
Push bulb into socket, turn counter-
clockwise and remove.
�
Insert new bulb in socket, push in and
twist clockwise.
�
Reinsert bulb socket in lamp and twist
clockwise.Parking and standing lamp bulb
�
Switch off the lights.
�
Open the hood (
�page 252).
�
Press the clamp and remove lamp
cover2.
�
Pull out bulb socket6 with the bulb.
�
Pull the bulb out of bulb socket.
�
Insert a new bulb in the socket.
�
Reinstall bulb socket.
�
Align lamp cover2 and click into
place.
��
Page 315 of 400
315 Practical hints
Replacing bulbs
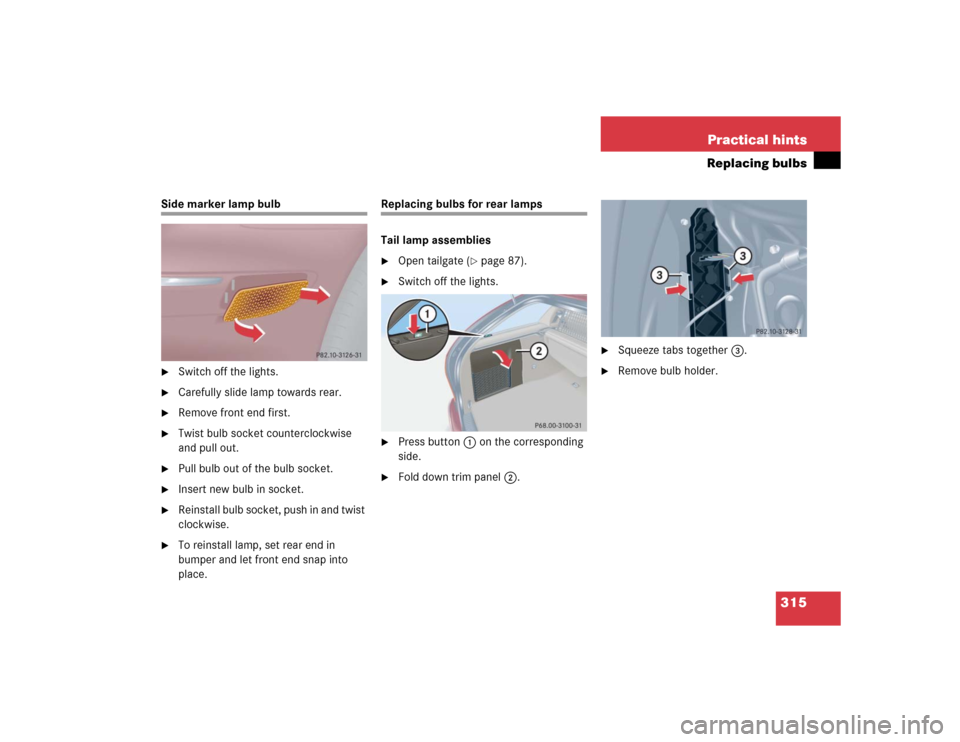
Side marker lamp bulb�
Switch off the lights.
�
Carefully slide lamp towards rear.
�
Remove front end first.
�
Twist bulb socket counterclockwise
and pull out.
�
Pull bulb out of the bulb socket.
�
Insert new bulb in socket.
�
Reinstall bulb socket, push in and twist
clockwise.
�
To reinstall lamp, set rear end in
bumper and let front end snap into
place.
Replacing bulbs for rear lamps
Tail lamp assemblies�
Open tailgate (
�page 87).
�
Switch off the lights.
�
Press button1 on the corresponding
side.
�
Fold down trim panel2.
�
Squeeze tabs together3.
�
Remove bulb holder.
Page 316 of 400
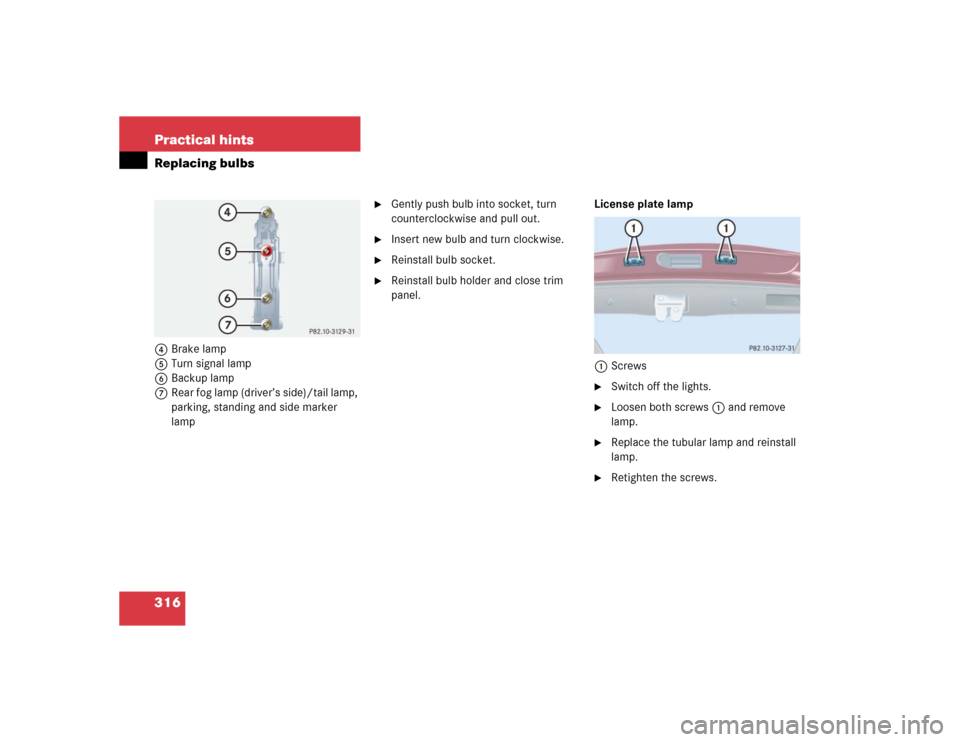
316 Practical hintsReplacing bulbs4Brake lamp
5Turn signal lamp
6Backup lamp
7Rear fog lamp (driver’s side)/tail lamp,
parking, standing and side marker
lamp
�
Gently push bulb into socket, turn
counterclockwise and pull out.
�
Insert new bulb and turn clockwise.
�
Reinstall bulb socket.
�
Reinstall bulb holder and close trim
panel.License plate lamp
1Screws
�
Switch off the lights.
�
Loosen both screws1 and remove
lamp.
�
Replace the tubular lamp and reinstall
lamp.
�
Retighten the screws.
Page 322 of 400

322 Practical hintsFlat tire�
Unscrew the alignment bolt, install last
wheel bolt and tighten slightly.Lowering the vehicle
�
Lower vehicle by turning crank
counterclockwise until vehicle is
resting fully on its own weight.
�
Remove the jack.
1 - 5Wheel bolts
�
Tighten the five wheel bolts evenly,
following the diagonal sequence
illustrated (1to5), until all bolts are
tight. Observe a tightening torque
of 80 lb-ft (110 Nm).Before storing the jack, it should be fully
collapsed, with handle folded in (storage
position) (
�page 301).
�
Store the jack and the other vehicle
tools in the storage compartment be-
hind the left trim panel (
�page 301).
�
Store the wheel cover (Canada only)
and the damaged wheel in the cargo
compartment.
Warning!
G
Only use genuine equipment
Mercedes-Benz wheel bolts. Other wheel
bolts may come loose.
Do not tighten the wheel bolts when the
vehicle is raised. Otherwise the vehicle
could tip over.
Warning!
G
Have the tightening torque checked after
changing a wheel. The wheels could come
loose if they are not tightened to a torque
of 80 lb-ft (110 Nm).
Page 326 of 400
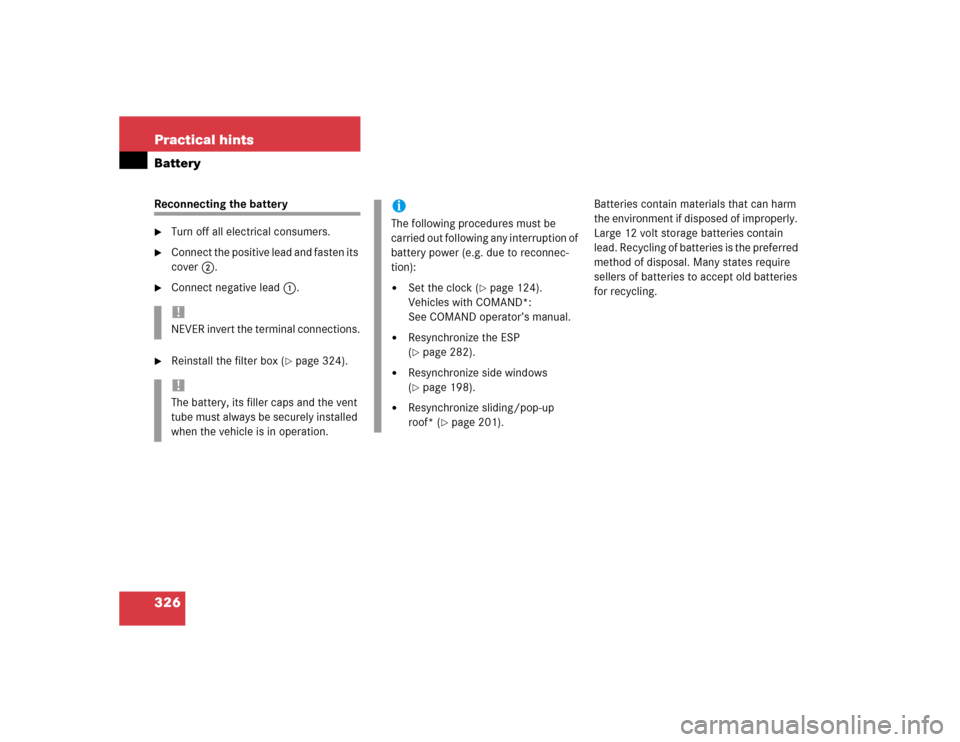
326 Practical hintsBatteryReconnecting the battery�
Turn off all electrical consumers.
�
Connect the positive lead and fasten its
cover2.
�
Connect negative lead1.
�
Reinstall the filter box (
�page 324).Batteries contain materials that can harm
the environment if disposed of improperly.
Large 12 volt storage batteries contain
lead. Recycling of batteries is the preferred
method of disposal. Many states require
sellers of batteries to accept old batteries
for recycling.
!NEVER invert the terminal connections.!The battery, its filler caps and the vent
tube must always be securely installed
when the vehicle is in operation.
iThe following procedures must be
carried out following any interruption of
battery power (e.g. due to reconnec-
tion):�
Set the clock (
�page 124).
Vehicles with COMAND*:
See COMAND operator’s manual.
�
Resynchronize the ESP
(�page 282).
�
Resynchronize side windows
(�page 198).
�
Resynchronize sliding/pop-up
roof* (
�page 201).
Page 333 of 400
333 Practical hintsFuses
�Fuses
Fuse box in passenger compartment
1CoverOpening
�
Pull cover1 open with a screw driver
or similar tool.
�
Remove cover rearward.
Closing
�
Attach cover1 in the front.
�
Fold cover in until it engages.
Fuse chart
The fuse chart is found in the fuse box in
the passenger compartment. The amper-
ages of the fuses are also given there.
Fuse box in engine compartment
The fuse box is located in the engine
compartment on the left-hand side.
1Screw
2Cover
3Retainer
Removing/installing cover�
Twist screws1
90° counterclockwise.
�
Pull up cover2.
�
Slide out retainer3 and remove cover
by pulling towards front.
iOnly install fuses that have been tested
and approved by Mercedes-Benz and
that have the specified amperage
rating.
Never attempt to repair or bridge a
blown fuse. Have the cause determined
and remedied by an authorized
Mercedes-Benz Center.
��
Page 368 of 400

368 Index
Upholstery 271
Windows 270
Windshield 48
Wiper blades 270
Wood trims 272
Climate control 150
Adjusting 153
Defogging windshield 153
Defrosting 154
Setting the temperature 152
Clock 23, 124
Closing
Glove box 215
Hood 253
Side windows 197
Sliding/pop-up roof 199, 309
Sliding/pop-up roof with
SmartKey 200
Tailgate 88
Windows 196
Windows with SmartKey 198Closing sliding/pop-up roof
In an emergency 309
Cloth upholstery
Cleaning 272
Cockpit 20, 357
Cockpit management and
data system (COMAND*) 358
COMAND*
See separate operating instructions
Combination switch 103
High beam flasher 47, 104
Turn signals 46
Windshield wipers 47
Comfort driving
Transmission program mode 143
Consumer information 355
Control and operation of radio
transmitter 246
Control system 111, 358
AUDIO menu 116
Convenience submenu 132
Display digital speedometer 116Functions 112, 115
Instrument cluster submenu 124
Lighting submenu 127
Malfunction memory menu 120
Menus 114, 115
Multifunction display 111
Multifunction steering wheel 112
NAVI menu 119
Selecting radio system 117
Selecting satellite radio* system 117
Settings menu 121
Standard display menu 116
Submenus 113, 115
TEL* menu 136
Trip computer menu 134
Vehicle submenu 131
Convenience submenu 132
Activating easy-entry/exit
feature 132
Setting key dependency 133
Setting parking position for
exterior rear view mirror 134
Page 370 of 400
 261
Discharged battery
Jump starting 327
Disconn")
370 IndexDifficulties
While driving see
Problems while driving
With starting 44
Digital clock 23
Digital speedometer 116
Direction of rotation (tires) 261
Discharged battery
Jump starting 327
Disconnecting
Vehicle battery 325
Display
Selecting 127
Display elements
Audio system 170
Displays
Digital speedometer 116
Messages 255, 280
Selecting 127
Service indicator 265Showing malfunctions 120
Symbol messages 284
Text messages 281
Distance to empty (range)
Calling up 134
Door control panel 28
Door entry lamps 106
Door handle 28
Door unlock
With Tele Aid* 229
Doors
Message in display 290
Opening from inside vehicle 87
Downhill driving
Cruise control 203
Downshifting 140
Drinking and driving 239
Driving
General instructions 40, 239
Hydroplaning 242
In winter 244
Problems 50Safety systems 74
Through standing water 245
Traveling abroad 245
Driving instructions 239
Driving off 241
Driving safety systems
4MATIC 79
ABS 74
BAS 75
ESP 76
Driving systems 202
Cruise control 202
Driving safety systems 74
E
Easy-entry/exit feature
Activating 132
Interrupting movement 132
Easy-entry/exit feature* 90
Interrupting movement 90
Electrical fuses 333